Introduction
Thank you for choosing the Gillaway 001B-3500A Car Jump Starter. This powerful and versatile device is designed to provide reliable jump-starting for a wide range of vehicles, including cars, trucks, motorcycles, snowmobiles, ATVs, UTVs, lawnmowers, and yachts. With a peak current of 3500 Amps, it can start engines up to 9.0L Gas and 7.0L Diesel. Beyond jump-starting, it functions as a portable power bank for your electronic devices and features a multi-mode LED flashlight for emergencies. This manual provides essential information for safe and effective operation, maintenance, and troubleshooting.
Safety Information
Please read all safety warnings and instructions carefully before using this product. Failure to follow these instructions may result in electric shock, fire, and/or serious injury.
- Do not use the jump starter if the clamps or cables are damaged.
- Ensure proper polarity connection (red clamp to positive, black clamp to negative) to avoid sparks or damage.
- Do not attempt to jump start a frozen battery.
- Keep the jump starter away from children.
- Do not expose the jump starter to rain or wet conditions.
- Do not disassemble the unit. Refer all servicing to qualified personnel.
- Operate in a well-ventilated area.
- Remove the jump starter from the vehicle battery within 30 seconds after the vehicle starts.
- The device is equipped with 8 built-in safety protection technologies, including reverse polarity, short circuit, over charge, overload, reverse connection, low voltage, over temperature, and over current protection.

Figure 1: Overview of the 10 Safety Protections integrated into the Gillaway Jump Starter, including reverse polarity, short circuit, overcharge, overload, reverse connection, low voltage, over temperature, and over current protection.
Package Contents
Verify that all items are present in your package:
- Gillaway 001B-3500A Jump Starter (x1)
- Smart Jump Starter Clamps (x1)
- USB-C Charging Cable (x1)
- Storage Case (x1)
- User Manual (x1)
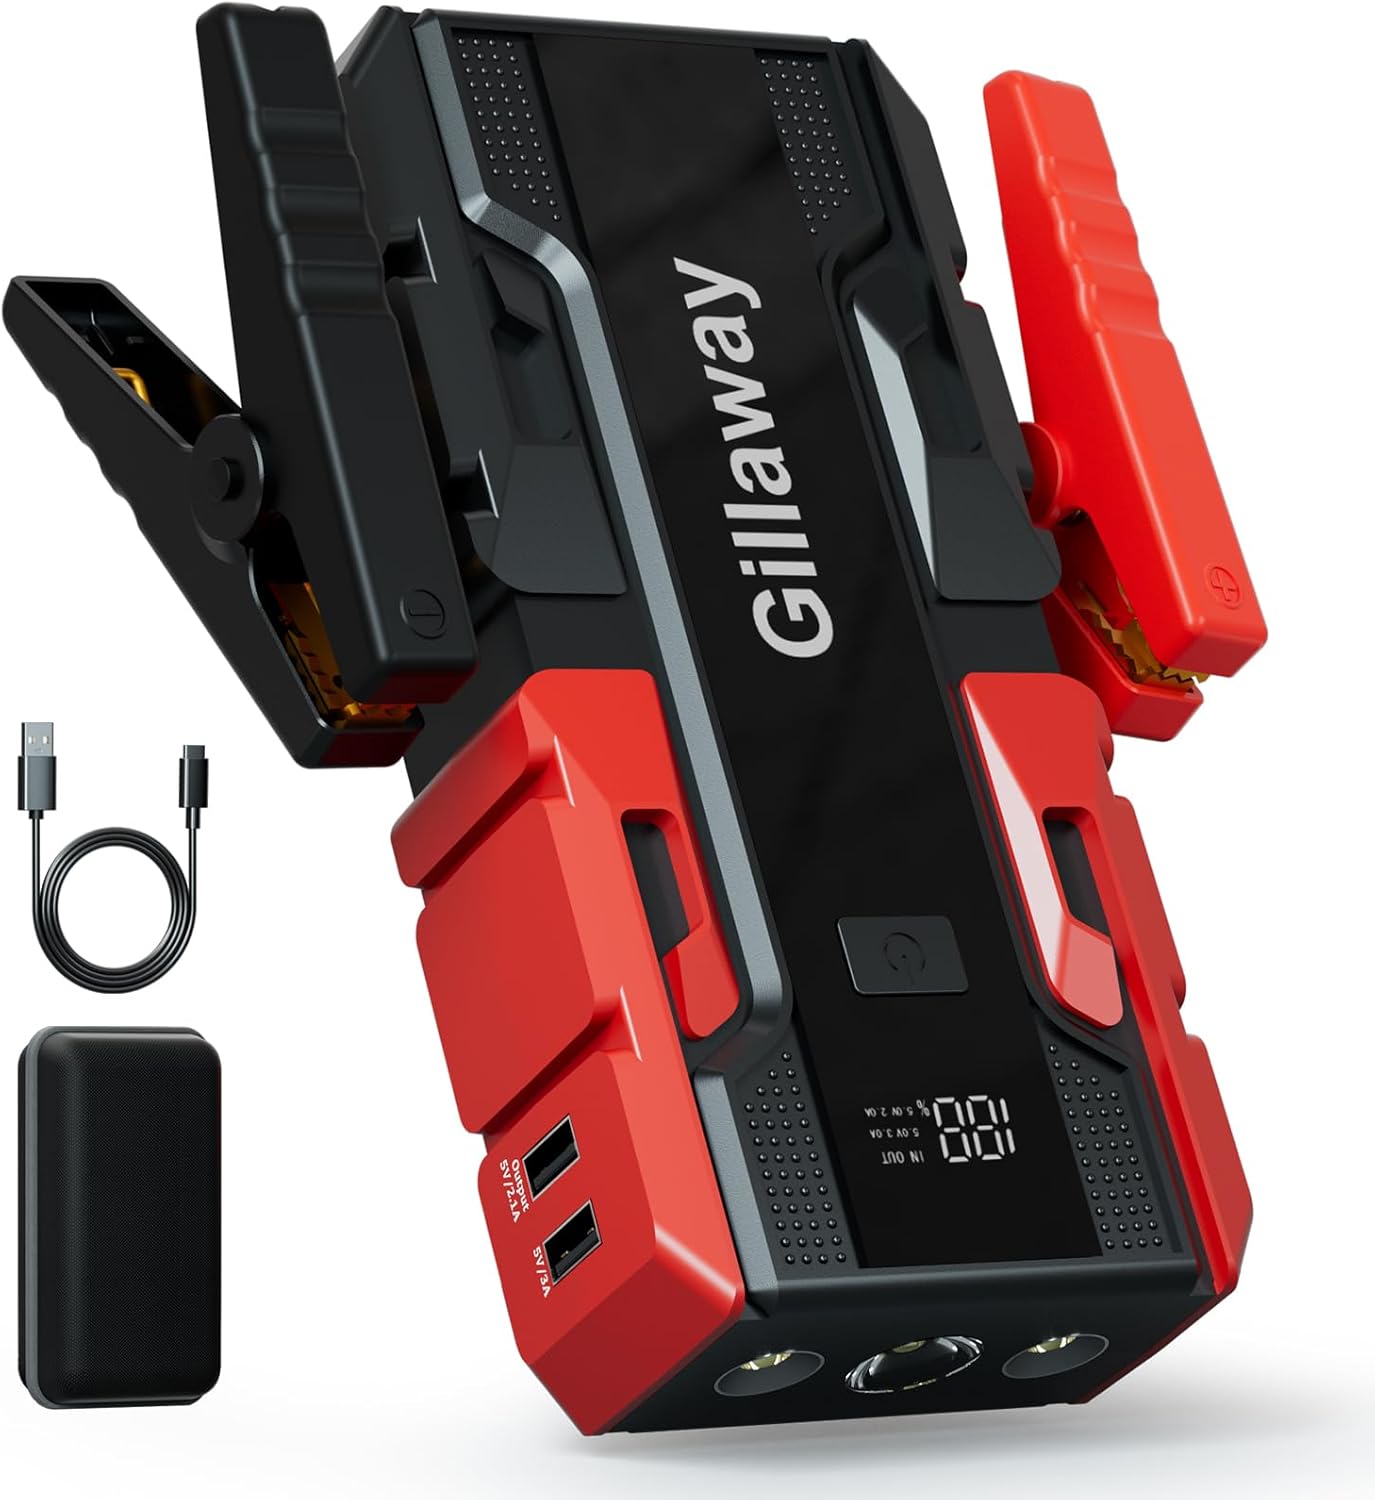
Figure 2: The complete package contents of the Gillaway 001B-3500A Car Jump Starter.
Product Overview
Familiarize yourself with the components of your Gillaway Jump Starter:

Figure 3: Labeled components of the Gillaway Jump Starter, showing the power switch, LCD display, flashlight, jump starter port, and USB output ports.
- Jump Starter Unit: Main device with battery, control panel, and ports.
- Smart Clamps: Cables with intelligent protection features for safe connection to vehicle battery terminals.
- LCD Display: Shows battery status and other relevant information.
- LED Flashlight: Integrated light with multiple modes (steady, strobe, SOS).
- USB Output Ports: For charging external electronic devices (Output 5V/3A, Output 5V/2A).
- USB Input Port: For charging the jump starter unit (Input 5V/3A).
- 12V Vehicle Start Port: Connection point for the smart clamps.
Setup and Charging
Charging the Jump Starter
Before first use, fully charge the Gillaway Jump Starter. It is recommended to recharge the unit every 3-6 months to maintain optimal battery health, especially if not used frequently. The LCD display will indicate the current battery percentage.
- Connect the provided USB-C charging cable to the jump starter's input port.
- Connect the other end of the USB-C cable to a compatible USB wall adapter (not included) or a powered USB port.
- The LCD display will indicate charging progress. Charging is complete when the display shows 100%.
Using as a Power Bank
The jump starter can also be used to charge your mobile devices.
- Connect your device's USB charging cable to one of the jump starter's USB output ports (Output 5V/3A or Output 5V/2A).
- The jump starter will automatically begin charging your device.

Figure 4: The Gillaway Jump Starter functioning as a power bank, capable of quick charging multiple USB devices.
Operating Instructions: Jump Starting a Vehicle
Follow these steps carefully to safely jump start your vehicle:
- Prepare the Jump Starter: Ensure the jump starter has sufficient power (at least 50% charge is recommended for optimal performance).
- Connect Smart Clamps: Insert the blue plug of the smart clamps firmly into the 12V vehicle start port on the jump starter.
- Connect to Vehicle Battery:
- Connect the RED positive (+) clamp to the positive (+) terminal of the vehicle's battery.
- Connect the BLACK negative (-) clamp to the negative (-) terminal of the vehicle's battery.
The smart clamps have indicator lights. If connected correctly, the light will turn solid green. If connected incorrectly (reverse polarity), it will flash red and green, and an alarm may sound. Disconnect and re-connect correctly.
- Start the Vehicle: Once the smart clamp indicator is solid green, return to your vehicle and start the engine.
- Remove Clamps: As soon as the vehicle starts, immediately remove the smart clamps from the vehicle battery terminals, then disconnect the clamps from the jump starter.

Figure 5: Step-by-step guide for jump starting a vehicle using the Gillaway Jump Starter.

Figure 6: The Gillaway 3500A Jump Starter in use, demonstrating its capacity for various engine types and multiple starts.
Additional Features: LED Flashlight
The Gillaway Jump Starter is equipped with a powerful 400 lumen LED flashlight with three modes:
- Steady Light: Long press the power button to turn on the flashlight.
- SOS Mode: Short press the power button again to switch to SOS mode (flashing Morse code for distress).
- Strobe Mode: Short press the power button a third time to activate strobe mode (rapid flashing).
- Turn Off: Short press the power button a fourth time to turn off the flashlight.

Figure 7: The 3-in-1 LED flashlight functionality, including steady, SOS, and strobe modes.
Troubleshooting
If you encounter issues with your Gillaway Jump Starter, refer to the following common problems and solutions:
| Problem | Possible Cause | Solution |
|---|---|---|
| Jump starter does not turn on. | Battery is completely drained. | Charge the jump starter fully. |
| Vehicle does not start. | Incorrect clamp connection (reverse polarity). | Check smart clamp indicator lights. Reconnect clamps correctly (red to positive, black to negative). |
| Vehicle does not start. | Jump starter battery is too low. | Ensure jump starter has at least 50% charge. Recharge if necessary. |
| Vehicle does not start. | Vehicle battery is severely damaged or frozen. | Consult a professional mechanic. Do not attempt to jump start a frozen battery. |
| Jump starter gets warm during use. | Normal operation during high current discharge. | This is normal. If it becomes excessively hot, disconnect and allow to cool. |
Specifications
| Feature | Detail |
|---|---|
| Model | 001B-3500A |
| Manufacturer Part Number | COCY-001 |
| Peak Current | 3500 Amps |
| Engine Compatibility | Up to 9.0L Gas, 7.0L Diesel |
| Battery Type | Lithium Polymer (included) |
| Operating Temperature | -4°F to 140°F (-20°C to 60°C) |
| USB Output 1 | 5V/3A |
| USB Output 2 | 5V/2A |
| USB Input | 5V/3A (USB-C) |
| LED Flashlight Lumens | 400 Lumens |
| Dimensions | 3 x 6 x 5 inches |
| Item Weight | 2.18 pounds |
| Standby Time | Up to 24 months |
Maintenance and Storage
- Charging: Recharge the jump starter every 3-6 months, even if unused, to prolong battery life.
- Cleaning: Wipe the unit with a dry, soft cloth. Do not use harsh chemicals or abrasive cleaners.
- Storage: Store the jump starter in its provided storage case in a cool, dry place, away from direct sunlight and extreme temperatures.
- Clamps: Ensure clamps are clean and free of corrosion before and after each use.
Warranty and Support
Gillaway provides a 24-month warranty for this product from the date of purchase. This warranty covers manufacturing defects and workmanship under normal use.
For technical support, warranty claims, or any questions regarding your Gillaway Jump Starter, please contact our customer service team. Our 7-24H professional support after-service is always available to assist you.
Please refer to the contact information provided on the product packaging or the official Gillaway website for the most up-to-date support channels.


