1. Introduction
This manual provides detailed instructions for the installation, maintenance, and troubleshooting of the SPEDWHEL Main Control Cable for the Ninebot MAX G2 Electric Scooter. Please read this manual thoroughly before attempting any installation or maintenance to ensure proper function and safety.
2. Product Overview
The SPEDWHEL Main Control Cable is a replacement component designed for the Ninebot MAX G2 electric scooter. It serves as the primary connection line between the scooter's controller and other essential electrical components, ensuring proper communication and operation of the scooter's systems.
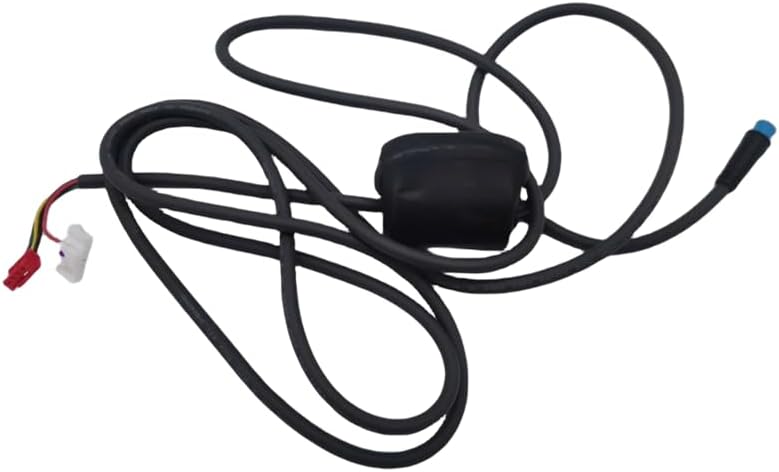
Figure 2.1: Overview of the SPEDWHEL Main Control Cable, showing its full length and connectors.
3. Safety Information
Always prioritize safety when working with electrical components. Failure to follow these safety guidelines may result in injury or damage to the scooter.
- Ensure the scooter is powered off and disconnected from any charging source before beginning installation.
- Wear appropriate personal protective equipment, such as gloves and eye protection.
- If you are unsure about any step, consult a qualified technician or the scooter's official service center.
- Do not attempt to modify the cable or its connectors.
- Keep small parts away from children.
4. Package Contents
Verify that all items are present and undamaged upon opening the package.
- 1 x SPEDWHEL Main Control Cable for Ninebot MAX G2 Electric Scooter
Note: Additional tools required for installation (e.g., screwdrivers, wrenches) are not included.
5. Installation Guide
Follow these steps carefully to replace the main control cable on your Ninebot MAX G2 electric scooter.
- Prepare the Scooter:
Ensure the scooter is completely powered off and unplugged from any charging source. Place the scooter on a stable surface to prevent it from moving during the installation process.
- Access the Controller Area:
Locate and carefully remove the necessary covers or panels to access the scooter's main controller unit. This typically involves unscrewing several fasteners. Refer to your scooter's original manual for specific panel removal instructions if needed.
- Disconnect the Old Cable:
Identify the existing main control cable connected to the controller. Carefully disconnect all connectors associated with this cable. Pay attention to the orientation and color coding of each connector to ensure correct re-connection later.

Figure 5.1: Close-up view of a typical main control cable connector, highlighting the pin configuration.
- Remove the Old Cable:
Once all connectors are detached, carefully unroute and remove the old main control cable from the scooter's frame. Note its routing path to guide the installation of the new cable.
- Install the New Cable:
Take the new SPEDWHEL Main Control Cable. Route it through the scooter's frame, following the same path as the old cable. Ensure the cable is not pinched or excessively bent.
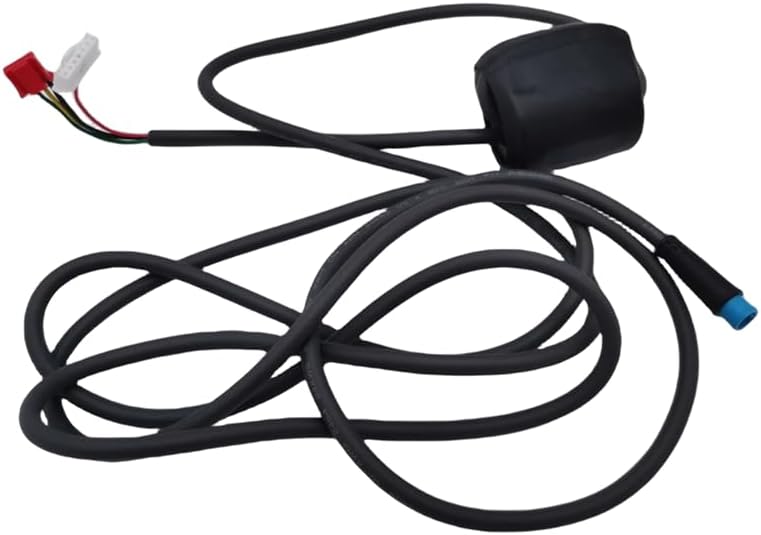
Figure 5.2: The new main control cable, showing its various connectors ready for installation.
- Connect the New Cable:
Carefully connect each end of the new cable to its corresponding port on the controller and other components. Ensure each connection is secure and fully seated. Double-check that all connectors are correctly matched (e.g., by color or pin configuration).
- Test Functionality:
Before reattaching all covers, briefly power on the scooter to verify that all functions (e.g., display, throttle response, lights) are working correctly. If any issues arise, power off immediately and re-check all connections.
- Reassemble the Scooter:
Once functionality is confirmed, carefully reattach all covers and panels that were removed. Ensure all fasteners are tightened securely, but do not overtighten.
6. Operating Instructions
Once the SPEDWHEL Main Control Cable is correctly installed, the scooter's electrical systems will operate as intended. No specific operating instructions are required for the cable itself, as its function is to facilitate communication between existing components. Ensure all connections remain secure during scooter operation.
7. Maintenance
Proper maintenance can extend the lifespan of your main control cable and ensure reliable scooter performance.
- Regular Inspection: Periodically inspect the visible portions of the cable for any signs of wear, fraying, cuts, or damage.
- Cleanliness: Keep the cable and its connectors free from dirt, dust, and moisture. Use a dry, soft cloth for cleaning.
- Avoid Stress: Ensure the cable is not subjected to excessive pulling, bending, or pinching, especially during storage or transport of the scooter.
- Secure Connections: If accessible, occasionally check that all cable connections remain tight and secure.
8. Troubleshooting
If you experience issues after installing the new main control cable, consider the following troubleshooting steps:
- No Power/Functionality:
- Ensure the scooter's battery is charged and properly connected.
- Verify that all connectors of the new main control cable are fully seated and correctly matched.
- Check for any visible damage to the cable or its connectors.
- Intermittent Functionality:
- This could indicate a loose connection. Power off the scooter and re-seat all cable connectors.
- Inspect the cable for any internal breaks or damage that might not be visible externally.
- Error Codes:
If the scooter displays an error code, consult your Ninebot MAX G2 user manual to interpret the code. Some error codes may point to issues with specific electrical connections that the main control cable facilitates.
If troubleshooting steps do not resolve the issue, contact SPEDWHEL customer support or a certified scooter technician.
9. Specifications
| Feature | Specification |
|---|---|
| Model Number | MAX G2 |
| Brand | SPEDWHEL |
| Material | Acrylonitrile Butadiene Styrene (Connectors) |
| Color | Black |
| Product Dimensions | Approximately 4"L x 3"W (packaged) |
| Item Weight | 5.3 ounces |
| Special Feature | Easy to Install |
| UPC | 744612935267 |
| ASIN | B0CNRBJCF7 |
10. Warranty and Support
For warranty information or technical support regarding your SPEDWHEL Main Control Cable, please contact the retailer or manufacturer directly. Keep your purchase receipt as proof of purchase.
Manufacturer: SPEDWHEL
Contact details are typically provided on the product packaging or the manufacturer's official website.