
1. Important Safeguards
When using electrical appliances, basic safety precautions should be followed, including the following:
- Read all instructions before using the appliance.
- Do not use this appliance for other than its intended use.
- Do not operate this appliance if it has a damaged cord or plug, if it is not working properly, or if it has been damaged or dropped.
- Do not immerse the cord or plug in water. Keep the cord away from heated surfaces.
- Close supervision is necessary when any appliance is used by or near children.
- Always unplug the appliance from the outlet when not in use and before cleaning.
- Do not cover or block any openings on the appliance.
- Only use attachments recommended by the manufacturer.
- Do not use outdoors.
- Do not place on or near a hot gas or electric burner, or in a heated oven.
- Always attach the plug to the appliance first, then plug the cord into the wall outlet. To disconnect, turn any control to “off”, then remove the plug from the wall outlet.
2. Product Overview
The SHARP SMC1161KW is a mid-sized countertop microwave oven with a 1.1 cubic feet capacity and 1000 watts of cooking power. It features a removable 12.4-inch Carousel turntable for even cooking, one-touch controls, and auto defrost functions, making it suitable for daily reheating and cooking tasks.

Figure 2.1: Front view of the SHARP SMC1161KW Countertop Microwave Oven.

Figure 2.2: Detailed view of the control panel.
Key Features:
- 1.1 cu. ft. capacity, 1000 watts.
- Stylish design with gray interior and white LED display.
- 12.4" Carousel turntable for even cooking.
- 10 Power Levels with 2-stage cooking.
- Convenient "+30 seconds" key for instant start.
- Auto Cook for popular menu items.
- Weight and Time Defrost for quick and accurate thawing.
- Convenient "Express Cook" with single press up to 6 minutes cooking.
3. Setup
Placement:
Place the microwave oven on a flat, stable surface that is strong enough to hold the oven and the food being cooked. Ensure there is adequate ventilation around the unit. Maintain a minimum of 4 inches (10 cm) of space on the top, sides, and rear of the oven for proper airflow.
Turntable Assembly:
The glass turntable and turntable ring must be in place when cooking. The turntable ensures even heating of food. To assemble:
- Place the turntable ring securely in the center of the microwave oven cavity.
- Carefully place the glass turntable onto the turntable ring, ensuring it sits properly on the center hub.

Figure 3.1: Interior view with the glass turntable correctly placed.
4. Operating Instructions
Basic Cooking:
To cook food using a specific time and power level:
- Place food in the microwave-safe container on the turntable.
- Press the TIME COOK button.
- Enter the desired cooking time using the number pad.
- Press the POWER LEVEL button.
- Select the desired power level (1-10). For 100% power, skip this step or select '10'.
- Press START/+30 SEC.
Express Cook:
For quick cooking, simply press a number from 1 to 6 on the number pad for 1 to 6 minutes of cooking at 100% power.
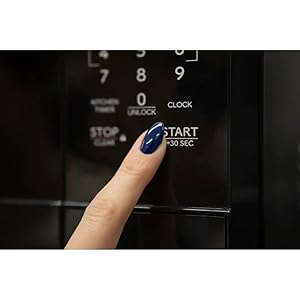
Figure 4.1: Using the '+30 Sec' button for instant start.
Auto Defrost:
The Auto Defrost feature allows for quick and accurate thawing of various food items.
- Press the AUTO DEFROST button.
- Select the food type (Meat, Poultry, Fish) and enter the weight.
- Press START/+30 SEC.
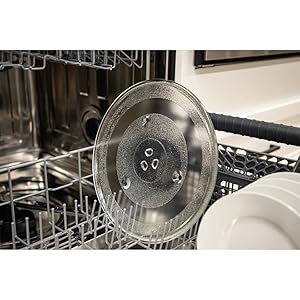
Figure 4.2: Auto Defrost function for various frozen foods.
Child-Resistant Door Lock:
This microwave oven is equipped with a UL923 Child-Resistant Door Lock function. The door will stay locked for the duration of the cooking operation, plus 30 minutes after completion. To unlock the microwave door during this time, press the 0/UNLOCK button before pulling the door open or pressing the door open button (depending on the model).
To disable/re-enable this feature, press 7-9-0 (hold 0 button for 3 seconds). When disabled, "OFF" will be displayed with an audible sound. When re-enabled, "DOOR" will be displayed with an audible sound. Once disabled, this feature will remain disabled even after a power outage.

Figure 4.3: Child-resistant door lock feature for safety.
Video 4.1: Demonstration of the child-resistant door lock feature and how to unlock the microwave during a cooking cycle.
5. Maintenance
Cleaning the Microwave Oven:
Regular cleaning of your microwave oven is essential for optimal performance and hygiene. Always unplug the oven before cleaning.
- Interior: Wipe the interior with a soft, damp cloth after each use. For stubborn stains, use a mild detergent or microwave-safe cleaner.
- Exterior: Clean the exterior surfaces with a soft, damp cloth. Avoid abrasive cleaners or scouring pads that could scratch the finish.
- Door Seal: Keep the door seal clean to ensure proper closure and efficient operation.
Figure 5.1: Cleaning the exterior of the microwave oven.
Turntable Care:
The 12.4-inch Carousel turntable is removable and dishwasher safe, making cleanup easy.
- Remove the glass turntable and turntable ring for cleaning.
- Wash them in warm, soapy water or place them in the dishwasher.
- Ensure they are completely dry before placing them back into the microwave oven.

Figure 5.2: Dishwasher-safe turntable for easy cleaning.
6. Troubleshooting
If your microwave oven is not operating correctly, refer to the following common issues and solutions:
| Problem | Possible Cause | Solution |
|---|---|---|
| Oven will not start | Door is not closed properly. | Close the oven door securely. |
| Power cord is not plugged in. | Plug the power cord into a grounded electrical outlet. | |
| Circuit fuse is blown or circuit breaker is tripped. | Replace fuse or reset circuit breaker. | |
| Food is not heating | Incorrect cooking time or power level selected. | Adjust cooking time and power level as needed. |
| Food is not microwave-safe. | Use only microwave-safe cookware. | |
| Turntable is not rotating | Turntable or ring is not properly placed. | Check and reposition the turntable and ring. |
| Debris under the turntable. | Clean the area under the turntable. |
7. Specifications
| Feature | Specification |
|---|---|
| Model Number | SMC1161KW |
| Capacity | 1.1 Cubic Feet |
| Wattage | 1000 watts |
| Voltage | 120 Volts |
| Product Dimensions (D x W x H) | 14.7"D x 20.6"W x 11.8"H |
| Item Weight | 33.1 Pounds |
| Turntable Size | 12.4 inches |
| Color | White |
| Material | Stainless Steel |
| Installation Type | Countertop |

Figure 7.1: Product dimensions for placement reference.
8. Warranty Information
For detailed warranty information regarding your SHARP SMC1161KW Countertop Microwave Oven, please refer to the warranty card included with your product packaging or visit the official Sharp website. Keep your purchase receipt as proof of purchase for any warranty claims.
9. Support
Should you require further assistance or have questions not covered in this manual, please contact Sharp Customer Support. Contact information can be found on the official Sharp website or in your product documentation.
Video 9.1: An official overview of the SHARP Countertop Microwave Oven, highlighting its design and key functionalities.


