Playtive 359778P
Playtive Real Beech Wood Railway Kit (Passenger Train) - Instruction Manual
Model: 359778P
1. Introduction
Thank you for choosing the Playtive Real Beech Wood Railway Kit. This set is designed to foster creativity, imagination, and fine motor skills through engaging railway play. Made from genuine European beech wood, this kit offers a durable and enjoyable experience. All vehicles and trains feature magnetic couplings for easy connection.
This manual provides essential information for the assembly, operation, and maintenance of your railway kit. Please read it thoroughly before use.
2. Safety Information
WARNING: Not suitable for children under 36 months. Choking hazard due to small parts that can be swallowed or inhaled.
- Always supervise children during play.
- Keep small parts away from young children.
- Ensure all components are securely connected during play to prevent detachment of small parts.
- Do not expose the wooden parts to excessive moisture or extreme temperatures.
- Dispose of batteries responsibly.
3. Package Contents
Your Playtive Passenger Train Railway Kit includes 56 pieces, designed for creative construction. Please verify that all components listed below are present:
- Wooden track pieces (various shapes and lengths)
- 1 Battery-powered passenger train with forward and reverse function
- 1 Passenger wagon
- 1 Freight train for pushing and loading
- 1 Taxi vehicle
- 4 Figurines
- 3 Detailed stations:
- Level crossing with barriers
- Bridge elements
- Train stop/station building
- Assorted accessories (e.g., trees, signs)
The maximum track length for this kit is approximately 4.2 meters.
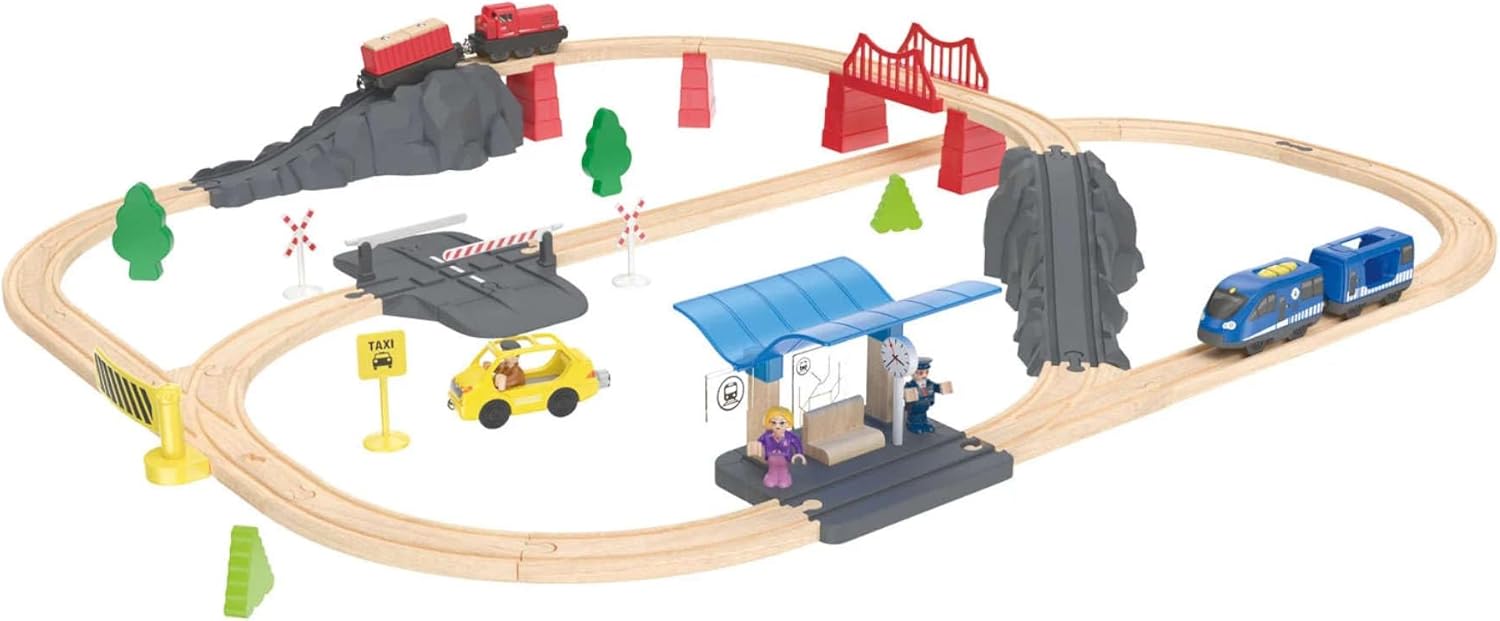
Image: Overview of the Playtive Real Beech Wood Railway Kit, showing the complete track layout with a blue passenger train, a red freight train on an elevated section, a yellow taxi, a train station, a bridge, and a level crossing. Various track pieces, trees, and figurines are also visible.
4. Setup and Assembly
Follow these steps to assemble your railway kit:
- Unpack Components: Carefully remove all pieces from the packaging.
- Plan Your Layout: Refer to the image on the packaging or create your own track design. The wooden track pieces connect easily with interlocking ends.
- Assemble Track: Connect the straight and curved track pieces to form your desired railway path. Ensure connections are snug.
- Install Stations and Structures:
- Level Crossing: Place the level crossing piece within a straight section of track. The barriers can be manually raised and lowered.
- Bridge: Assemble the bridge elements (supports and bridge track sections) and integrate them into your track layout to create an elevated section.
- Train Stop/Station: Position the station building next to a straight track section.
- Add Accessories: Place trees, signs, and other decorative elements around your railway for a more immersive play experience.
- Prepare Trains: Insert the required batteries into the battery-powered passenger train (refer to the "Operating Instructions" section for details).
5. Operating Instructions
5.1. Battery Installation (Passenger Train)
The battery-powered passenger train requires batteries for operation. (Battery type and quantity typically specified on the product packaging or the train itself, e.g., 1x AA battery). To install:
- Locate the battery compartment on the underside of the passenger train.
- Using a small screwdriver (not included), open the battery compartment cover.
- Insert the batteries, ensuring correct polarity (+/-).
- Replace the cover and secure it with the screw.
5.2. Train Operation
- Power On/Off: Locate the ON/OFF switch on the train (usually on the top or side). Slide it to the 'ON' position to start the train.
- Direction Control: The train features forward and reverse functions. There will be a switch or button to change the direction of travel.
- Magnetic Couplings: Use the magnetic couplings to attach the passenger wagon and the freight train to the passenger train. Simply bring the magnetic ends together.
- Manual Play: The freight train and taxi can be pushed manually along the tracks or other surfaces.
6. Maintenance
- Cleaning: Wipe all wooden and plastic components with a dry or slightly damp cloth. Do not use harsh chemicals or abrasive cleaners.
- Storage: Store the railway kit in a dry place, away from direct sunlight and extreme temperatures, to prevent warping or damage to the wood.
- Battery Care: Remove batteries from the train if it will not be used for an extended period to prevent leakage.
- Inspection: Periodically inspect all parts for wear and tear. Discontinue use if any part is broken or damaged.
7. Troubleshooting
- Train Not Moving:
- Check if the ON/OFF switch is in the 'ON' position.
- Ensure batteries are correctly installed with proper polarity.
- Replace old or depleted batteries with new ones.
- Check for any obstructions on the track or under the train.
- Track Pieces Don't Connect:
- Ensure you are using compatible track pieces.
- Check for any debris in the connection points.
- Apply gentle pressure to connect the pieces.
8. Specifications
| Feature | Detail |
|---|---|
| Brand | Playtive |
| Model Number | 359778P |
| Material | European Beech Wood |
| Recommended Age | 3 years and up (36 months minimum) |
| Product Dimensions (L x W x H) | 30 x 20 x 10 cm (approx. 11.8 x 7.9 x 3.9 inches) |
| Maximum Track Length | Approx. 4.2 meters (13.8 feet) |
| Number of Pieces | 56 pieces (Passenger Train Kit) |
| Compatibility | Compatible with other Playtive vehicle kits and commercially available wooden railway tracks. |
9. Warranty and Support
Specific warranty information for this product is not provided in the available data. Please refer to the product packaging or contact the retailer/manufacturer directly for warranty details and customer support.
Related Documents - 359778P
 |
Playtive Passenger Train / Freight Train Instructions Comprehensive instructions for assembling and operating the Playtive Passenger Train / Freight Train, including battery installation, remote control operation, and safety guidelines. |
 |
Playtive Farm / Dinosaur Wooden Train Set - User Manual & Safety Guide Comprehensive instructions, safety guidelines, delivery contents, and technical data for the Playtive Farm / Dinosaur Wooden Train Set (models HB-14813, HB-14814). Includes assembly tips and warranty information. |
 |
Playtive Passenger Train Set - Instructions for Use Comprehensive user manual and safety guide for the Playtive Passenger Train Set, covering assembly, operation, safety precautions, and disposal. Includes multilingual instructions. |
 |
Playtive Battery-Powered Train: Instructions, Safety, and Operation Manual Comprehensive instructions for Playtive battery-powered train sets (models LE-14828, LE-14829, LE-14830, LE-14831), covering package contents, technical data, intended use, detailed safety information, battery handling, operation of locomotives and carriages, storage, cleaning, disposal, and warranty information. |
 |
Playtive Battery-Powered Train Instructions for Use Comprehensive instructions for Playtive battery-powered trains, including models LE-14828, LE-14829, LE-14830, and LE-14831. Covers package contents, technical data, safety information, battery handling, operation, storage, cleaning, disposal, and warranty. |
 |
Playtive Farm / Dinosaur Wooden Train Set - Instructions & Safety Guide Comprehensive instructions and safety information for the Playtive Farm / Dinosaur Wooden Train Set (IAN 460730_2401), including delivery contents, intended use, care, and guarantee details. |
Ask a question about this manual
Ask about setup, troubleshooting, compatibility, parts, safety, or missing instructions. Manuals+ will review the question and use this page’s manual context to help answer it.