
Hotpoint H2I HRD526 S
Hotpoint Ariston H2I HRD526 S Dishwasher User Manual
Model: H2I HRD526 S
Introduction
This manual provides essential information for the safe and efficient operation, installation, and maintenance of your Hotpoint Ariston H2I HRD526 S dishwasher. Please read these instructions carefully before using the appliance and keep them for future reference.
Safety Information
Always follow basic safety precautions when using electrical appliances to reduce the risk of fire, electric shock, and injury to persons. This appliance is intended for household use only. Do not allow children to play with the appliance. Ensure the power supply is disconnected before any maintenance or cleaning. Do not operate the dishwasher if it is damaged.
What's in the Box
Upon unpacking your Hotpoint Ariston H2I HRD526 S dishwasher, please ensure all components are present and undamaged:
- Integrated Display
- Silver Control Panel
- Water Overflow Protection System
Setup and Installation
The Hotpoint Ariston H2I HRD526 S is a freestanding dishwasher. Proper installation is crucial for optimal performance and safety. Ensure the appliance is placed on a stable, level surface and connected to appropriate water and electrical supplies by a qualified technician.
Dimensions and Placement
Refer to the diagram below for precise dimensions required for installation. Ensure adequate space for ventilation and door opening.

Figure 1: Installation dimensions for the Hotpoint Ariston H2I HRD526 S dishwasher. Dimensions are provided in centimeters, indicating the required space for width, depth, and height, as well as connections.
Electrical and Water Connections
Connect the dishwasher to a grounded electrical outlet (240 Volt AC). Ensure water inlet and outlet hoses are securely attached and free from kinks. The water overflow protection system is integrated to prevent leaks.
Operating Instructions
Your Hotpoint Ariston H2I HRD526 S dishwasher is designed for efficient cleaning of up to 14 place settings. It features a button-controlled interface for easy program selection.
Loading the Dishwasher
Proper loading ensures optimal cleaning results. Place larger items in the lower rack and smaller items, such as cups and glasses, in the upper rack. Ensure items do not block the spray arms.
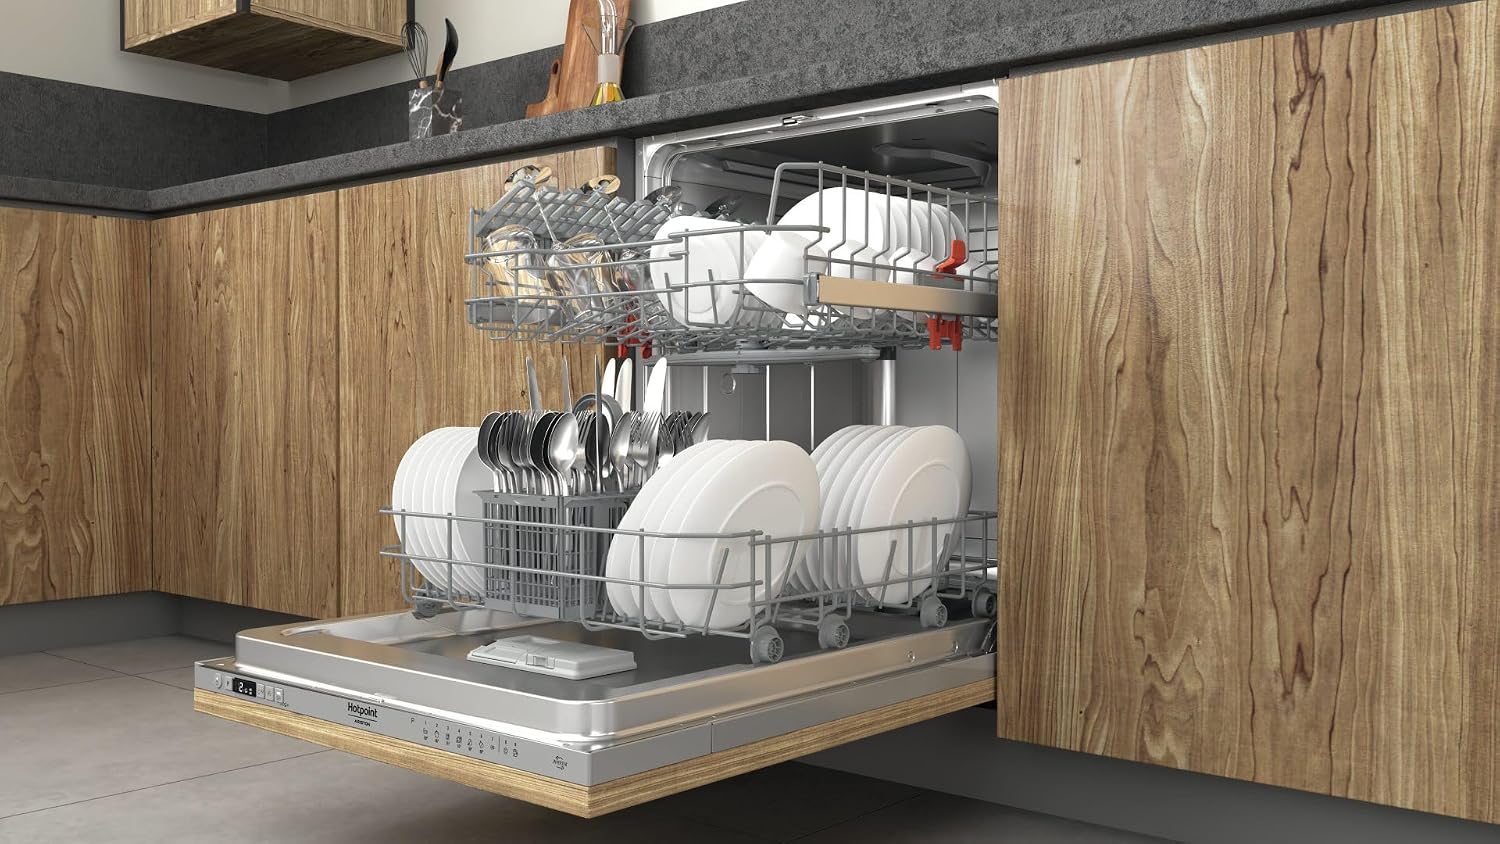
Figure 2: Example of a loaded dishwasher interior, showing proper placement of dishes, cutlery, and glassware in both upper and lower racks.

Figure 3: View of the empty dishwasher interior, highlighting the adjustable racks and cutlery basket for flexible loading.
Adding Detergent and Rinse Aid
Fill the detergent dispenser with the appropriate amount of dishwasher detergent. Check the rinse aid indicator and refill if necessary to ensure streak-free drying.
Selecting a Wash Program
Your dishwasher offers 9 optional cycles. Use the control panel to select the desired program based on the soil level of your dishes. The integrated display will show program information.

Figure 4: Close-up of the silver control panel, showing the power button, program selection button, integrated display, and various function buttons.
Starting a Cycle
Close the dishwasher door firmly. Press the Start/Pause button to begin the selected wash cycle. The display will show the remaining time.
Maintenance and Cleaning
Regular maintenance ensures the longevity and efficiency of your dishwasher.
Self-Clean 65°C Feature
This dishwasher includes a Self-Clean 65°C special feature. Run this cycle periodically to clean the interior of the appliance and remove grease and limescale buildup. Consult the full manual for specific instructions on activating this cycle.
Filter Cleaning
The filter system should be cleaned regularly to prevent food particles from recirculating and affecting wash performance. Remove the filters, rinse them under running water, and reassemble them correctly.
Exterior Cleaning
Wipe the exterior surfaces with a soft, damp cloth. Avoid abrasive cleaners or solvents that could damage the finish.
Troubleshooting
Before contacting customer service, refer to the following common issues and their potential solutions:
- Dishes are not clean: Check filter, spray arms for blockages, ensure proper loading, use adequate detergent.
- Water remains in the dishwasher: Check drain hose for kinks or blockages, clean filters.
- Dishwasher is leaking: Ensure door seal is clean and intact, check hose connections.
- Unusual noises: Check for items obstructing spray arms or foreign objects in the pump area.
For persistent issues or error codes displayed on the integrated display, consult the comprehensive troubleshooting guide in the full product manual or contact customer support.
Specifications
| Brand | Hotpoint |
| Model Number | H2I HRD526 S |
| Installation Type | Freestanding |
| Dimensions (W x D x H) | 59.8 x 55.5 x 82 cm |
| Weight | 30 kg |
| Place Settings | 14 |
| Number of Cycles | 9 |
| Control Type | Button |
| Special Feature | Self-Clean 65°C |
| Material | Stainless Steel |
| Voltage | 240 Volt (AC) |
| Energy Class | E |

Figure 5: Energy efficiency label, indicating the appliance's energy class as E.
Warranty and Support
Your Hotpoint Ariston H2I HRD526 S dishwasher comes with a manufacturer's warranty. Please refer to the warranty card included with your purchase for specific terms and conditions. For technical assistance, spare parts, or to schedule a service appointment, please contact Hotpoint customer support through their official website or the contact information provided in your purchase documentation.
Related documentsH2I HRD526 S


Ask a question about this manual
Ask about setup, troubleshooting, compatibility, parts, safety, or missing instructions. Manuals+ will review the question and use this page’s manual context to help answer it.