1. Introduction
Thank you for choosing the OKAIDI OD8021 2.4-inch Video Baby Monitor. This device is designed to provide secure and reliable monitoring of your baby, pet, or elderly family members. It operates on a 2.4GHz FHSS wireless technology, ensuring a private connection without the need for Wi-Fi or smartphone applications. Please read this manual thoroughly before use to ensure proper operation and to maintain the product's longevity.
2. Safety Information
- Choking Hazard: Keep all cables and small parts out of reach of children.
- Strangulation Hazard: Never place the camera or monitor within 3 feet (1 meter) of the crib or playpen. Secure all cords to prevent entanglement.
- Water and Moisture: Do not expose the units to water or moisture. Use only in dry indoor environments.
- Power Source: Use only the provided power adapters. Incorrect adapters may damage the device and pose safety risks.
- Heat: Keep the units away from heat sources such as radiators, heat registers, stoves, or other heat-producing appliances.
- Ventilation: Ensure proper ventilation around both units. Do not block any ventilation openings.
- Interference: The monitor operates on a 2.4GHz frequency. Other 2.4GHz devices may cause interference.
3. Package Contents
Verify that all items are present in the package:
- Parent Unit (Monitor) with 2.4-inch LCD Screen
- Baby Unit (Camera)
- Power Adapter for Parent Unit
- Power Adapter for Baby Unit
- Wall Mounting Screws and Anchors
- User Manual

Image: Contents of the OKAIDI OD8021 baby monitor package, including the monitor, camera, power adapters, mounting hardware, and user manual.
4. Product Overview
4.1 Parent Unit (Monitor)
The parent unit features a 2.4-inch LCD screen for viewing the camera feed and buttons for control.
- LCD Screen: Displays video feed from the camera.
- Power Button: Turns the monitor on/off.
- Menu/OK Button: Accesses menu options and confirms selections.
- Navigation Buttons (Up/Down/Left/Right): Navigates through menus and adjusts settings.
- Return Button: Exits current menu or returns to the previous screen.
- Zoom Button: Activates 2x digital zoom.
- Microphone: For two-way audio communication (if supported by model).
- Speaker: Outputs audio from the baby unit.
- Power Indicator: Lights up when the unit is powered on.
4.2 Baby Unit (Camera)
The baby unit captures video and audio from the monitored area.
- Camera Lens: Captures video.
- Infrared LEDs: Provide night vision in low light conditions.
- Microphone: Captures audio from the monitored area.
- Speaker: For two-way audio communication (if supported by model).
- Power Indicator: Lights up when the unit is powered on.
- Pairing Button: Used to pair the camera with the monitor.

Image: The OKAIDI OD8021 parent unit (monitor) displaying a baby, and the baby unit (camera) with its lens and infrared LEDs.
5. Setup
5.1 Powering On
- Connect the small end of the power adapter to the DC input port on the Baby Unit.
- Plug the other end of the power adapter into a wall outlet. The Baby Unit will power on automatically.
- Connect the small end of the power adapter to the DC input port on the Parent Unit.
- Plug the other end of the power adapter into a wall outlet.
- Press and hold the Power Button on the Parent Unit for a few seconds to turn it on.
5.2 Camera Placement
Place the Baby Unit (camera) in a location that provides a clear view of the monitored area. Ensure it is at least 3 feet (1 meter) away from the baby's crib or playpen to prevent strangulation hazards from the power cord.
- The camera can be placed on a flat surface, mounted on a wall, or attached to a crib using a compatible bracket (not included).
- The camera features a 360° rotation and 120° tilt capability, allowing you to adjust the angle manually for the best view.
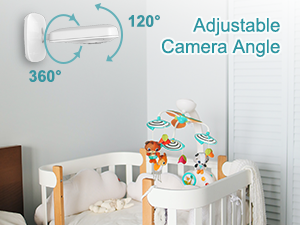
Image: Illustration of the camera unit demonstrating its 360-degree rotation and 120-degree tilt for flexible positioning.
5.3 Pairing the Units
The units are pre-paired at the factory. If the connection is lost or you need to pair a new camera, follow these steps:
- Ensure both the Parent Unit and Baby Unit are powered on.
- On the Parent Unit, press the Menu/OK button to enter the menu.
- Navigate to the 'Camera' or 'Pairing' option and select it.
- Follow the on-screen prompts to initiate pairing.
- Within 10 seconds, press the Pairing Button on the back of the Baby Unit.
- Once successfully paired, the video feed will appear on the Parent Unit screen.
6. Operating Instructions
6.1 Basic Monitoring
Once both units are powered on and paired, the Parent Unit will automatically display the live video feed from the Baby Unit. The audio from the Baby Unit will also be transmitted to the Parent Unit.
6.2 Adjusting Volume
Use the Up/Down navigation buttons on the Parent Unit to increase or decrease the audio volume.
6.3 Digital Zoom
Press the Zoom Button on the Parent Unit to activate 2x digital zoom. Press it again to return to the normal view. This allows for a closer look at the monitored area.
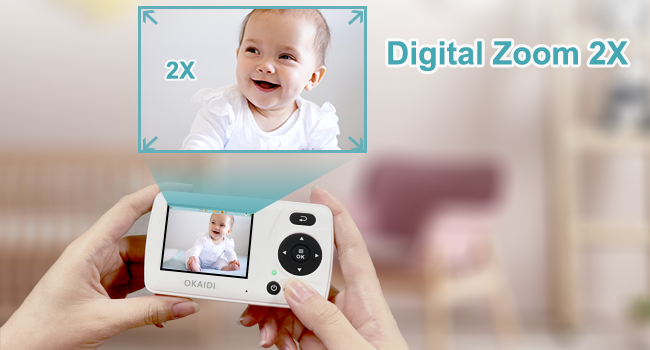
Image: The monitor screen showing a baby's face, with an overlay indicating the 2x digital zoom capability for a closer view.
6.4 VOX Mode (Sound-activated Screen)
The VOX (Voice Operated eXchange) mode, also known as ECO mode, conserves battery power by turning off the monitor screen when no sound is detected from the Baby Unit. The screen will automatically activate and alert you when the baby unit detects sound above a certain threshold.
- Press the Menu/OK button on the Parent Unit.
- Navigate to the 'VOX' or 'ECO' setting.
- Select 'On' to activate the mode. You may also be able to adjust the sound sensitivity level.
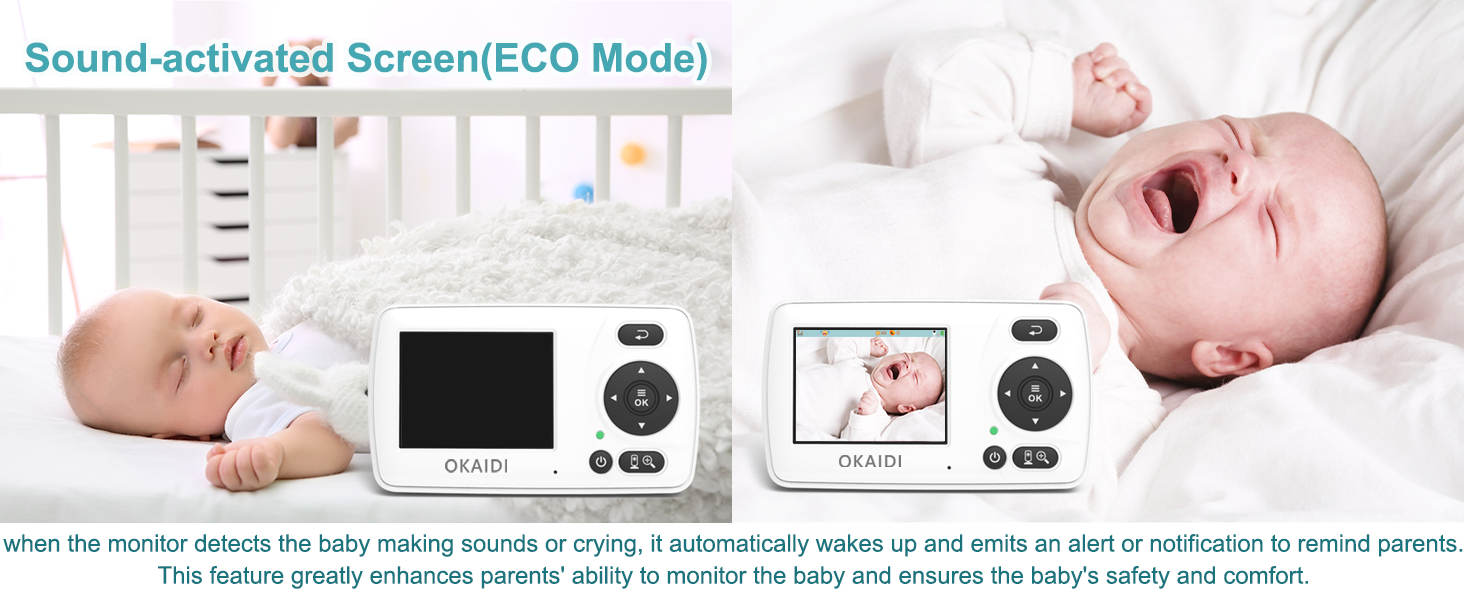
Image: A split image showing the monitor screen off when a baby is sleeping quietly, and the screen on with an alert when the baby is crying, demonstrating the sound-activated screen (VOX) feature.
6.5 Feeding Timer Alert
The monitor includes a feeding timer feature to help parents keep track of feeding schedules.
- Access the menu on the Parent Unit.
- Navigate to the 'Timer' or 'Feeding Alert' option.
- Set the desired interval (e.g., 30 minutes, 1 hour, 2 hours, 4 hours).
- The monitor will emit an alert when the set time has elapsed.
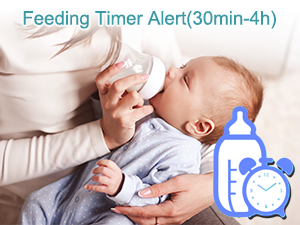
Image: A baby being fed with a bottle, accompanied by an icon of a baby bottle and an alarm clock, illustrating the feeding timer alert feature.
6.6 Language Settings
The monitor supports multiple languages for its menu interface.
- Enter the menu on the Parent Unit.
- Find the 'Language' option.
- Select your preferred language from the available options (e.g., English (US), English (UK), Français, Español, Português, Deutsch, Italiano, Nederlands).
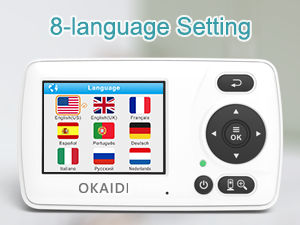
Image: The monitor screen displaying a list of 8 language options with corresponding national flags, indicating multi-language support.
7. Features
- No Wi-Fi, No App, Secure Connection: The monitor operates on a dedicated 2.4GHz FHSS (Frequency Hopping Spread Spectrum) technology, ensuring a private, secure, and stable connection that is not susceptible to internet hacking.
- Long Monitoring Range: Offers an outdoor transmission range of up to 1000 feet (300 meters) and an indoor range of up to 165 feet (50 meters), allowing flexibility in monitoring locations.
- Automatic Infrared Night Vision: The camera automatically switches to infrared night vision mode in low light conditions, providing clear black and white images for continuous monitoring without disturbing sleep.
- Sound-activated Screen (VOX Mode): The monitor screen automatically activates when sound is detected, reducing surveillance fatigue and conserving battery life.
- 2x Digital Zoom: Allows users to zoom in on the video feed for a closer view of the monitored area.
- Adjustable Camera Angle: The camera unit can be manually rotated 360° and tilted 120° to achieve the optimal viewing angle.
- 8-Language Setting: The parent unit supports multiple languages for user convenience.
- Feeding Timer: A programmable alert to remind users of feeding times.
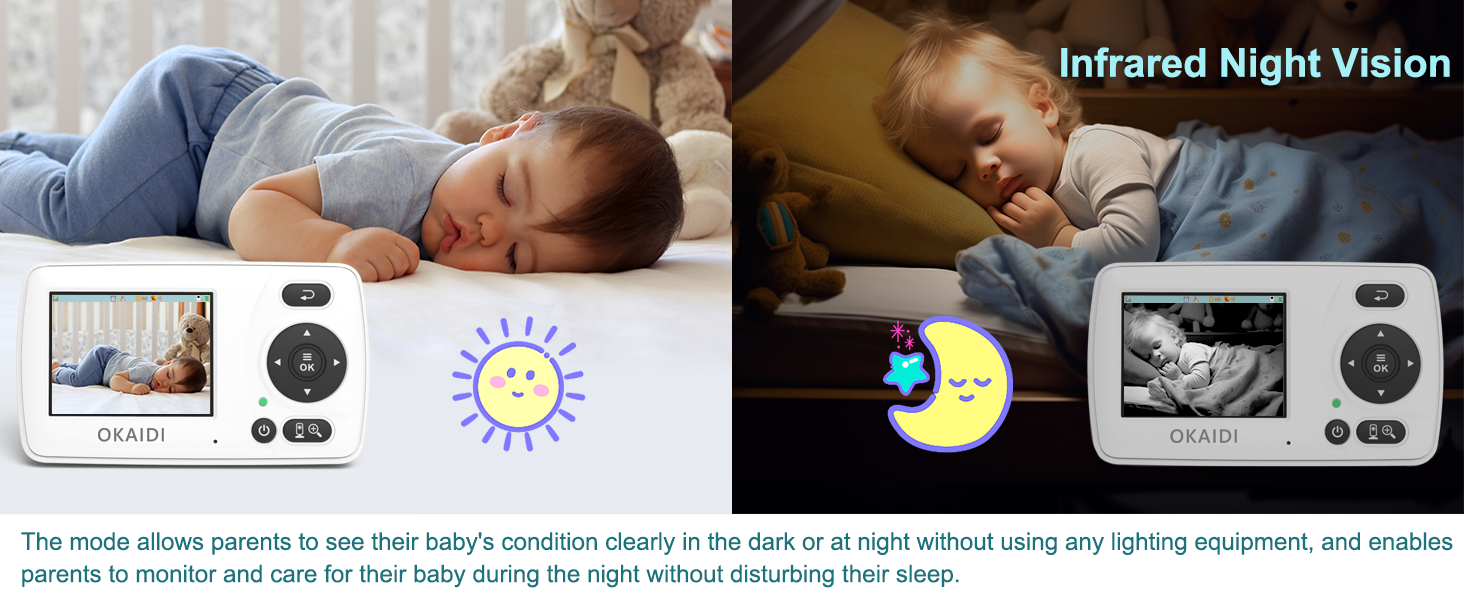
Image: A split image showing a baby sleeping in a brightly lit room (color view) and the same baby sleeping in a dark room (black and white infrared night vision view), illustrating the automatic night vision feature.
8. Troubleshooting
| Problem | Possible Cause | Solution |
|---|---|---|
| No picture/sound on Parent Unit | Units not powered on; Units out of range; Units not paired. | Ensure both units are plugged in and powered on. Move units closer. Re-pair the units as per Section 5.3. |
| Picture is black and white | Infrared Night Vision is active. | This is normal in low light conditions. The camera automatically switches to color when sufficient light is available. |
| Screen turns off frequently | VOX/ECO mode is active. | This is normal behavior for power saving. The screen will activate when sound is detected. Adjust VOX sensitivity or disable it in the menu if preferred. |
| Poor signal/Interference | Units too far apart; Obstructions; Other 2.4GHz devices. | Move Parent Unit closer to Baby Unit. Reduce obstructions (walls, furniture). Move other 2.4GHz devices away from the monitor. |
| Parent Unit battery drains quickly | Continuous screen on; High brightness/volume. | Activate VOX/ECO mode. Reduce screen brightness and volume. Ensure the unit is fully charged before use. |
9. Specifications
- Model: OD8021
- Screen Size: 2.4 inches
- Connectivity Technology: 2.4GHz FHSS Wireless
- Wireless Communication Technology: Wi-Fi (Note: Product operates without direct Wi-Fi network connection, uses 2.4GHz FHSS for proprietary wireless communication)
- Outdoor Range: Up to 1000 feet (300 meters)
- Indoor Range: Up to 165 feet (50 meters)
- Night Vision: Automatic Infrared
- Zoom: 2x Digital
- Special Features: VOX Mode, Adjustable Camera Angle, Feeding Timer, 8-Language Setting
- Power Source: Corded Electric (with rechargeable battery in Parent Unit)
- Item Weight: 13.4 ounces
- Package Dimensions: 6.46 x 5.55 x 3.11 inches
10. Maintenance
- Cleaning: Use a soft, dry cloth to clean the surfaces of the Parent Unit and Baby Unit. Do not use abrasive cleaners or solvents.
- Lens Care: Gently wipe the camera lens with a soft, lint-free cloth. Avoid touching the lens directly with fingers.
- Storage: If storing the device for an extended period, ensure both units are fully charged, then power them off. Store in a cool, dry place.
11. Warranty and Support
For warranty information, technical support, or any questions regarding your OKAIDI OD8021 Video Baby Monitor, please contact our customer service team.
- Email: service@okaidicare.com
- Website: www.okaidicare.com
Please retain your proof of purchase for warranty claims.