Introduction
This manual provides essential information for setting up, operating, maintaining, and troubleshooting your HP Pro Mini 400 G9 Business Mini Desktop Computer. This compact and powerful system is designed for business environments, featuring a 12th Gen Intel Core i5-12500T processor, 16GB DDR4 RAM, and a 512GB PCIe NVMe SSD, running Windows 11 Pro.
Please read this manual thoroughly before using your new computer to ensure proper operation and to maximize its lifespan.
What's in the Box
Verify that all items are present in the packaging:
- HP Pro Mini 400 G9 Desktop PC
- Wired Keyboard
- Wired Mouse
- Power Adapter and Cable
- Documentation (Quick Start Guide, Warranty Information)
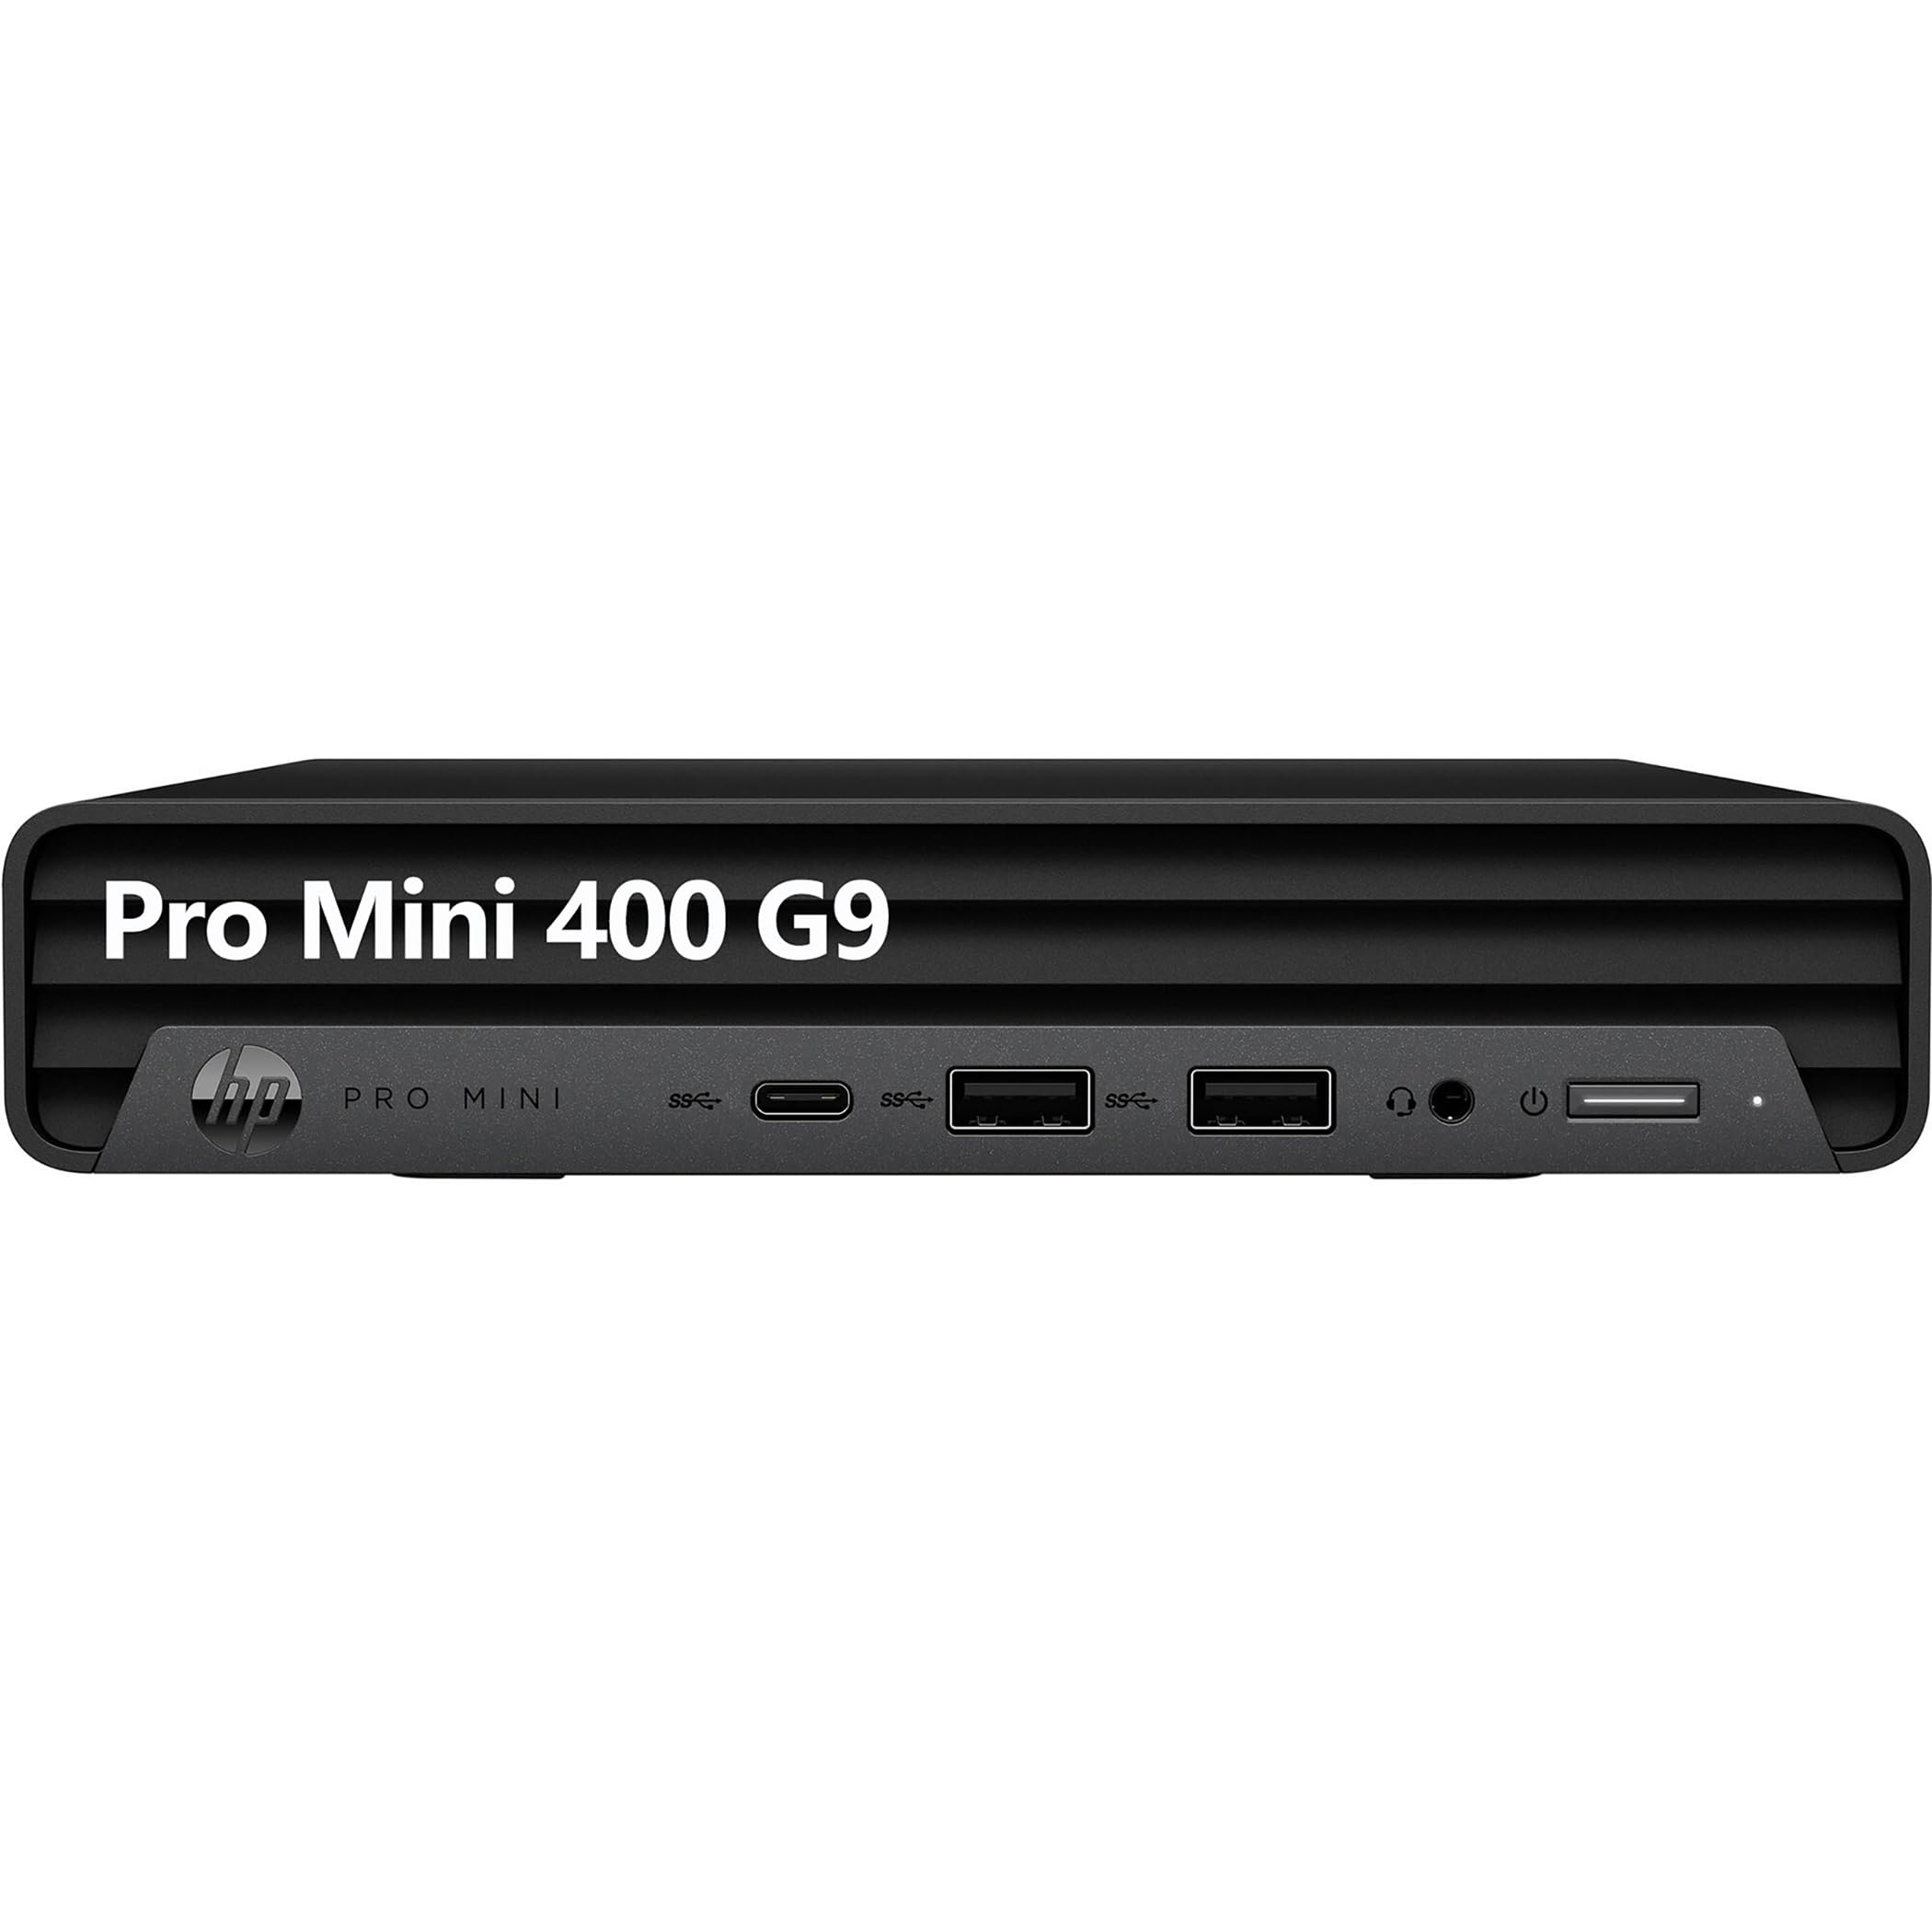
Image: The HP Pro Mini 400 G9 desktop computer shown with its accompanying wired keyboard and mouse.
Setup
Follow these steps to set up your HP Pro Mini 400 G9 desktop computer:
- Connect Peripherals:
- Connect the wired keyboard to an available USB Type-A port on the front or rear of the computer.
- Connect the wired mouse to another available USB Type-A port.
- Connect your monitor(s) to the DisplayPort or HDMI ports on the rear of the computer. The system supports up to two DisplayPort 1.4 and one HDMI 2.1 output.
- Connect to Power:
- Connect the power cable to the power connector on the rear of the computer.
- Plug the other end of the power cable into a grounded electrical outlet.
- Network Connection (Optional):
- For a wired connection, connect an Ethernet cable from your router or network switch to the RJ-45 port on the rear of the computer.
- For wireless connectivity, the system includes Wi-Fi 6 (802.11ax) and Bluetooth 5.2. Configuration will occur during initial Windows setup or via Windows settings.
- Initial Boot-Up:
- Press the power button located on the front of the computer.
- Follow the on-screen instructions to complete the Windows 11 Pro setup process. This includes setting up your user account, network preferences, and other initial configurations.

Image: Front panel of the HP Pro Mini 400 G9, highlighting USB-C, USB-A ports, headphone/microphone jack, and power button.

Image: Rear panel of the HP Pro Mini 400 G9, showing DisplayPort, HDMI, USB-A ports, RJ-45 Ethernet, and power connector.
Operating Instructions
Power On/Off
- To Power On: Press the power button on the front panel.
- To Shut Down: Click the Start button in Windows, then select Power > Shut down.
- To Restart: Click the Start button in Windows, then select Power > Restart.
- To Sleep: Click the Start button in Windows, then select Power > Sleep.
Connecting Devices
- USB Devices: Use the SuperSpeed USB Type-A (10Gbps and 5Gbps signaling rate) and SuperSpeed USB Type-C (20Gbps signaling rate) ports for connecting external drives, printers, and other USB peripherals. One front USB Type-A port supports charging.
- Audio Devices: Connect headphones or a headset to the headphone/microphone combo jack on the front panel.
- Display Devices: Connect up to three displays using the two DisplayPort 1.4 and one HDMI 2.1 ports on the rear.
Wireless Connectivity
- Wi-Fi: To connect to a wireless network, open Windows Settings, navigate to Network & internet > Wi-Fi, and select your desired network.
- Bluetooth: To pair Bluetooth devices, open Windows Settings, navigate to Bluetooth & devices, and turn on Bluetooth. Select "Add device" to pair new devices.
Maintenance
Cleaning
- Ensure the computer is powered off and unplugged before cleaning.
- Use a soft, lint-free cloth slightly dampened with water or a mild cleaning solution to wipe the exterior surfaces.
- Use compressed air to clear dust from ventilation grilles and ports. Avoid spraying liquid directly into openings.
Software Updates
- Regularly check for and install Windows updates to ensure system security and performance. Go to Settings > Windows Update.
- Keep device drivers updated. HP provides driver updates through their support website or HP Support Assistant software.
Storage Management
- Periodically delete unnecessary files and empty the Recycle Bin to free up storage space.
- Consider using cloud storage or external drives for large files to maintain optimal performance of the internal 512GB M.2 PCIe NVMe SSD.
Troubleshooting
No Power
- Ensure the power cable is securely connected to both the computer and the electrical outlet.
- Verify the electrical outlet is functional by plugging in another device.
- Check the power adapter for any damage.
No Display
- Confirm that the monitor is powered on and its input source is correctly selected (e.g., HDMI, DisplayPort).
- Ensure the video cables (HDMI/DisplayPort) are securely connected to both the computer and the monitor.
- Try connecting the monitor to a different video port on the computer, if available.
Network Connectivity Issues
- Wired: Check if the Ethernet cable is properly connected to the RJ-45 port and your router/modem. Verify router/modem status.
- Wireless: Ensure Wi-Fi is enabled in Windows Settings. Restart your router/modem. Try forgetting and re-connecting to the Wi-Fi network.
System Slowdown
- Close unnecessary applications running in the background.
- Check Task Manager (Ctrl+Shift+Esc) for processes consuming high CPU, memory, or disk resources.
- Ensure Windows and drivers are up to date.
- Run a disk cleanup and check for malware.
Specifications
| Brand | HP |
| Model Name | Pro Mini 400 G9 |
| Operating System | Windows 11 Pro |
| CPU Model | 12th Gen Intel Core i5-12500T (6 Cores, 12 Threads, 2.00 GHz to 4.40 GHz Turbo) |
| Graphics | Intel UHD Graphics 770 (Integrated) |
| RAM Memory | 16GB DDR4 RAM (Max 64GB) |
| Storage | 512GB M.2 PCIe NVMe SSD |
| Wireless Connectivity | Realtek RTL8852BE Wi-Fi 6 (2x2) and Bluetooth 5.2 combo |
| Front Ports |
|
| Rear Ports |
|
| Dimensions (H x W x D) | 1.34 x 6.97 x 6.89 inches (approx.) |
| Power Consumption | 90 Watts |
Warranty Information
This HP Pro Mini 400 G9 desktop computer typically comes with a 1-year limited warranty. The warranty covers defects in materials and workmanship under normal use. Specific terms and conditions may vary by region and retailer.
For detailed warranty information, please refer to the warranty documentation included with your product or visit the official HP support website.
Support
If you encounter issues that cannot be resolved using the troubleshooting steps in this manual, or if you require further assistance, please contact HP customer support.
- Online Support: Visit the official HP Support website for drivers, manuals, and troubleshooting guides.
- Phone Support: Refer to your product documentation for regional phone support numbers.
- HP Support Assistant: Utilize the pre-installed HP Support Assistant software for system diagnostics, updates, and direct access to support resources.