Introduction
This manual provides comprehensive instructions for the Muxierr 7-in-1 Motor Kit, designed to enhance your building block creations. It covers component identification, setup procedures, operational guidelines, maintenance tips, and troubleshooting information. Please read this manual thoroughly before use to ensure proper assembly and function.
Product Components
The Muxierr 7-in-1 Motor Kit includes the following components:
- 2 x M Motors
- 1 x Receiver
- 1 x Remote Control (batteries not included)
- 1 x Battery Box (batteries not included)
- 2 x Extension Cords

This image displays all the items included in the kit: two M motors, one receiver, one remote control, one battery box, and two extension cords, laid out against a white background.
Setup Instructions
1. Battery Box Setup
The battery box requires 6 AA batteries (not included). Ensure correct polarity when inserting batteries. The box features an output interface, an indicator light, and a switch for Forward/Stop/Backward motion.

This image illustrates the Muxierr battery box, highlighting its dimensions (3.5 in x 2.4 in x 1.2 in), the output interface, indicator light, and the three-position switch for controlling motor direction (Forward/Stop/Backward). The battery compartment is shown open, indicating the requirement for 6 AA batteries (9V output) and emphasizing correct positive and negative battery placement.
Important: Pay close attention to the positive and negative direction of the batteries during installation. Incorrect installation can lead to malfunction or damage.
2. Remote Control Setup
The remote control requires 3 AAA batteries (not included). It features a 4-channel switch, an adjust/reverse switch, control levers, and an indicator light.
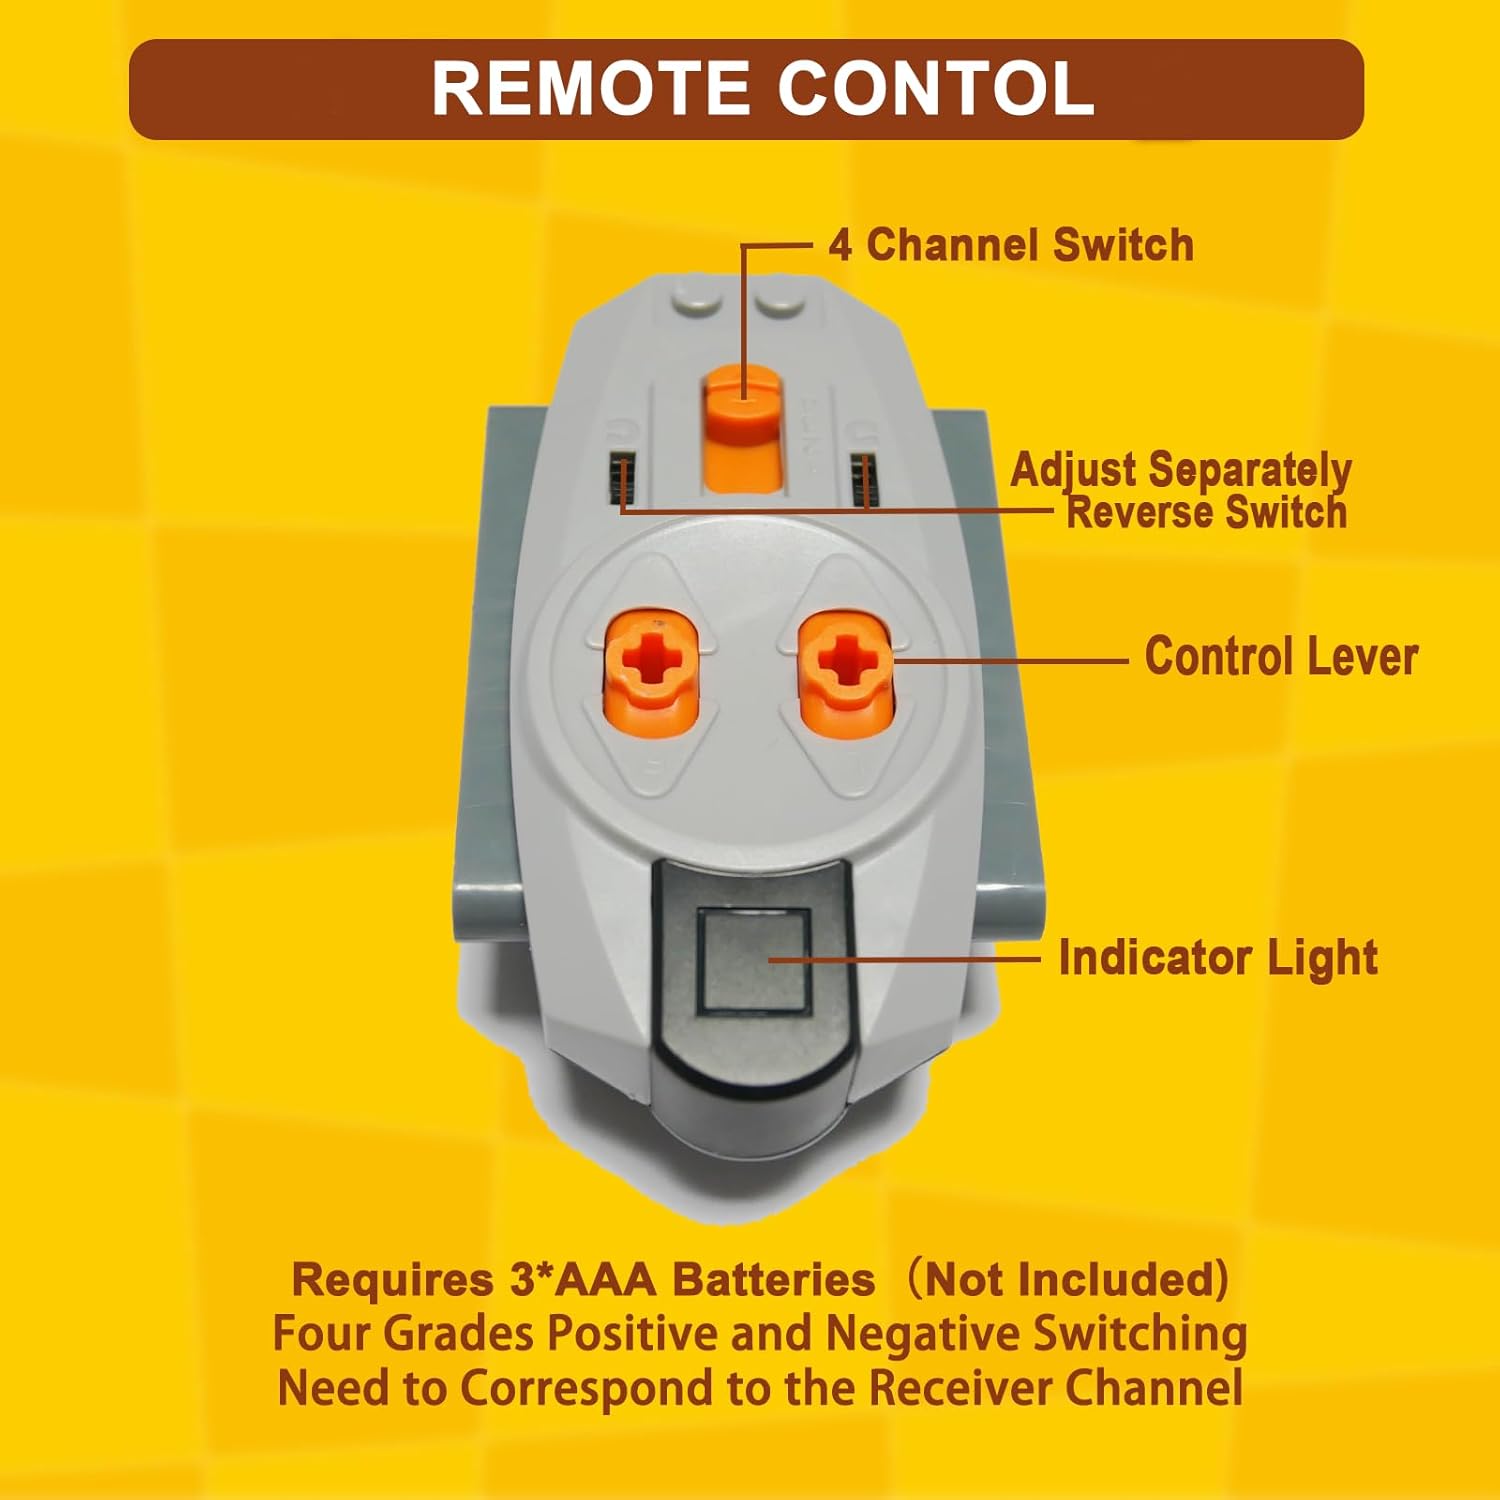
This image displays the Muxierr remote control, pointing out its key features: a 4-channel switch, an adjust/reverse switch for individual control, two control levers, and an indicator light. It also states that 3 AAA batteries are required and that the channel needs to correspond to the receiver channel.
3. Receiver Setup
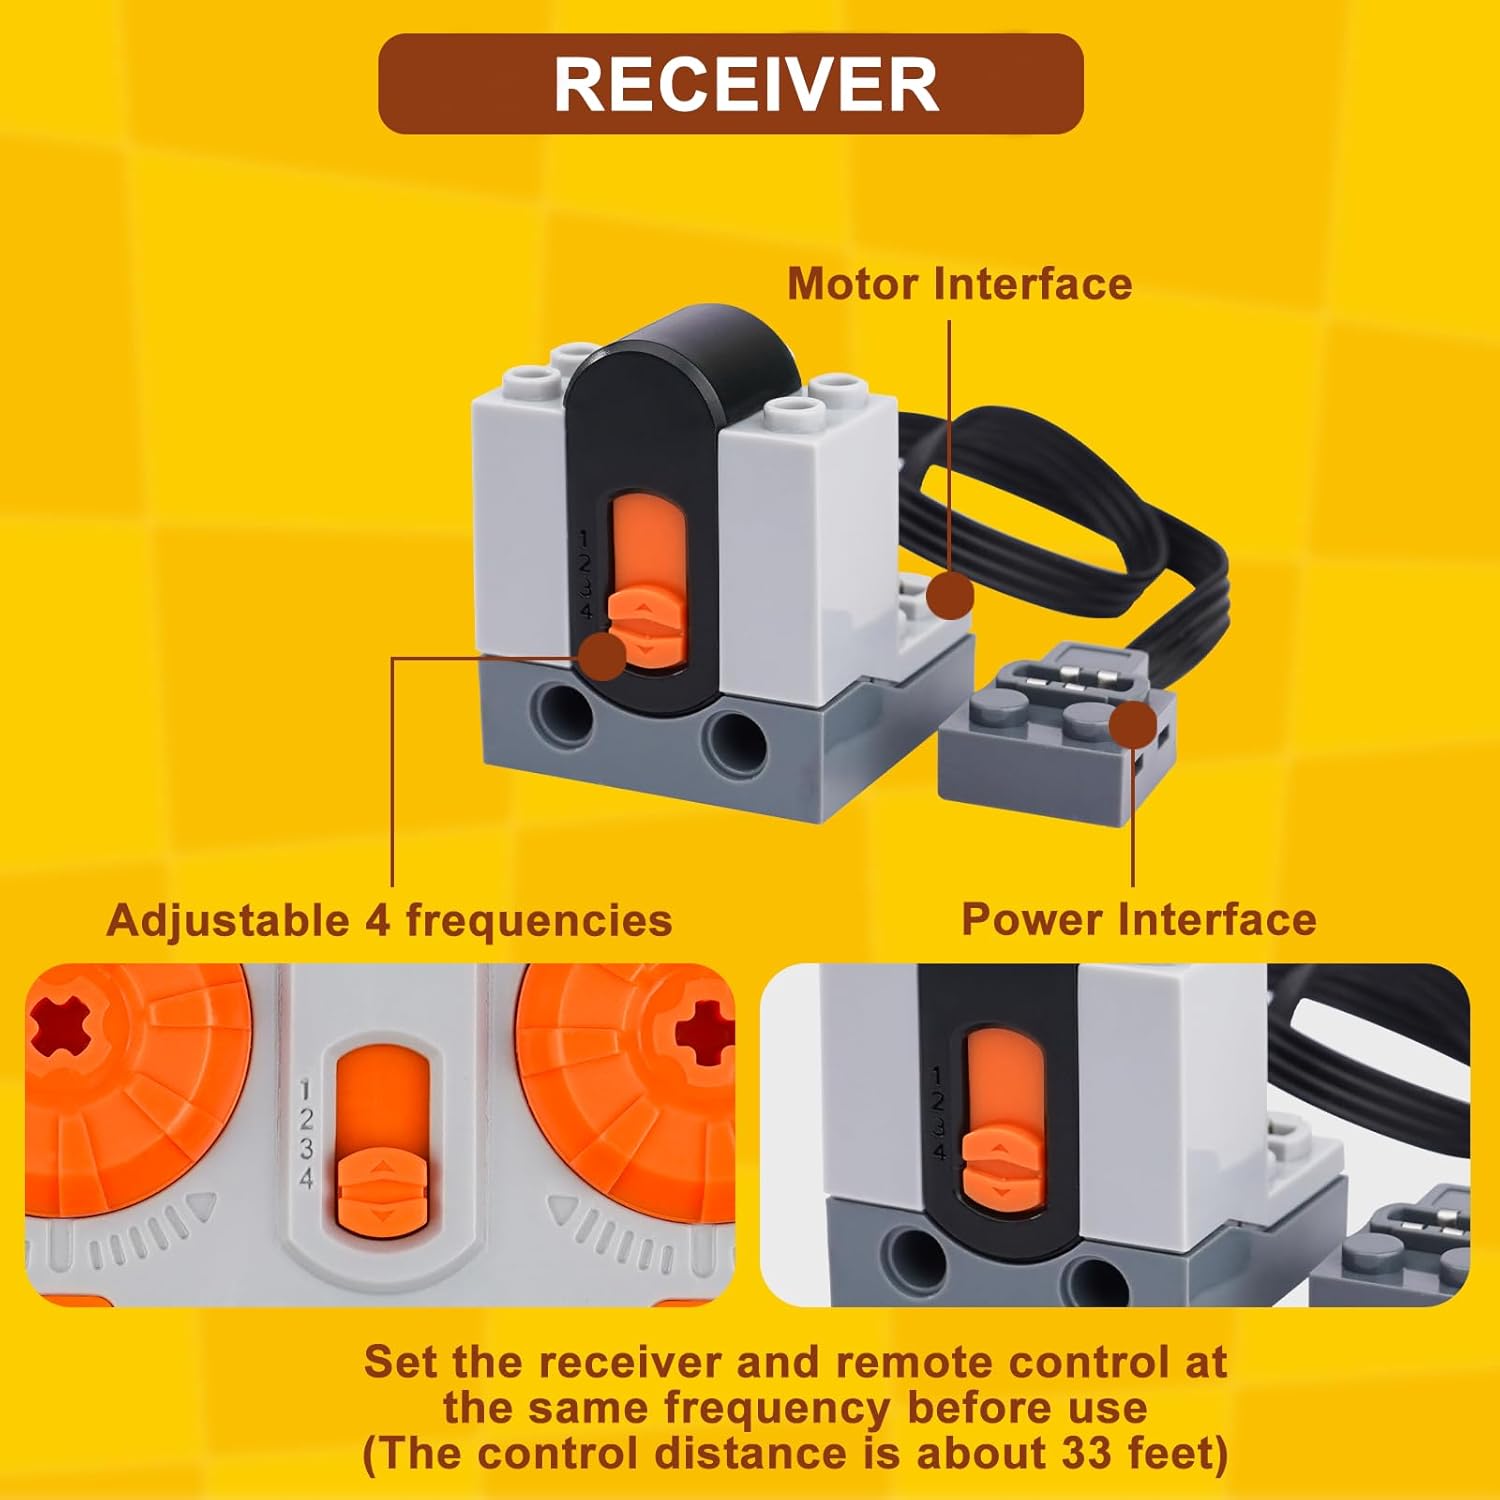
The receiver has an adjustable 4-frequency switch, motor interfaces, and a power interface. Before operation, ensure the receiver's frequency switch matches the channel selected on the remote control.

This image shows the Muxierr receiver, detailing its adjustable 4-frequency switch (numbered 1-4), motor interface, and power interface. A crucial instruction is provided: "Set the receiver and remote control at the same frequency before use (The control distance is about 33 feet)."
4. Connecting Components
Connect the M motors and extension cords to the receiver's motor interfaces. Then, connect the receiver's power interface to the battery box. Ensure all connections are secure.

This image displays two M motors, indicating their dimensions (0.9 in x 0.9 in x 1.89 in) and highlighting their power interfaces. The text suggests they are suitable for various racing car models.

This image shows two extension cords, each approximately 0.4 inches long, designed for connecting the power function components.
Operating Instructions
Once all components are connected and batteries are installed, ensure the remote control and receiver are set to the same channel. Use the control levers on the remote to operate the connected motors. The adjust/reverse switch allows for individual motor direction control.
- Power On: Turn on the battery box using its Forward/Stop/Backward switch.
- Channel Matching: Verify the 4-channel switch on the remote matches the frequency setting on the receiver.
- Motor Control: Use the control levers on the remote to activate and direct the motors. Each lever typically controls one motor or a pair of motors depending on your setup.
- Direction Adjustment: Utilize the adjust/reverse switch on the remote to change the rotation direction of individual motors as needed.
This image shows a child interacting with a building block creation powered by the Muxierr motor kit, illustrating the practical application and educational benefits of the product, such as developing hands-on ability and fostering parent-child interaction.
Maintenance
- Cleaning: Wipe components with a dry, soft cloth. Avoid using water or cleaning solutions directly on electronic parts.
- Battery Replacement: Replace batteries in the battery box and remote control when performance diminishes. Always use new batteries of the specified type (AA for battery box, AAA for remote).
- Storage: Store the kit in a cool, dry place away from direct sunlight and extreme temperatures. Remove batteries if the kit will not be used for an extended period to prevent leakage.
Troubleshooting
| Problem | Possible Cause | Solution |
|---|---|---|
| Motors do not respond. |
|
|
| Burning smell from battery box. |
|
|
| Limited control range. |
|
|
Specifications
| Feature | Detail |
|---|---|
| Product Dimensions | 7.87 x 5.9 x 1.97 inches |
| Item Weight | 8.4 ounces |
| Model Number | M7 |
| Manufacturer Recommended Age | 6 years and up |
| Battery Box Power | 6 x AA batteries (not included), 9V output |
| Remote Control Power | 3 x AAA batteries (not included) |
| Control Channels | 4 channels |
| Control Distance | Approximately 33 feet (10 meters) |
Warranty and Support
For warranty information or technical support, please refer to the contact details provided with your purchase or visit the official Muxierr website. Keep your purchase receipt as proof of purchase.