SenhE LD-901
SENHE LD-901 Euro Dimmer Instruction Manual
Model: LD-901
1. Introduction
This manual provides essential information for the safe and effective installation, operation, and maintenance of your SENHE LD-901 Euro Dimmer. This device is designed for dimming 220-240V incandescent lamps using varistor technology. Please read this manual thoroughly before installation and use, and retain it for future reference.
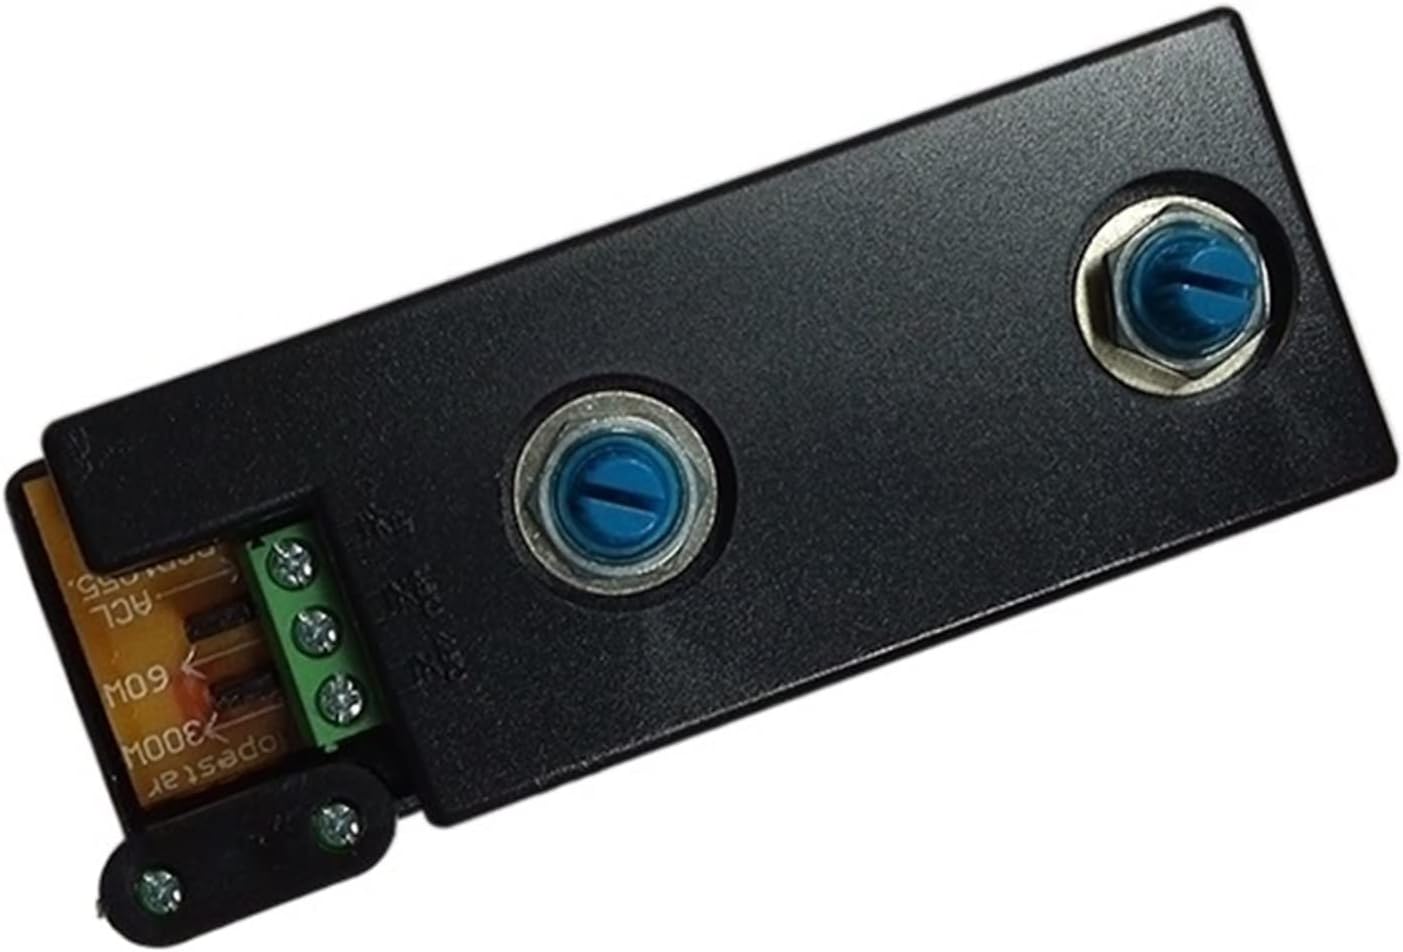
Figure 1: Main view of the SENHE LD-901 Euro Dimmer. This image displays the compact black housing with two blue adjustment screws visible on the top surface, and a portion of the circuit board with green terminal blocks exposed on one end.
2. Safety Instructions
WARNING: Electrical installation should only be performed by a qualified electrician. Incorrect installation can lead to electric shock, fire, or damage to the device and connected loads.
- Always disconnect power at the main circuit breaker before installing or servicing the dimmer.
- Ensure the input voltage matches the dimmer's specification (220-240V AC, 50/60Hz).
- Do not exceed the specified output load limits: O/P1 (25-60W) and O/P2 (60-300W).
- This dimmer is designed exclusively for 220-240V incandescent lamps. Do not use with other lamp types unless explicitly stated by the manufacturer.
- Ensure proper ventilation around the dimmer to prevent overheating. The aluminum housing aids in heat dissipation.
- Do not operate the dimmer if it is damaged or has exposed wiring.
- Keep out of reach of children.
3. Product Features
- Model: LD-901
- Input Voltage: 220-240V AC, 50/60Hz
- Output Power: O/P1: 25-60W Dimmable; O/P2: 60-300W Dimmable
- Load Type: Specifically designed for 220-240V incandescent lamps.
- Dimming Technology: Varistor dimming for smooth light adjustment.
- Durable Construction: High-quality aluminum housing for excellent corrosion resistance and efficient heat dissipation, ensuring long-lasting performance.
- Overheat Protection: Integrated safety feature to prevent damage from excessive temperatures.
- Certifications: TUV/EMC/CE approved, ensuring compliance with European safety and quality standards.
4. Specifications
| Parameter | Value |
|---|---|
| Model | LD-901 |
| Input Voltage | 220-240V AC, 50/60Hz |
| Output 1 (O/P1) | 25-60W Dimmable |
| Output 2 (O/P2) | 60-300W Dimmable |
| Load Types | 220-240V Incandescent Lamps |
| Dimming Way | Varistor |
| Dimming Life | Min. 10,000 cycles |
| Ambient Temperature (Ta) | 50°C (maximum) |
| Protection | Overheat protection |
| Approvals | TUV/EMC/CE |
| Dimensions (L*W*H) | 94 x 35.3 x 24 mm |
| Housing Material | Aluminum |
5. Installation
IMPORTANT: Installation must be carried out by a qualified electrician in accordance with local electrical codes and regulations. Ensure power is disconnected before proceeding.
- Power Disconnection: Turn off the main power supply at the circuit breaker before beginning any wiring.
- Mounting: Securely mount the dimmer in a suitable location, ensuring adequate ventilation.
- Wiring Connections:
- Connect the 220-240V AC input wires to the designated input terminals (ACL).
- Connect the incandescent lamp load wires to the appropriate output terminals:
- For loads between 25-60W, use O/P1 terminals.
- For loads between 60-300W, use O/P2 terminals.
- Ensure all connections are tight and secure to prevent loose contacts.
- Verification: Double-check all wiring connections against the diagram on the device and in this manual.
- Power Restoration: Once installation is complete and verified, restore power at the circuit breaker.
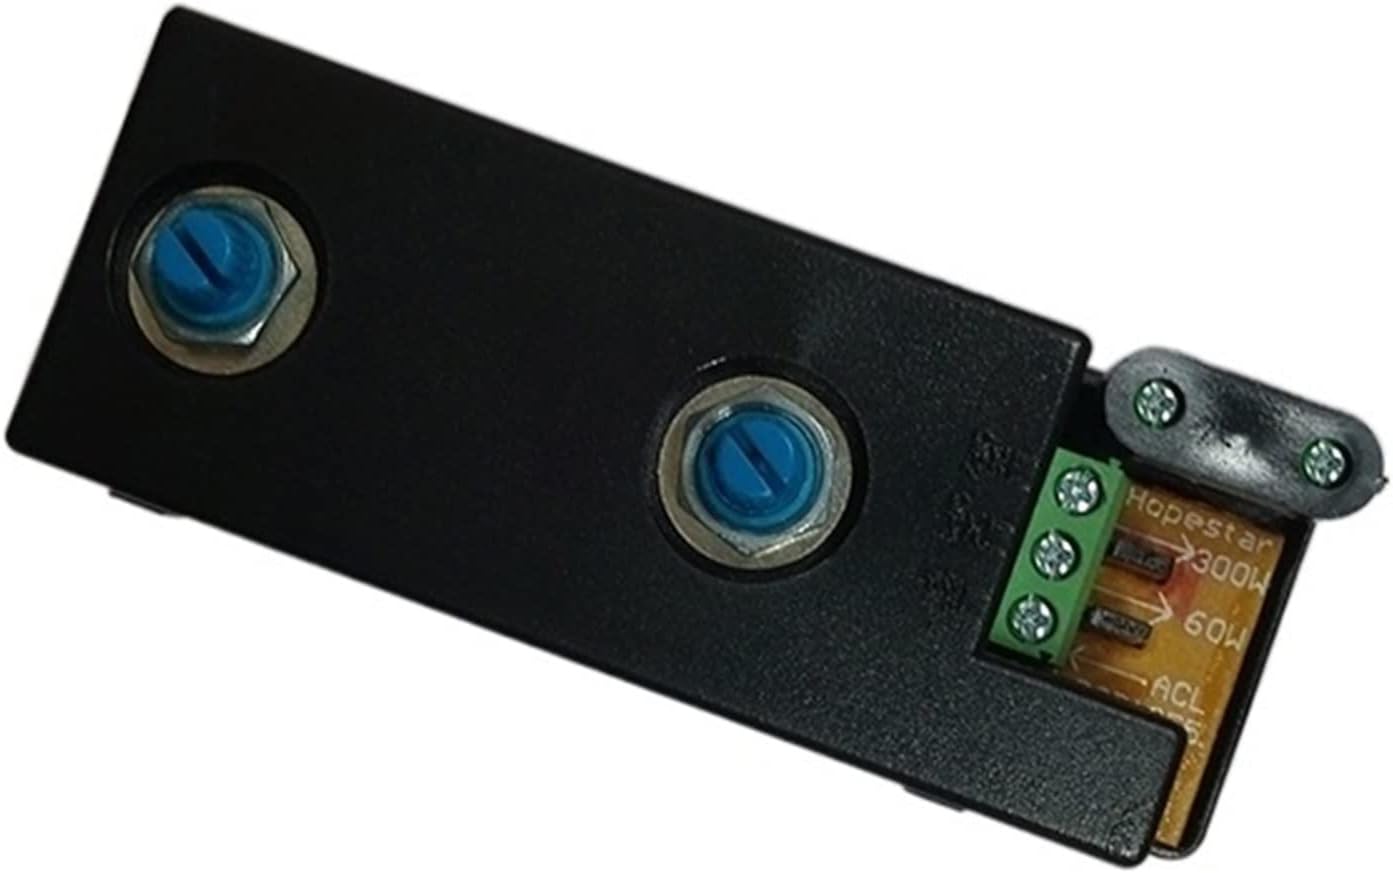
Figure 2: Top view of the dimmer showing the green terminal blocks for wiring connections. Labels for ACL (AC Line), 60W (O/P1), and 300W (O/P2) are visible on the circuit board, along with the two blue adjustment screws.
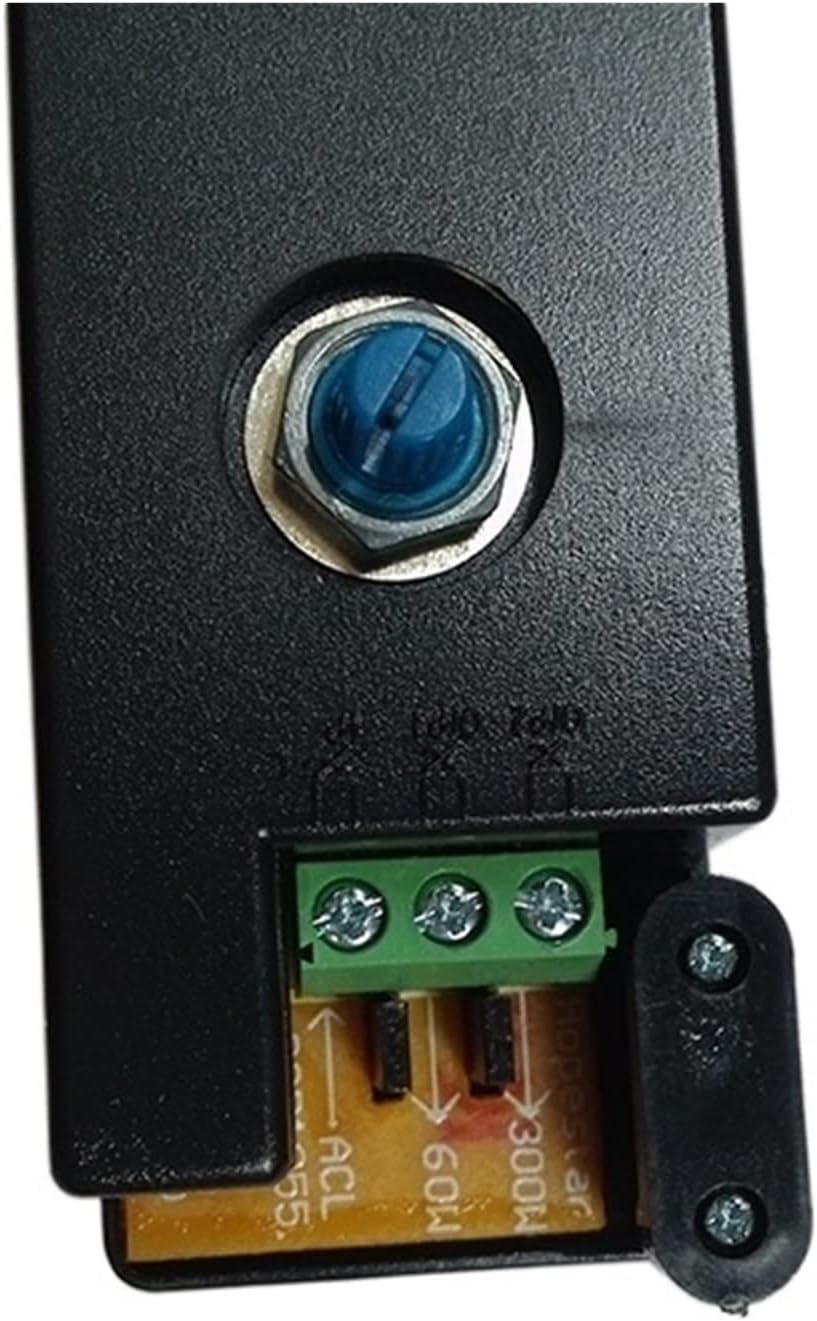
Figure 3: A detailed close-up of the wiring terminals on the SENHE LD-901 dimmer. The green terminal block is clearly visible with screw terminals for connecting input and output wires, labeled ACL, 60W, and 300W.
6. Operation
The SENHE LD-901 dimmer features two independent dimming outputs, O/P1 and O/P2, each controlled by a dedicated adjustment screw.
- Adjusting Brightness: Use a small screwdriver to carefully turn the blue adjustment screws on the dimmer's surface.
- One screw controls the brightness for O/P1 (25-60W loads).
- The other screw controls the brightness for O/P2 (60-300W loads).
- Dimming Range: Rotate the screws clockwise to increase brightness and counter-clockwise to decrease brightness. Adjust to your desired light level.
- Load Compatibility: Ensure that the connected incandescent lamps fall within the specified wattage range for the respective output (O/P1 or O/P2).
7. Maintenance
The SENHE LD-901 dimmer is designed for minimal maintenance. However, periodic checks can ensure optimal performance and longevity.
- Cleaning: Disconnect power before cleaning. Use a soft, dry cloth to wipe the dimmer's surface. Do not use liquid cleaners or abrasive materials.
- Fuse Replacement: The dimmer is equipped with a replaceable fuse. If the dimmer stops functioning, check the fuse.
- Disconnect power before attempting to replace the fuse.
- Locate the fuse compartment on the bottom of the dimmer (refer to Figure 4).
- Carefully open the fuse compartment and replace the blown fuse with a new one of the exact same rating (e.g., T2.5A 250V, if specified on the device).
- Close the fuse compartment securely and restore power. If the new fuse blows immediately, there may be a short circuit or overload; consult a qualified electrician.
- Connection Checks: Periodically inspect wiring connections for tightness, especially if the dimmer is subject to vibration or temperature fluctuations.

Figure 4: Bottom view of the SENHE LD-901 dimmer, clearly showing the fuse compartment cover. This compartment houses the replaceable fuse for circuit protection.
8. Troubleshooting
If you experience issues with your SENHE LD-901 dimmer, refer to the following common problems and solutions:
| Problem | Possible Cause | Solution |
|---|---|---|
| Lamps do not turn on. | No power supply, blown fuse, incorrect wiring, faulty lamp. | Check circuit breaker. Replace fuse (see Maintenance). Verify wiring connections. Test lamp with another power source. |
| Lamps do not dim or flicker. | Incorrect lamp type (not incandescent), load outside specified range, loose connection, faulty dimmer. | Ensure incandescent lamps are used. Verify load wattage is within 25-60W (O/P1) or 60-300W (O/P2). Check wiring. If problem persists, dimmer may be faulty. |
| Dimmer feels excessively hot. | Overload, insufficient ventilation. | Reduce connected load to within specifications. Ensure dimmer has adequate airflow. If overheating persists, disconnect power and consult an electrician. |
If troubleshooting steps do not resolve the issue, please contact customer support or a qualified electrician.
9. Warranty and Support
For warranty information or technical support, please refer to the product packaging or contact your retailer. You may also visit the official SENHE website for further assistance.
Ask a question about this manual
Ask about setup, troubleshooting, compatibility, parts, safety, or missing instructions. Manuals+ will review the question and use this page’s manual context to help answer it.