1. Introduction
This manual provides essential information for the safe and effective operation of your IMREN Portable Heat Press Machine (Model HP3). Please read this manual thoroughly before using the machine and retain it for future reference. This heat press is designed for heat transfer projects on various materials, including T-shirts, hoodies, and other fabric items, utilizing sublimation, vinyl, and other heat transfer materials.
2. Safety Instructions
WARNING: To reduce the risk of fire, electric shock, or injury, read and understand all instructions before use.
- Always place the heat press on a stable, heat-resistant surface during operation.
- Keep hands and fingers away from the hot plate during operation and cool-down. The heating plate reaches high temperatures.
- Ensure the machine is unplugged when not in use or before cleaning and maintenance.
- Do not immerse the machine in water or other liquids.
- This machine features an auto-shutoff function that activates after 10 minutes of inactivity. Always place the machine on its insulated safety base when not actively pressing to allow for proper heat dissipation and protect surfaces.
- Use only with compatible electrical outlets and voltage as specified in the product specifications.
- Keep out of reach of children and pets.
3. Product Overview & Components
The IMREN Portable Heat Press Machine features a 12" x 10" heating plate, suitable for a variety of heat transfer projects. It includes a digital display for precise temperature and time control, and dual heating elements for even heat distribution.

Figure 3.1: Top view of the IMREN Portable Heat Press Machine.
Control Panel
The control panel allows you to manage the machine's settings.

Figure 3.2: Digital control panel with temperature and timer settings.
- Power Button: Turns the machine on or off.
- Temperature Button: Toggles between temperature setting mode.
- Timer Button: Toggles between timer setting mode.
- '+' and '-' Buttons: Adjust temperature and time values.
- Start Button: Initiates the countdown for the set time.
- Digital Display: Shows current temperature and time settings.
Heating Plate
The 12" x 10" heating plate is equipped with two heating elements to ensure quick and even heat distribution across the entire surface, which is crucial for consistent transfer results.
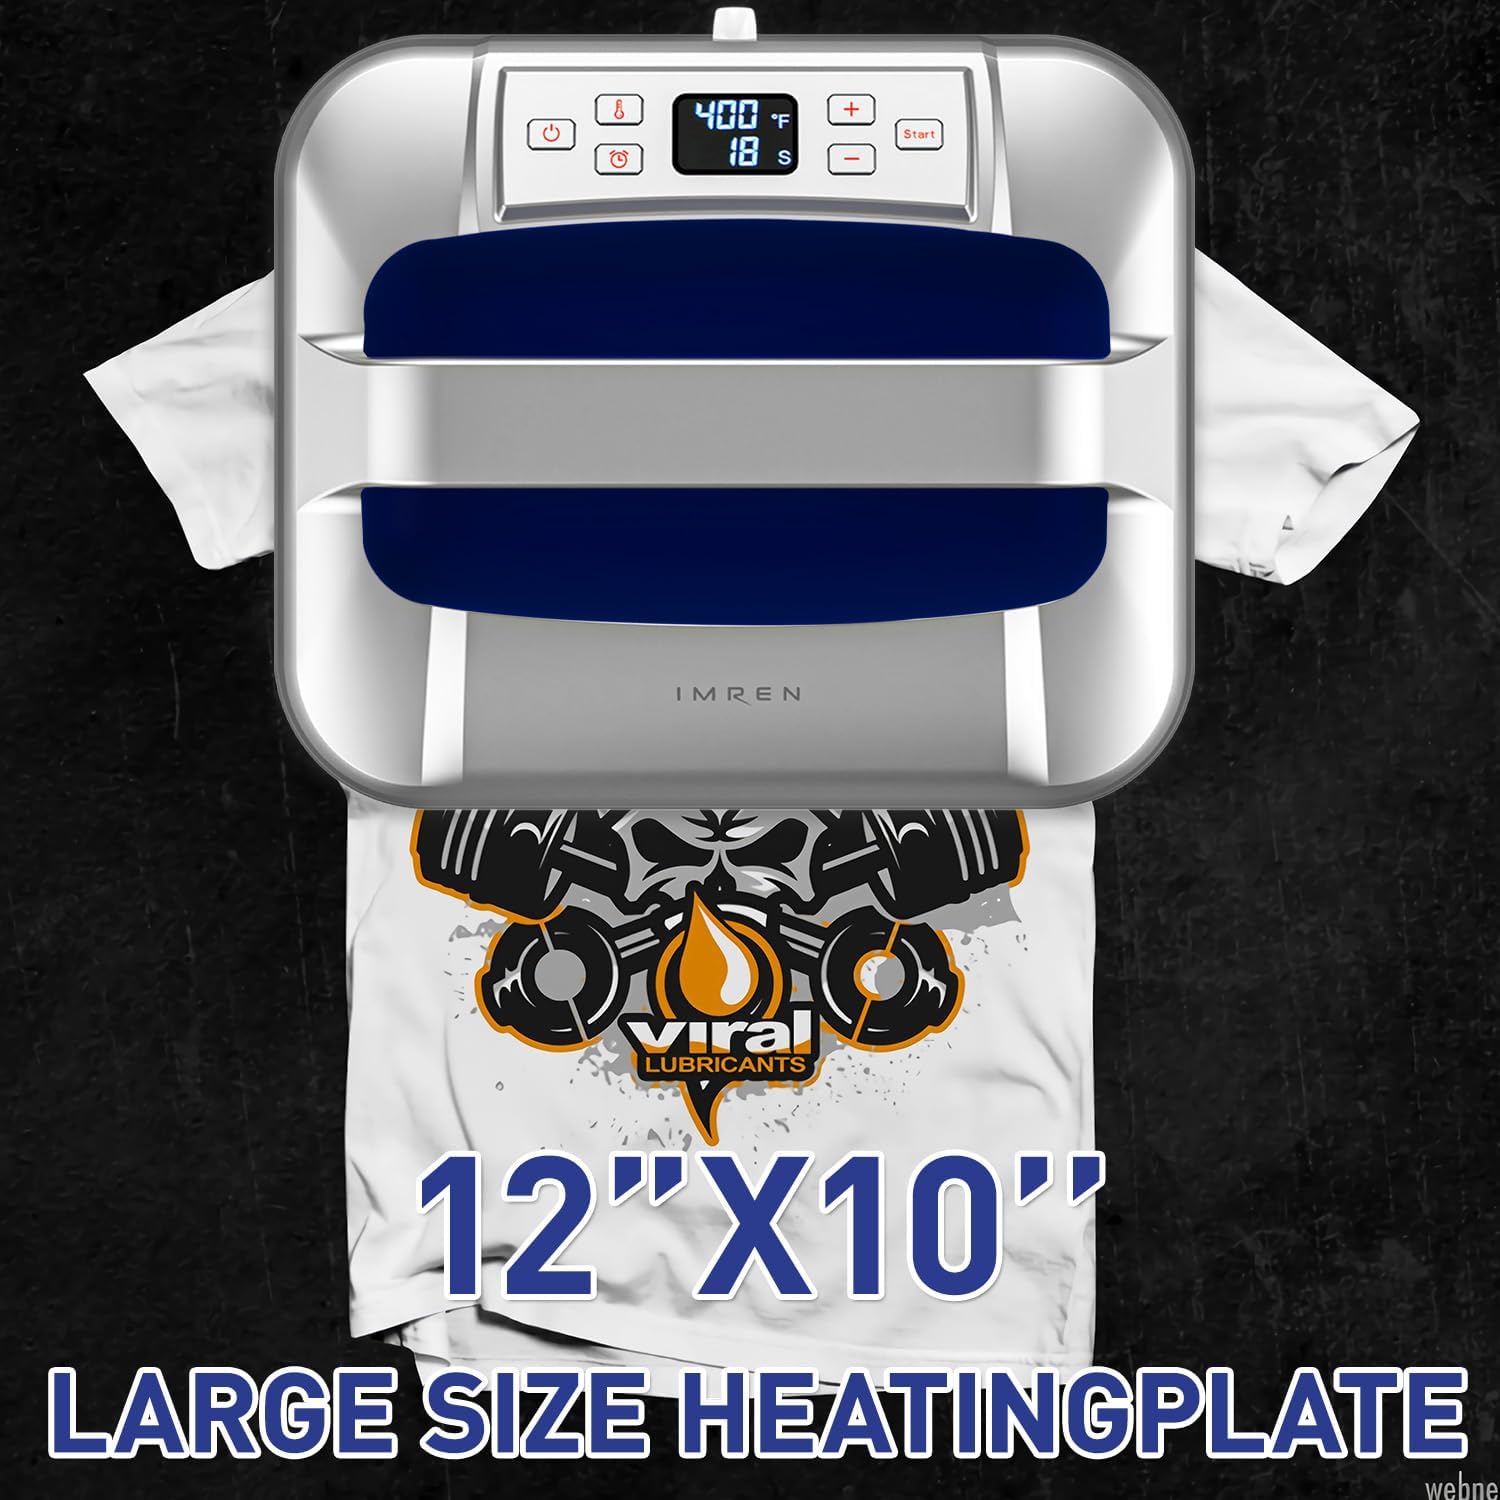
Figure 3.3: The 12" x 10" heating plate size demonstration.
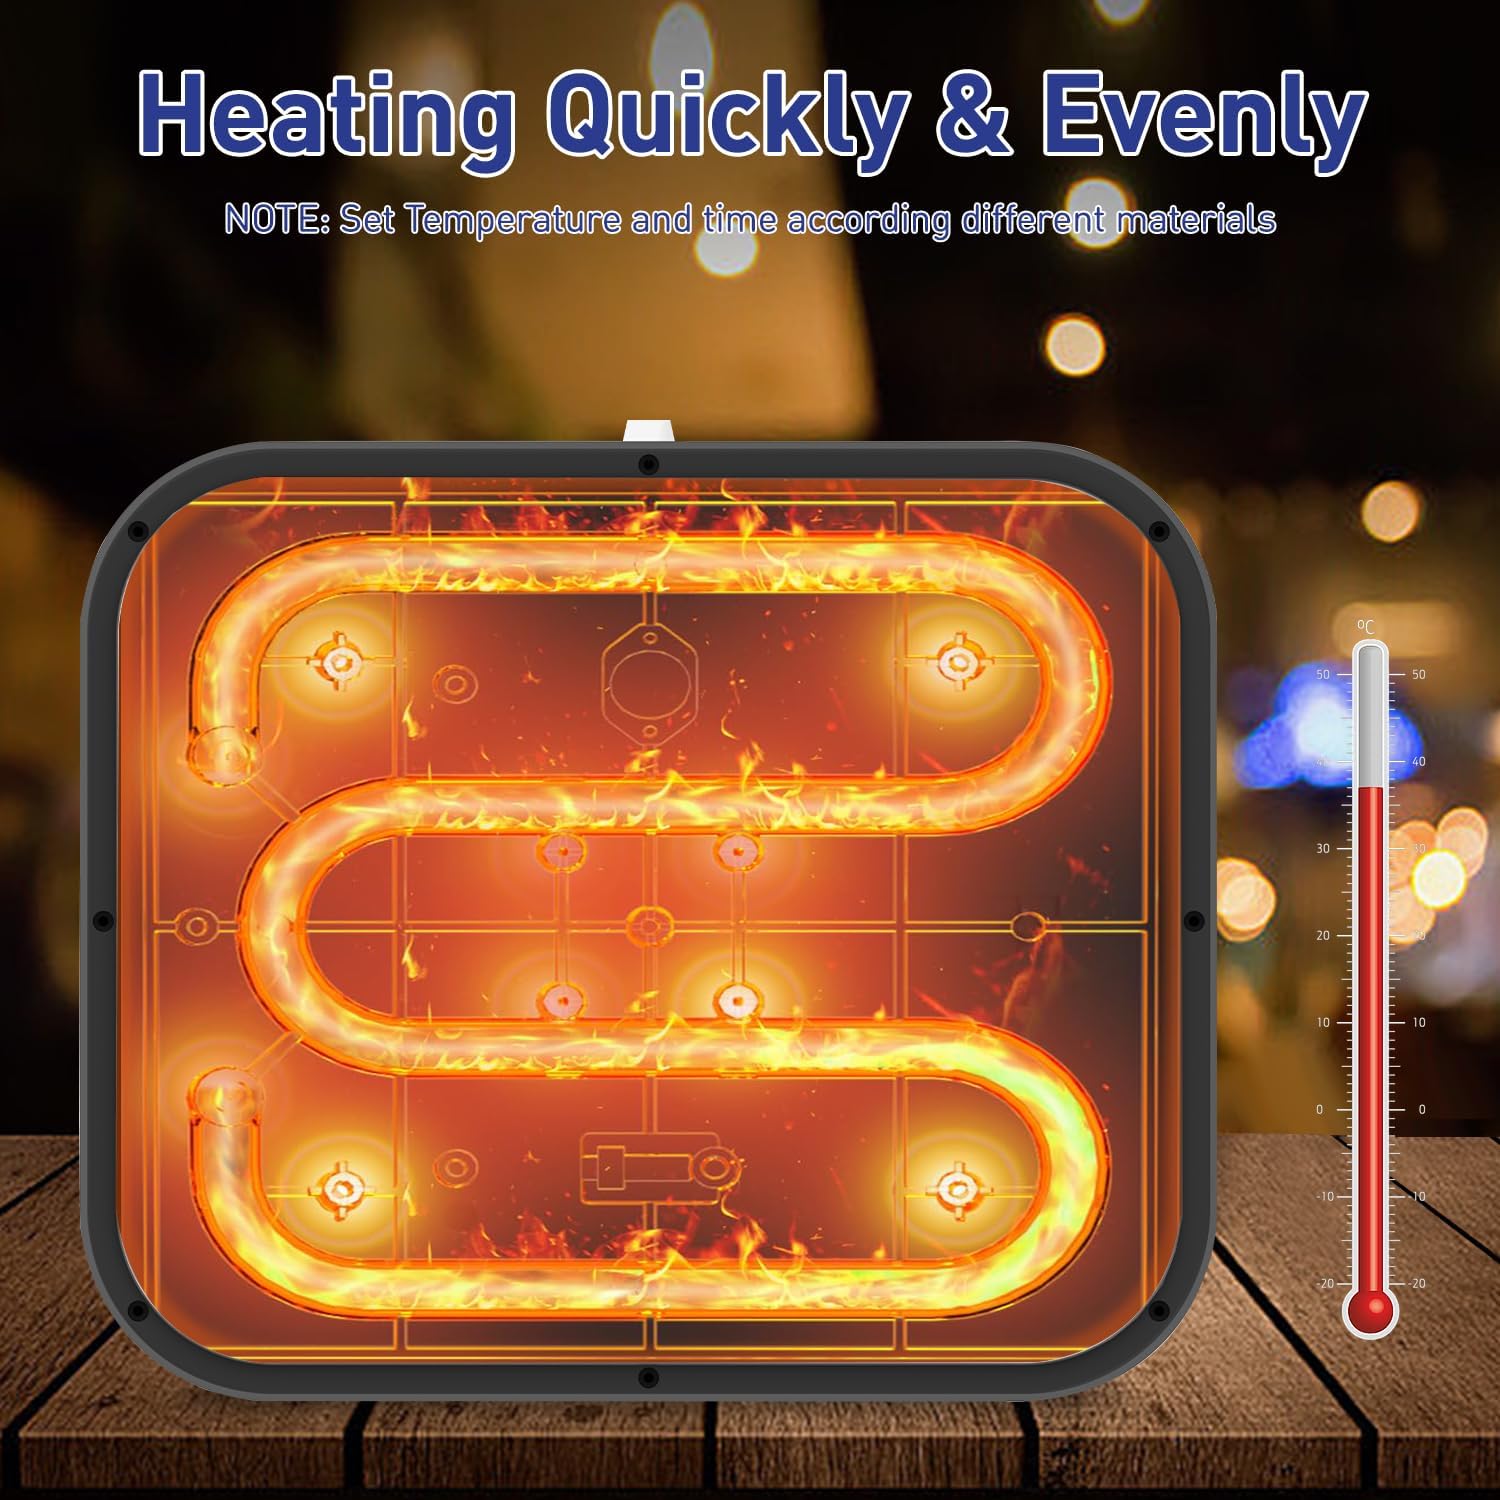
Figure 3.4: Illustration of the dual heating elements for even heat.
Insulated Safety Base
The included insulated safety base is designed to protect your work surface from heat and allow the machine to cool down safely after use. It features a porous design for efficient heat dissipation.

Figure 3.5: Insulated safety base for heat dissipation.
4. Setup
- Unpack: Carefully remove the heat press machine and all accessories from the packaging. Verify that all components listed in the 'What You Get' section are present.
- Placement: Place the heat press on a flat, stable, and heat-resistant surface. Ensure there is adequate space around the machine for safe operation and ventilation.
- Power Connection: Plug the power cord into a compatible electrical outlet. The machine will typically display a standby indicator.
- Initial Heat-Up: For optimal results, allow the machine to heat up patiently after turning it on. The advanced heat plate design allows it to heat up in under 15 seconds.
5. Operating Instructions
Follow these steps for successful heat transfer projects. Always refer to the specific instructions provided with your heat transfer material (e.g., HTV, sublimation paper) for recommended temperature and time settings.
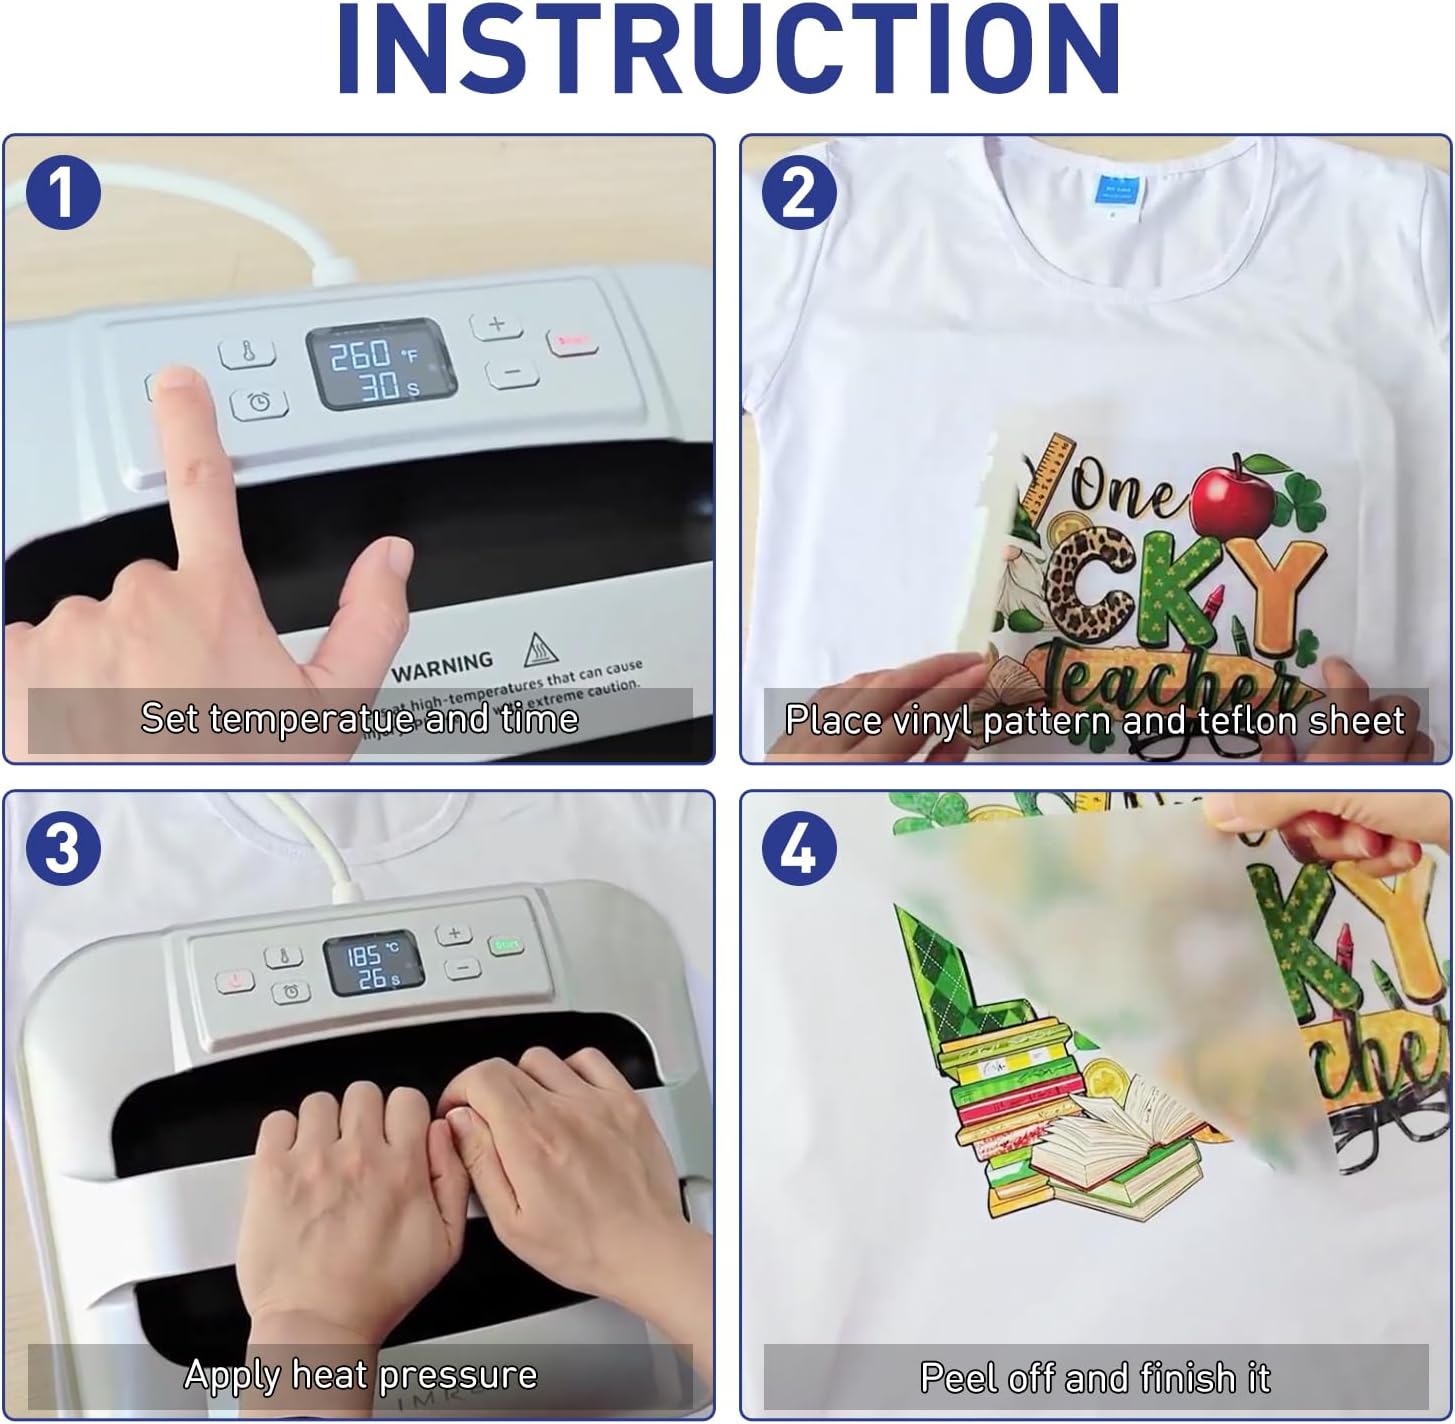
Figure 5.1: Visual guide for the heat transfer process.
- Power On: Press the Power Button (U) to turn on the machine.
- Set Temperature: Press the Temperature Button (🌡️). Use the '+' and '-' buttons to adjust the desired temperature (range: 210°F (100°C) - 400°F (205°C)).
- Set Time: Press the Timer Button (⏰). Use the '+' and '-' buttons to adjust the desired time (up to 600 seconds).
- Pre-heat: Allow the machine to reach the set temperature. The display will indicate when it's ready.
- Prepare Item: Place your garment or item on a heat-resistant mat. Position your heat transfer material (e.g., vinyl, sublimation print) onto the item. It is recommended to use a Teflon sheet or parchment paper over the design to protect the heating plate and the material.
- Apply Pressure: Place the heat press machine firmly over the design. Press the Start Button to begin the countdown. Apply gentle, even pressure by hand throughout the duration of the timer.
- Finish: Once the timer completes, carefully lift the heat press machine and immediately place it on its insulated safety base. Allow the transfer to cool according to your material's instructions (hot peel or cool peel) before removing the carrier sheet.
- Power Off: Press and hold the Power Button to turn off the machine when finished.
Temperature and Time Guide (General)
The following table provides general guidelines. Always perform a test press on a scrap piece of material if unsure.
| Material Type | Temperature Range | Time Range |
|---|---|---|
| Heat Transfer Vinyl (HTV) | 305-320°F (150-160°C) | 15-30 seconds |
| Sublimation Paper | 380-400°F (195-205°C) | 45-60 seconds |
| Glitter HTV | 320-330°F (160-165°C) | 20-30 seconds |
| Foil/Metallic HTV | 280-300°F (138-150°C) | 10-15 seconds |
Note: These are general recommendations. Always consult the specific instructions provided by your heat transfer material manufacturer.
6. Maintenance
- Cleaning the Heating Plate: Ensure the machine is unplugged and completely cool. Gently wipe the heating plate with a soft, damp cloth to remove any residue. For stubborn residue, a specialized heat press cleaner can be used, following the cleaner's instructions. Avoid abrasive cleaners or harsh chemicals.
- Storage: Store the heat press machine in a dry, dust-free environment. Always place it on its insulated safety base when storing to prevent accidental damage or heat transfer to surfaces.
- Cord Care: Inspect the power cord regularly for any signs of damage. Do not use the machine if the cord is frayed or damaged.
7. Troubleshooting
| Problem | Possible Cause | Solution |
|---|---|---|
| Machine does not power on. | Not plugged in; power outlet issue; machine fault. | Check power cord connection. Test outlet with another device. If problem persists, contact customer support. |
| Uneven heating or transfer results. | Insufficient pre-heating time; incorrect temperature/time settings; uneven pressure. | Allow machine to fully pre-heat. Verify temperature and time settings against material instructions. Ensure even pressure is applied during pressing. |
| Heat transfer material not sticking. | Temperature too low; time too short; incorrect peel method (hot/cool peel). | Increase temperature or time slightly. Refer to material instructions for correct peel method. Ensure sufficient pressure. |
| Machine automatically shuts off. | Auto-shutoff feature activated due to 10 minutes of inactivity. | This is a safety feature. Simply press the Power Button to turn it back on. |
8. Specifications
| Feature | Detail |
|---|---|
| Model Number | HP3 |
| Product Dimensions | 12"L x 10"W x 4.2"H (12 x 10 x 4.2 inches) |
| Heating Plate Size | 12" x 10" |
| Item Weight | 9 ounces (8.96 Ounces) |
| Upper Temperature Rating | 400°F (205°C) |
| Adjustable Temperature Range | 210°F (100°C) - 400°F (205°C) |
| Adjustable Timer | Up to 600 seconds |
| Auto-Shutoff | After 10 minutes of inactivity |
| Color | Blue |
| Manufacturer | Hunan Aimeiren New Energy Co., Ltd. |
| Date First Available | November 14, 2023 |
9. Warranty and Support
Your IMREN Portable Heat Press Machine comes with a user manual and is designed for reliable performance. If you encounter any issues or have questions regarding the operation, maintenance, or performance of your heat press machine, please contact the seller or IMREN customer support directly. They are committed to providing solutions and ensuring your satisfaction.
The product package includes: heat press machine × 1, insulated base × 1, storage bag × 1, stickers for Practice × 4, user manual × 1.