1. Introduction
This manual provides comprehensive instructions for the safe and efficient operation, maintenance, and troubleshooting of your Suuim Portable Electric Strapping Machine V2 Model. This versatile tool is designed for various packaging applications across industries such as paper, light industry, logistics, textile, steel, agriculture, and metal, significantly improving work efficiency.
The machine combines tensioning, welding, and cutting functions into a single handheld unit, making it an ideal solution for securing packages with PP (Polypropylene) and PET (Polyester) straps.

Figure 1.1: Suuim Portable Electric Strapping Machine V2 Model with included accessories. This image displays the main strapping tool, two rechargeable batteries, a charger, and various tools and spare parts for maintenance and adjustment.
2. Product Features
- 3-in-1 Functionality: Integrates tensioning, welding (friction and hot-melt), and cutting into one compact machine, eliminating the need for separate buckles or seals. This design reduces strap waste and enhances operational efficiency.
- Automatic and Efficient Operation: Simplifies the strapping process. Users manually wrap the strap, then the machine automatically tightens, welds, and cuts the strap. This automation significantly reduces the time and labor required for packaging tasks.
- Rechargeable Lithium Battery: Equipped with two 4000 mAh lithium batteries, allowing for cordless operation anywhere. Each battery can be recharged approximately 2000 times. A full charge takes about 90 minutes and provides over 4 hours of continuous operation, capable of strapping 80-200 belts. The batteries can be charged independently.
- Lightweight and Easy to Operate: Weighing approximately 6.6 lbs (including battery), the machine is designed for comfortable one-handed operation, further improving work efficiency.
- Versatile Strap Compatibility: Compatible with both PP (Polypropylene) and PET (Polyester) strapping. It supports strap widths from 1/2 inch (13mm) to 5/8 inch (16mm) and thicknesses from 0.024 inch (0.6mm) to 0.047 inch (1.2mm). This makes it suitable for light to medium-weight packages such as newspapers, cartons, textiles, and plastic pipes.
3. Package Contents
Upon unpacking, please verify that all items listed below are present and in good condition:
- 1 x Portable Electric Strapping Machine V2 Model
- 2 x Rechargeable Lithium Batteries (4.0A/h, 14.4V)
- 1 x Battery Charger
- 1 x Accessory Kit (includes various tools and spare parts for maintenance and adjustment)
- 1 x User Manual

Figure 3.1: Visual representation of the complete package contents. This image clearly labels the main machine, two batteries, the accessory kit, the user manual, and the battery charger, ensuring users can confirm all components are present.
4. Specifications
| Parameter | Value |
|---|---|
| Machine Weight | 3.6 kg (8 lb) |
| Machine Dimensions (LxWxH) | 38 x 13 x 13 cm (15 x 4.7 x 4.7 inch) |
| Applicable Strap Type | PET Strap, PP Strap |
| Applicable Strap Width | 13-16 mm (1/2 - 5/8 inch) |
| Applicable Strap Thickness | 0.4 - 1.2 mm (0.016 - 0.047 inch) |
| Tensioning Speed | 100-200 mm/s |
| Tension Force | 900-3200 N (Adjustable) |
| Sealing Method | Friction and Welding |
| Battery Type | Lithium-ion (Li-ion) |
| Battery Capacity | 4.0 A/h, 57.6 Wh (14.4V) |
| Battery Charging Time | Approximately 90 minutes |
| Battery Cycle Life | 2000+ charges |
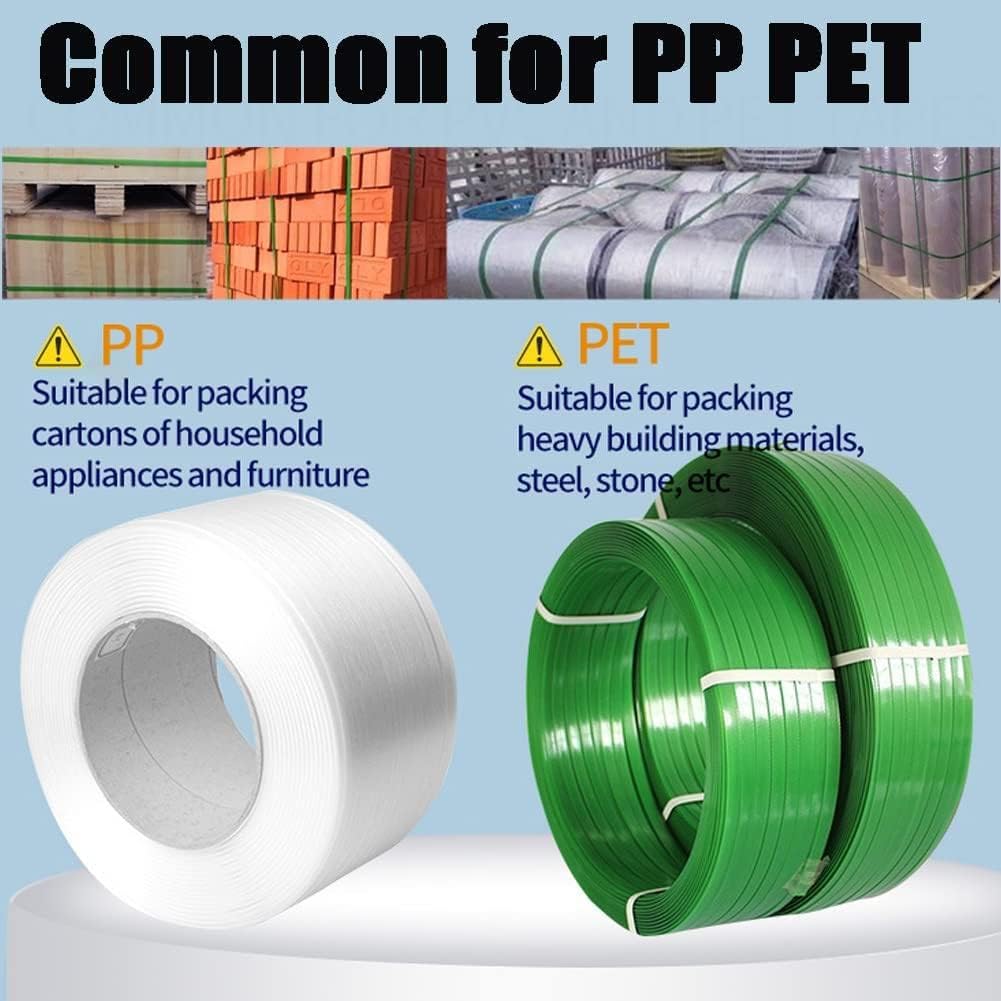
Figure 4.1: Comparison of PP and PET strapping. PP (Polypropylene) is suitable for packing cartons of household appliances and furniture, while PET (Polyester) is suitable for packing heavy building materials, steel, and stone.
5. Component Identification
Familiarize yourself with the main components of the strapping machine:

Figure 5.1: Labeled diagram of the strapping machine's key components. This diagram points out the Pull Tight Button, Hot-melt button, Operation interface, Carrying handle, Inlet port, Release handle, and Battery, aiding in component identification.
- Pull Tight Button: Engages the tensioning mechanism.
- Hot-melt Button: Initiates the friction welding process.
- Operation Interface: Digital display and control buttons for setting parameters.
- Carrying Handle: Ergonomic handle for portability and operation.
- Inlet Port: Where the strapping material is inserted.
- Release Handle: Used to release the strap after welding.
- Battery: Removable power source for cordless operation.
6. Setup
6.1. Battery Installation and Charging
Before first use, ensure the battery is fully charged. The battery can be charged independently using the provided charger.
- Insert the battery into the charger, ensuring proper alignment.
- Plug the charger into a standard power outlet. The charging indicator light will show the charging status.
- Once fully charged (approx. 90 minutes), remove the battery from the charger.
- To install the battery into the machine, slide it into the battery compartment until it clicks securely into place.
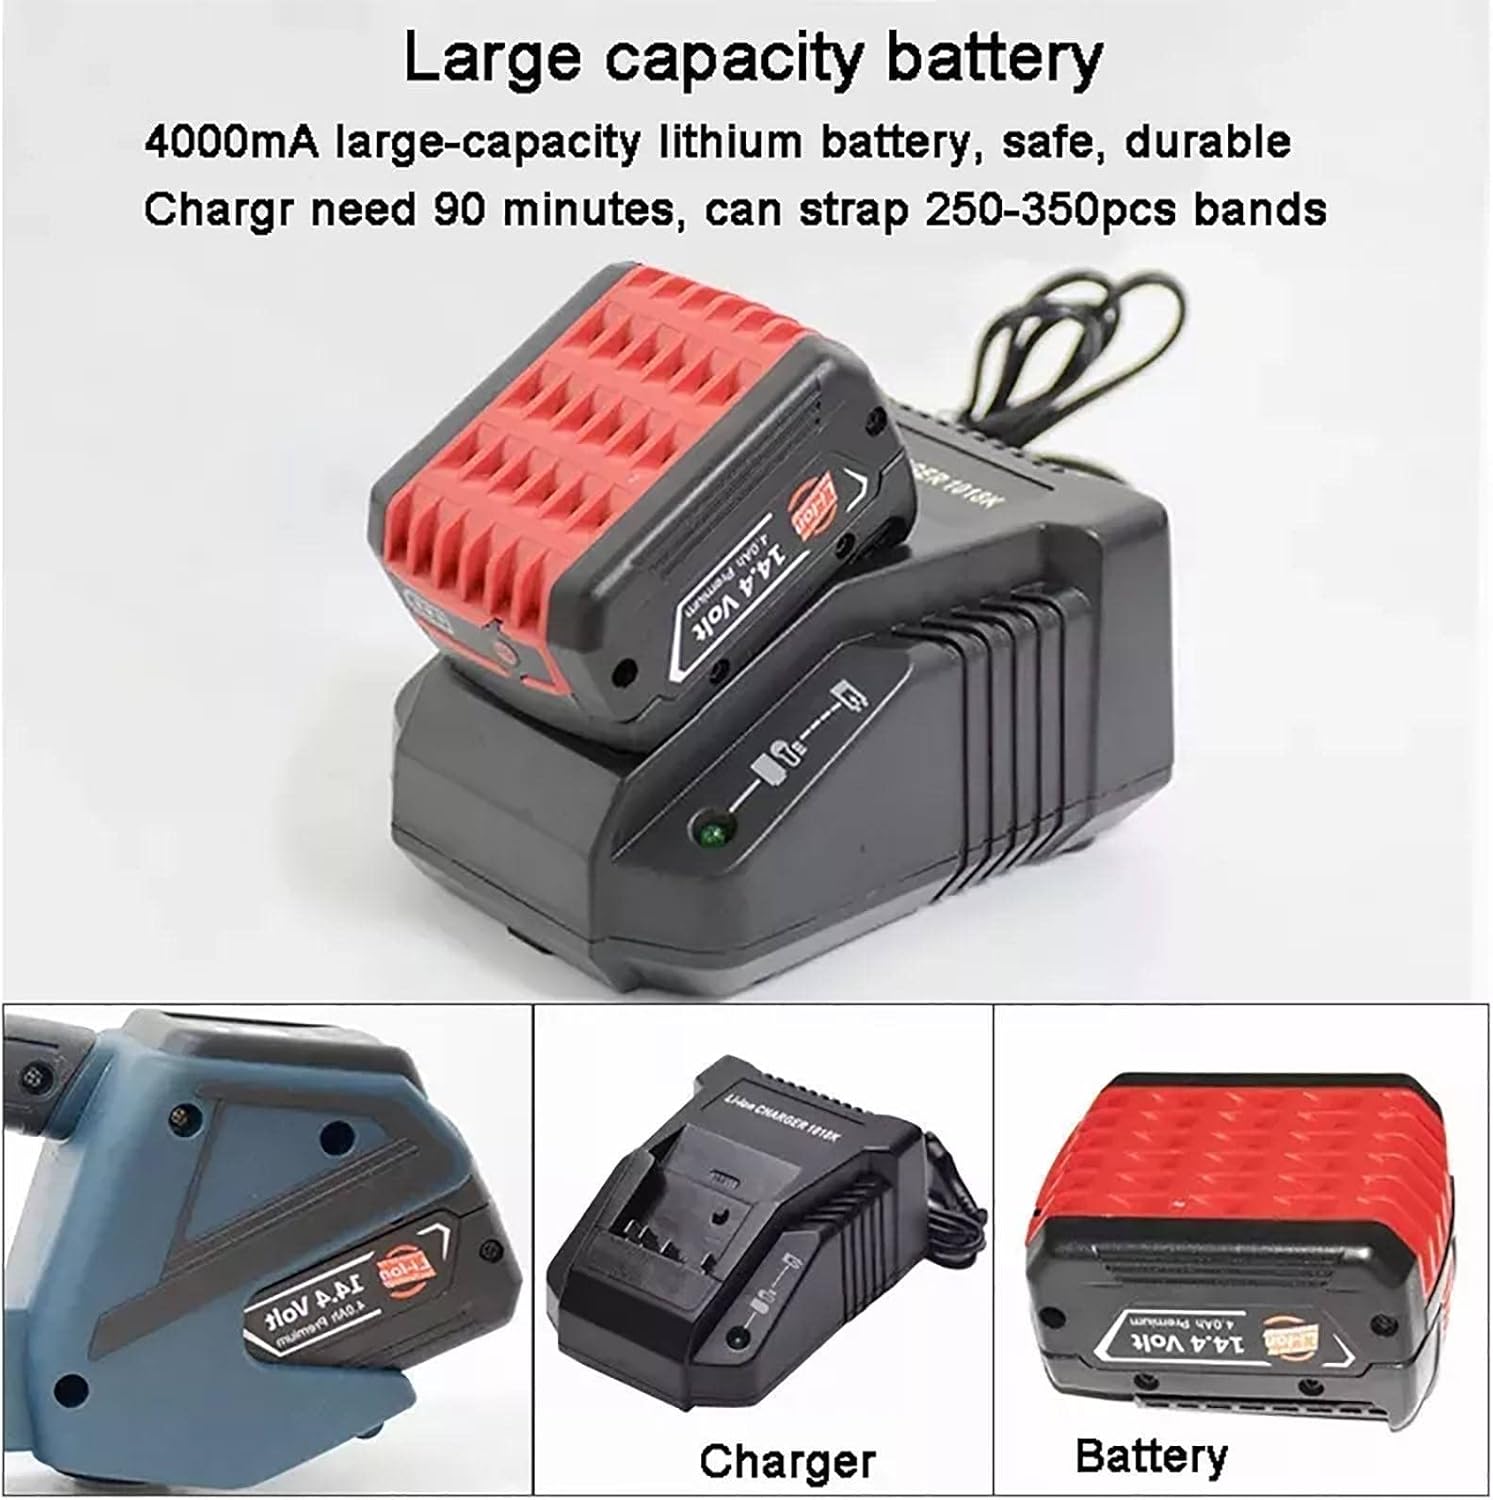
Figure 6.1: Large capacity battery and charger. This image highlights the 4000mA lithium battery and its dedicated charger, emphasizing their role in providing portable power for the strapping machine.
6.2. Loading the Strapping Material
Ensure you are using the correct type and size of strap (PP or PET, 13-16mm width, 0.4-1.2mm thickness) for your application.
- Open the strap inlet cover (if applicable).
- Feed the strap into the inlet port, ensuring it passes through the tensioning and welding mechanisms correctly.
- Pull the strap through until it extends beyond the machine by a sufficient length to wrap around your package.
7. Operating Instructions
7.1. Parameter Settings
The operation interface allows adjustment of bundling force (tension) and welding time (melting time).
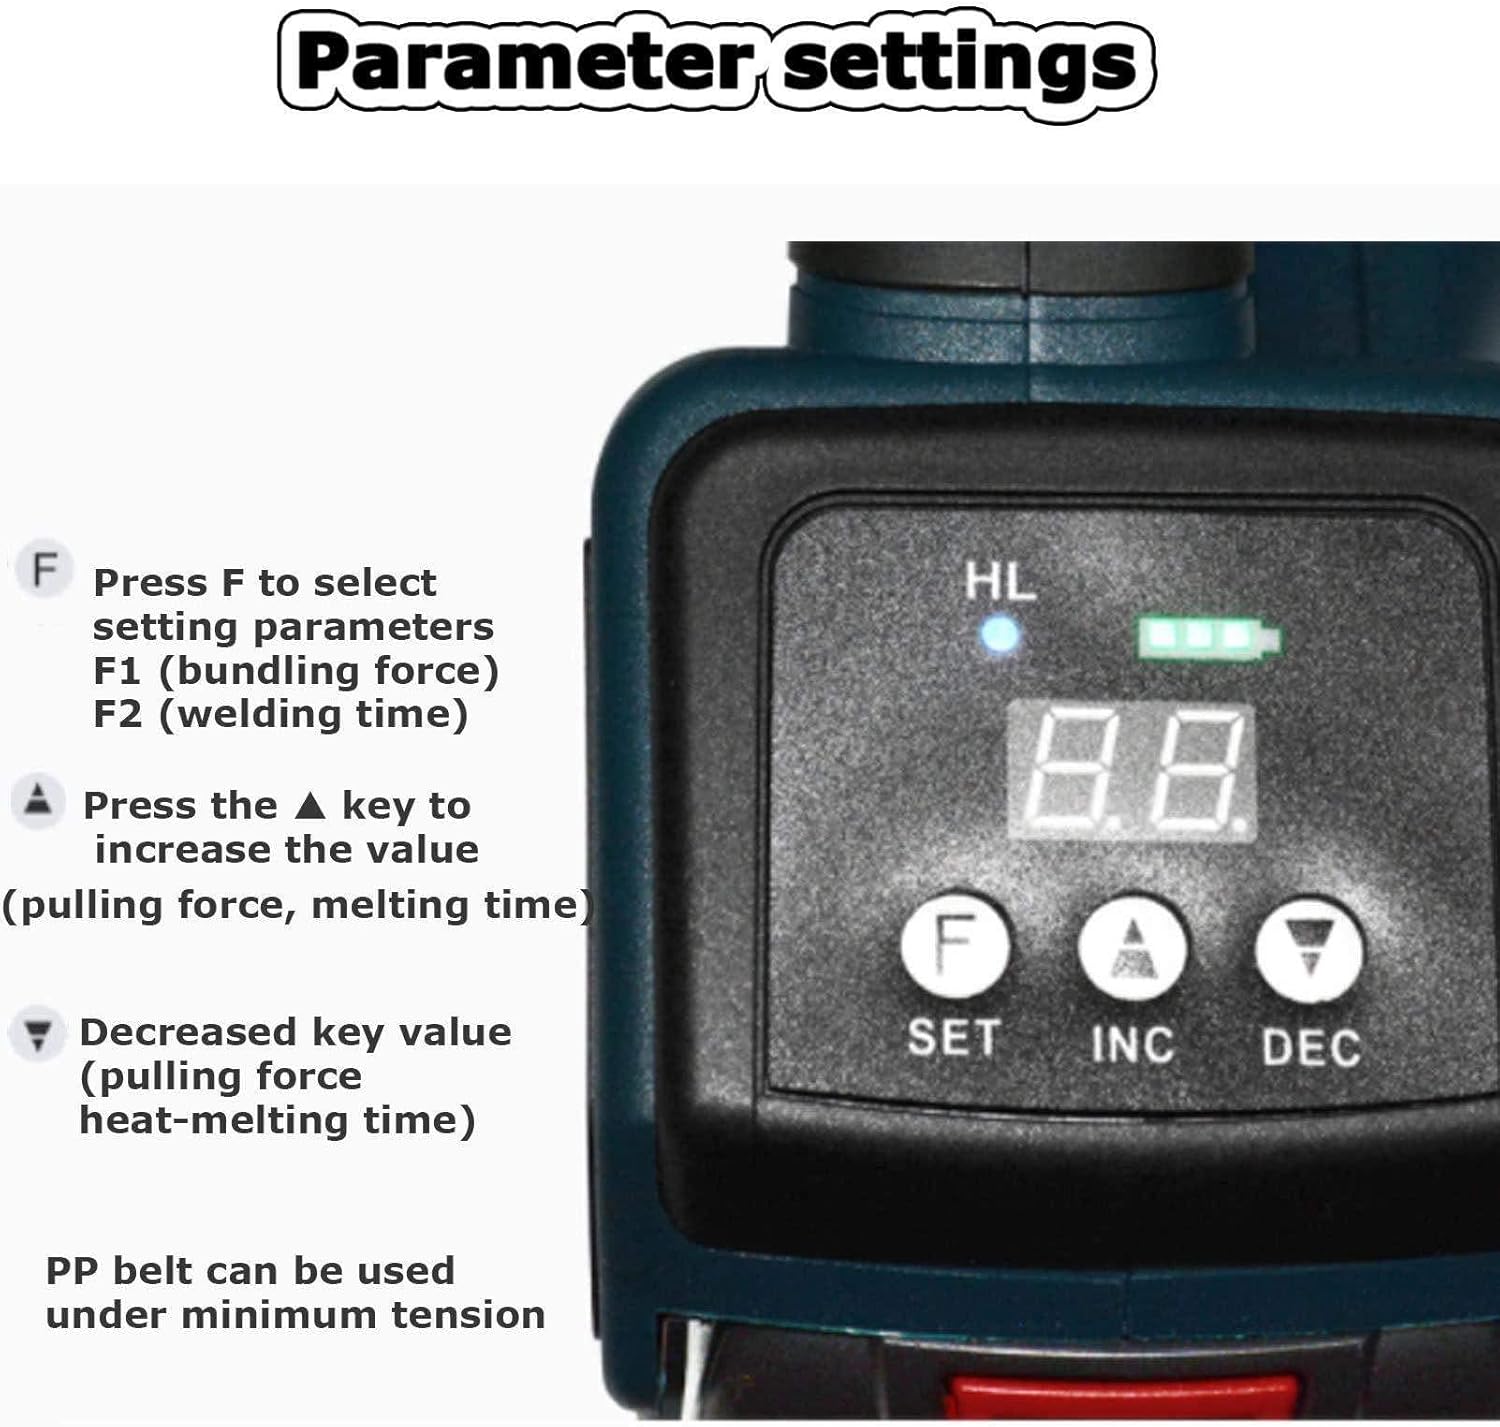
Figure 7.1: Control panel for parameter settings. This image details the digital display and control buttons (F, SET, INC, DEC) used to adjust the bundling force (F1) and welding time (F2) of the strapping machine.
- Press the F button to select the setting parameter:
- F1: Bundling force (tensioning force).
- F2: Welding time (melting time).
- Press the ▲ (INC) key to increase the value for the selected parameter.
- Press the ▼ (DEC) key to decrease the value for the selected parameter.
- For PP belts, it is recommended to use the minimum tension setting.
7.2. Strapping Process
Follow these steps for effective strapping:

Figure 7.2: Step-by-step guide for operating the strapping machine. This visual guide demonstrates inserting the strap, pressing the tension button, pressing the fusion button, and finally removing the finished strapping.
- Insert the Strapping: Wrap the strap around the package. Insert both ends of the strap into the machine's inlet port, ensuring they are properly aligned and seated.
- Apply Tension: Press the Pull Tight Button (tension button) to tighten the strapping around the package. Hold until the desired tension is achieved. The machine will automatically tension the strap.
- Weld the Strapping: Press the Hot-melt Button (fusion button) to fuse the strapping ends together. The machine will perform a friction weld. Hold the button until the welding process is complete (indicated by a sound or light change).
- Remove the Strapping: Once the weld is complete and the machine has cut the strap, press the Release Handle to disengage the machine from the strap. Carefully remove the machine from the finished strapping.
8. Maintenance
Regular maintenance ensures the longevity and optimal performance of your strapping machine.
- Cleaning: Regularly clean the strap path, tensioning wheels, and welding plate to prevent strap residue buildup. Use a dry cloth or soft brush. Do not use abrasive cleaners or solvents.
- Battery Care: Store batteries in a cool, dry place when not in use. Avoid fully discharging the battery before recharging. If storing for extended periods, charge the battery to about 50% capacity.
- Inspection: Periodically inspect the machine for any signs of wear, damage, or loose components. Pay close attention to the cutting blade and welding plate.
- Lubrication: Refer to the accessory kit for any specific lubrication points, if indicated in the detailed manual.
9. Safety Precautions
WARNING: Failure to follow these safety instructions may result in injury or damage to the machine.
- Always wear appropriate personal protective equipment (PPE), such as safety glasses and gloves, when operating the machine.
- Ensure the work area is clear of obstructions and well-lit.
- Strictly prohibited from being used when there is no straps. Operating the machine without strapping material can cause damage to the internal mechanisms.
- Do not attempt to strap objects that exceed the machine's specified dimensions or weight limits.
- Keep hands and fingers clear of moving parts, especially the tensioning and welding mechanisms, during operation.
- Do not modify the machine or use non-original replacement parts.
- Disconnect the battery before performing any maintenance or cleaning.
- Keep the machine away from water and excessive moisture.
10. Troubleshooting
This section addresses common issues you might encounter and their potential solutions.
| Problem | Possible Cause | Solution |
|---|---|---|
| Machine does not power on. | Battery not installed correctly or discharged. | Ensure battery is securely installed. Charge the battery fully. |
| Strap does not tension properly. | Incorrect tension setting; strap not inserted correctly; worn tensioning wheel. | Adjust tension setting (F1). Re-insert strap. Inspect and clean tensioning wheel. |
| Strap does not weld or weld is weak. | Incorrect welding time setting; dirty welding plate; incorrect strap material. | Adjust welding time setting (F2). Clean the welding plate. Ensure correct strap type (PP/PET) is used. |
| Strap breaks during tensioning. | Tension setting too high; strap quality issue; incorrect strap thickness. | Reduce tension setting (F1). Use high-quality straps. Verify strap thickness is within specifications. |
| Machine makes unusual noise. | Foreign object in mechanism; worn internal parts. | Stop operation immediately. Inspect for foreign objects. If noise persists, contact customer support. |
11. Warranty and Support
For specific warranty information, please refer to the warranty card included with your product or contact the manufacturer directly. Suuim is committed to providing reliable products and customer satisfaction.
If you encounter issues not covered in this manual or require technical assistance, please contact Suuim customer support through your purchase platform or the official brand website.


