1. Introduction
This manual provides comprehensive instructions for the setup, care, and maintenance of your new Modular Canvas Wall Art. This product features high-definition printed canvas panels designed to enhance the aesthetic of various indoor spaces. Please read this manual thoroughly before proceeding with installation.
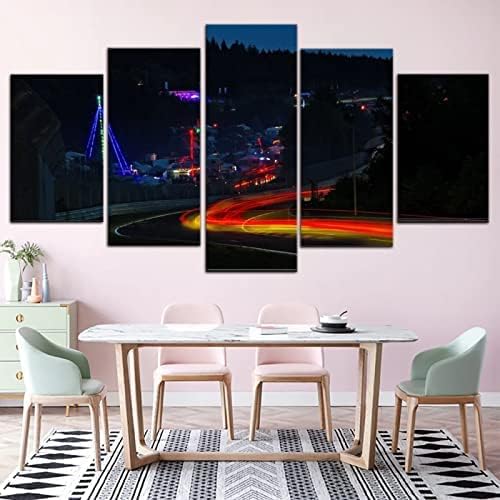
Image: The complete five-piece modular canvas set, showcasing a dynamic car racing scene at night, ideal for modern room decor.
2. Product Components
Your package includes the following components:
- Five (5) Unframed Canvas Panels:
- Two (2) panels measuring 30 cm x 60 cm (approximately 11.8 in x 23.6 in)
- Two (2) panels measuring 30 cm x 80 cm (approximately 11.8 in x 31.5 in)
- One (1) panel measuring 30 cm x 100 cm (approximately 11.8 in x 39.4 in)
- Installation Accessories (Non-tracking nails/hooks, if included by manufacturer)

Image: Detailed diagram illustrating the individual dimensions of each of the five unframed canvas panels, totaling 150 cm in width and 100 cm in height for the central panel.
3. Specifications
| Model | RTT-022 |
| Type | Unframed Modular Canvas Wall Art |
| Total Dimensions (Approx.) | 150 cm (Width) x 100 cm (Height) |
| Number of Panels | 5 |
| Material | 100% High Quality Canvas |
| Ink Type | Environmentally Friendly, Non-toxic, Odorless Ink |
| Features | Waterproof, UV Protection, HD Print, Colorfast |
| Country of Origin | China |
4. Setup & Installation
As this is an unframed canvas set, you have two primary installation options:
Option 1: Mounting on a Frame (Recommended for best results)
For a professional finish, it is recommended to mount each canvas panel onto a stretcher frame. Frames can be purchased separately from art supply stores or custom-made. Once framed, you can hang them using standard picture hanging hardware.
Option 2: Direct Wall Mounting (DIY Method)
You can directly attach the unframed canvases to your wall. This method requires careful alignment and may involve trimming the white edges of the canvas if desired.
- Prepare the Wall: Ensure the wall surface is clean, dry, and smooth. Mark the desired positions for each panel lightly with a pencil, ensuring proper spacing and alignment.
- Prepare the Canvases: If you wish to remove the white border, carefully trim it using a sharp utility knife and a straight edge.
- Apply Adhesive (Optional): For a flush mount, you can apply a suitable wall adhesive (e.g., strong double-sided tape, spray adhesive, or wallpaper paste) to the back of each canvas. Follow the adhesive manufacturer's instructions.
- Attach to Wall: Carefully press each canvas panel onto the marked position on the wall. Smooth out any air bubbles from the center outwards.
- Using Non-Tracking Nails (if provided):
- Identify the correct position on the wall for each panel.
- Place the non-tracking nail/hook at the marked spot.
- Gently tap the nail into the wall with a hammer until secure.
- Hang the canvas panel onto the hook.

Image: Step-by-step guide for installing the canvas panels using non-tracking nails, demonstrating how to position the hook and secure it to the wall.
Important Note: For optimal visual impact, ensure consistent spacing between each panel. It is advisable to lay out the panels on the floor first to determine the desired arrangement and overall dimensions before mounting them on the wall.
5. Usage and Placement
This modular canvas art is designed for indoor decorative purposes. Its versatile design makes it suitable for various environments:
- Residential Spaces: Living rooms, bedrooms, kitchens, dining areas, hallways, and children's rooms.
- Commercial Spaces: Offices, hotels, restaurants, cafes, and bars.
- Educational/Recreational: Galleries, studios, and common areas.
Avoid placing the artwork in direct sunlight for prolonged periods to prevent potential fading, despite its UV protection. Keep it away from areas with extreme temperature fluctuations or high humidity, such as directly above radiators or in unventilated bathrooms, to preserve the canvas integrity.
6. Care & Maintenance
Proper care will ensure the longevity and vibrancy of your canvas artwork:
- Dusting: Gently dust the surface of the canvas regularly with a soft, dry, lint-free cloth or a soft brush.
- Cleaning: For light marks, lightly dampen a clean, soft cloth with plain water and gently wipe the affected area. Do not use harsh chemicals, abrasive cleaners, or excessive water, as this may damage the print or canvas material.
- Handling: When moving or handling the artwork, always hold it by the edges to avoid touching the printed surface.
- Storage: If storing the artwork, keep it in a cool, dry place, away from direct sunlight and extreme temperatures. Protect the surface from scratches by wrapping it in a soft cloth or acid-free paper.

Image: Close-up details highlighting the waterproof nature of the canvas material, the metal hook for hanging (if framed), and the construction of a solid wood frame (for framed versions).
7. Troubleshooting
This section addresses common concerns you might encounter:
| Problem | Possible Cause | Solution |
|---|---|---|
| Canvas appears wavy or not flat on the wall. | Uneven wall surface; insufficient adhesive; humidity changes. | Ensure wall is smooth before application. Use sufficient adhesive. Consider mounting on a frame for better rigidity, especially in humid environments. |
| Panels are not aligned correctly. | Inaccurate measurements during installation. | Carefully measure and mark positions before permanent attachment. Use a level to ensure horizontal alignment. |
| Fading of colors over time. | Prolonged exposure to direct sunlight. | Relocate the artwork to an area not exposed to direct, intense sunlight. While the canvas has UV protection, extreme exposure can still cause gradual fading. |
| Dust or smudges on the canvas. | Normal accumulation; accidental contact. | Gently dust with a soft, dry cloth. For smudges, lightly wipe with a slightly damp cloth (water only). Do not rub vigorously. |
8. Warranty & Support
For any questions, concerns, or issues regarding your Modular Canvas Wall Art, please contact the seller directly through the platform where you made your purchase. The seller aims to respond to inquiries within 24 hours and is committed to providing excellent after-sales service.
Please retain your purchase receipt or order details as proof of purchase for any support inquiries.


