1. Introduction
Thank you for choosing the Pilipane Mini Security Camera. This compact and versatile device is designed for various surveillance needs, offering 1080P HD video recording, night vision, motion detection, and remote viewing capabilities via a mobile application. Please read this manual carefully to ensure proper use and optimal performance of your camera.

Figure 1: Pilipane Mini Security Camera Overview
2. Package Contents
Please verify that all items listed below are included in your package:
- 1 x Pilipane Mini Security Camera
- 1 x Instruction Manual (this document)
- 1 x Magnetic Bracket
- 1 x Charging Cable (Micro USB)
3. Product Overview
The Pilipane Mini Security Camera is designed for discreet and flexible placement. Its compact size and magnetic design allow for easy installation in various environments.

Figure 2: Camera Ports and Buttons
The camera features a strong magnetic module on its back, enabling it to attach securely to metal surfaces. The included magnetic bracket provides additional flexibility for adjusting the camera's angle to achieve optimal coverage.

Figure 3: Magnetic Design and Compact Size
Key features include:
- Night Vision: Enhanced visibility in low-light conditions.
- HD Quality: Records in 1080P resolution for clear video.
- Remotely: Access live feed and recordings via a mobile app.
- Hot Spot: Direct connection capability for local viewing without a network.
- Video Audio: Captures both video and audio.
- Storage: Supports local storage via a memory card.

Figure 4: Product Feature Icons
4. Setup
4.1 Charging the Camera
Before initial use, fully charge the camera. Connect the provided Micro USB charging cable to the camera's charging port and a 5V1A USB power adapter (not included). A full charge typically takes approximately 30 minutes (from 0% to 100%). The camera has a built-in 350 mAh polymer lithium battery, providing up to 60 minutes of continuous operation on a full charge.
4.2 Inserting a Memory Card
The camera supports up to a 128GB memory card (not included) for local storage. Insert the memory card into the designated slot on the camera. Ensure the card is inserted correctly. The camera will automatically overwrite older footage to ensure continuous recording once the memory card is full.

Figure 5: Memory Card Insertion and Looping Video
4.3 Mobile App Connection (WiFi Connectivity)
To view live images and manage recordings remotely, connect the camera to your WLAN network via the dedicated mobile application. Download the appropriate app for your smartphone (Android compatible). Follow the in-app instructions to pair your camera with your device. The camera also supports an AP hotspot mode, allowing direct connection to your phone for surveillance and playback even without an internet connection.
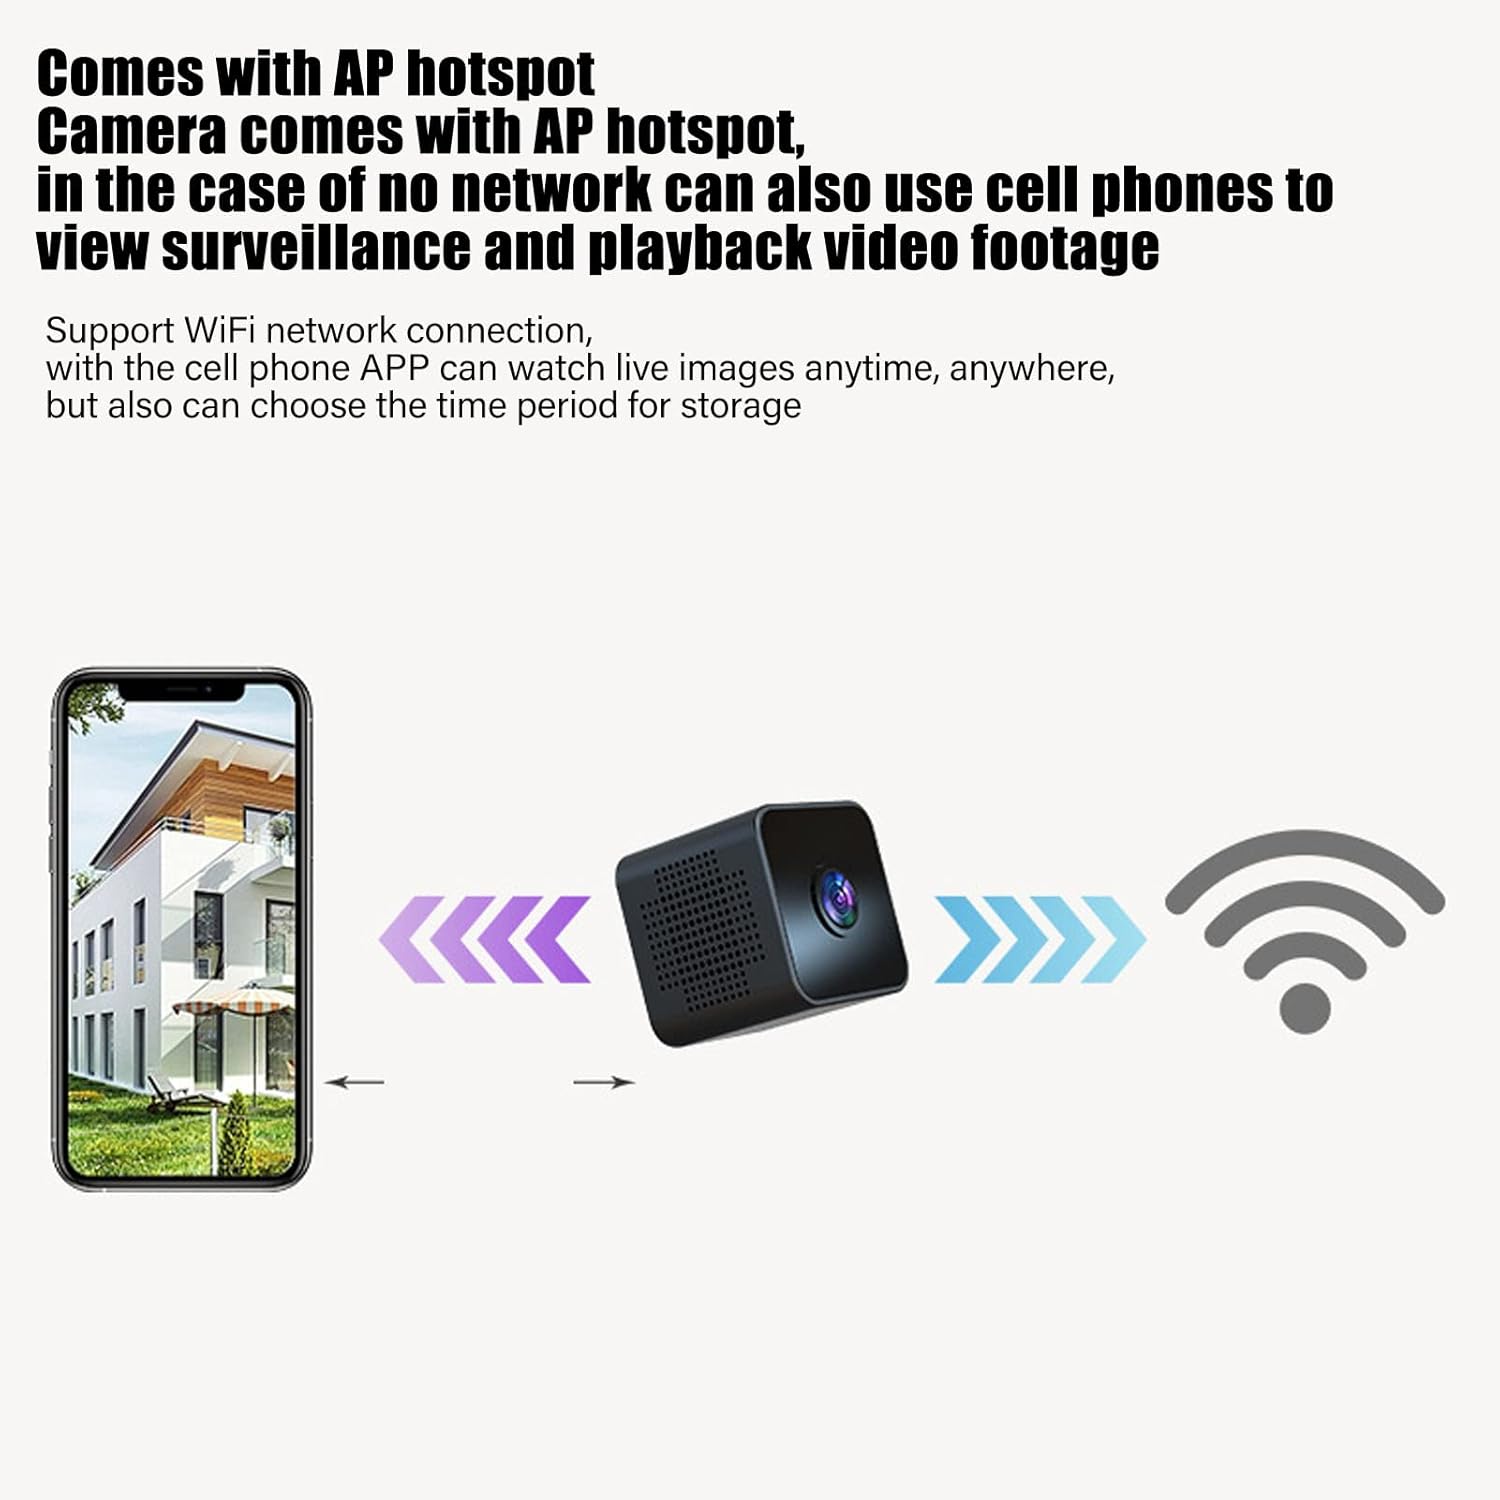
Figure 6: WiFi and AP Hotspot Connectivity
5. Operating Instructions
5.1 Powering On/Off
Refer to the camera's physical buttons for power control. Typically, a long press on the power button will turn the camera on or off. Consult the quick start guide included in the package for specific button functions.
5.2 Recording Modes
- Continuous Recording: The camera will record continuously to the inserted memory card, overwriting older files when full.
- Motion Detection Recording: When enabled, the camera will only record when motion is detected in its field of view. This conserves storage space and battery life.

Figure 7: Intelligent Motion Detection
5.3 Night Vision
The camera is equipped with 6 photosensitive lenses to ensure clear 1080P HD video even in low-light conditions. Night vision can be set to manual or timed open via the mobile application.
5.4 Remote Viewing and Playback
Once connected to your WLAN network, use the mobile app to view live footage from anywhere. You can also access and play back recorded videos stored on the memory card through the app. The app allows you to schedule recording times for convenient storage management.

Figure 8: Clear 1080P HD Picture Quality
6. Maintenance
- Cleaning: Use a soft, dry cloth to clean the camera lens and body. Avoid using harsh chemicals or abrasive materials.
- Battery Care: To prolong battery life, avoid fully discharging the camera frequently. Store the camera in a cool, dry place when not in use for extended periods.
- Firmware Updates: Check the mobile application periodically for any available firmware updates to ensure optimal performance and security.
7. Troubleshooting
- Camera Not Turning On: Ensure the camera is fully charged. Connect it to a power source and try again.
- No WiFi Connection: Verify that your router is working correctly and the camera is within range. Restart both the camera and your router. Ensure the correct WiFi password is entered in the app.
- Recording Issues: Check if a memory card is properly inserted and has sufficient free space. If the card is full, older footage will be overwritten. Format the memory card if issues persist (this will erase all data).
- Poor Video Quality: Ensure the camera lens is clean. Check your network connection speed if viewing remotely.
- App Not Connecting: Ensure the app is updated to the latest version. Restart your smartphone and the camera.
8. Specifications
| Item Type | Mini Camera |
| Product Material | ABS, Metal |
| Product Size | Approx. 3x3x3cm / 1.2x1.2x1.2in |
| Video Resolution | 1080P |
| Battery Life | 60 Minutes (Ultra Clear Video Format) |
| Battery Capacity | 350 MAh |
| Battery Type | Polymer Lithium Battery |
| Connection Mode | Cell Phone APP Connection, WLAN, AP Hotspot |
| Memory Maximum Expansion Capacity | 128GB (Memory Card not included) |
| Night Vision Mode | Manual, Timed Open |
| Charging Power | 5V1A |
| Charging Interface | Micro USB |
| Charging Time | 30 Minutes (0%-100%) |
| Compression Standard | H.264 Main, H.264 Baseline, MJPEF, JPEG Baseline |
| Special Feature | Motion Sensor, Night Vision |
| Control Method | App |
| Mount Type | Magnetic, Wall Mount (with bracket) |
| Item Weight | 0.12 Kilograms |
Note: All data are measured manually, and there may be certain errors in the measurement results.
9. Warranty and Support
For warranty information and technical support, please refer to the contact details provided with your purchase or visit the official Pilipane website. Keep your purchase receipt as proof of purchase for any warranty claims.