
PHILIPS S9974/55
Philips Shaver Series 9000 User Manual
Model: S9974/55 | Brand: PHILIPS
Introduction
Welcome to the user manual for your Philips Shaver Series 9000. This intelligent electric shaver is designed to provide an exceptional shaving experience with advanced SkinIQ Technology, ensuring superior closeness and personalized skin comfort. This manual provides essential information on setup, operation, maintenance, and safety to help you get the most out of your device.
Safety Information
Please read all safety warnings and instructions carefully before using the shaver.
- Always unplug the shaver when not in use or during cleaning to avoid risk of electric shock.
- Be careful to avoid cutting yourself while shaving and cleaning the shaver.
- Do not use the shaver near water or while charging.
- Clean the shaver regularly to prevent bacterial growth and skin irritation.
- Replace the shaving head every 2 years for optimal performance and safety.
Package Contents
Your Philips Shaver Series 9000 package includes the following items:
- Philips Shaver Series 9000 (Main Unit)
- Cleaning Pod
- Charging Stand
- Pop-up Beard Trimmer
- Travel Case
- Power Adapter
- User Manual (this document)
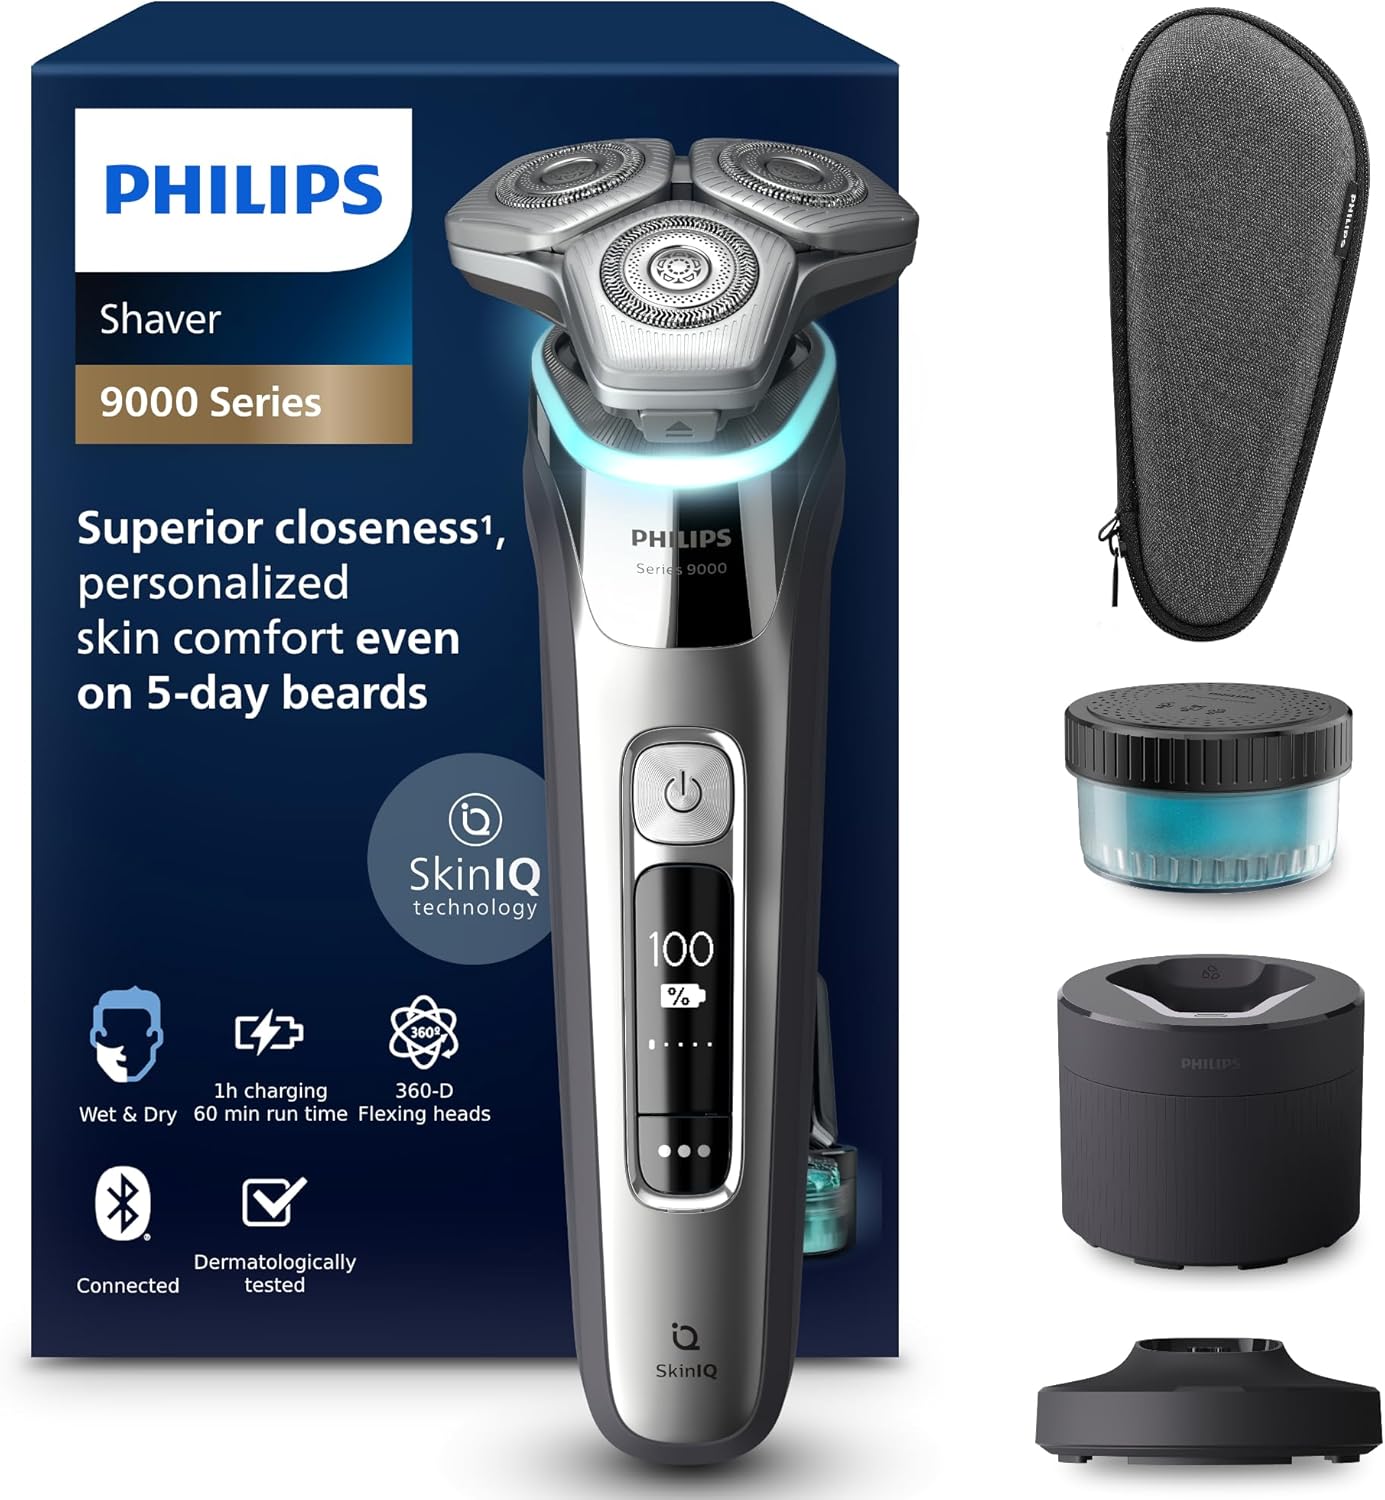
Image: Philips Shaver Series 9000 with its packaging and all included accessories.
Setup
1. Charging the Shaver
Before first use, fully charge your shaver. A full charge takes approximately 1 hour and provides up to 60 minutes of shaving time.
- Connect the power adapter to the charging stand.
- Place the shaver onto the charging stand. Ensure it is securely seated.
- The battery indicator on the shaver will show charging progress. Once fully charged, the indicator will show 100%.
2. Initial Cleaning
It is recommended to clean the shaving head before the first use.
- Detach the shaving head from the shaver body.
- Rinse the shaving head under warm running water.
- Allow it to air dry completely before reattaching.
Operating Instructions
Shaving Techniques
The Philips Shaver Series 9000 can be used for both wet and dry shaving.
Dry Shaving
For a quick and convenient shave, ensure your face is clean and dry. Move the shaver in small, circular motions over your skin.
Wet Shaving
For a refreshing shave, use with shaving foam or gel. Apply foam/gel to your face and then shave using small, circular motions. Rinse the shaver head under water during shaving to prevent clogging.
SkinIQ Technology and Pressure Guidance
The shaver features SkinIQ Technology which senses your beard density and adapts its power for an effortless shave. The Pressure Guard Sensor provides real-time feedback on shaving pressure.
- Apply gentle pressure. The light ring on the shaver will indicate if you are applying too much or too little pressure.
- Maintain consistent, small circular motions for optimal results.

Image: SkinIQ technology senses, guides, and adapts to your unique face.

Image: The Pressure Guard Sensor provides visual feedback for optimal shaving pressure.
Using the Pop-up Beard Trimmer
The integrated pop-up trimmer is ideal for shaping sideburns and moustaches.
- Push the slider on the back of the shaver upwards to activate the trimmer.
- Use the trimmer to define lines and edges.
- Push the slider downwards to retract the trimmer when finished.
Maintenance
Daily Cleaning
For optimal performance and hygiene, clean your shaver after each use.
- Turn off the shaver and unplug it if charging.
- Open the shaving head unit by pressing the release button.
- Rinse the shaving head thoroughly under warm running water.
- Shake off excess water and allow the head to air dry before closing.
Using the Quick Clean Pod
The Quick Clean Pod provides deep cleaning and lubrication for your shaver in just one minute.
- Place the shaver head-down into the Quick Clean Pod.
- Press the power button on the shaver to start the cleaning cycle.
- The cleaning cycle will automatically complete. Remove the shaver and allow it to air dry.

Image: Deep cleaning in just one minute with the Quick Clean Pod.
Replacing Shaving Heads
For optimal shaving performance, it is recommended to replace the shaving heads every 2 years.
- Replacement heads can be purchased from authorized Philips retailers.
- Follow the instructions provided with the new shaving heads for proper replacement.
Troubleshooting
| Problem | Possible Cause | Solution |
|---|---|---|
| Shaver does not turn on. | Battery is empty or shaver is not charged. | Charge the shaver fully. Ensure the charging stand and adapter are correctly connected. |
| Poor shaving performance. | Shaving heads are dirty or worn out. | Clean the shaving heads thoroughly. If performance does not improve, replace the shaving heads. |
| Skin irritation after shaving. | Incorrect shaving technique or sensitive skin. | Ensure you are using gentle, circular motions. Use the Pressure Guard Sensor feedback. Consider wet shaving with foam/gel. Allow skin to adapt to the new shaver. |
| Shaver makes unusual noise. | Shaving heads are clogged or damaged. | Clean the shaving heads. If the noise persists, the heads may be damaged and require replacement. |
If the problem persists after trying these solutions, please contact Philips customer support.
Specifications
| Feature | Detail |
|---|---|
| Model Number | S9974/55 |
| Shaving System | Dual SteelPrecision blades, Lift & Cut system |
| Technology | SkinIQ Technology, Pressure Guard Sensor |
| Shaving Type | Wet & Dry |
| Battery Type | Rechargeable (Battery Powered) |
| Battery Life | Up to 60 minutes shaving time |
| Charging Time | 1 hour for full charge |
| Included Accessories | Cleaning Pod, Charging Stand, Pop-up Beard Trimmer, Travel Case |
| Blade Material | Alloy Steel |
| Item Weight | 1000 Grams |
Warranty and Support
Your Philips Shaver Series 9000 comes with a standard manufacturer's warranty. Please refer to the warranty card included in your package for specific terms and conditions.
For technical support, product registration, or to find replacement parts and accessories, please visit the official Philips support website or contact their customer service.
Online Support: Philips Official Website
Related documentsS9974/55


Ask a question about this manual
Ask about setup, troubleshooting, compatibility, parts, safety, or missing instructions. Manuals+ will review the question and use this page’s manual context to help answer it.