Introduction
This instruction manual provides essential information for the proper installation, operation, and maintenance of your SteFik Water Tank. This water tank is designed as a replacement part for specific Midea robot vacuum cleaner models, ensuring your device continues to perform its mopping functions effectively.
Product Overview
The SteFik Water Tank is a transparent-blue plastic reservoir designed to hold water for the mopping function of compatible Midea robot vacuum cleaners. It features a fill port and a water dispensing mechanism.

Image: Top view of the SteFik Water Tank, showing its transparent blue plastic construction and general shape.

Image: Side view of the SteFik Water Tank, highlighting its curved design and the integrated components.
Compatibility
This water tank is compatible with the following Midea robot vacuum cleaner models:
- Midea I5
- Midea I5 Extra
- Midea I5 Young
- Midea I9
- Midea I9 EYE
- Midea K50
Please ensure your robot vacuum cleaner model matches one of the listed compatible models before installation.
Setup and Installation
- Power Off: Before beginning, ensure your Midea robot vacuum cleaner is powered off and disconnected from its charging base.
- Remove Old Water Tank (if applicable): Locate the existing water tank on your robot vacuum. Depending on your model, it may slide out from the rear or bottom. Refer to your robot vacuum's original manual for specific removal instructions.
- Prepare New Water Tank: Open the fill port on the new SteFik Water Tank.
- Fill with Water: Carefully fill the water tank with clean tap water. Do not overfill; ensure the water level does not exceed the 'MAX' indicator, if present. Avoid using detergents or cleaning solutions unless specifically recommended by your robot vacuum's manufacturer.
- Close Fill Port: Securely close the fill port to prevent leaks.
- Install New Water Tank: Align the new SteFik Water Tank with the corresponding slot on your robot vacuum cleaner. Gently slide or click it into place until it is firmly seated. Ensure there are no gaps and the tank is flush with the robot's body.
- Power On: You may now power on your robot vacuum cleaner.

Image: Close-up view of the water tank, showing the fill port and the water dispensing valve mechanism.
Operating Instructions
Once the water tank is installed and filled, your robot vacuum cleaner is ready for mopping operations. The robot vacuum will automatically draw water from the tank as needed for its mopping function.
- Monitor Water Level: Periodically check the water level in the tank, especially before starting a mopping cycle. Refill as necessary.
- Empty After Use: For optimal hygiene and to prevent stagnant water issues, it is recommended to empty any remaining water from the tank after each mopping session.
Maintenance
Regular maintenance of the water tank ensures its longevity and the effective performance of your robot vacuum's mopping function.
- Empty and Rinse: After each use, or at least weekly, remove the water tank from the robot vacuum. Empty any remaining water. Rinse the inside of the tank thoroughly with clean water.
- Clean Fill Port and Valve: Use a soft brush or cloth to clean around the fill port and the water dispensing valve to prevent mineral buildup or blockages.
- Air Dry: Allow the water tank to air dry completely before reinstalling it or storing it. This helps prevent mold and mildew growth.
- Avoid Harsh Chemicals: Do not use abrasive cleaners, strong detergents, or solvents, as these can damage the plastic material of the tank.
Troubleshooting
| Problem | Possible Cause | Solution |
|---|---|---|
| Water not dispensing during mopping. |
|
|
| Water tank is leaking. |
|
|
| Robot vacuum not recognizing water tank. |
|
|
Specifications
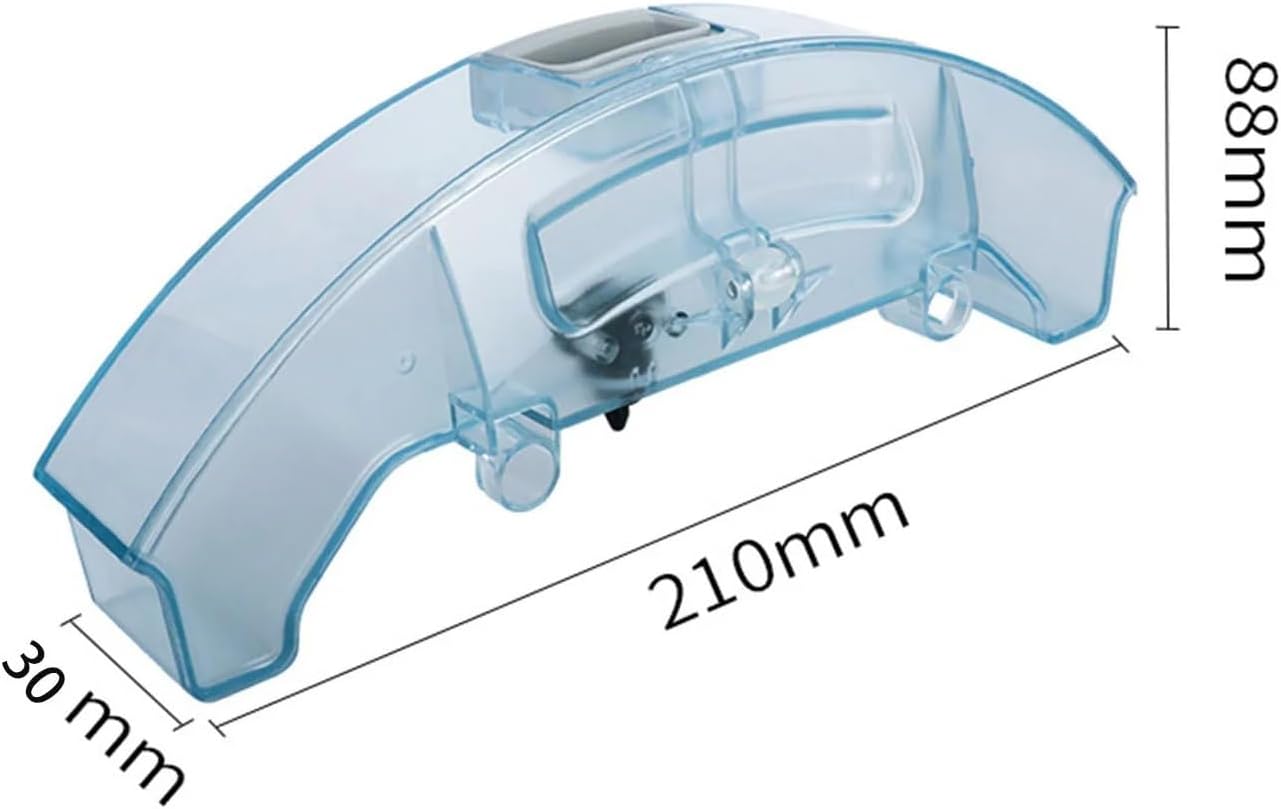
Image: SteFik Water Tank displaying its approximate dimensions: 210mm in length, 88mm in height, and 30mm in width.
- Product Name: SteFik Water Tank
- Material: Plastic
- Color: Transparent-Blue
- Dimensions (Approximate): 210mm (Length) x 88mm (Height) x 30mm (Width)
- Included Components: 1 x Water Tank
- Compatibility: Midea I5, I5 Extra, I5 Young, I9, I9 EYE, K50 Robot Vacuum Cleaners
Support
If you encounter any issues not covered in this manual or require further assistance, please contact the seller directly. They are available to help resolve any problems you may experience with your SteFik Water Tank.
For general inquiries about your Midea robot vacuum cleaner, please refer to its original instruction manual or contact Midea customer support.