1. Introduction
Thank you for choosing the Kärcher RCF 3 Robot Floor Cleaner. This device is designed to efficiently clean hard floors such as tiles, laminate, parquet, vinyl, and PVC, performing both wet mopping and light dry dirt collection. This manual provides essential information for the safe and effective use, setup, operation, and maintenance of your RCF 3 robot.

Image 1.1: The Kärcher RCF 3 Robot Floor Cleaner. This image shows the top-down view of the white and black circular robot with the Kärcher logo.
2. Safety Instructions
Please read all safety instructions carefully before operating the device. Failure to follow these instructions may result in electric shock, fire, or serious injury.
- Ensure the power adapter and charging station are placed in a dry, stable location.
- Do not use the robot on wet carpets or in areas with standing water.
- Keep hair, loose clothing, fingers, and all parts of the body away from openings and moving parts.
- Do not allow children to operate the robot. Supervise children and pets when the robot is in operation.
- Use only Kärcher-approved accessories and replacement parts.
- Unplug the robot from the charging station before performing any maintenance or cleaning.
- The robot is equipped with sensors to detect stairs and obstacles. Ensure these sensors are kept clean for optimal performance.
3. Package Contents
Verify that all items are present in the package:
- Kärcher RCF 3 Robot Floor Cleaner
- Charging Station
- Fresh Water Tank (430 ml capacity)
- Dirty Water Tank (115 ml capacity)
- 2 x Cleaning Rollers
- Kärcher Universal Cleaner RM 536 (30 ml sample)
- Power Adapter
- User Manual (this document)
4. Product Overview
Familiarize yourself with the main components of your Kärcher RCF 3.

Image 4.1: Underside view of the Kärcher RCF 3, highlighting the cleaning roller and wheels. The robot mop uses the proven technology of Kärcher FC floor cleaners.
Key components include the LiDAR navigation sensor (top center), control buttons, fresh water tank, dirty water tank, cleaning rollers, and various sensors for obstacle and drop detection.
5. Setup
5.1. Charging the Device
- Place the charging station against a wall in an open area, ensuring at least 0.5 meters of clear space on either side and 1.5 meters in front.
- Connect the power adapter to the charging station and plug it into a wall outlet.
- Place the RCF 3 robot onto the charging station. Ensure the charging contacts align. The indicator light on the robot will illuminate to show it is charging.
- Allow the robot to fully charge before its first use (approximately 4-5 hours).
5.2. Installing Cleaning Rollers
- Turn the robot upside down.
- Locate the roller compartment cover and open it.
- Insert the cleaning rollers, ensuring they click into place.
- Close the roller compartment cover securely.
5.3. Filling Water Tanks
- Remove the fresh water tank from the robot.
- Open the tank cap and fill with clean tap water. You may add a small amount (30 ml) of Kärcher Universal Cleaner RM 536 if desired. Do not overfill.
- Close the cap securely and reinsert the fresh water tank into the robot.
- Ensure the dirty water tank is empty and properly installed before operation.
5.4. App Setup and Mapping

Image 5.1: A person interacting with the Kärcher Home Robots app on a smartphone. With the Kärcher Home Robots App, the robot mop can be easily configured and controlled.
- Download the Kärcher Home Robots app from your device's app store.
- Follow the in-app instructions to create an account and add your RCF 3 robot.
- Initiate the mapping process through the app. The robot uses LiDAR navigation to create a detailed map of your home, supporting up to 5 floors.
- Once mapped, you can define cleaning zones, no-go zones, and set cleaning schedules within the app.
6. Operation
6.1. Starting a Cleaning Cycle

Image 6.1: The Kärcher RCF 3 robot actively cleaning a hard floor in a living space. The RCF 3 robot mop cleans hard floors wet - and completely autonomously.
- Manual Start: Press the power button on the robot once to start a standard cleaning cycle.
- App Control: Open the Kärcher Home Robots app, select your RCF 3, and choose a cleaning mode or specific area to clean.
6.2. Cleaning Modes
The RCF 3 offers various cleaning modes configurable via the app:
- Standard Cleaning: Default mode for general floor cleaning.
- Spot Cleaning: Targets a specific small area for intensive cleaning.
- Zone Cleaning: Cleans user-defined zones on the map.
- Custom Cleaning: Adjust water quantity and cleaning intensity for different floor types or dirt levels.

Image 6.2: The Kärcher RCF 3 robot cleaning a hard floor, demonstrating its ability to pick up light dry dirt. The cleaning roller also picks up light dry dirt like breadcrumbs.
6.3. Pausing/Stopping a Cleaning Cycle
- Press the power button on the robot once to pause. Press again to resume.
- Use the app to pause or stop the cleaning cycle.
- To send the robot back to its charging station, press and hold the power button for a few seconds, or use the 'Return to Dock' function in the app.
7. Maintenance
Regular maintenance ensures optimal performance and extends the lifespan of your RCF 3 robot.
7.1. Cleaning Rollers
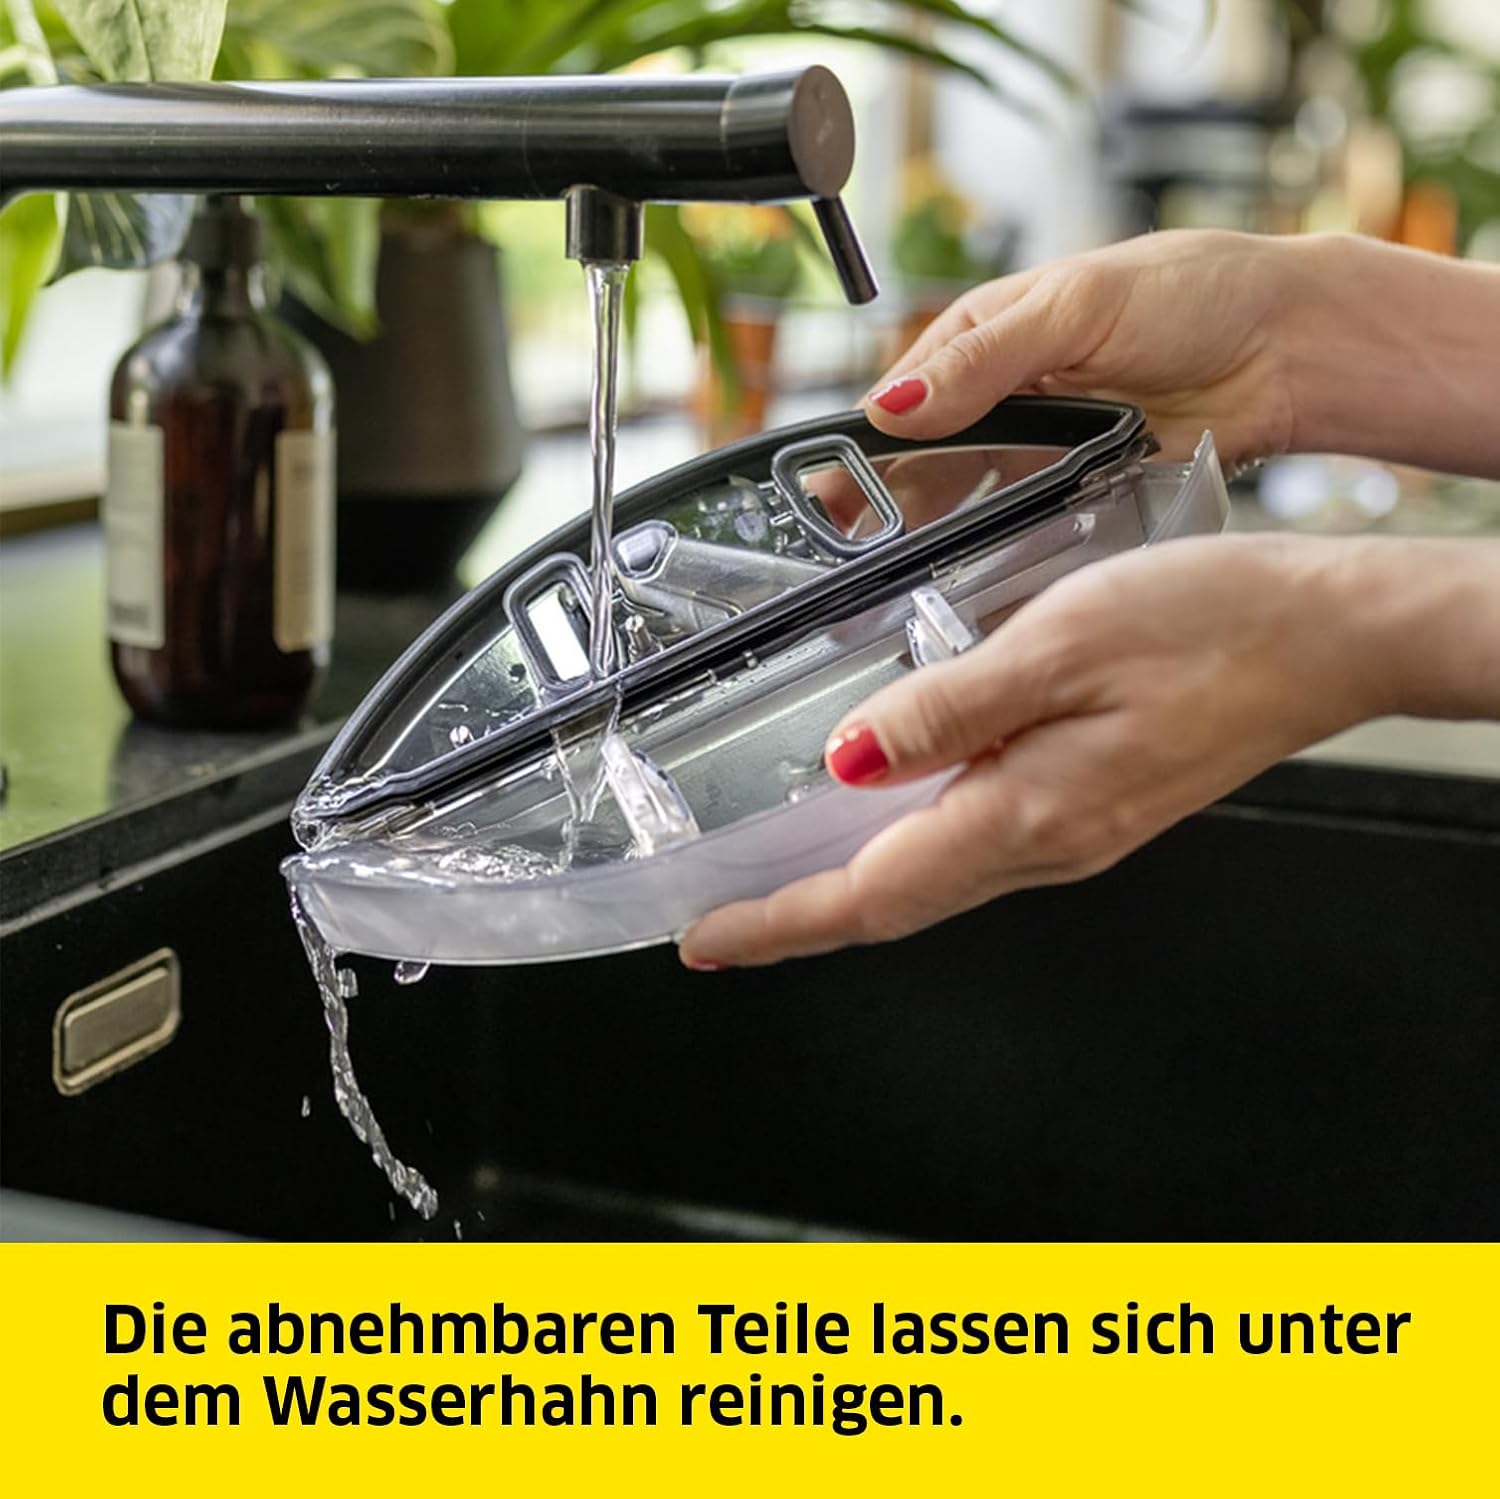
Image 7.1: Hands cleaning a removable component of the robot under a faucet. The removable parts can be cleaned under the tap.
- After each cleaning cycle, remove the rollers from the robot.
- Rinse the rollers under running water until clean.
- For deeper cleaning, rollers can be machine washed at 60°C.
- Allow rollers to air dry completely before reinstallation.
7.2. Emptying and Cleaning Water Tanks
- The app will notify you when the dirty water tank needs emptying or the fresh water tank needs refilling.
- Remove the dirty water tank and dispose of the contents. Rinse the tank thoroughly with clean water.
- Refill the fresh water tank as described in Section 5.3.
7.3. Sensor Cleaning
- Periodically wipe the LiDAR sensor, drop sensors, and bumper sensors with a clean, dry cloth to ensure accurate navigation and obstacle detection.
8. Troubleshooting
Refer to this section for common issues and their solutions.
| Problem | Possible Cause | Solution |
|---|---|---|
| Robot does not start | Low battery; Power button not pressed correctly | Charge the robot; Press the power button firmly. |
| Poor cleaning performance | Dirty rollers; Empty fresh water tank; Full dirty water tank | Clean or replace rollers; Refill fresh water tank; Empty dirty water tank. |
| Robot gets stuck frequently | Obstacles in path; Dirty sensors | Clear obstacles; Clean all sensors. |
| App connection issues | Wi-Fi signal weak; Incorrect network settings | Ensure strong Wi-Fi signal; Reconfigure network settings in app. |
| Robot avoids certain areas | No-go zones set in app; Carpet detection | Check app for no-go zones; Robot avoids carpets to prevent wetting. |
If the problem persists, please contact Kärcher customer support.
9. Specifications
Technical details for the Kärcher RCF 3 Robot Floor Cleaner:
- Brand: Kärcher
- Model Number: 1.269-660.0
- Color: White
- Product Dimensions (L x W x H): 41.4 x 34.1 x 12.5 cm
- Weight: 4.9 Kilograms
- Power: 500 Watts
- Battery Type: Lithium-ion
- Battery Life: 120 minutes
- Fresh Water Tank Capacity: 430 ml
- Dirty Water Tank Capacity: 115 ml
- Navigation: LiDAR Laser
- Control Type: App Control
- Recommended Surface: Tile, Laminate, PVC, Vinyl, Parquet
- Special Features: Intelligent Mapping, Automatic Mop Washing, Selective Room Cleaning, Scheduling, Bagless
10. Warranty and Support
Kärcher products are manufactured to high-quality standards and undergo rigorous quality checks. For warranty information, please refer to the warranty card included with your purchase or visit the official Kärcher website. For technical support, spare parts, or service inquiries, please contact Kärcher customer service in your region. Keep your purchase receipt as proof of purchase for warranty claims.
Online Resources: For additional support, FAQs, and product registration, visit the official Kärcher website or the Kärcher Home Robots app support section.


