1. Introduction
Welcome to the user manual for your Pilipane Mini Wireless Security Camera. This guide provides essential information for setting up, operating, and maintaining your device. Please read it carefully before use to ensure proper functionality and safety.
2. Package Contents
Please verify that all items listed below are included in your package:
- 1 x Pilipane Mini Wireless Camera
- 1 x Instruction Manual (this document)
- 1 x Magnetic Stand
- 1 x Charging Cable (Micro USB)

Figure 2.1: Pilipane Mini Wireless Security Camera and included accessories: magnetic stand and charging cable.
This image displays the Pilipane Mini Wireless Security Camera along with its accessories, including a magnetic stand for flexible placement and a Micro USB charging cable.
3. Product Overview
The Pilipane Mini Wireless Security Camera is a compact device designed for various surveillance needs, including home security, meeting recording, and evidence collection. It features 1080p HD video recording, night vision, and motion detection.
3.1 Key Features
- Ultra-small and portable design.
- 1080p HD video resolution.
- Night vision capabilities.
- Motion detection function.
- Magnetic module for easy attachment to iron surfaces.
- Built-in 350mAh battery providing up to 60 minutes of recording.
- Supports up to 128GB memory card for continuous loop recording.
- Cell phone APP connection for remote viewing.

Figure 3.1: Wireless Connectivity Diagram.
This diagram illustrates the camera's wireless connectivity, showing how it can transmit video to a smartphone application, enabling remote monitoring.

Figure 3.2: Camera Side View with Ports.
A close-up view of the camera's side, highlighting the Micro USB charging port (DC) and the TF (microSD) card slot for memory expansion.

Figure 3.3: Camera Angled View with Buttons and Ports.
This image provides an angled perspective of the camera, detailing the control buttons on the top surface and the charging and memory card ports on the side.
4. Setup
4.1 Charging the Camera
- Connect the provided Micro USB charging cable to the camera's DC port.
- Connect the other end of the cable to a 5V1A power adapter (not included).
- The camera will fully charge in approximately 30 minutes (from 0% to 100%).
4.2 Inserting a Memory Card
- Locate the TF (microSD) card slot on the side of the camera.
- Gently insert a memory card (up to 128GB, not included) into the slot until it clicks into place. Ensure the card is oriented correctly.
- The camera supports continuous loop recording, automatically overwriting older footage when the memory is full.
4.3 Initial Power On
- Press and hold the power button (refer to Product Overview for button location) for a few seconds until an indicator light illuminates.
4.4 App Connection (WLAN)
For remote viewing and advanced settings, connect the camera to your smartphone via the dedicated application.
- Download the appropriate mobile application (details typically found in the included instruction manual or product packaging).
- Follow the in-app instructions to add your camera, which usually involves connecting to the camera's Wi-Fi hotspot first, then configuring it to connect to your home Wi-Fi network.

Figure 4.1: App Connection for Home Security.
This image demonstrates the camera's use in a home security context, showing the camera discreetly placed and its live feed accessible through a mobile application on a smartphone.
5. Operation
5.1 Recording Video
The camera automatically begins recording when powered on, especially when a memory card is inserted.
- Continuous Recording: With a memory card, the camera records continuously, overwriting the oldest files when the card is full.
- Motion Detection Recording: The camera can be configured via the mobile app to record only when motion is detected, conserving battery and storage.
5.2 Night Vision
The camera is equipped with night vision capabilities.
- Manual Activation: Night vision can be manually turned on or off.
- Timed Activation: Configure night vision to activate automatically during specific hours via the mobile application.
5.3 Viewing Footage
- Via Mobile App: Access live view and recorded footage directly through the connected smartphone application.
- Via Memory Card: Remove the memory card from the camera and insert it into a computer or compatible device to view recorded files.

Figure 5.1: Motion Detection in Action.
This image illustrates the camera's motion detection capability, displaying a comparison of a scene before and after motion, as viewed on a smartphone.
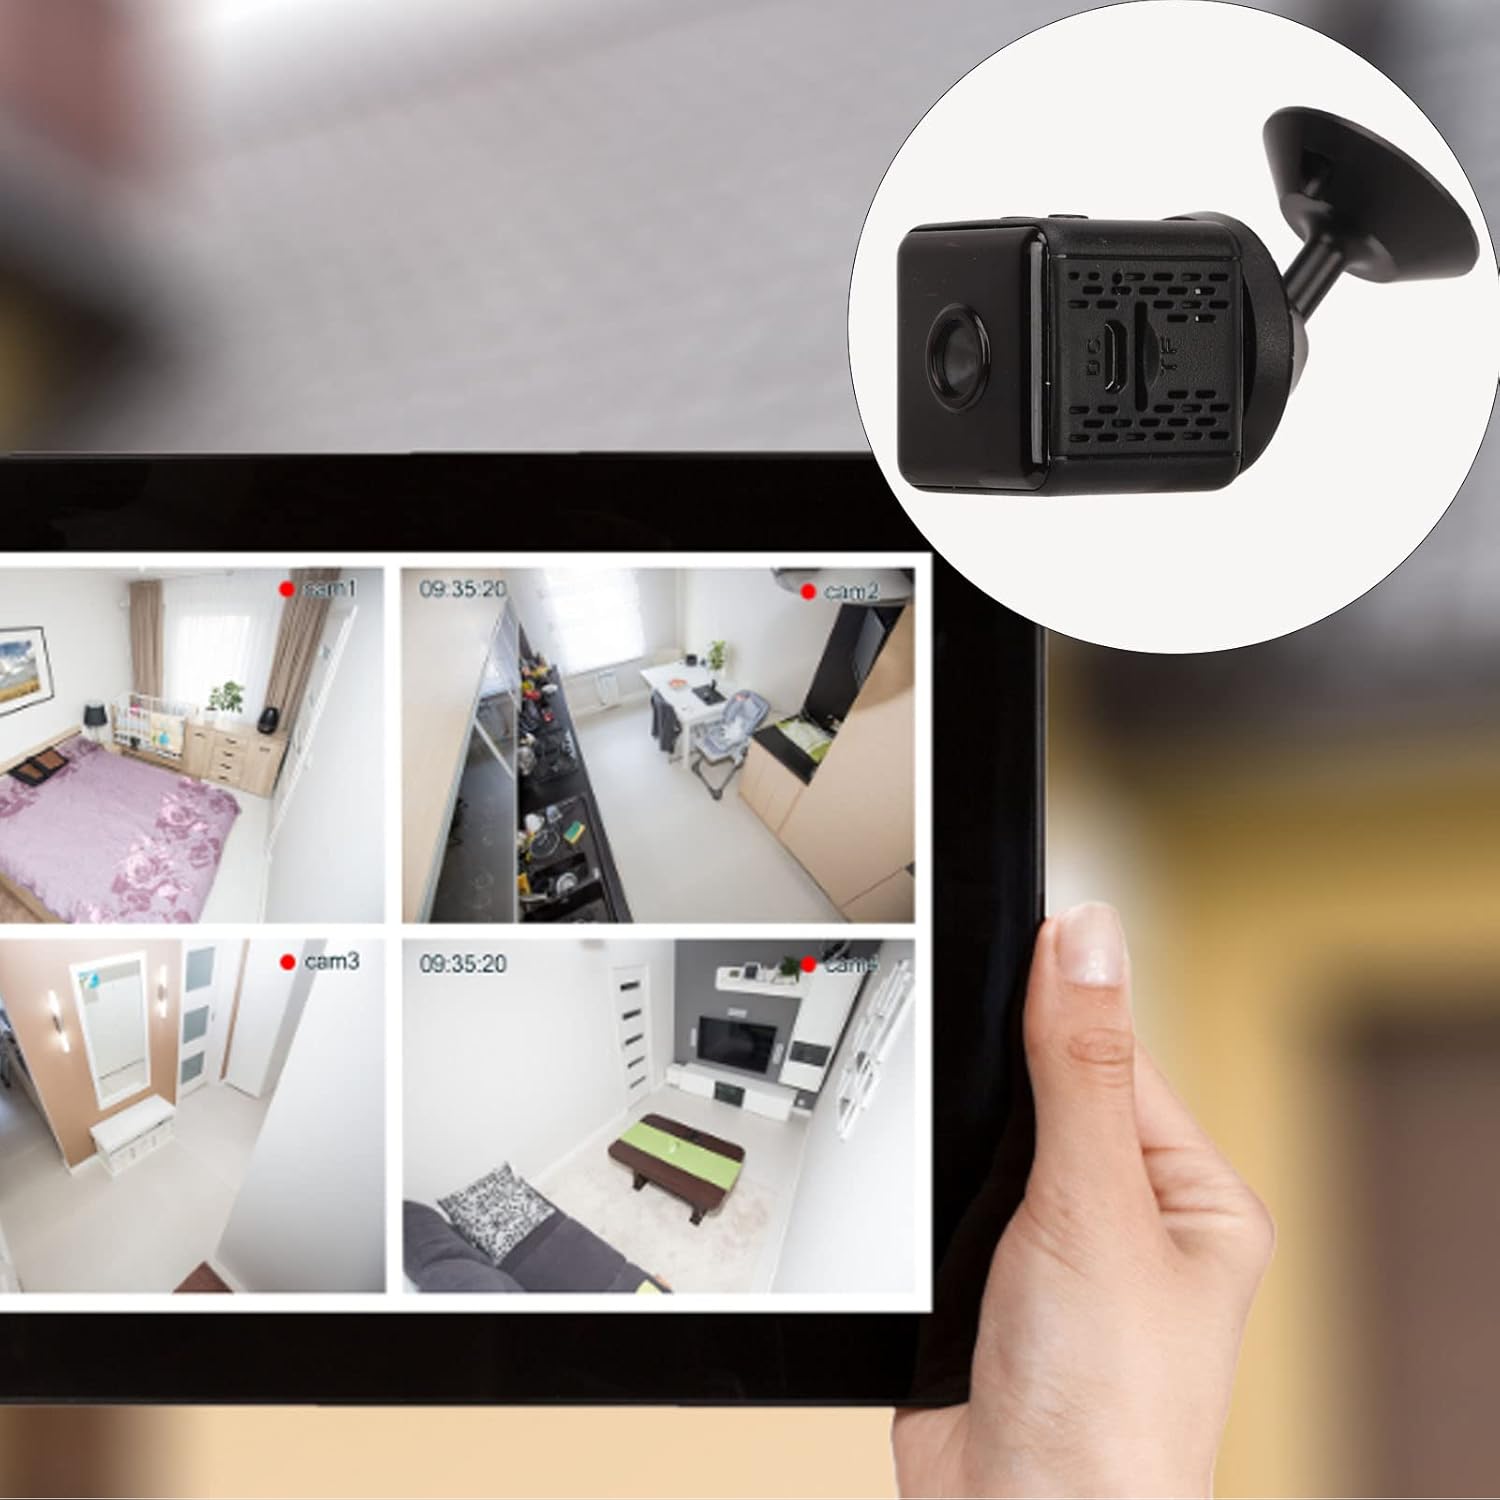
Figure 5.2: Loop Recording Explanation.
This graphic explains how the camera's loop recording works, showing a microSD card and a film strip representing continuous recording that overwrites older footage.
6. Maintenance
Proper maintenance ensures the longevity and optimal performance of your camera.
- Cleaning: Use a soft, dry cloth to clean the camera lens and body. Avoid abrasive cleaners or solvents.
- Battery Care: To prolong battery life, avoid extreme temperatures and fully charge the camera before long periods of inactivity.
- Firmware Updates: Check the manufacturer's website or mobile app for any available firmware updates to ensure optimal performance.
- Storage: Store the camera in a cool, dry place when not in use.
7. Troubleshooting
If you encounter issues with your camera, refer to the following common problems and solutions:
7.1 Camera Not Powering On
- Ensure the camera is fully charged. Connect it to a power source and wait for the charging indicator.
- Verify the power button is pressed and held correctly.
7.2 Cannot Connect to Wi-Fi
- Ensure the camera is within range of your Wi-Fi router.
- Check that your Wi-Fi network password is entered correctly in the app.
- Restart both the camera and your Wi-Fi router.
- Confirm your router is operating on a 2.4GHz frequency, as this camera may not support 5GHz networks.
7.3 Poor Video Quality
- Clean the camera lens with a soft cloth.
- Ensure adequate lighting in the recording area, especially for non-night vision footage.
- Check your internet connection speed if viewing remotely, as a slow connection can affect streaming quality.
7.4 Recording Stops Unexpectedly
- Check if the memory card is full. The camera supports loop recording, but ensure it's functioning correctly.
- Verify the memory card is properly inserted and not corrupted. Try reformatting the card (this will erase all data).
- Ensure the battery is sufficiently charged.
8. Specifications
| Item | Value |
|---|---|
| Item Type | Mini Wireless Camera |
| Material | ABS |
| Product Size (L x W x H) | Approx. 3 x 3 x 3cm / 1.2 x 1.2 x 1.2in |
| Video Resolution | 1080p |
| Battery Life | 60 Minutes (Ultra HD Video Format) |
| Battery Capacity | 350mAh |
| Battery Type | Lithium Polymer Battery |
| Connection Mode | Cell Phone APP Connection |
| Memory Maximum Expansion Capacity | 128GB (Memory Card, not included) |
| Night Vision Mode | Manual, Timed Open |
| Charging Power | 5V1A |
| Charging Interface | Micro USB |
| Charging Time | 30 Minutes (0% to 100%) |
| Compression Standard | H.264 MP, H.264 BP, MJPEF, JPEG Baseline |
| Item Weight | 3.87 ounces |
| Manufacturer | Pilipane |
9. Safety Information
Please observe the following safety guidelines to prevent damage to the device or personal injury:
- Do not expose the camera to extreme temperatures, direct sunlight, or moisture.
- Do not attempt to disassemble or modify the camera. This will void the warranty and may cause damage.
- Keep the camera out of reach of children and pets.
- Use only the specified charging cable and power adapter.
- Dispose of the camera and its battery responsibly according to local regulations.
10. Warranty and Support
For warranty information and technical support, please refer to the documentation included with your purchase or visit the official Pilipane website.
Manufacturer: Pilipane
Date First Available: November 7, 2023