1. Introduction
The Volkano Dew Series Weather Station provides accurate and up-to-date weather information for your home or office. This wireless system includes an indoor display unit and an outdoor sensor unit, offering comprehensive data on indoor and outdoor temperature, humidity, and pressure. It also displays the weather forecast, time, and date, keeping you informed of local conditions.
Key Features:
- Wireless weather station with outdoor sensor unit.
- Large, easy-to-read display shows indoor and outdoor temperature, humidity, and pressure.
- Displays weather forecast, time, and date.
- Outdoor sensor unit can be placed up to 100 meters away from the indoor display unit.
2. Package Contents
Please check the package contents to ensure all items are present:
- Volkano Dew Series Indoor Display Unit
- Volkano Dew Series Outdoor Sensor Unit
- Instruction Manual

Image: The Volkano Dew Series Weather Station main display unit and its accompanying outdoor sensor unit, shown side-by-side.
3. Product Overview
3.1 Indoor Display Unit
The indoor display unit features a large LCD screen that presents all weather data and time information. It typically includes buttons for setting time, alarm, and display modes.
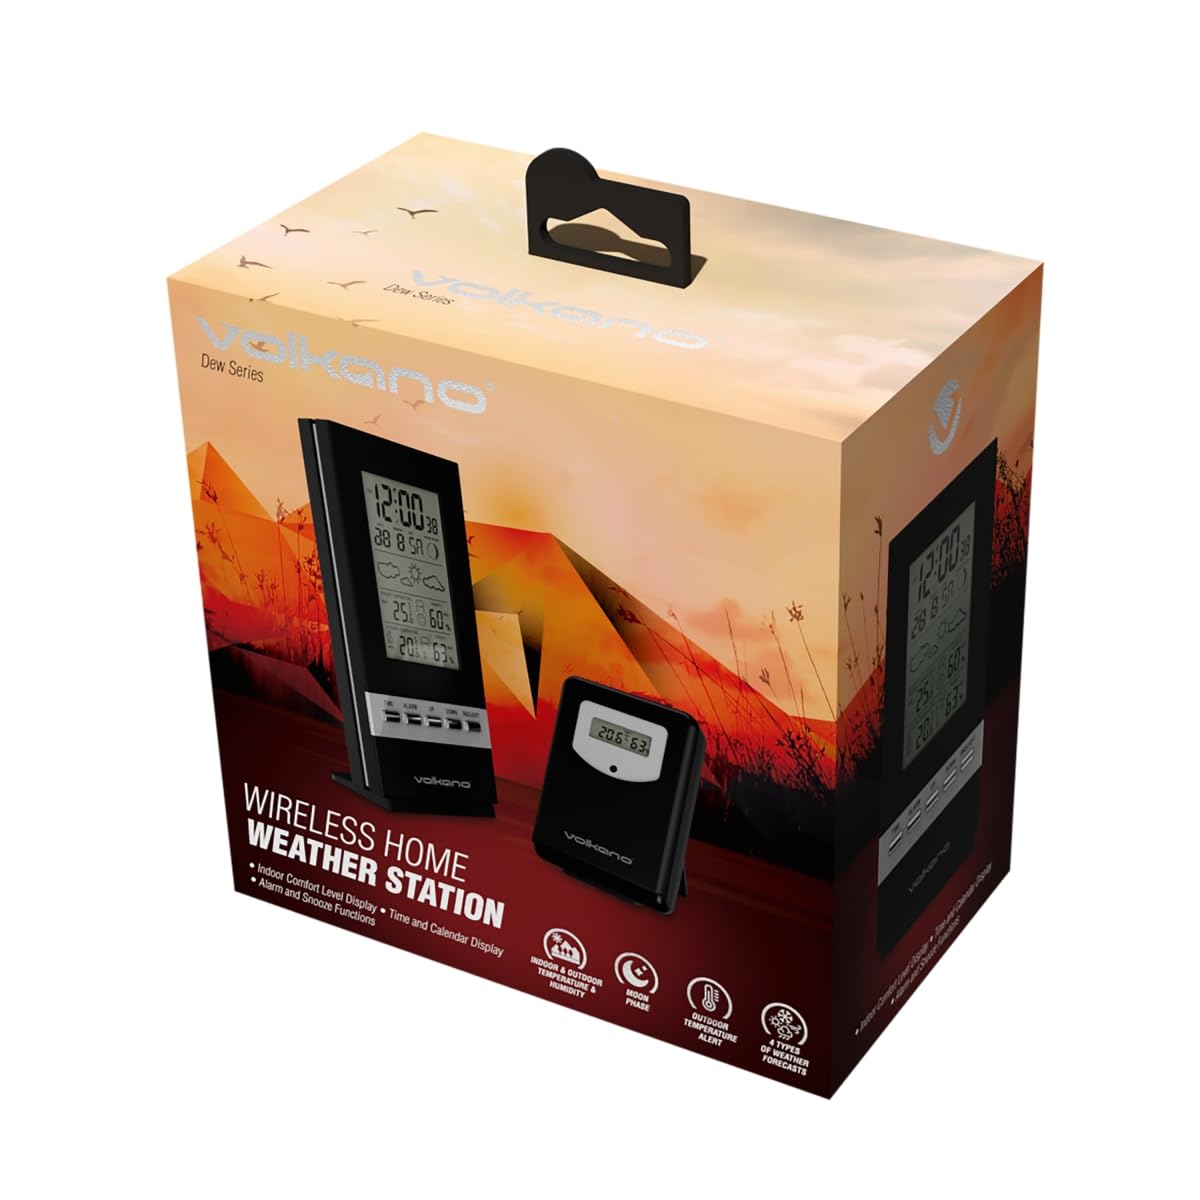
Image: The Volkano Dew Series Weather Station indoor display unit, showing its digital screen with temperature and humidity readings.
3.2 Outdoor Sensor Unit
The outdoor sensor unit is designed to measure external temperature and humidity. It wirelessly transmits this data to the indoor display unit. It is typically compact and weather-resistant.
4. Setup
Follow these steps to set up your Volkano Dew Series Weather Station:
4.1 Battery Installation
- Open the battery compartment on the back of both the indoor display unit and the outdoor sensor unit.
- Insert the required batteries (not included) according to the polarity indicators (+/-).
- Close the battery compartments securely.
4.2 Placing the Outdoor Sensor
- Choose a location for the outdoor sensor that is protected from direct sunlight and precipitation to ensure accurate readings.
- Ensure the sensor is within 100 meters of the indoor display unit for optimal wireless transmission. Avoid large metal objects or thick walls between the units.
- Mount the sensor securely using appropriate hardware (not included).
4.3 Initial Synchronization and Settings
- Once batteries are installed in both units, the indoor display unit will automatically attempt to connect with the outdoor sensor. This may take a few minutes.
- If the outdoor reading does not appear, refer to the Troubleshooting section.
- Set the time and date using the buttons on the indoor display unit (refer to the specific button labels on your device, typically 'TIME', 'SET', 'UP', 'DOWN').
- Select your preferred temperature unit (Celsius or Fahrenheit) and pressure unit (if applicable) using the designated button (e.g., 'C/F' or 'UNIT').
5. Operating the Weather Station
5.1 Reading the Display
The large display provides the following information:
- Indoor Temperature & Humidity: Current readings inside your home.
- Outdoor Temperature & Humidity: Current readings from the outdoor sensor.
- Pressure: Atmospheric pressure reading.
- Weather Forecast: Icons indicating predicted weather conditions (e.g., sunny, cloudy, rainy).
- Time & Date: Current time and calendar date.
5.2 Understanding Weather Forecast Icons
The weather station uses various icons to represent the forecast. These forecasts are based on changes in atmospheric pressure and are an estimation, not a guarantee of future weather conditions.
5.3 Alarm and Snooze Functions
If your unit includes an alarm function, use the 'ALARM' or 'MODE' button to set and activate it. The 'SNOOZE' button typically provides a temporary pause for the alarm.
6. Maintenance
- Cleaning: Wipe the display unit and sensor with a soft, damp cloth. Do not use abrasive cleaners or solvents.
- Battery Replacement: Replace batteries in both units when the low battery indicator appears on the display. Always replace all batteries at the same time.
- Sensor Placement: Periodically check the outdoor sensor's location to ensure it remains protected and has a clear path for wireless transmission.
7. Troubleshooting
| Problem | Possible Cause | Solution |
|---|---|---|
| No outdoor temperature/humidity reading | Outdoor sensor out of range, low batteries, interference, or not synchronized. | Check battery levels in both units. Move sensor closer to the main unit. Remove and reinsert batteries in both units to force re-synchronization. Avoid sources of interference. |
| Inaccurate readings | Sensor exposed to direct sunlight/rain, or placed near heat sources. | Relocate the outdoor sensor to a shaded, protected area. Ensure proper ventilation around both units. |
| Display is dim or blank | Low batteries in the indoor display unit. | Replace batteries in the indoor display unit. |
| Time/Date incorrect | Not set correctly after battery change. | Manually set the time and date using the unit's buttons. |
8. Specifications
| Feature | Detail |
|---|---|
| Brand | Volkano |
| Model Number | VK-6300-BK |
| Colour | Black |
| Display Type | Digital |
| Special Features | Humidity Display, Temperature Display |
| Product Dimensions | 24.2W x 20.5H centimetres |
| Item Weight | 440 g |
| Power Source | Battery Powered |
| Batteries Included | No |
| Outdoor Sensor Range | Up to 100 meters (line of sight) |
9. Warranty and Support
Volkano products are typically backed by a 1-year limited coverage. You may be able to extend this coverage by registering your product. Please refer to the official Volkano website or your purchase documentation for specific warranty terms and registration details.
For any questions, technical assistance, or support regarding your Volkano Dew Series Weather Station, please contact Volkano customer support. You can usually find contact information on the official Volkano website or through the retailer where you purchased the product.