FairyHover 172CM A
FairyHover 5-Tier Shoe and Coat Rack User Manual
Model: 172CM A
Product Overview
The FairyHover 5-Tier Shoe and Coat Rack is a versatile 3-in-1 entryway solution designed to organize your coats, shoes, and accessories efficiently. It features a robust metal frame and wooden shelving units, suitable for entryways, bedrooms, and hallways.
This unit combines a coat stand with a shoe rack, offering 8 hooks for hanging items and multiple levels of storage for footwear. Its compact design helps maximize space while keeping your living areas tidy.

Figure 1: The FairyHover 5-Tier Shoe and Coat Rack (white version) in an entryway, showcasing its coat hanging and shoe storage capabilities.
Package Contents
Before assembly, please ensure all components are present and undamaged. The package typically includes:
- Metal frame components (steel pipes)
- 8 removable coat hooks
- Shelving units (partition cloths)
- Assembly hardware (screws, connectors)
- Instruction manual (this document)

Figure 2: Detail of the widened storage design for shoes and small items, highlighting the shelving units.
Setup and Assembly
Assembly of the FairyHover Shoe and Coat Rack is required and designed to be straightforward. Please follow these general steps. Refer to the included diagram for specific part identification.
- Unpack Components: Carefully remove all parts from the packaging and lay them out on a clean, flat surface. Verify all components listed in the package contents are present.
- Assemble Base Frame: Connect the lower steel pipe sections to form the base of the shoe rack. Ensure all connections are secure.
- Install Shelving Units: Place the partition cloths onto the designated shelf levels. Ensure they are taut and properly seated within the frame. The waterproof interlayer cloth provides effective water resistance.
- Attach Vertical Supports: Connect the vertical steel pipes to the base frame, extending upwards to form the coat rack section.
- Assemble Top Frame: Connect the upper steel pipe sections to complete the top frame of the coat rack. The L-shaped integrated design ensures stability.
- Attach Hooks: Secure the 8 removable coat hooks to the designated bars on the upper section. The double-row hook design provides ample hanging space.
- Final Tightening: Once all parts are assembled, gently tighten all screws and connections to ensure the unit is stable and secure. Avoid over-tightening.
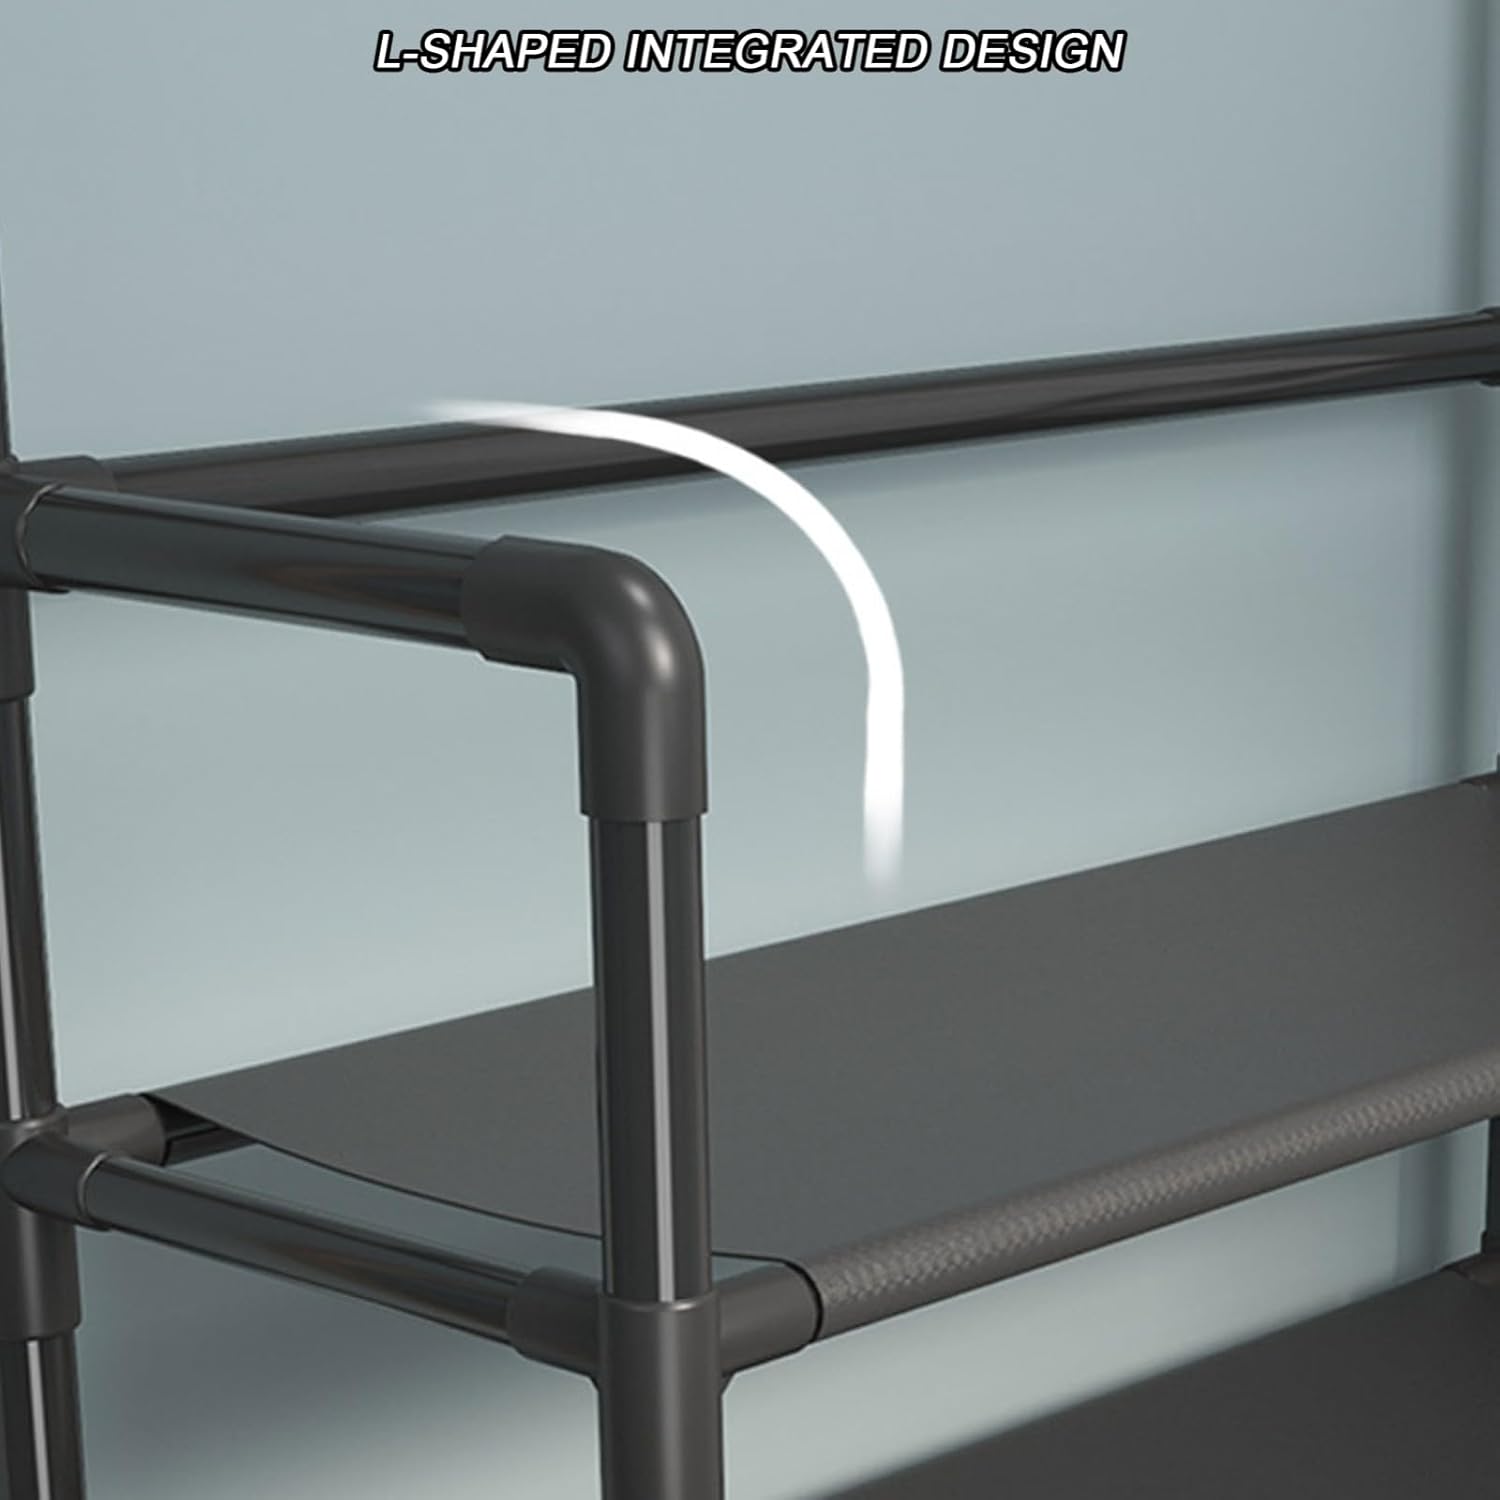
Figure 3: Illustration of the L-shaped integrated design, indicating a secure connection point for structural integrity.

Figure 4: Diagram illustrating the robust construction of the steel pipes, featuring a bare pipe layer, inner anti-rust layer, phosphate-free sealing layer, and electrostatic paint layer for durability.
Operating Instructions
The FairyHover Shoe and Coat Rack is designed for intuitive use:
- Coat Hanging: Utilize the 8 removable hooks to hang coats, jackets, hats, scarves, bags, and other accessories. The hooks are designed for strong bearing capacity.
- Shoe Storage: Place shoes on the 5 levels of bottom storage racks. Each layer can accommodate 3 to 4 pairs of shoes, depending on size.
- Accessory Storage: The top shelf and shoe rack levels can also be used for small storage boxes, decorative items, or other entryway essentials.

Figure 5: Detail of the double row hook design, showing multiple hooks for hanging coats, hats, and other items.
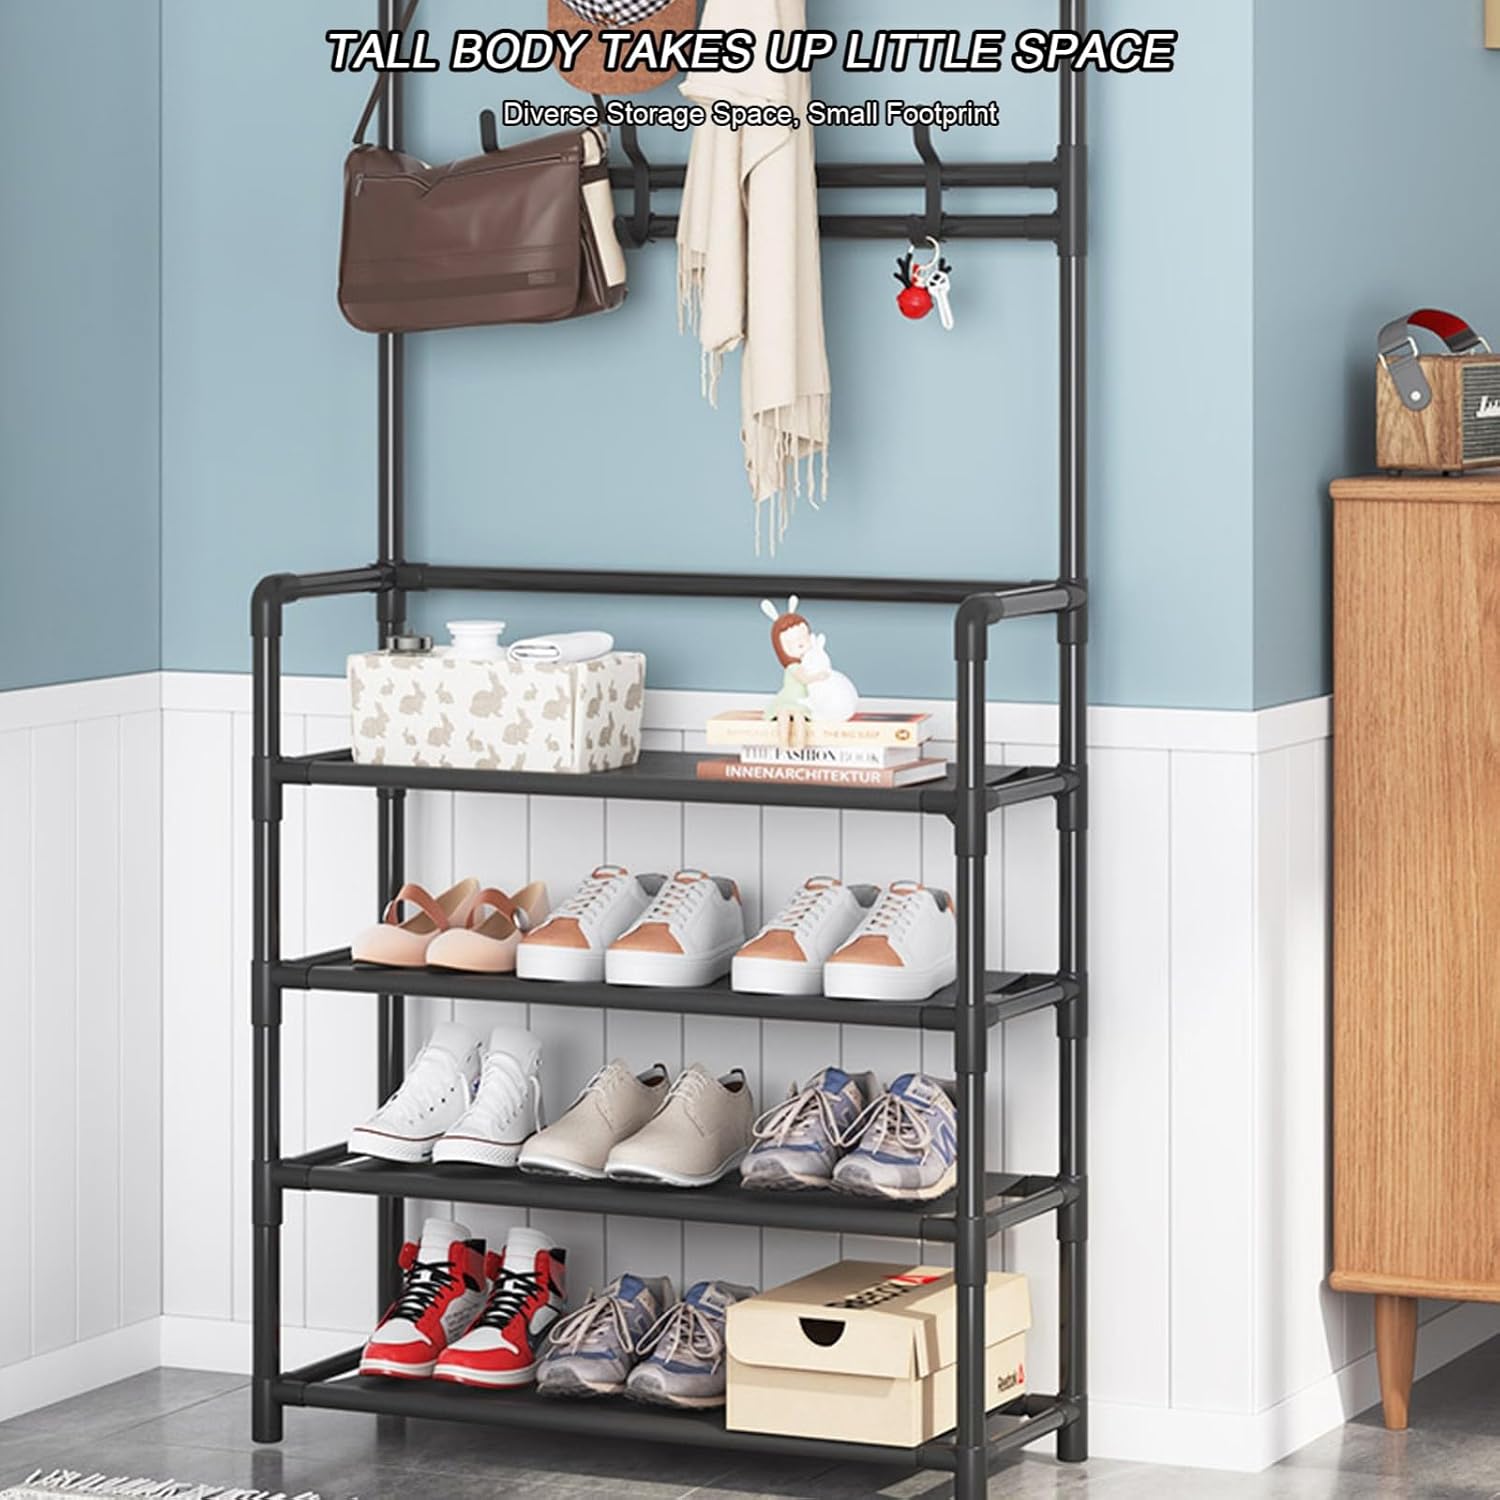
Figure 6: The black variant of the rack, illustrating its tall and slim profile, designed to take up minimal floor space while offering diverse storage.
Maintenance
To ensure the longevity and appearance of your FairyHover Shoe and Coat Rack, follow these simple maintenance guidelines:
- Cleaning: Wipe the metal frame and shelving units with a dry cloth to remove dust and dirt. Avoid using abrasive cleaners or harsh chemicals, which may damage the finish.
- Spills: The shelving units feature a waterproof interlayer cloth. In case of spills, promptly wipe them clean with a dry or slightly damp cloth to prevent moisture buildup.
- Regular Inspection: Periodically check all screws and connections to ensure they remain tight. Re-tighten if necessary to maintain stability.

Figure 7: Detail of a shelf showing the partition cloth, which is made of waterproof material for easy cleaning and protection against spills.
Troubleshooting
If you encounter any issues with your FairyHover Shoe and Coat Rack, consider the following common solutions:
- Instability/Wobbling:
- Ensure all screws and connections are fully tightened.
- Verify the unit is placed on a flat, level surface.
- Check if any components are bent or damaged from shipping; if so, contact customer support.
- Missing Parts:
- Carefully re-check all packaging materials to ensure no small parts were overlooked.
- Refer to the package contents list and contact customer support if parts are genuinely missing.
- Difficulty Assembling:
- Review the assembly steps and diagrams carefully.
- Ensure components are oriented correctly before attempting to connect them.
- Do not force parts together; if they don't fit, re-check the instructions.
Specifications
| Brand | FairyHover |
|---|---|
| Model | 172CM A |
| Material | Steel Pipe |
| Color | A (White) |
| Dimensions (L x W x H) | 80cm x 26cm x 172cm (31.5" x 10.2" x 67.7") |
| Coat Hooks | 8 (removable, double-layer metal) |
| Shoe Rack Levels | 5 (for 172CM model) |
| Assembly Required | Yes |
| Product Care | Wipe with Dry Cloth |
| Country of Origin | China |

Figure 8: Product size diagram, detailing the dimensions of the 172CM model, including height, width, and depth.
Warranty and Support
Specific warranty details for the FairyHover 5-Tier Shoe and Coat Rack are not provided in this manual. For information regarding product warranty, returns, or technical support, please contact the retailer or manufacturer directly.
You may also refer to the product listing on the purchase platform for any available protection plans or extended warranty options.
Related Documents - 172CM A
 |
DOADW 8 Tier Tall Shoe Rack Assembly Instructions A comprehensive assembly guide for the DOADW 8 Tier Tall Shoe Rack, detailing all necessary parts and providing clear, step-by-step instructions for quick and easy setup of this metal shoe organizer. |
 |
SMILOVII Clothes Rail Installation Manual: Assembly Guide Detailed instructions and parts list for assembling your SMILOVII Clothes Rail. Easy-to-follow steps for a sturdy garment rack. |
 |
WowLive Simple Shoe Rack Assembly Instructions and Guide Comprehensive assembly instructions and product details for the WowLive Simple Shoe Rack, featuring DIY assembly options, product dimensions, safety guidelines, and contact information for various models like SSS2B7, SSS2B9, and SSS3B9. |
 |
Entryway Coat Rack Assembly Instructions - Model HOGA-LD0044 Step-by-step assembly instructions for the Entryway Coat Rack, Model No. HOGA-LD0044. Includes parts list, hardware list, and detailed assembly steps with textual descriptions of diagrams. |
 |
Assembly Instructions for ECOMEX Shoe Rack Bench Step-by-step assembly guide for the ECOMEX 3-Tier Bamboo Shoe Rack Bench, including a parts list and detailed visual instructions for assembly. |
 |
HOMEFORT PG-01SR024A 10-Tier Vertical Shoe Rack Assembly Instructions Comprehensive guide for assembling the HOMEFORT PG-01SR024A 10-Tier Vertical Shoe Rack. Includes safety warnings, parts list, hardware details, and step-by-step assembly instructions for home organization. |
Ask a question about this manual
Ask about setup, troubleshooting, compatibility, parts, safety, or missing instructions. Manuals+ will review the question and use this page’s manual context to help answer it.