BBQration Charbroil TRU-Infrared 2-Burner, 3-Burner, 4-Burner Series Compatible Parts
Instruction Manual for BBQration Grill Replacement Parts
Model: Charbroil TRU-Infrared Series Compatible Parts
Product Overview
This manual provides detailed instructions for the installation and maintenance of your BBQration Stainless Steel Heat Plate Shields and Burner Parts. These replacement components are designed to restore optimal performance to your Charbroil TRU-Infrared grill.
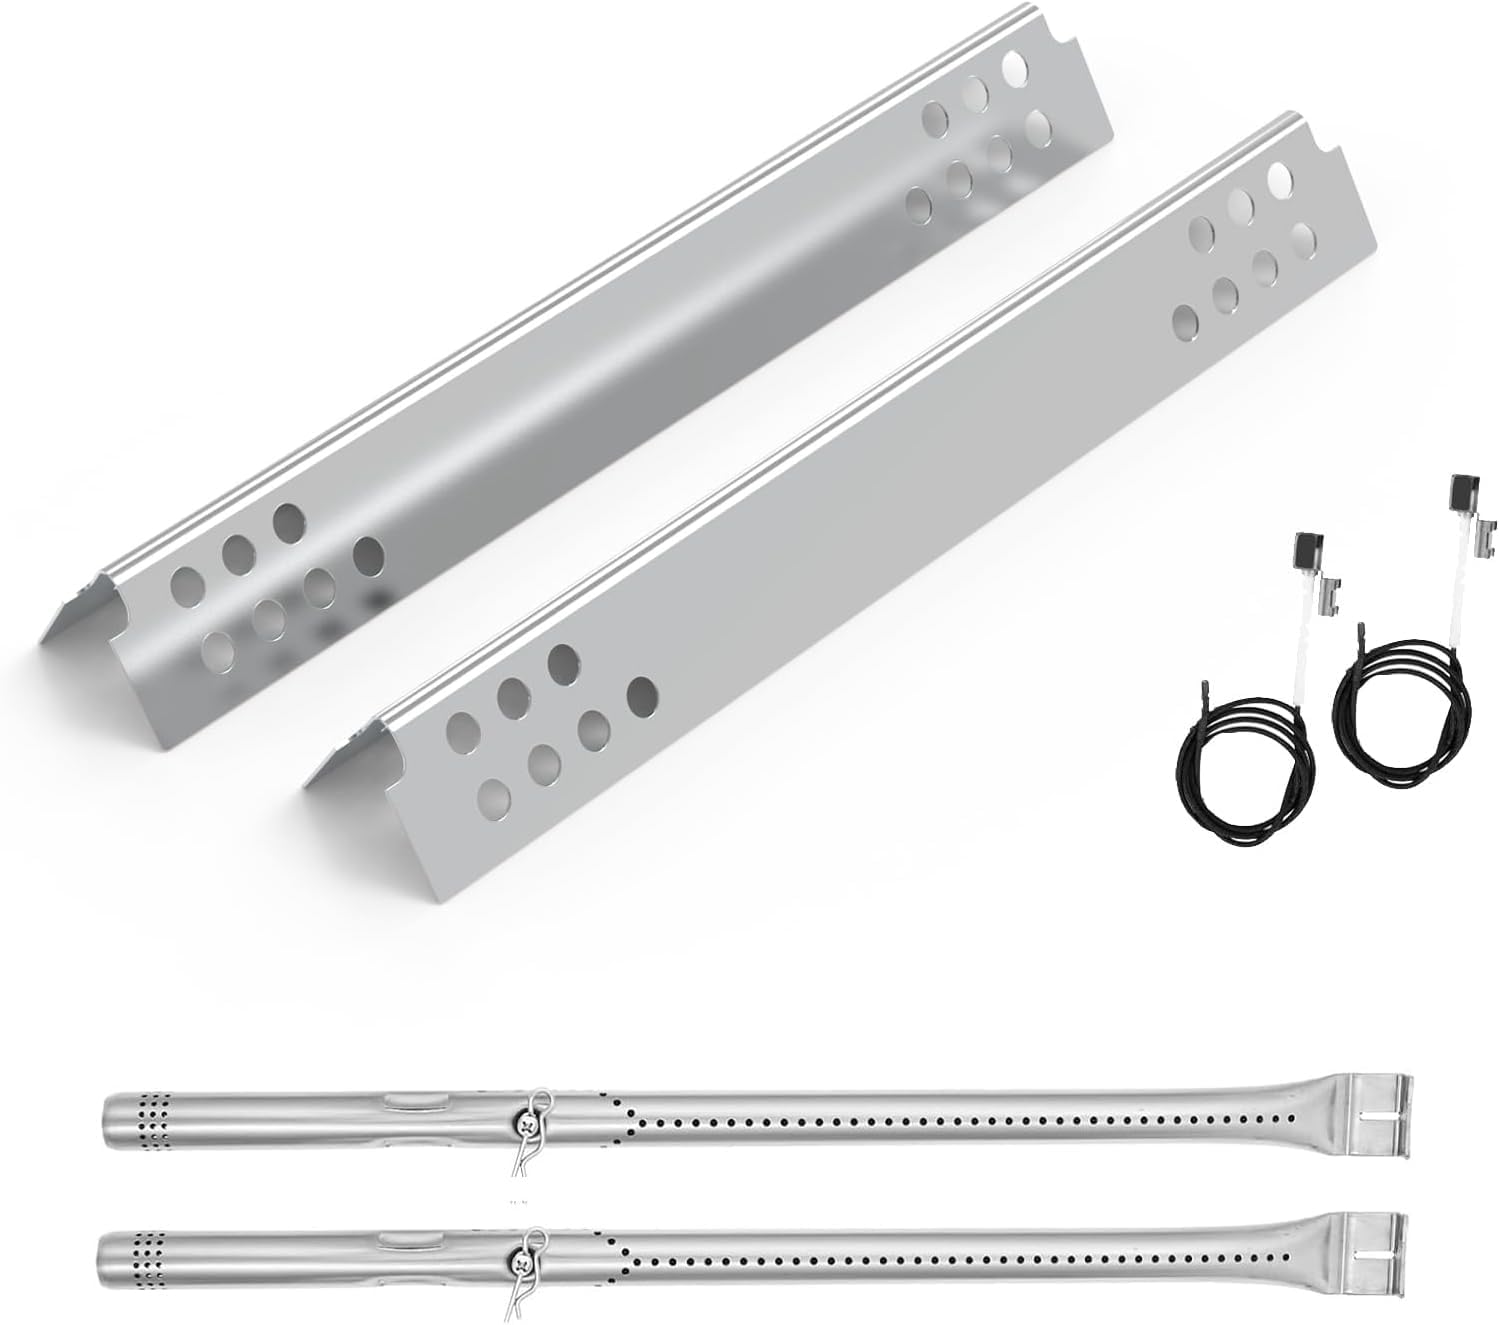
Image: The complete set of BBQration grill replacement parts, including two stainless steel heat plates, two stainless steel burners, and two grill igniters.
Package Contents
Verify that all items listed below are present in your package:
- 2 x Stainless Steel Heat Tent (Heat Plate Shields)
- 2 x Stainless Steel Burner
- 2 x Grill Igniter
Compatible Grill Models
These replacement parts are compatible with various Charbroil TRU-Infrared grill models. Please confirm your grill model number before installation.

Image: Visual guide to compatible Charbroil TRU-Infrared grill models, including 2-burner (e.g., 463644220, 463642316), 3-burner (e.g., 463355220, 463242515), and 4-burner (e.g., 463257520, 463242715) series.
2-Burner Grill Models:
- Charbroil Commercial TRU-Infrared 2-Burner Grills: 463644220, 463642316, 466642316, 466642416
- Charbroil Signature TRU-Infrared 2-Burner Grills: 463632520, 463632320, 463675016, 463675016P1
3-Burner Grill Models (Requires 2 x 2-Pack of these parts):
- Charbroil Commercial TRU-Infrared 3-Burner Grills: 463355220, 466243219, 463242515, 463242516, 463243016, 466242515, 466242516, 466242616, 466242615
- Charbroil Signature TRU-Infrared 3-Burner Grills: 463342420, 463342620, 463367016, 463246018, 4463346017
4-Burner Grill Models (Requires 2 x 2-Pack of these parts):
- Charbroil Commercial TRU-Infrared 4-Burner Grills: 463257520, 463242715, 463242716, 466242815, 466242816, 463245518
- Charbroil Signature TRU-Infrared 4-Burner Grills: 463255721, 463276016, 463255020
Product Dimensions
Ensure these dimensions match your existing grill components for proper fitment.
- Heat Plate Dimension: 15 1/4 inches (length) x 1 13/16 inches (width)
- Burner Dimension: 14 3/4 inches (length) x 3/5 inches (diameter)

Image: Detailed dimension diagram for the heat plate and burner, alongside a visual comparison of a grill's interior before and after installing new parts.
Setup and Installation
Replacing your grill's heat plates, burners, and igniters is a straightforward process. Always ensure your grill is completely cool and disconnected from its fuel source before beginning any installation or maintenance.
1. Removing Old Components:
- Open the grill lid and remove the cooking grates and any existing infrared emitter plates.
- Carefully lift out the old heat plates and burners. Note their orientation for reference.
- Disconnect the old igniter wires from the igniter module and remove the old igniter electrodes.
Image: A visual comparison demonstrating the worn-out state of old grill components ("Before") versus the clean, new appearance after installing the replacement parts ("After").
2. Installing New Burners:
- Position the new stainless steel burners into their respective slots, ensuring they are properly seated over the gas orifices.
- Secure the burners if your grill model requires fasteners.

Image: Detailed views of the stainless steel burner, highlighting its construction, perforations for gas flow, and connection points for secure installation. These burners are designed for improved thermal efficiency and durability.
3. Installing New Heat Plates:
- Place the new stainless steel heat plates directly over the installed burners. Ensure they sit flush and cover the burners adequately to distribute heat evenly.

Image: Detailed views of the stainless steel heat plate, showcasing its design for even heat distribution and long-lasting performance. These plates are original part number G466-0024-W1 replacements.
4. Connecting Igniters:
- Attach the new grill igniters to the designated points near the burners.
- Connect the igniter wires to the igniter module, ensuring a secure connection for efficient ignition.

Image: Illustration of the efficient ignition process, showing an electrical spark. Insets provide close-up views of the igniter's connection points, demonstrating its simple and easy installation.
5. Final Assembly:
- Replace the infrared emitter plates and cooking grates.
- Reconnect the grill to its fuel source and perform a leak test if necessary.
- Test the ignition system to ensure all burners light properly.
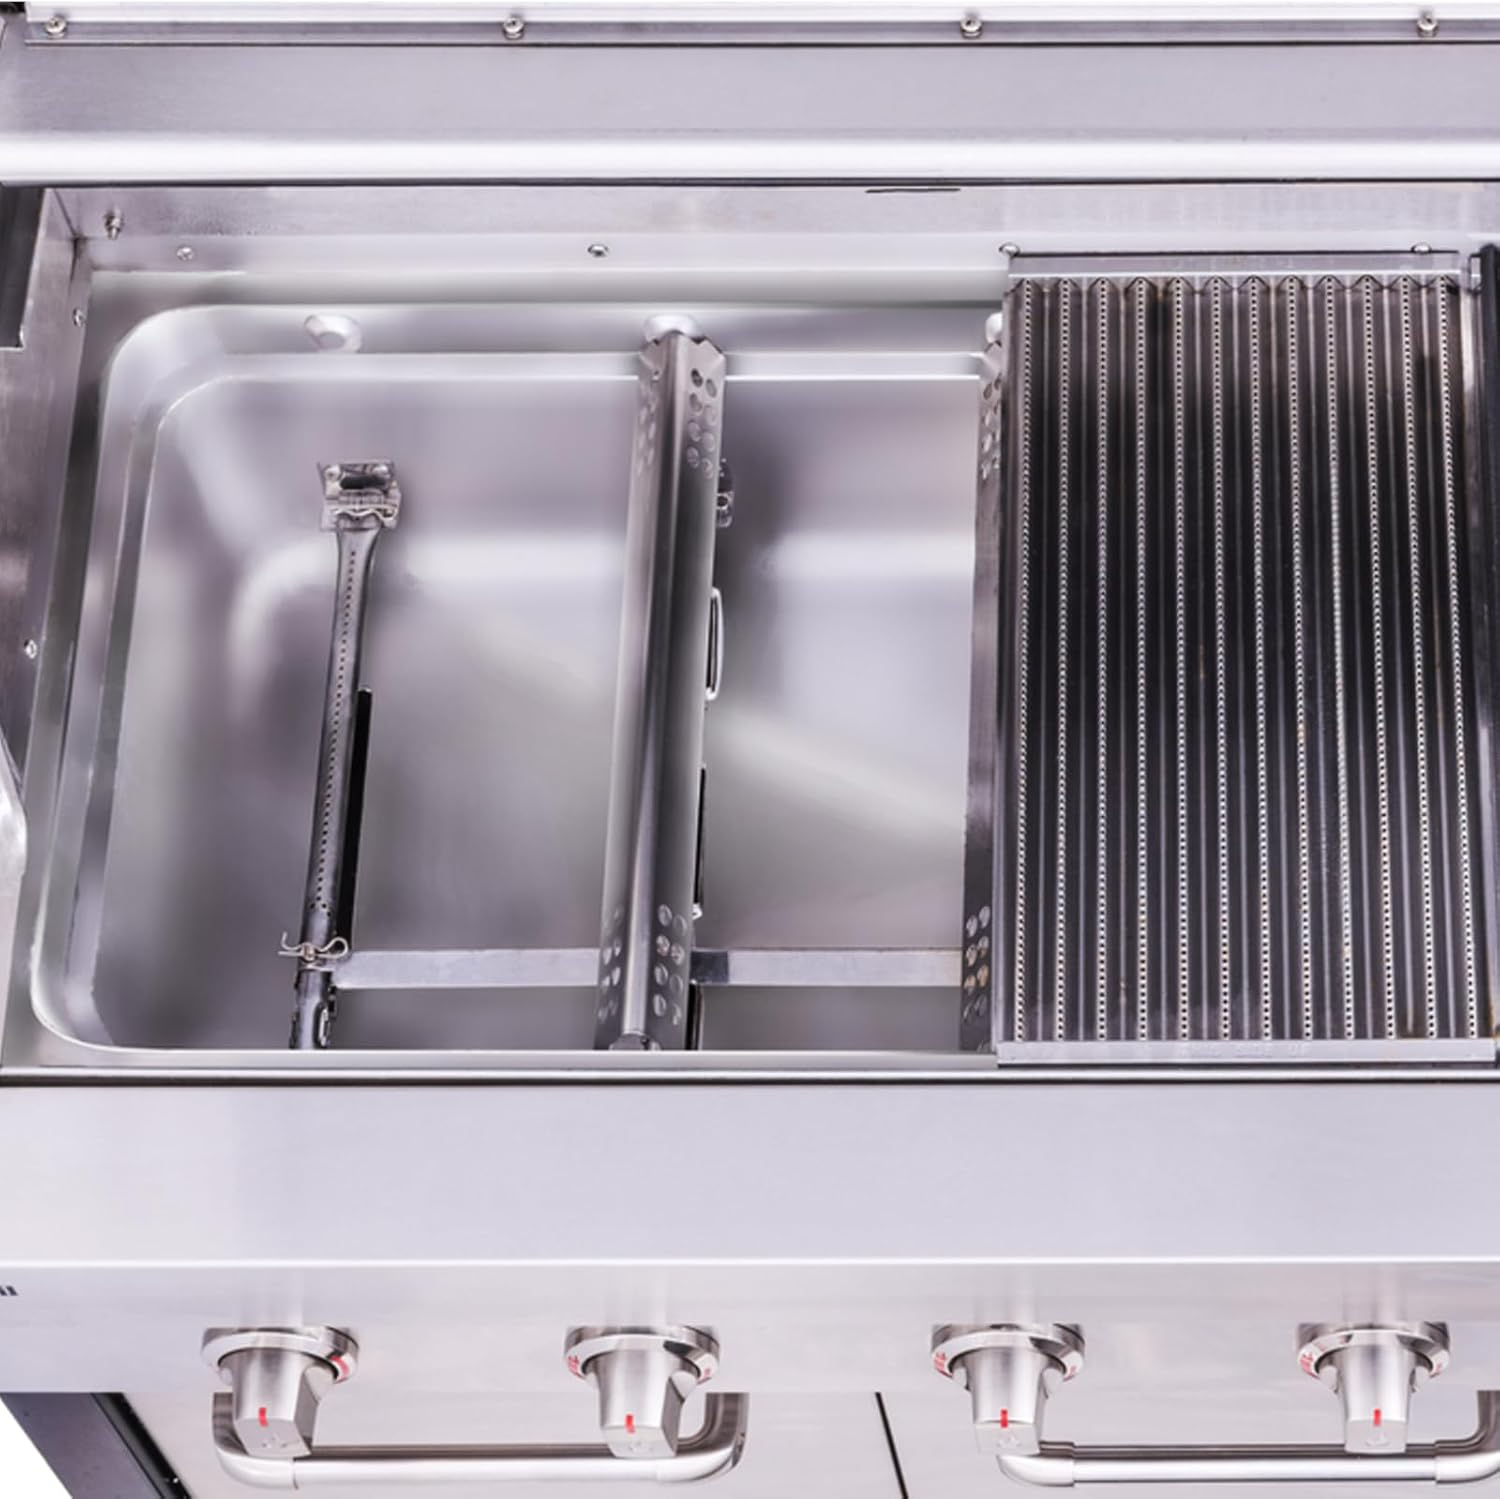
Image: An overhead view of a grill's cooking chamber, showcasing the newly installed heat plates and burners, indicating readiness for operation.
Operating Your Grill with New Parts
Once installed, your grill should operate as intended, providing efficient and even heat. Always follow the operating instructions provided with your specific Charbroil grill model.

Image: A grill in operation, showing the blue flames from the burners beneath the grates, with food cooking, demonstrating proper function after part replacement.
Maintenance
Regular maintenance of your grill components will extend their lifespan and ensure consistent performance.
- Cleaning Heat Plates: After each use, allow the grill to cool. Scrape off any food debris from the heat plates using a grill brush or scraper. For stubborn residue, remove the plates and wash with warm, soapy water, then rinse and dry thoroughly.
- Cleaning Burners: Periodically inspect burner ports for blockages (e.g., spider webs, food debris). Use a wire brush or a stiff wire to clear any obstructions. Ensure gas orifices are clear.
- Igniter Care: Keep igniter electrodes clean and free of grease buildup to ensure reliable sparking.
- Storage: If storing the grill for an extended period, ensure all components are clean and dry to prevent corrosion.
Troubleshooting
If you encounter issues after installing your new parts, consider the following common solutions:
| Problem | Possible Cause | Solution |
|---|---|---|
| Burner not lighting | Igniter not sparking; Gas flow issue; Clogged burner port. | Check igniter wire connection. Ensure gas tank is open and full. Clear burner ports. |
| Uneven heating | Heat plates misaligned; Clogged burner ports; Incorrect burner placement. | Verify heat plates are seated correctly. Clean burner ports. Re-check burner installation. |
| Low flame | Low gas pressure; Clogged burner. | Check gas tank level. Clear burner ports. Ensure regulator is functioning. |
Specifications
- Product Type: Grill Replacement Parts (Heat Plates, Burners, Igniters)
- Material: Stainless Steel
- Heat Plate Original Part Number: G466-0024-W1
- Burner Original Part Number: G466-2500-W1
- Product Dimensions: 8 x 5 x 2 inches (packaged)
- Item Weight: 1.59 pounds
- Manufacturer: BBQration
- Country of Origin: China
Warranty and Support
For any questions regarding installation, compatibility, or product performance, please contact BBQration customer support. Refer to your purchase documentation for specific warranty details.
You can find more information and contact details by visiting the official BBQration store on Amazon: BBQration Store
Ask a question about this manual
Ask about setup, troubleshooting, compatibility, parts, safety, or missing instructions. Manuals+ will review the question and use this page’s manual context to help answer it.