1. Introduction
This manual provides essential instructions for the proper installation, operation, and maintenance of your XGEDA CV9256-A42 LCD TV Motherboard. Please read this manual thoroughly before attempting any installation or operation to ensure correct usage and prevent damage to the product or connected devices.
2. Safety Information
Always observe the following safety precautions to prevent injury and damage:
- Disconnect power from the television before installing or removing the motherboard.
- Wear an anti-static wrist strap to prevent electrostatic discharge (ESD) damage to sensitive electronic components.
- Handle the motherboard by its edges; avoid touching components directly.
- Ensure all connections are secure and correctly oriented before applying power.
- Do not expose the motherboard to moisture or extreme temperatures.
3. Setup and Installation
3.1 Pre-installation Checks
- Verify that the XGEDA CV9256-A42 motherboard is compatible with your specific LCD TV model.
- Ensure you have the necessary tools: Phillips head screwdriver, anti-static wrist strap, and a clean, well-lit workspace.
- Unpack the motherboard carefully and inspect it for any visible damage.
3.2 Installation Steps
- Power Disconnection: Turn off the television and unplug it from the power outlet.
- Access Panel Removal: Carefully remove the back panel of your LCD TV to access the existing motherboard. Refer to your TV's service manual for specific instructions.
- Static Protection: Put on an anti-static wrist strap and connect it to a grounded metal object.
- Disconnect Cables: Disconnect all cables connected to the old motherboard, noting their positions for re-connection. Take photos if necessary.
- Remove Old Motherboard: Unscrew and carefully remove the old motherboard from the TV chassis.
- Install New Motherboard: Align the XGEDA CV9256-A42 motherboard with the mounting holes in the TV chassis. Gently place it into position and secure it with the appropriate screws. Do not overtighten.
- Connect Cables: Reconnect all cables to the new motherboard. Ensure that the 24-Pin main power connector, display cables, and other peripheral connectors are firmly seated.
- Verify Connections: Double-check all connections to ensure they are correct and secure.
- Close Panel: Replace the TV's back panel.
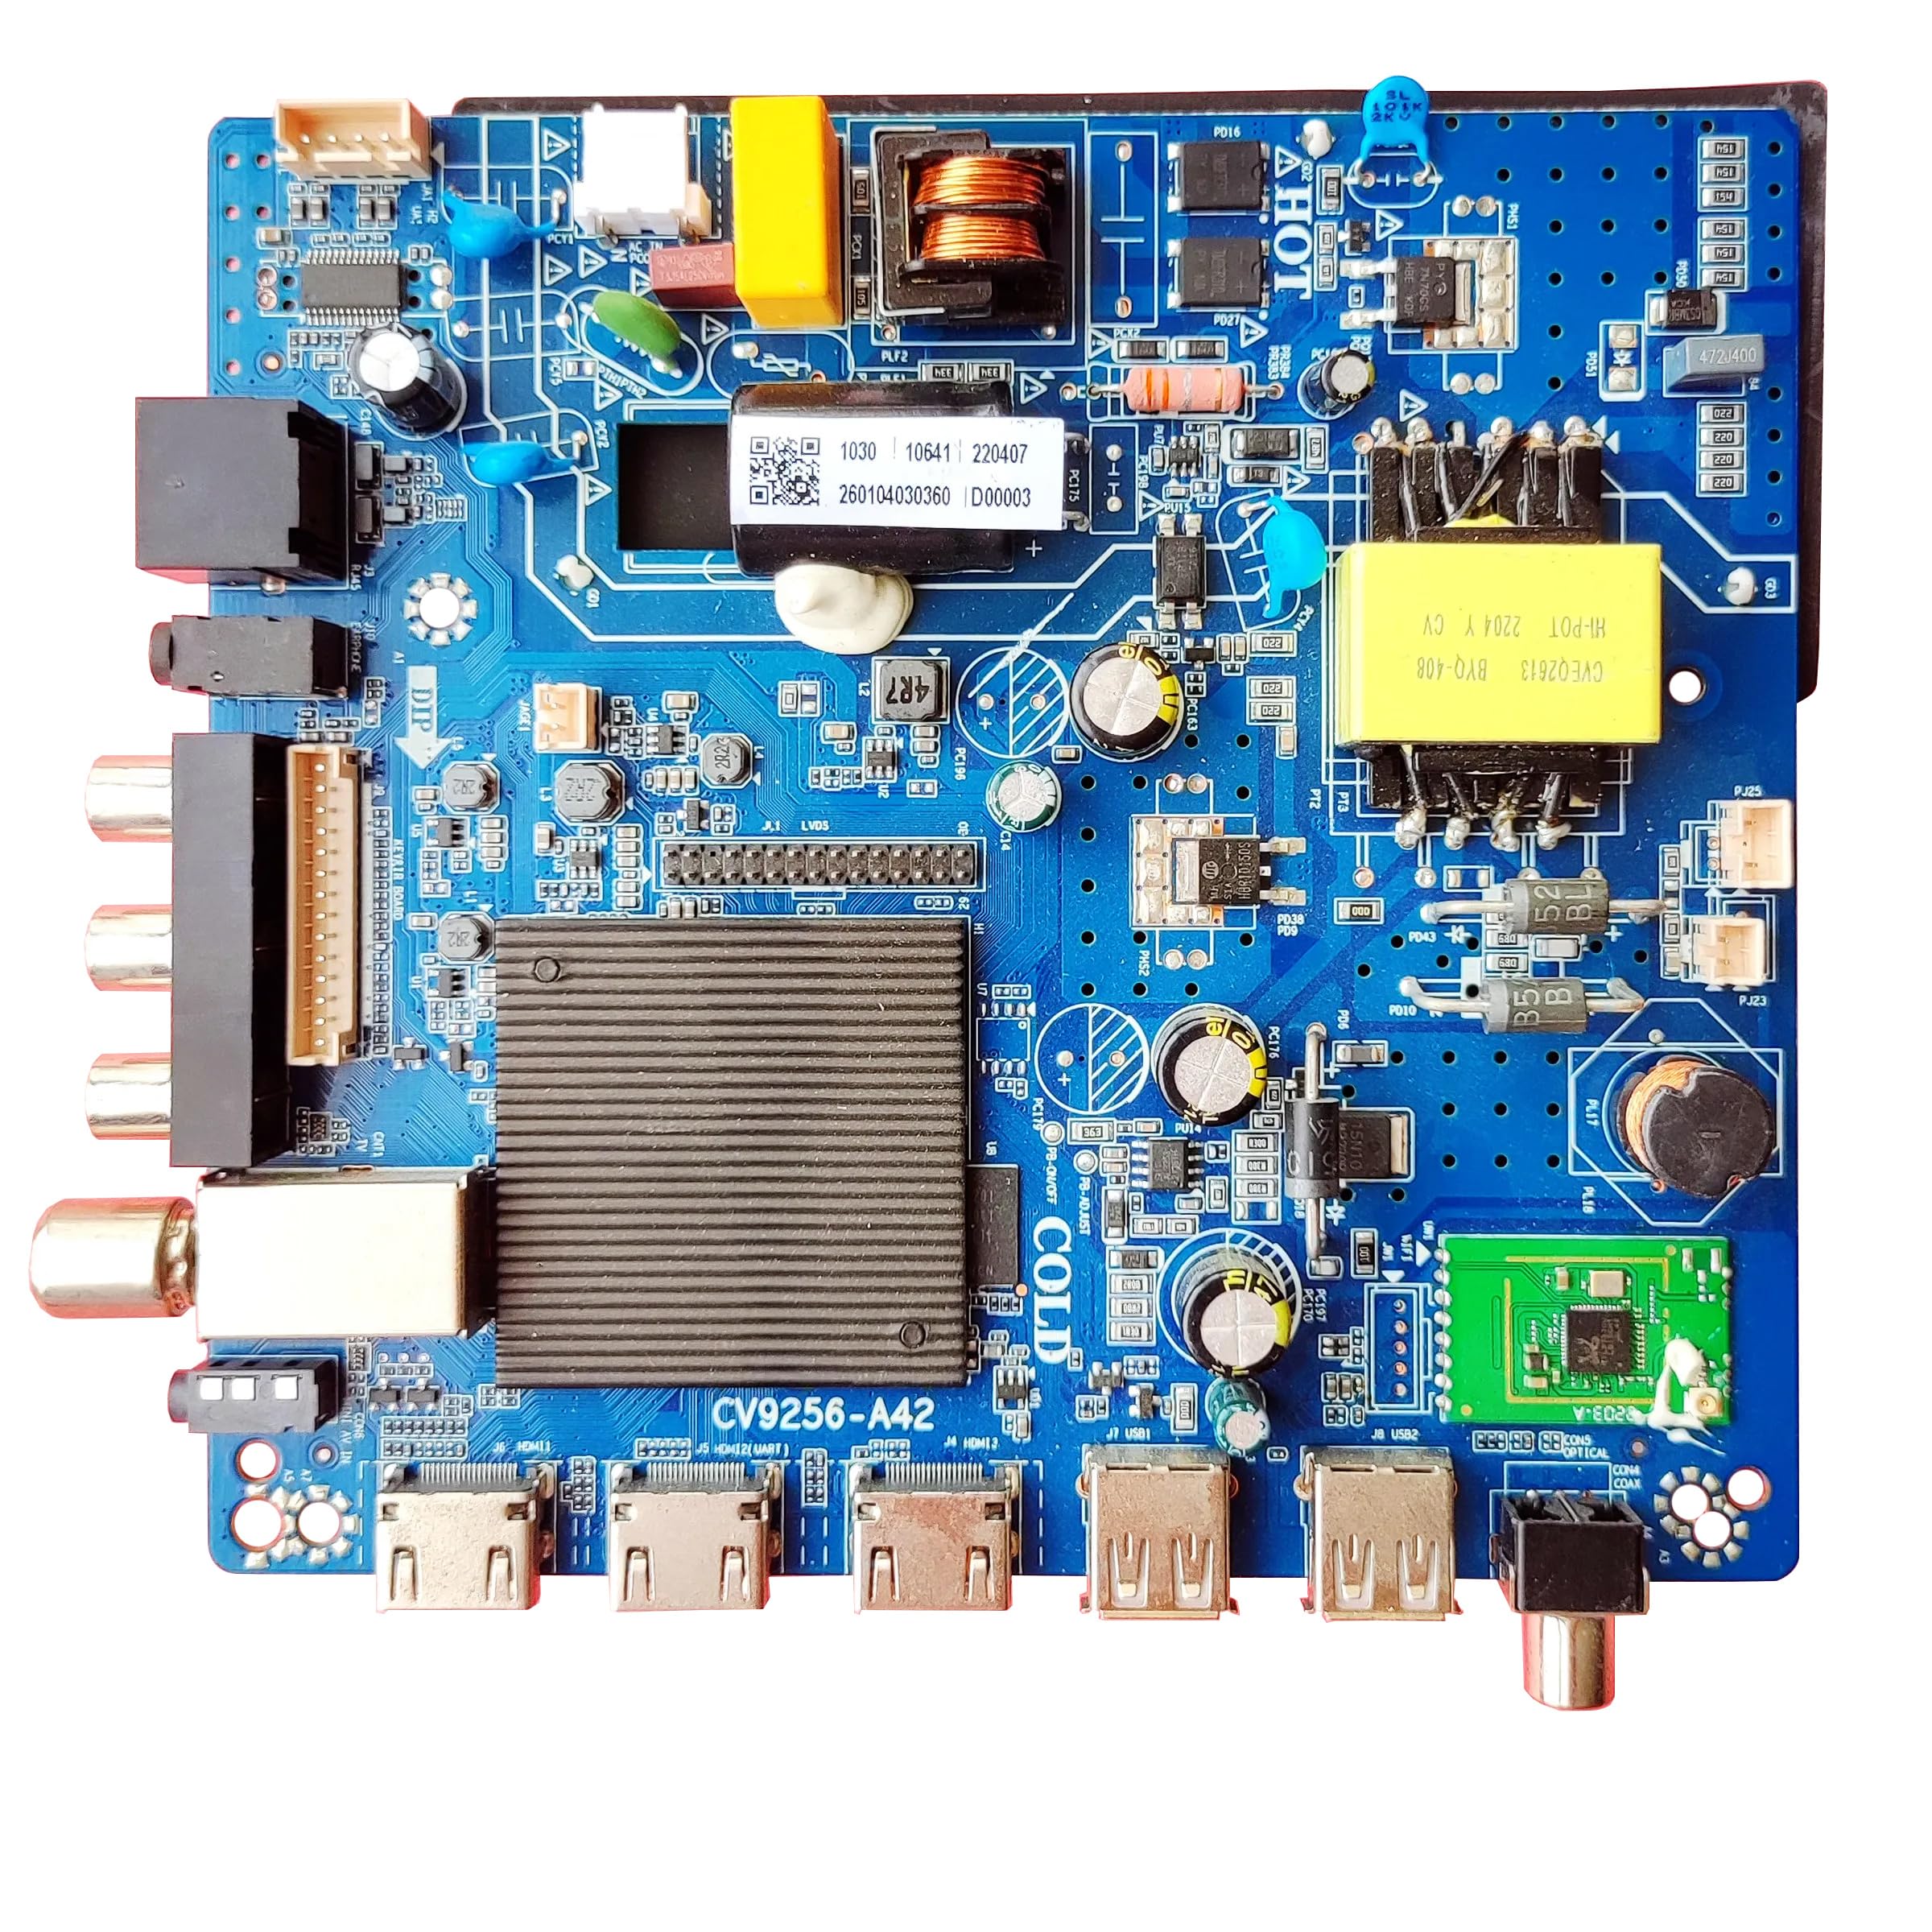
Figure 3.2.1: XGEDA CV9256-A42 LCD TV Motherboard. This image shows the overall layout of the motherboard with various ports and components visible, including the main power connector and memory slots.
4. Operating Instructions
4.1 Initial Power-On
- After installation, plug the TV back into the power outlet.
- Press the power button on the TV or remote control.
- Observe the TV screen for display. If the TV powers on and displays an image, the installation was successful.
4.2 Basic Functionality
The motherboard is designed to restore the core functionality of your LCD TV. This includes:
- Video and audio output to the display and speakers.
- Processing of input signals from various sources (HDMI, AV, etc.).
- Control of TV settings via the remote control or onboard buttons.
5. Maintenance
5.1 Cleaning
- Ensure the TV is powered off and unplugged before cleaning.
- Use a soft, dry, lint-free cloth to gently wipe away dust from the TV's vents and exterior.
- Do not use liquid cleaners or sprays directly on the motherboard or inside the TV.
- For internal cleaning (recommended only for experienced technicians), use compressed air to remove dust from components, holding the can upright to prevent liquid propellant discharge.
5.2 Storage
If the TV is to be stored for an extended period, ensure it is kept in a cool, dry environment, away from direct sunlight and extreme temperature fluctuations.
6. Troubleshooting
This section addresses common issues you might encounter. For complex problems, consult a qualified technician.
| Problem | Possible Cause | Solution |
|---|---|---|
| TV does not power on | Loose power cable, faulty power supply, incorrect motherboard installation. | Check power cable connection. Verify power supply unit. Re-check all motherboard connections. |
| No display on screen | Loose display cable, incorrect input source selected, faulty display panel. | Ensure display cables are securely connected. Select the correct input source using the TV remote. |
| No audio | Loose audio cables, muted volume, faulty speakers. | Check audio cable connections. Increase volume. Test with external speakers if possible. |
| Remote control not working | Dead batteries, obstructed sensor, remote not paired (if applicable). | Replace remote batteries. Clear any obstructions to the TV's IR sensor. |
7. Specifications
Key technical specifications for the XGEDA CV9256-A42 LCD TV Motherboard:
| Feature | Detail |
|---|---|
| Model Number | CV9256-A42 |
| Manufacturer | XGEDA |
| Compatible Devices | Television |
| Main Power Connector Type | 24-Pin |
| Graphics Card Interface | PCI Express |
| Memory Slots Available | 2 |
| Number of Ports | 2 |
| System Bus Standard Supported | SATA 2 |
| Number of USB 2 Ports | 2 |
| Total USB Ports | 1 |
| UPC | 767552665582 |
| Date First Available | November 6, 2023 |
8. Warranty Information
For specific warranty terms and conditions, please refer to the documentation provided with your purchase or contact the seller directly. General warranty typically covers manufacturing defects for a limited period from the date of purchase.
9. Support
If you require further assistance or encounter issues not covered in this manual, please contact your retailer or the manufacturer's customer support. Have your product model number (CV9256-A42) and purchase details ready when contacting support.