1. Introduction
This manual provides detailed instructions for the assembly, operation, and maintenance of your Rolife Garden House Book Nook Kit (TGB06) and Flower Bouquet 3D Wooden Puzzle (TW01H). Please read all instructions carefully before beginning assembly to ensure a smooth and enjoyable building experience.
2. Product Overview
The Rolife Garden House Book Nook Kit and Flower Bouquet are intricate 3D wooden puzzles designed for adult enthusiasts. The Garden House (TGB06) creates a miniature scene with internal lighting, while the Flower Bouquet (TW01H) forms a decorative floral arrangement.

Image 2.1: The complete Rolife Garden House Book Nook Kit and Flower Bouquet 3D Wooden Puzzle.
Key Features:
- Exquisite Design: Combines three-dimensional structures with detailed internal landscapes, offering an aesthetic and imaginative miniature world.
- Durable Materials: Constructed from robust wooden components for a lasting build.
- Engaging DIY Experience: Provides an enjoyable and rewarding assembly process.
- Decorative Display: Suitable for display on bookshelves, desks, or cabinets as a unique collectible.
- Integrated Lighting (Garden House): Features internal lighting to enhance the miniature scene.
3. Setup and Assembly
Assembly of both the Garden House and the Flower Bouquet involves carefully connecting wooden puzzle pieces. The estimated assembly time for the Garden House is approximately 6 hours, and for the Flower Bouquet, it may take 3-4 hours. Follow the included graphical instructions for each kit.
3.1 Required Tools and Materials (Not Included):
- 2 x AAA Batteries (for Garden House lighting)
- Small craft knife or sandpaper (optional, for smoothing edges)
- Wood glue (optional, for added stability)
3.2 General Assembly Steps:
- Unpack Components: Carefully remove all wooden sheets and other components from the packaging. Verify that all parts are present according to the parts list in your specific kit's manual.
- Identify Parts: Each wooden piece is typically numbered or labeled. Refer to the instruction manual to identify the correct pieces for each step.
- Detach Pieces: Gently detach the wooden pieces from their frames. Use a craft knife if necessary to carefully cut any remaining tabs, ensuring clean edges.
- Assemble According to Instructions: Follow the step-by-step diagrams provided in your kit's manual. Pay close attention to the orientation and connection points of each piece.
- Connect Electrical Components (Garden House): During the Garden House assembly, connect the wiring for the internal lights as indicated in the manual. Insert 2 AAA batteries into the designated battery compartment once assembly is complete.
- Secure Connections: Ensure all connections are firm. If using wood glue, apply sparingly to joints for increased stability, allowing adequate drying time.
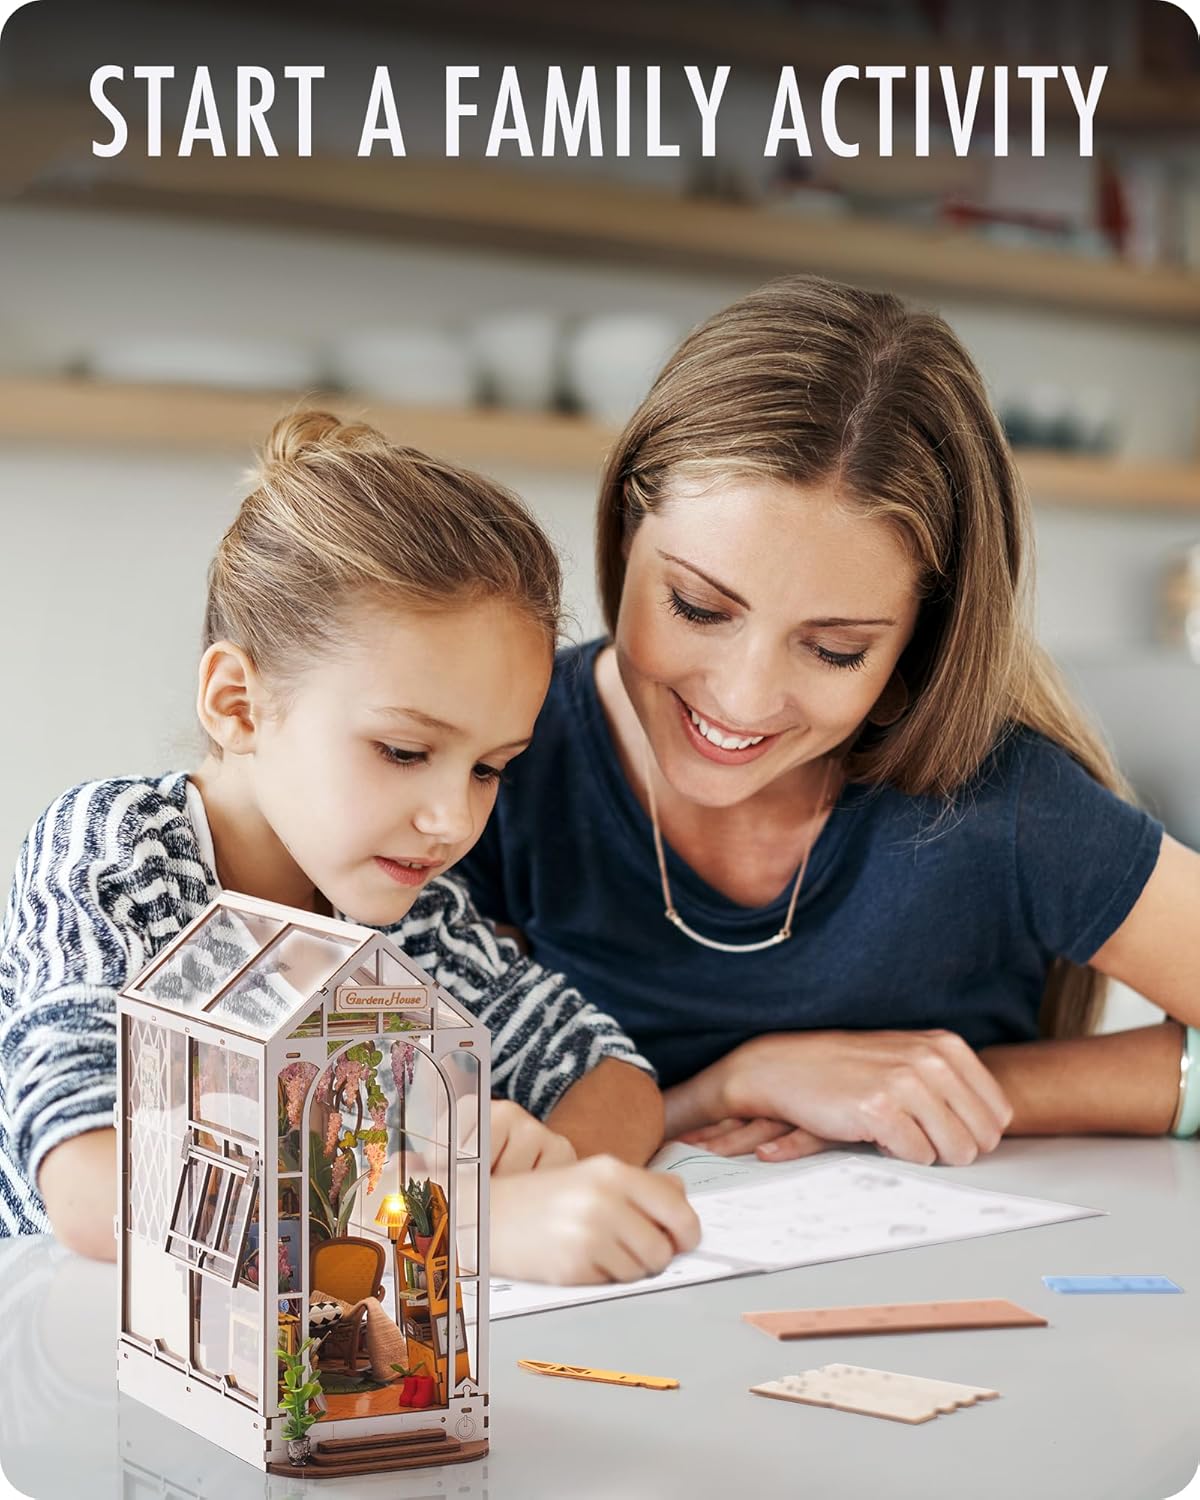
Image 3.1: An adult and child engaging in the assembly process of the Garden House kit.
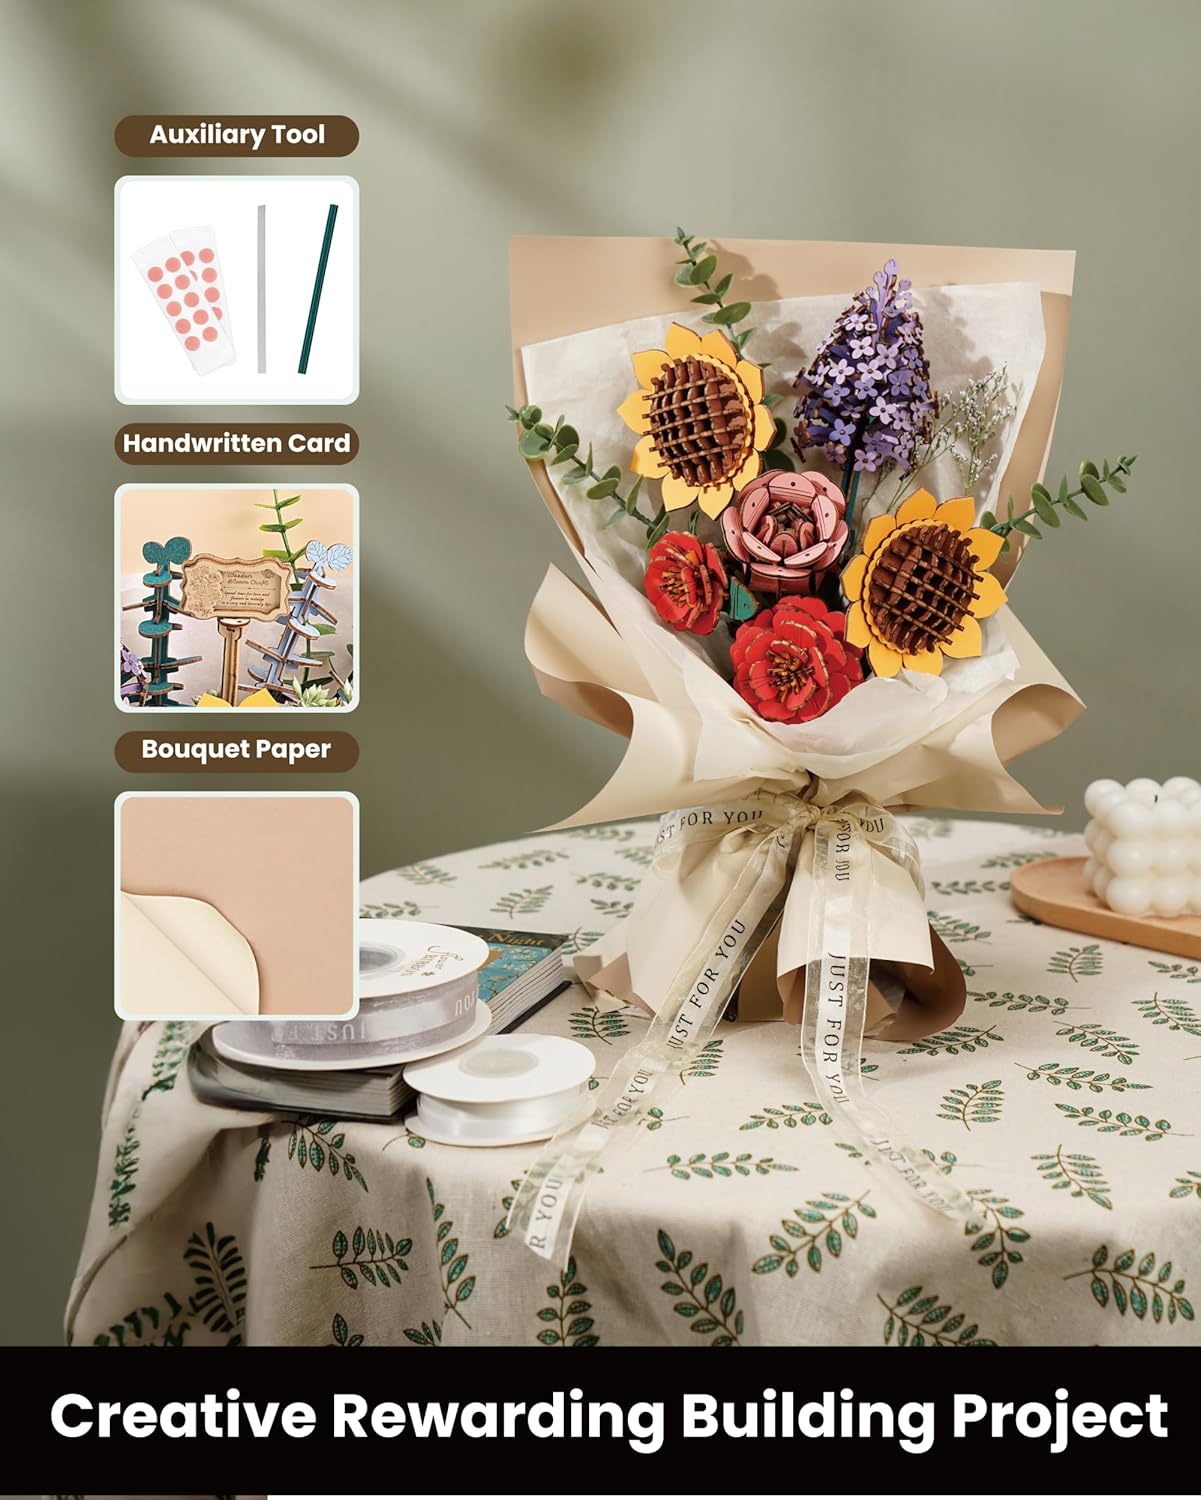
Image 3.2: Auxiliary tools, a handwritten card, and bouquet paper included for the Flower Bouquet assembly.
4. Operating Instructions (Garden House)
The Rolife Garden House features integrated LED lighting to illuminate the miniature scene.
4.1 Powering the Lights:
- Ensure 2 AAA batteries are correctly installed in the battery compartment, observing polarity (+/-).
- Locate the power switch, typically found on the side or base of the Garden House.
- Toggle the switch to the "ON" position to activate the internal lights.
- Toggle the switch to the "OFF" position to turn off the lights.
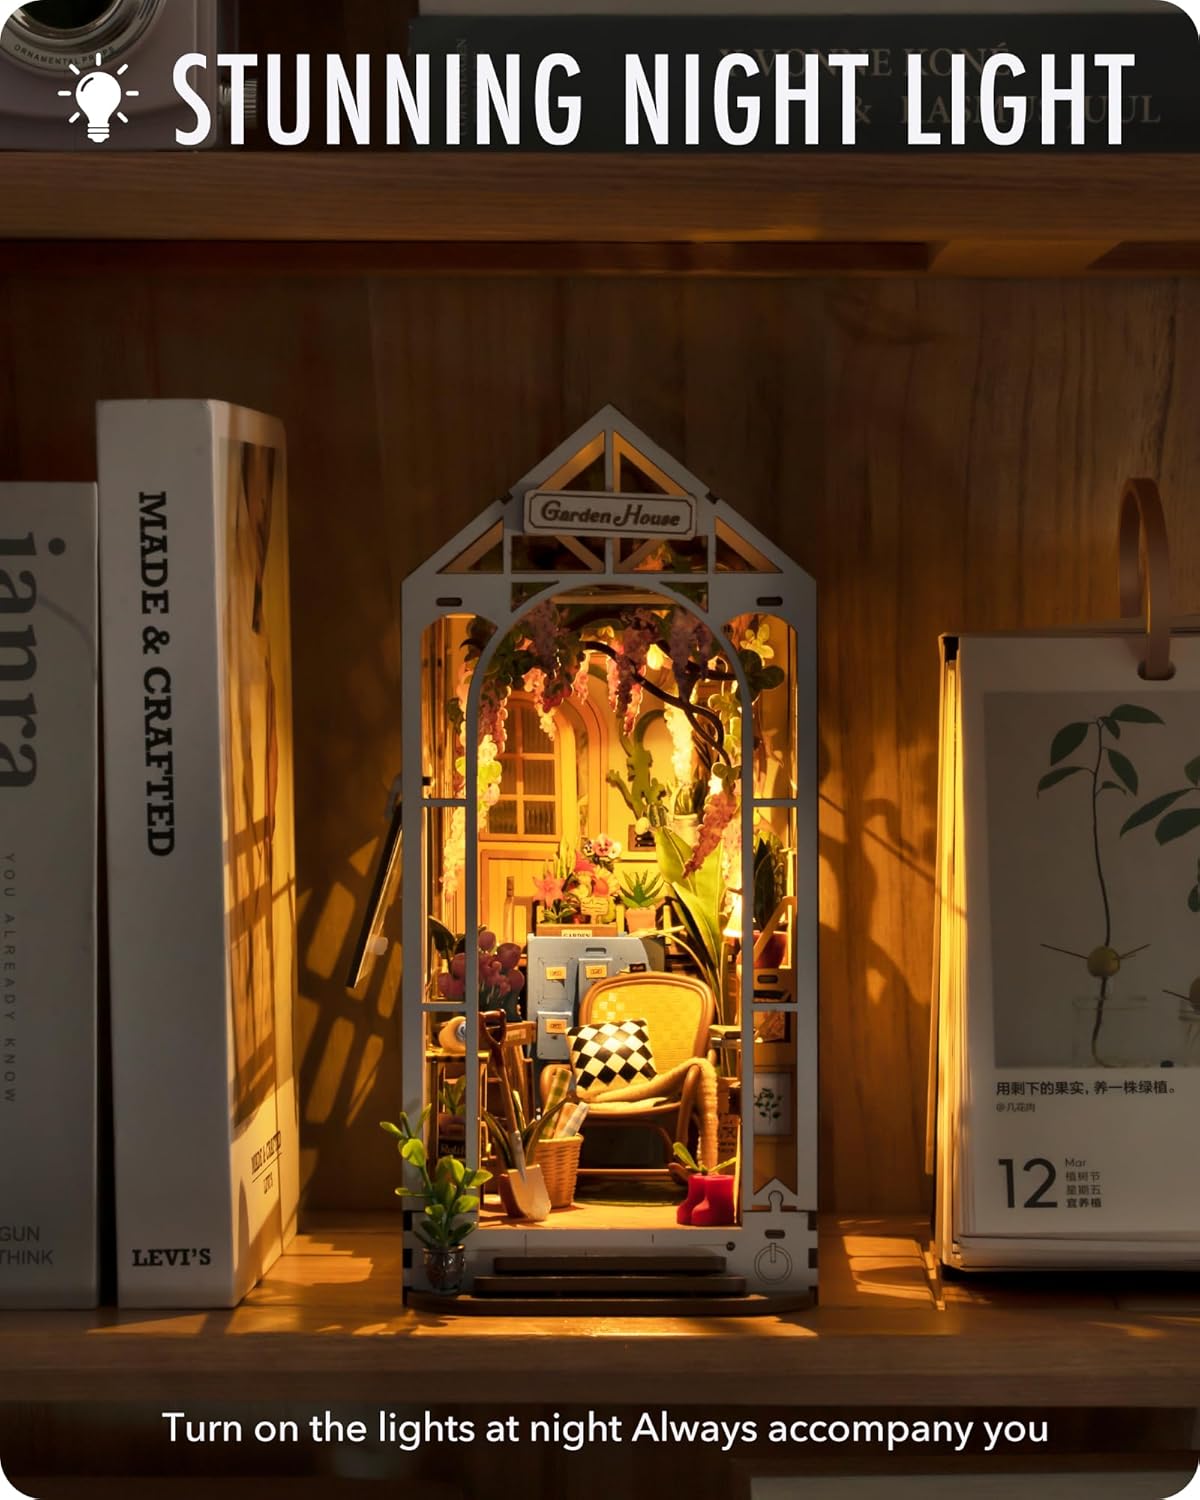
Image 4.1: The Garden House illuminated by its internal lights, creating a night scene.
5. Maintenance
To ensure the longevity and appearance of your Rolife 3D wooden puzzles, follow these maintenance guidelines:
- Cleaning: Gently dust the assembled models with a soft, dry cloth or a soft brush. Avoid using liquid cleaners or abrasive materials.
- Placement: Display the models in a stable, dry environment away from direct sunlight, extreme temperatures, and high humidity to prevent warping or fading of the wood.
- Battery Replacement (Garden House): If the lights dim or stop working, replace the AAA batteries. Ensure proper disposal of old batteries.
- Handling: Handle the assembled models with care to avoid accidental damage to delicate parts.
6. Troubleshooting
6.1 Common Issues:
- Lights Not Working (Garden House):
- Check if batteries are installed correctly with the correct polarity.
- Ensure batteries are fresh. Replace if necessary.
- Verify all electrical connections are secure as per the assembly manual.
- Difficulty Detaching Pieces:
- Use a craft knife or hobby tool to carefully cut any stubborn tabs.
- Avoid forcing pieces, as this may cause breakage.
- Loose Connections:
- If parts feel loose, a small amount of wood glue can be applied to secure them. Allow sufficient drying time.
6.2 Missing or Broken Parts:
If you encounter any broken parts during assembly or find that pieces are missing, please contact Rolife customer support for assistance. Provide details of the missing or broken components, and they will assist with replacements or provide a suitable solution.
7. Specifications
| Feature | Detail |
|---|---|
| Brand | Rolife |
| Model Name | TGB06 (Garden House) + TW01H (Flower Bouquet) |
| Material | Wood |
| Age Range (Description) | Adult |
| Theme | Floral, Nature |
| Special Feature | 3D Wooden Puzzle, Exquisite Inspired Design, Integrated Lighting (Garden House) |
| Included Components | Wooden puzzle pieces, LED light kit (for TGB06), auxiliary tools, handwritten card, bouquet paper (for TW01H) |
| Approx. Assembly Time | Garden House: 6 hours; Flower Bouquet: 3-4 hours |
| Batteries Required | 2 x AAA (for Garden House, not included) |
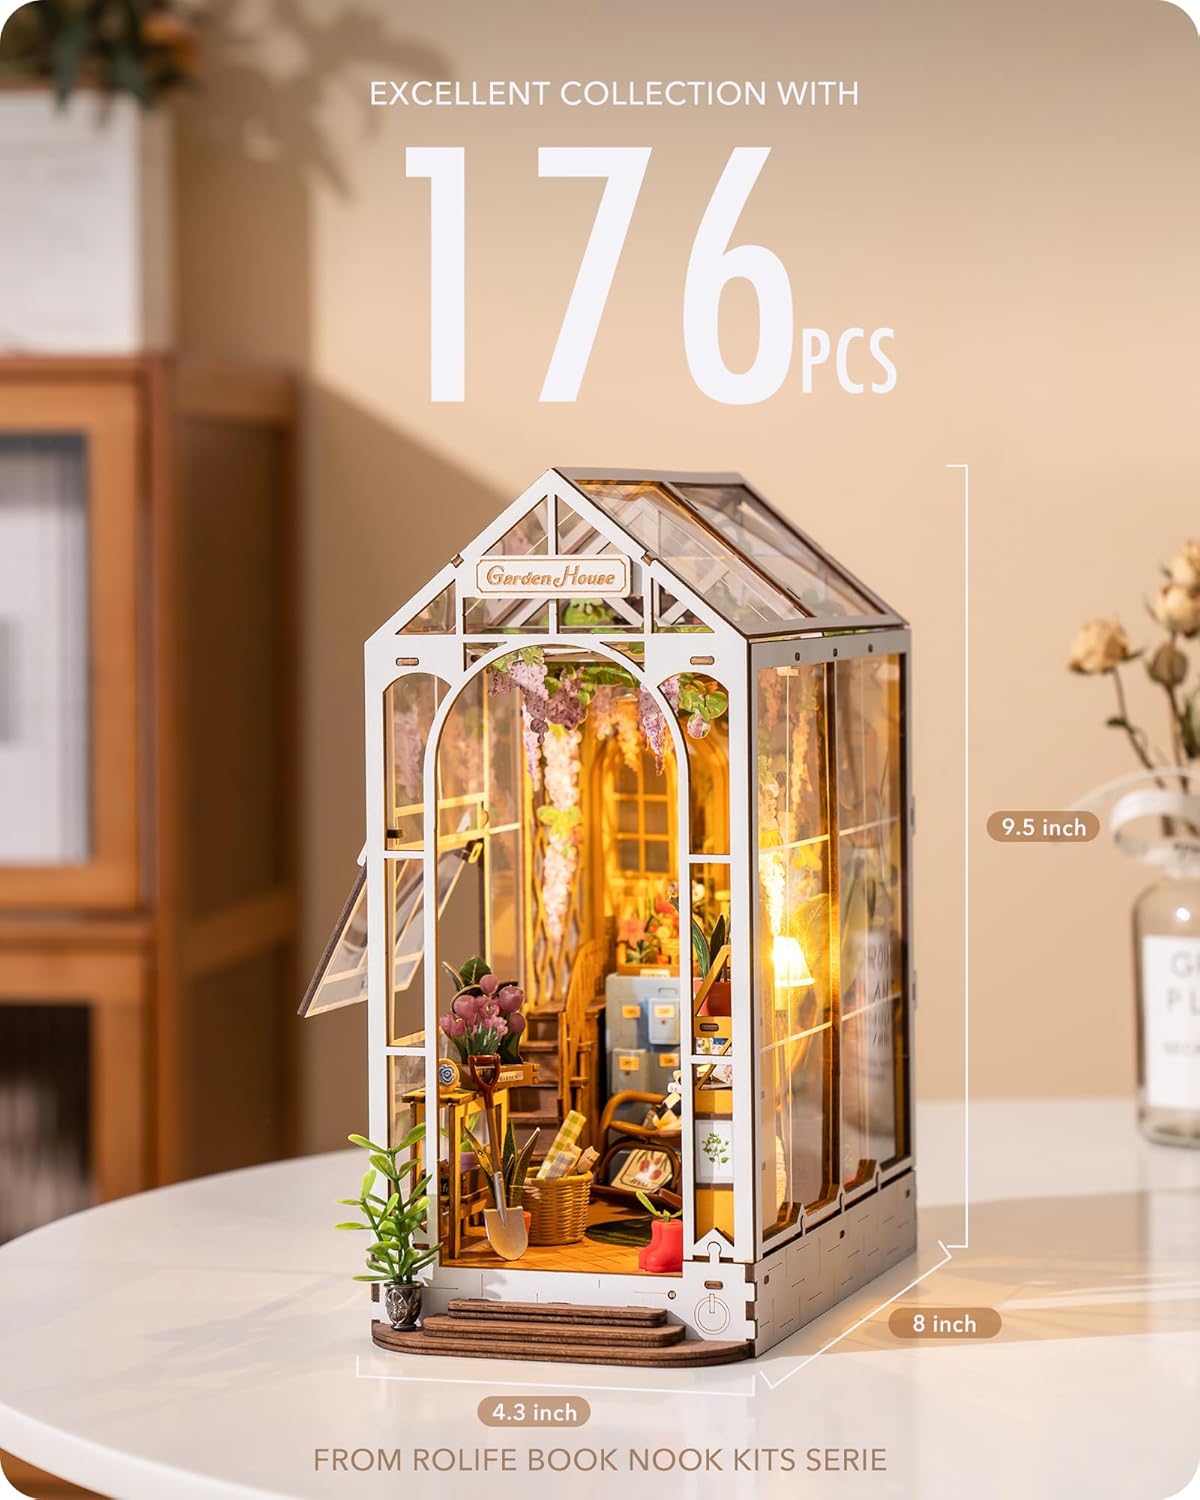
Image 7.1: Dimensions of the assembled Garden House: 9.5 inches (height), 8 inches (depth), 4.3 inches (width).
8. Warranty and Support
Rolife is committed to providing high-quality products. If you encounter any issues with your kit, such as broken or missing parts, please contact customer support. They are available to assist with replacements or provide a satisfactory solution.
For further assistance, please refer to the contact information provided with your product packaging or visit the official Rolife website.