1. Introduction
This manual provides instructions for the proper use, setup, maintenance, and storage of your ATsafepro 3/8" Torque Wrench. This tool is designed for precise torque application in various mechanical tasks, ensuring components are tightened to the correct specifications. Adhering to these instructions will help maintain the tool's accuracy and prolong its lifespan.

Image 1.1: ATsafepro 3/8" Torque Wrench. This image shows the overall design of the torque wrench, highlighting its red and black color scheme and robust construction.
2. Product Features
- High Precision: The industrial-grade torque wrench offers a torque range of 10-120 Nm (7.4-88.6 Lbf.ft) with a calibrated precision of ±3%. Each unit is tested and supplied with a calibration certificate.
- Durable Construction: Made from durable chrome-vanadium stainless steel, providing a comfortable, non-slip, and corrosion-resistant grip.
- Clear Dual Scale: Features laser-etched Nm and FT-LB scales for clear and easy reading, resistant to wear.
- Precise Adjustment: Allows fine adjustment of torque values to ensure components are tightened accurately, preventing damage from over-tightening and extending component life.
- Audible Click Mechanism: Emits an audible and tactile "click" when the preset torque value is reached, indicating to stop applying force.
- Bidirectional Operation: The wrench head allows for adjustment of the operating direction, supporting both clockwise and counter-clockwise torque application.

Image 2.1: Product Details. This image illustrates key components of the torque wrench, including the bidirectional switching paddle, adapter quick release button, main body material, accurate torque scale, torque locking ring, and non-slip handle.
3. Components Included
- 1 x ATsafepro 3/8" Torque Wrench (10-120 Nm)
- 1 x Storage Case
- 1 x Calibration Certificate
4. Setup and Torque Adjustment
To set the desired torque value:
- Unlock the Handle: Slide the torque locking ring down to unlock the handle.
- Adjust Torque: Rotate the handle to align the desired torque value on the main scale with the zero mark on the micrometer scale. For fine adjustments, continue rotating the handle until the exact value is set.
- Lock the Handle: Slide the torque locking ring up to lock the handle. Ensure it is securely locked before use to prevent accidental changes to the torque setting.
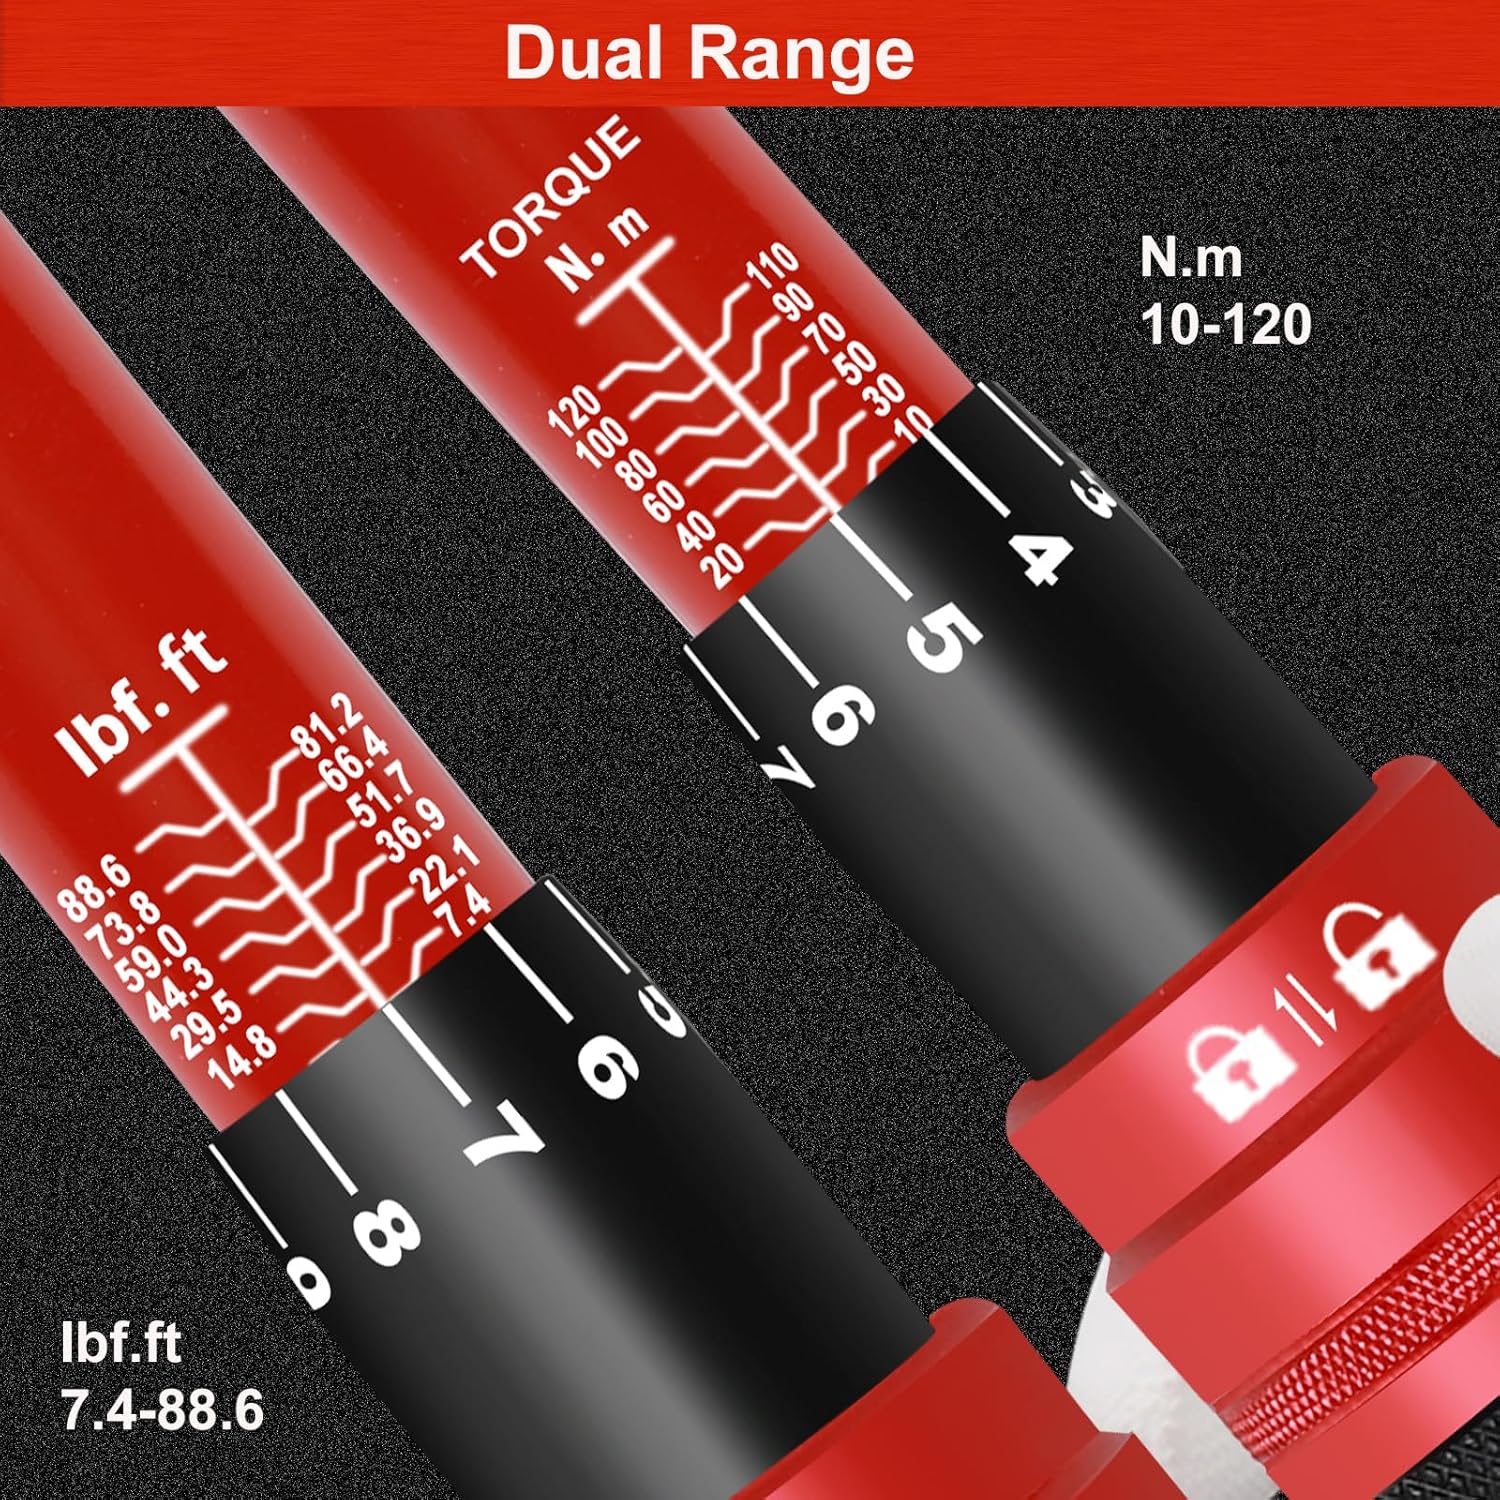
Image 4.1: How to Adjust the Required Torque Value. This image demonstrates the three steps for setting the torque: sliding down to unlock, rotating the handle for adjustment, and sliding up to lock.
5. Operation
Once the torque is set and locked:
- Attach Socket: Securely attach the appropriate socket or adapter to the 3/8" drive head.
- Select Direction: Use the bidirectional switching paddle on the ratchet head to select the desired tightening direction (clockwise or counter-clockwise).
- Apply Force: Place the socket onto the fastener and apply smooth, steady force to the wrench handle.
- Listen for Click: Continue applying force until you hear and feel a distinct "click." This indicates that the preset torque value has been reached. Immediately stop applying force to avoid over-tightening.

Image 5.1: Easy to Use. This image highlights the audible "click" sound and tactile feedback received when the preset torque is achieved, indicating the user to stop applying force.
6. Maintenance and Storage
- Cleaning: After each use, wipe the torque wrench clean with a dry, soft cloth. Do not use solvents or harsh chemicals that could damage the finish or internal mechanisms.
- Storage: Always store the torque wrench in its protective case. Set the torque to the lowest possible value (but not below the minimum specified range) before storage to relieve tension on the internal spring mechanism, which helps maintain accuracy over time. Store in a dry, clean environment.
- Calibration: For optimal accuracy, it is recommended to have the torque wrench recalibrated periodically, typically after 12 months or 5000 uses, or if dropped or mishandled.
7. Troubleshooting
- No Click Sound: Ensure the torque value is set correctly and the handle is locked. If the issue persists, the wrench may require recalibration or service.
- Inaccurate Readings: Verify that the wrench is clean and free from debris. Ensure the torque setting is locked. If accuracy is still questionable, recalibration is necessary.
- Stiff Adjustment: If the handle is difficult to turn, ensure the locking ring is fully disengaged. Do not force the adjustment; clean the mechanism if necessary.
8. Specifications

Image 8.1: Dual Range Scale. This image provides a detailed view of the Nm (10-120) and Lbf.ft (7.4-88.6) scales on the torque wrench, illustrating the clear markings for precise adjustments.
| Feature | Detail |
|---|---|
| Model Number | AT115B120-120NM |
| Drive Size | 3/8 inch |
| Torque Range | 10-120 Nm (7.4-88.6 Lbf.ft) |
| Precision | ±3% |
| Material | Chrome-Vanadium Stainless Steel |
| Dimensions (L x W x H) | 37 x 6 x 5 cm |
| Item Weight | 1.28 Kilograms |
| Head Style | Fixed Square |
| Operating Mode | Mechanical |
| Measurement Standard | Metric |
9. Application Scenarios
The ATsafepro 3/8" Torque Wrench is a versatile tool suitable for a wide range of applications where precise torque is required:
- Automotive maintenance (e.g., engine components, wheel nuts)
- Motorcycle repair and assembly
- Bicycle assembly and maintenance (e.g., stem bolts, crank bolts)
- General mechanical work and product assembly
- Electrical engineering tasks
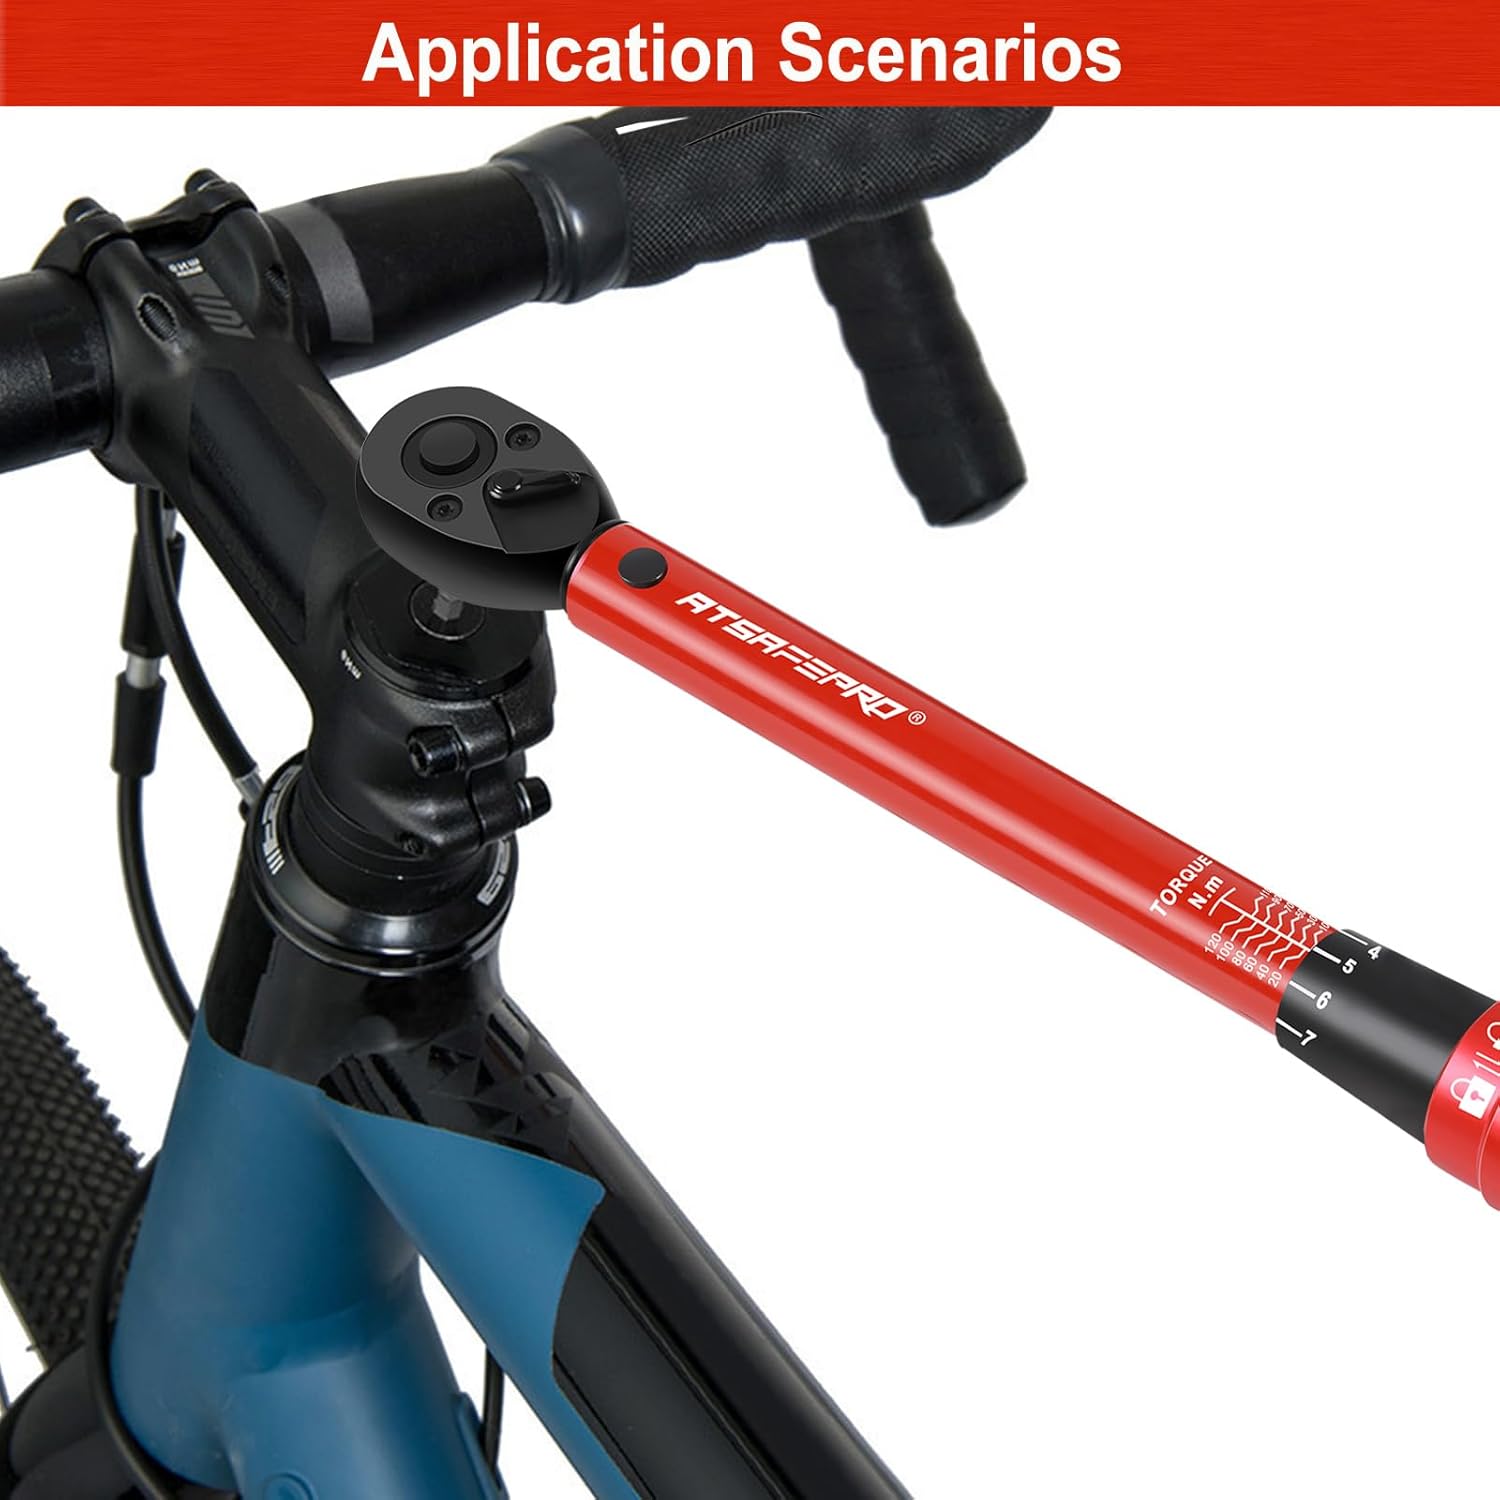
Image 9.1: Application on a Bicycle. This image shows the torque wrench being used to tighten a component on a bicycle, demonstrating its suitability for bicycle maintenance.
10. Warranty and Support
ATsafepro stands behind the quality of its products. For warranty information, technical support, or service inquiries, please refer to the contact details provided with your purchase or visit the official ATsafepro website. Keep your purchase receipt for warranty claims.


