1. Important Safety Information
- Do not expose the device to extreme temperatures, direct sunlight, or high humidity.
- Keep the device away from water or other liquids.
- Do not attempt to disassemble or modify the device. This will void the warranty.
- Use only the provided USB power adapter and cable.
- Ensure proper ventilation around the clock.
2. Package Contents
- Cadmos G10 Loud Alarm Clock
- USB Power Adapter
- USB Power Cord (Type-C, 59 inches)
- CR2032 Battery (pre-installed for backup)
- User Manual
3. Product Overview
The Cadmos G10 Alarm Clock features a large LED display, dual alarms, adjustable brightness, dynamic RGB lighting, and a USB charging port. It is designed for clear visibility and ease of use.
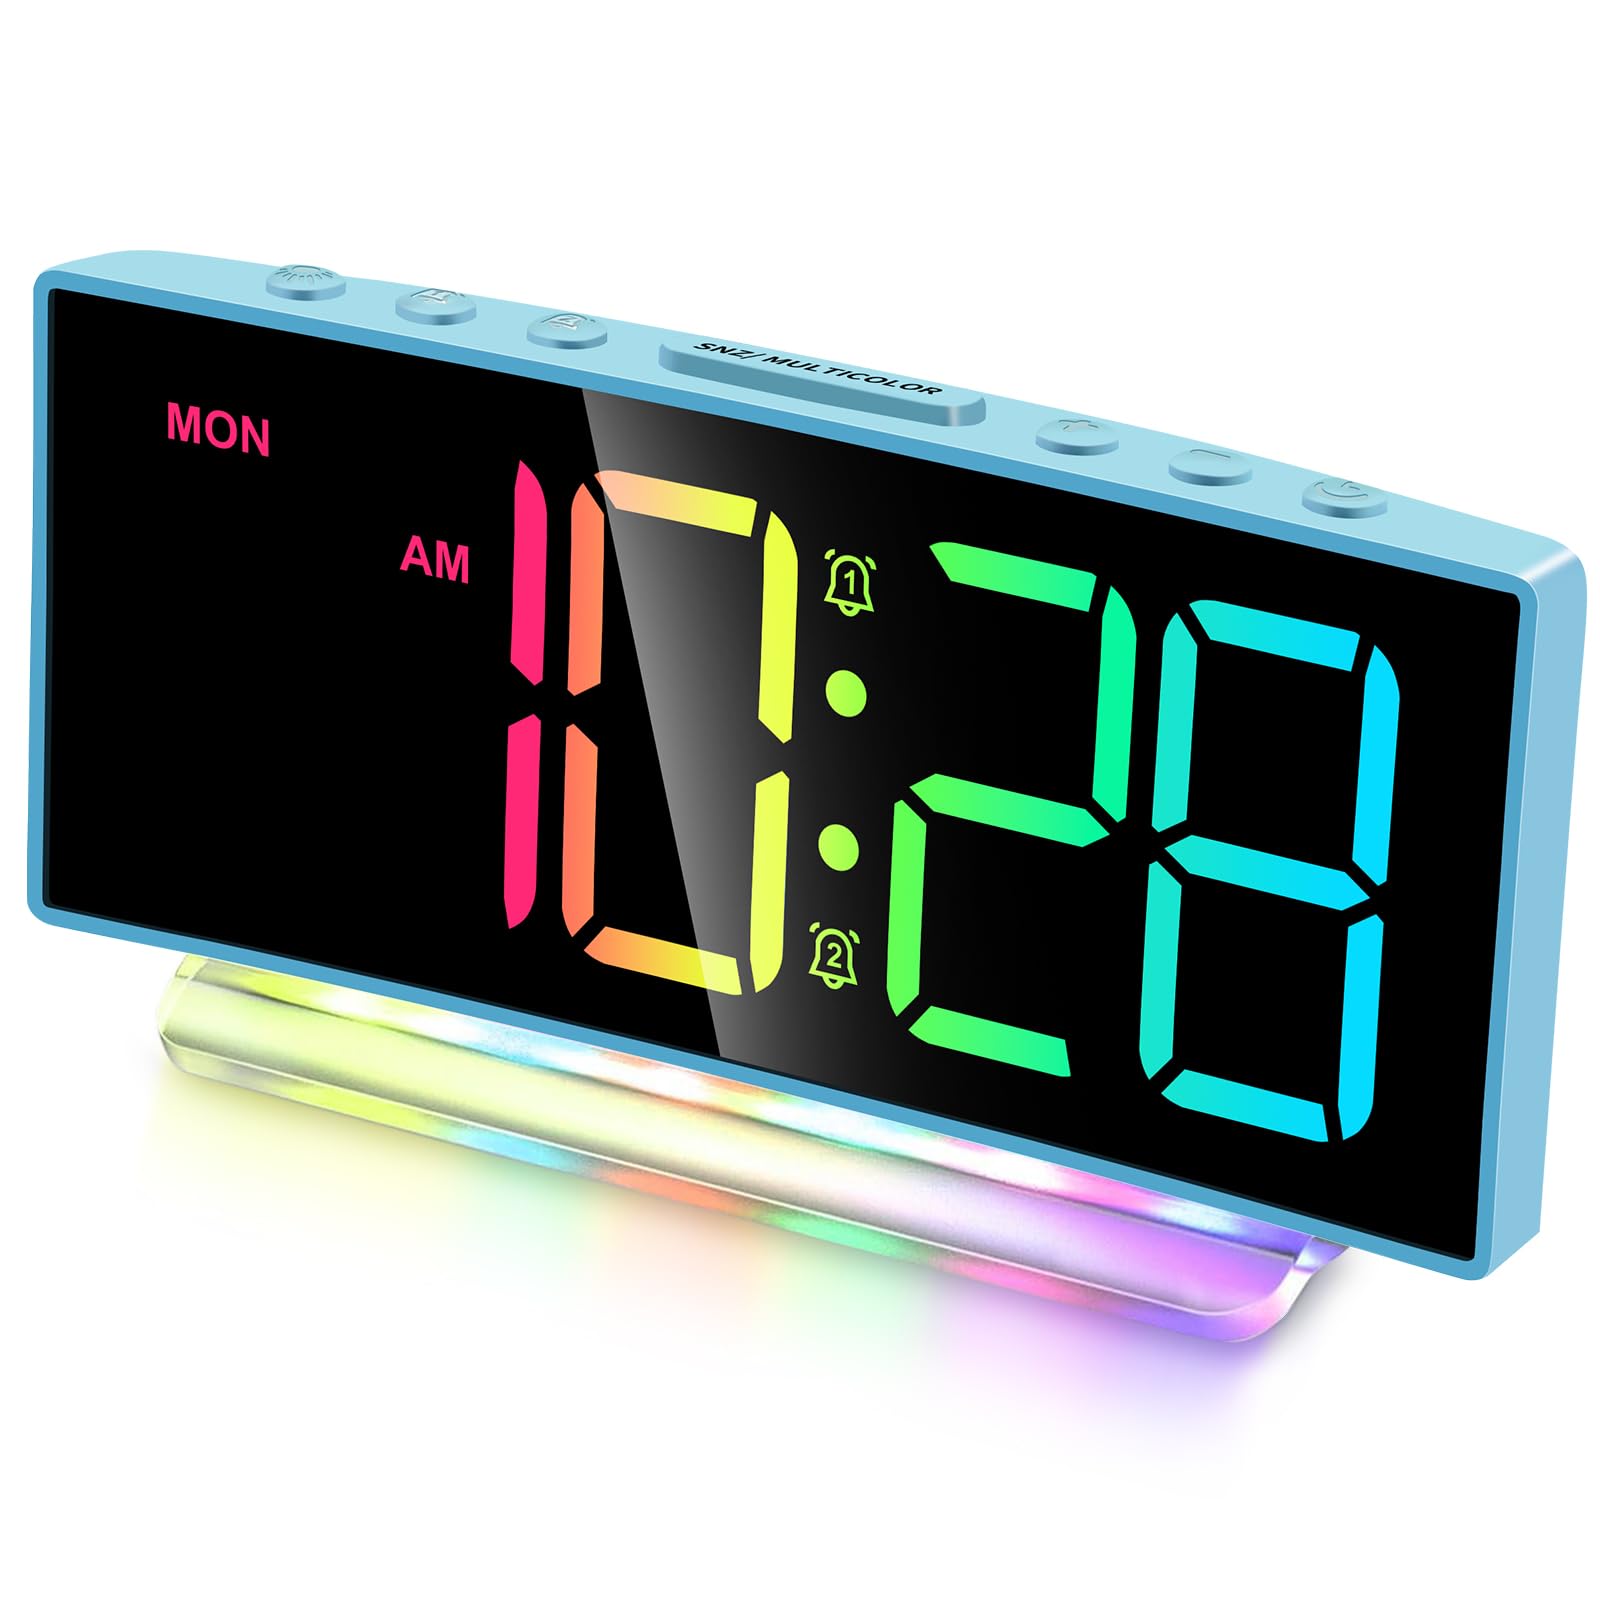
Image: Front view of the Cadmos G10 Alarm Clock displaying time with dynamic RGB numbers and a colorful base night light.
Controls and Ports

Image: Detailed overview of the Cadmos G10 Alarm Clock, highlighting the top control buttons, rear USB charging port, power input, and battery backup compartment.
- Top Buttons: Used for setting time, alarms, brightness, snooze, and color modes.
- USB Charger (DC 5V/1A-2A): Located on the back for charging external devices.
- Power Input (DC 5V/1A): For connecting the main power adapter.
- Backup-Battery Compartment: Holds 1 x CR2032 battery to maintain settings during power outages.
- Loud Buzzer: Integrated speakers for alarm sound, adjustable from 65dB to 95dB.
4. Setup
4.1 Power Connection
Connect the provided USB power cord to the 'Power Input' port on the back of the clock and plug the USB power adapter into a standard wall outlet. The clock will power on and display the time.
Image: The Cadmos G10 Alarm Clock connected to a wall outlet via its USB power adapter, with a smartphone charging from the clock's USB port.
4.2 Battery Backup Installation
The clock comes with a pre-installed CR2032 battery for backup. This battery ensures that time and alarm settings are retained during a power outage. If the battery needs replacement, open the backup-battery compartment on the back of the clock and insert a new CR2032 battery, observing polarity.
Image: Illustration of the Cadmos G10 Alarm Clock's battery backup feature, showing the CR2032 battery compartment and how the clock retains time after a power interruption.
4.3 Initial Time Setting
Upon first power-up or after a full reset, the time may need to be set. Refer to the 'Operating Instructions' section for detailed steps on setting the time and 12/24-hour format.
5. Operating Instructions
5.1 Setting Time and 12/24-Hour Format
Press the 'TIME SET' button to enter time setting mode. Use the '+' and '-' buttons to adjust hours and minutes. Press 'TIME SET' again to confirm. To switch between 12-hour and 24-hour format, press the '12/24H' button.

Image: The Cadmos G10 Alarm Clock displaying time in both 12-hour (AM/PM) and 24-hour formats, illustrating the flexibility of the time display.
5.2 Adjusting Display Brightness
The display has 4 levels of adjustable brightness. Press the 'BRIGHTNESS' button repeatedly to cycle through the brightness levels (100%, 75%, 50%, 25%).
Image: Visual representation of the Cadmos G10 Alarm Clock's 4-level brightness adjustment, showing the display at different intensity levels from 10% to 100%.
5.3 Setting Alarms (Alarm 1 & Alarm 2)
The clock features dual alarms. Press 'ALARM 1' or 'ALARM 2' button to enter alarm setting mode. Use '+' and '-' buttons to set the desired alarm time. Press the alarm button again to confirm. You can also set the alarm volume (3 levels: 65dB, 85dB, 95dB) and choose between weekday (MON-FRI), weekend (SAT-SUN), or all 7 days (MON-SUN) alarm modes.

Image: Illustration of the Cadmos G10 Alarm Clock's dual alarm functionality, showing options for weekday, weekend, or 7-day alarms, and three levels of alarm volume adjustment (65dB, 85dB, 95dB).
5.4 Using the Snooze Function
When an alarm sounds, press the 'SNOOZE' button to temporarily silence the alarm for 9 minutes. The alarm will sound again after the snooze period. To turn off the alarm completely, press any other button.
Image: A hand reaching to press the snooze button on the Cadmos G10 Alarm Clock, indicating the 9-minute snooze feature for easy temporary silencing of the alarm.
5.5 Customizing Dynamic RGB Display
The clock offers 8 different colorful display screens, including 4 regular colors (White, Red, Green, Blue) and 4 dynamic RGB color-changing modes. Press the 'RGB' button to cycle through these display options.

Image: Grid showing 8 different dynamic RGB display modes for the Cadmos G10 Alarm Clock, including static colors (White, Red, Green, Blue) and various color-changing patterns.
5.6 Activating Night Light
The clock features a 7-color rainbow atmosphere night light at its base, with 5 monocolor modes and 2 dynamic RGB modes. Press the 'LIGHT' button to activate and cycle through the night light options.

Image: The Cadmos G10 Alarm Clock demonstrating its 7-color night light feature, showing the clock with different colored illumination from its base.
5.7 Using the USB Charging Port
The USB port on the back of the clock (DC 5V/1A-2A) can be used to charge compatible electronic devices such as smartphones or tablets. Connect your device's charging cable to this port.
6. Maintenance
6.1 Cleaning the Clock
To clean the clock, gently wipe the surface with a soft, dry cloth. Do not use abrasive cleaners, solvents, or chemical sprays, as these may damage the finish or internal components.
6.2 Replacing the Backup Battery
If the clock consistently loses time or settings during power outages, the CR2032 backup battery may need replacement. Open the battery compartment on the back, remove the old battery, and insert a new CR2032 battery with the correct polarity (+ side up). Dispose of old batteries responsibly.
7. Troubleshooting
- Clock not powering on: Ensure the USB power adapter is securely plugged into both the clock and a working wall outlet. Try a different outlet or USB adapter.
- Alarm not sounding: Verify that the alarm is enabled (alarm icon displayed) and the volume is set to an audible level. Check if the alarm mode (weekday/weekend/7 days) is correctly configured.
- Display is dim or flickering: Adjust the brightness settings using the 'BRIGHTNESS' button. If the issue persists, ensure the power connection is stable.
- Time is incorrect after power outage: The CR2032 backup battery may be depleted. Replace the battery as described in the 'Maintenance' section.
- USB charging port not working: Ensure the clock is powered on. Check the charging cable and the device being charged. The port provides 5V/1A-2A output; some devices may require higher power.
8. Specifications
Image: The Cadmos G10 Alarm Clock displaying its dimensions: 6.7 inches width and 3.11 inches height.
| Feature | Specification |
|---|---|
| Brand | Cadmos |
| Model Number | G10 |
| Display Type | LED |
| Product Dimensions | 6.7"W x 3.11"H |
| Item Weight | 8.2 ounces |
| Power Source | Corded Electric |
| Backup Battery | 1 x CR2032 (included) |
| USB Charging Output | DC 5V/1A-2A |
| Alarm Volume | Adjustable (up to 105dB) |
| Display Brightness | 4 Levels |
| RGB Display Modes | 8 (4 static, 4 dynamic) |
| Night Light Colors | 7 (5 monocolor, 2 dynamic RGB) |
9. Warranty Information
This Cadmos G10 Alarm Clock comes with a limited warranty. For detailed information regarding warranty coverage, terms, and conditions, please refer to the warranty card included in your product packaging or visit the official Cadmos website.
10. Customer Support
If you encounter any issues or have questions about your Cadmos G10 Alarm Clock, please contact Cadmos customer support. You can typically find contact information (email, phone, or website) on the product packaging or on the official Cadmos brand store page.
For further assistance, please visit the Cadmos Store on Amazon.