USHINING T3105 4G
USHINING 4G Mobile Phone for Seniors User Manual
Model: T3105 4G
1. Introduction
Thank you for choosing the USHINING 4G Mobile Phone for Seniors. This device is designed with ease of use in mind, featuring large buttons, a clear dual display, and essential functions for communication. This manual provides detailed instructions to help you set up, operate, and maintain your new phone.
2. Package Contents
Please check the box for the following items:
- 1 x USHINING 4G Mobile Phone
- 1 x Charging Cable (USB)
- 1 x Battery (1200 mAh Lithium-ion)
- 1 x Charging Dock
- 1 x User Manual
3. Product Overview
The USHINING 4G Mobile Phone features a classic flip design with two displays and an intuitive interface.

Figure 3.1: USHINING 4G Mobile Phone (open) and Charging Dock.
This image displays the USHINING 4G Mobile Phone in its open, flip-phone configuration, showcasing the internal display with a prominent '4G' logo. The phone is black with silver accents. In the background, the black charging dock is visible, with another phone unit placed within it, indicating its charging capability.
3.1 Key Features
- Dual Display: A 2.8-inch internal color screen and a 1.77-inch external color screen for quick information.
- Large Buttons & Font: Designed for easy dialing and navigation.
- SOS Emergency Button: Quickly contact pre-set emergency numbers.
- Charging Dock: Convenient and safe charging solution.
- Multimedia Functions: Includes FM radio, camera, and basic tools.

Figure 3.2: Dual Display Screens.
This image illustrates the two display screens of the phone. On the left, the phone is shown closed, highlighting the 1.77-inch external screen which displays time, date, and battery status. On the right, the phone is open, revealing the larger 2.8-inch internal screen, which shows the main menu interface. Both screens are color displays.

Figure 3.3: Ergonomic Design for Seniors.
This image features a senior woman comfortably using the USHINING phone. Insets highlight key design elements: 'Loud Volume' indicating enhanced audio, 'Large Font' for improved readability on the screen, and 'Big Button' emphasizing the spacious and easy-to-press keypad. The phone's design prioritizes accessibility for elderly users.
4. Setup
4.1 Installing the SIM Card and Battery
- Open the back cover of the phone.
- Insert your Nano SIM card(s) into the designated slot(s). This phone supports Dual SIM.
- Insert the 1200 mAh Lithium-ion battery, ensuring the contacts align correctly.
- Replace the back cover.
4.2 Charging the Phone
Before first use, fully charge the phone.
- Using the Charging Dock: Place the phone securely into the charging dock. Ensure the charging contacts on the phone align with those on the dock. Connect the USB charging cable to the dock and then to a power adapter (not included) or a USB port.
- Direct Charging: Alternatively, connect the USB charging cable directly to the phone's charging port and then to a power adapter or USB port.
The battery indicator on the screen will show charging status. A full charge provides approximately 120 hours of standby time or 5 hours of call time.

Figure 4.1: Charging and Battery Life.
This image shows the USHINING phone placed in its charging dock, with the screen displaying a battery icon and a 72% charge level. Text overlays highlight the 'Large Capacity Battery' of 1200mAh, indicating over 120 hours of standby time and over 5 hours of call time, emphasizing the phone's long-lasting power.

Figure 4.2: Easy and Safe Charging Options.
This image demonstrates the two convenient charging methods for the USHINING phone. On the left, the phone is shown charging directly via a USB cable. On the right, the phone is placed in its dedicated charging dock, providing a stable and easy way to charge. A senior man is shown in the background, illustrating the ease of use for elderly individuals.
5. Operating the Phone
5.1 Power On/Off
- To Power On: Press and hold the Power/End Call button (red button) until the screen lights up.
- To Power Off: Press and hold the Power/End Call button until the power-off options appear, then select 'Power Off'.
5.2 Making and Receiving Calls
- To Make a Call: Dial the number using the keypad and press the Call button (green button).
- To Receive a Call: When the phone rings, open the flip or press the Call button to answer.
- To End a Call: Press the Power/End Call button or close the flip.
5.3 Sending and Receiving Messages (SMS)
- Navigate to the 'Messages' menu.
- Select 'New Message' to compose.
- Enter the recipient's number or select from contacts.
- Type your message and send.
5.4 Managing Contacts
The phone can store up to 500 contacts.
- Navigate to the 'Contacts' menu.
- Select 'Add New Contact' to save a number.
- Use the M1 and M2 dedicated buttons for speed dial functions (keys 2-9 can also be assigned).
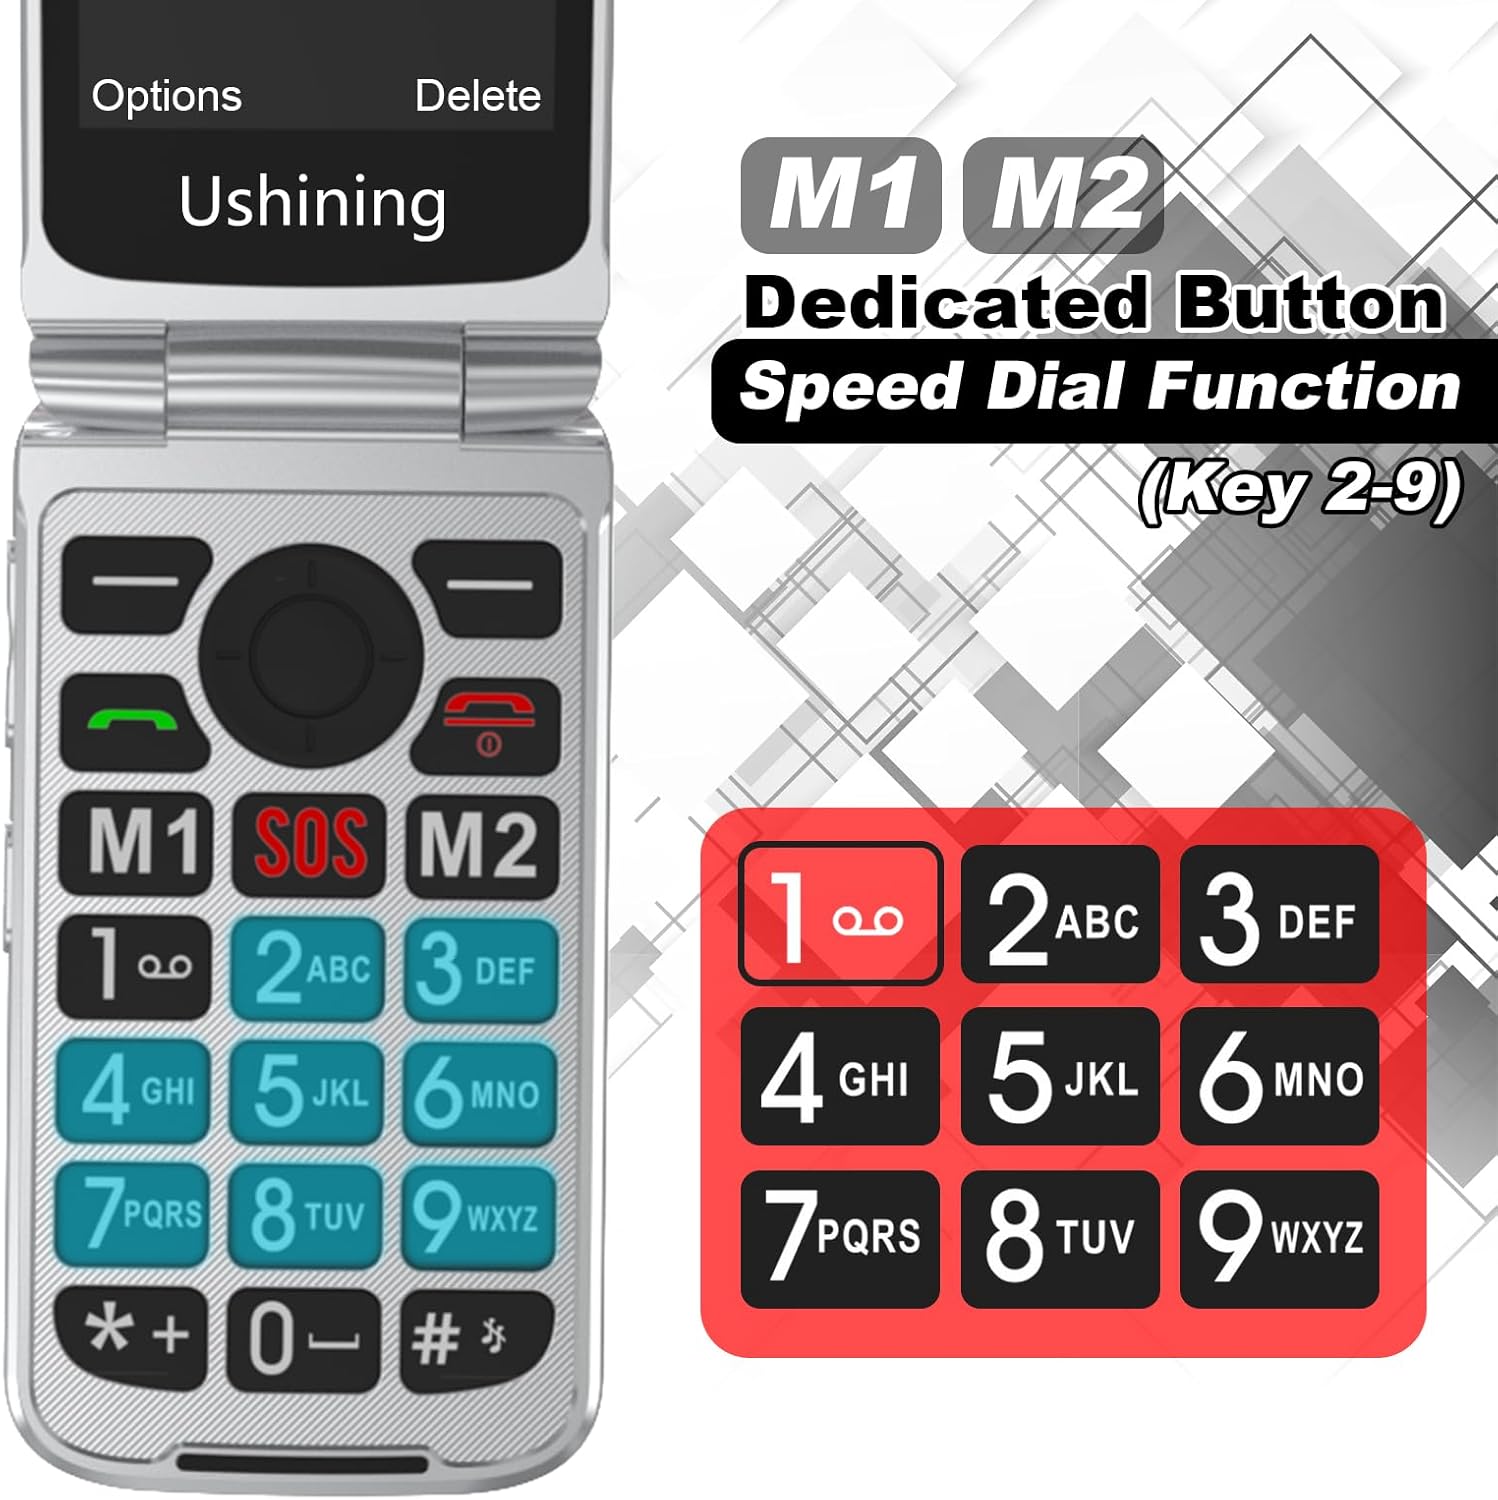
Figure 5.1: Dedicated Buttons and Speed Dial.
This close-up image of the phone's keypad highlights the M1, SOS, and M2 dedicated buttons. The M1 and M2 buttons are designed for quick access to frequently called numbers. Additionally, the number keys 2-9 are shown, indicating their capability to be programmed for speed dial functions, allowing users to quickly call pre-assigned contacts.
5.5 SOS Emergency Function
The SOS button allows you to quickly call and send messages to up to 5 pre-set emergency contacts.
- Setting Up SOS Contacts: Go to 'Settings' > 'SOS Settings' and add up to 5 emergency numbers.
- Using the SOS Button: In an emergency, press and hold the red SOS button on the back of the phone. The phone will automatically call the pre-set numbers in sequence until one answers, and also send an emergency SMS.
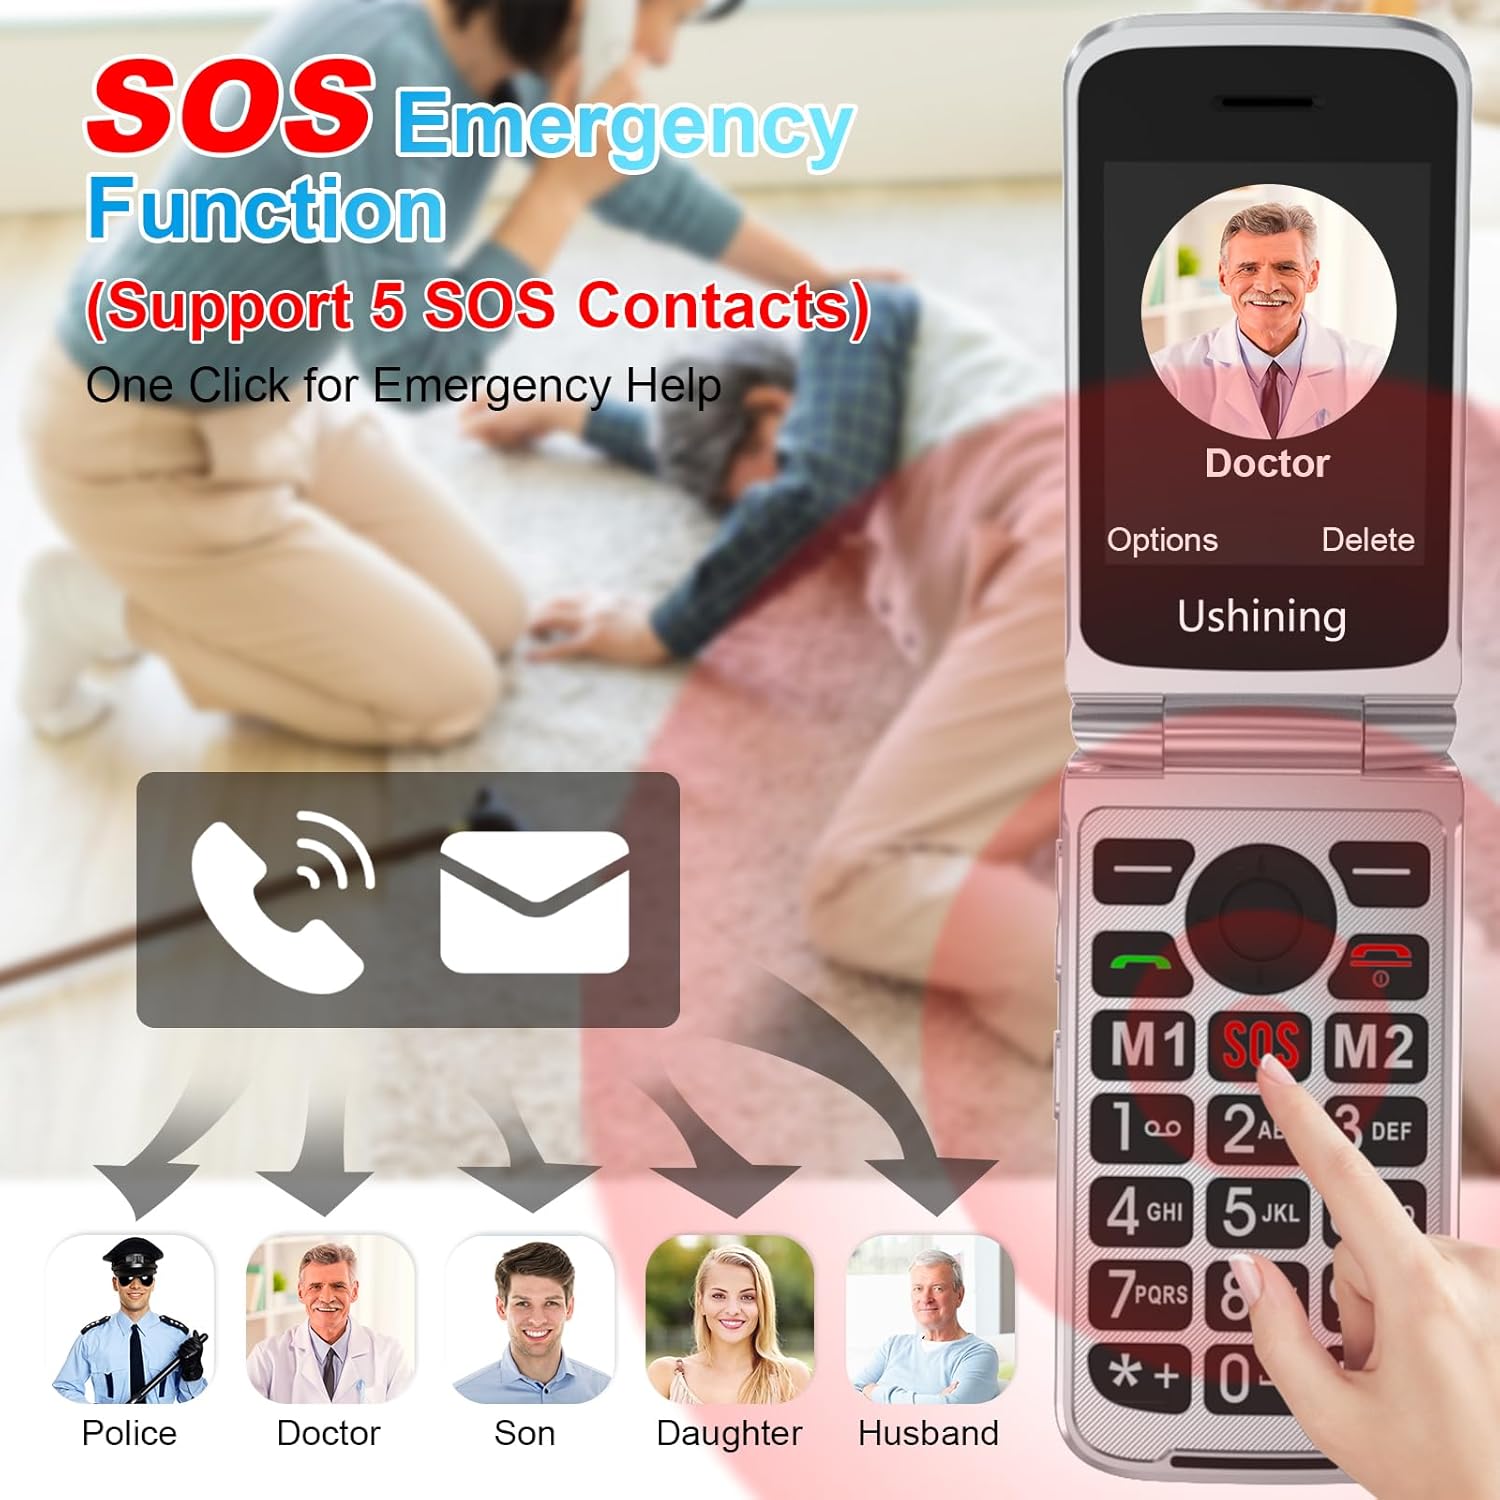
Figure 5.2: SOS Emergency Function.
This image visually explains the SOS Emergency Function. The phone's screen displays a contact named 'Doctor', indicating a potential emergency contact. Below, arrows point from a phone and message icon to five distinct icons representing common emergency contacts: Police, Doctor, Son, Daughter, and Husband. This illustrates that with one click, the phone can contact up to 5 pre-set emergency contacts.
5.6 Other Functions
- FM Radio: Access the FM Radio application to listen to local radio stations.
- Alarm Clock: Set multiple alarms through the 'Alarm' menu.
- Flashlight: Activate the built-in flashlight for illumination.
- Camera: Use the integrated camera for basic photo capture.
- Calculator: Perform basic arithmetic calculations.

Figure 5.3: User-Friendly Interface and Features.
This image showcases the phone's user-friendly interface, with the open phone displaying a contact photo. Surrounding the phone are circular icons representing various functions: Multimedia, Call logs, Tools, Contact, Message, Settings, FM radio, and Alarm. This visual representation emphasizes the phone's intuitive design and accessible features.
6. Maintenance
- Keep the phone dry. Liquids can corrode electronic circuits.
- Do not use or store the phone in dusty, dirty areas.
- Do not store the phone in high-temperature areas. High temperatures can shorten the life of electronic devices and warp or melt certain plastics.
- Do not store the phone in cold areas. When the phone returns to normal temperature, moisture can form inside the phone and damage electronic circuit boards.
- Do not drop, knock, or shake the phone. Rough handling can break internal circuit boards and fine mechanics.
- Clean the phone with a soft, dry cloth. Do not use harsh chemicals or cleaning solvents.
7. Troubleshooting
| Problem | Possible Cause | Solution |
|---|---|---|
| Phone does not power on | Battery is low or not installed correctly. | Charge the battery. Ensure the battery is correctly inserted. |
| Cannot make/receive calls | No SIM card, SIM card not properly inserted, or no network signal. | Ensure SIM card is inserted correctly. Check network signal strength. Contact your service provider if issues persist. |
| Poor call quality | Weak network signal or interference. | Move to an area with better signal. Avoid sources of interference. |
| Battery drains quickly | Frequent use, background applications, or old battery. | Reduce screen brightness. Close unused applications. Consider replacing the battery if it's old. |
| SOS function not working | No emergency contacts set or incorrect numbers. | Verify that emergency contacts are correctly set in the SOS settings. |
8. Specifications
| Feature | Detail |
|---|---|
| Model Number | T3105 4G |
| Brand | USHINING |
| Color | Black |
| Operating System | Proprietary (not Android 10.0 as stated in some listings) |
| Internal Screen Size | 2.8 inches |
| External Screen Size | 1.77 inches |
| Connectivity | USB |
| Special Features | Dual SIM, SOS Button, Large Buttons, Charging Dock |
| Battery Capacity | 1200 mAh Lithium-ion |
| Memory Storage | Supports up to 16GB expandable memory |
| Cellular Technology | 4G, 4G VoLTE, 3G WCDMA, 2G GSM |
| Supported Languages | English, Spanish, French, Italian, German |
9. Warranty and Support
USHINING provides technical and after-sales service for two years from the date of purchase. This warranty covers manufacturing defects but does not include artificial damage.
For support, please contact your retailer or refer to the contact information provided with your purchase documentation.
Ask a question about this manual
Ask about setup, troubleshooting, compatibility, parts, safety, or missing instructions. Manuals+ will review the question and use this page’s manual context to help answer it.