1. Important Safety Instructions
Please read all instructions carefully before using this appliance. Keep this manual for future reference.
- Do not touch hot surfaces. Use handles or knobs.
- To protect against electrical shock, do not immerse cord, plugs, or toaster in water or other liquid.
- Close supervision is necessary when any appliance is used by or near children.
- Unplug from outlet when not in use and before cleaning. Allow to cool before putting on or taking off parts.
- Do not operate any appliance with a damaged cord or plug, or after the appliance malfunctions or has been damaged in any manner.
- Do not use outdoors.
- Do not let cord hang over edge of table or counter, or touch hot surfaces.
- Do not place on or near a hot gas or electric burner, or in a heated oven.
- Do not use appliance for other than intended use.
- Oversize foods, metal foil packages, or utensils must not be inserted in a toaster as they may involve a risk of fire or electric shock.
- A fire may occur if toasters are covered or touching flammable material, including curtains, draperies, walls, and the like, when in operation.
- Do not attempt to dislodge food when toaster is plugged in.
- Always attach plug to appliance first, then plug cord into the wall outlet. To disconnect, turn any control to 'off', then remove plug from wall outlet.
- This appliance is for household use only.
2. Product Overview
The Generic 4-Slice Stainless Steel Long Slot Toaster is designed for efficient and versatile toasting. Familiarize yourself with its components:
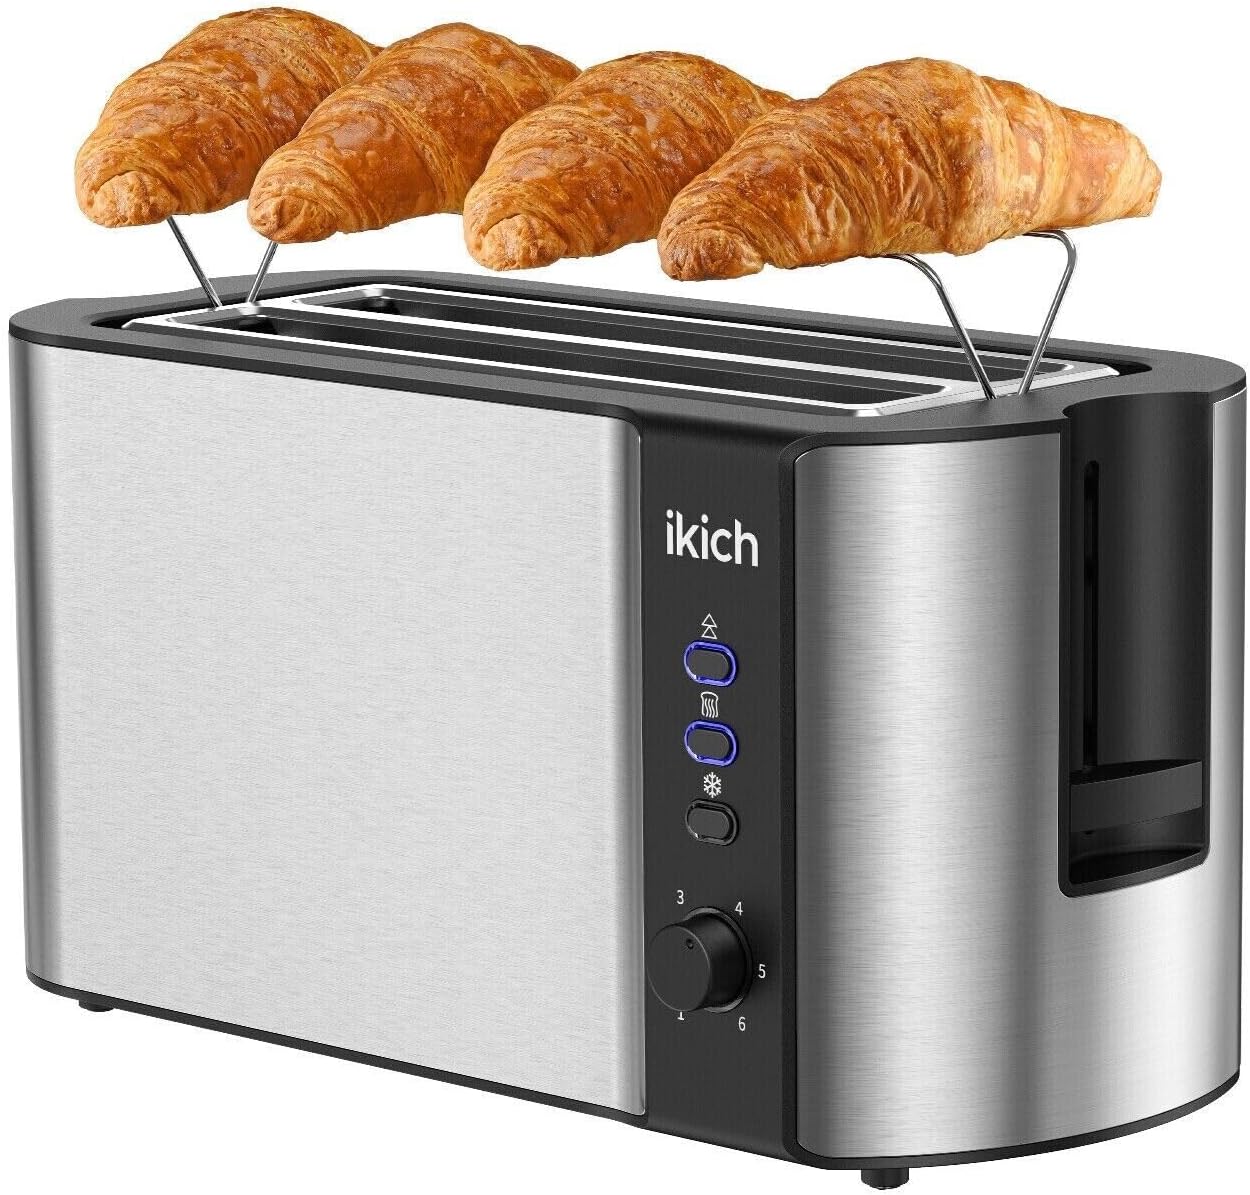
Image: Generic 4-Slice Stainless Steel Long Slot Toaster with warming rack and controls.
- Toasting Slots: Two extra-long slots accommodate up to four standard slices of bread or two longer slices.
- Warming Rack: Integrated rack for warming pastries, rolls, or croissants.
- Control Panel: Includes function buttons and browning control dial.
- Browning Control Dial: Adjustable settings from 1 (lightest) to 6 (darkest).
- Function Buttons: Cancel, Defrost, Reheat.
- High-Lift Lever: Raises toast higher for easy removal of smaller items.
- Removable Crumb Tray: Located at the bottom for easy cleaning.
- Cord Wrap Storage: For neat storage of the power cord.
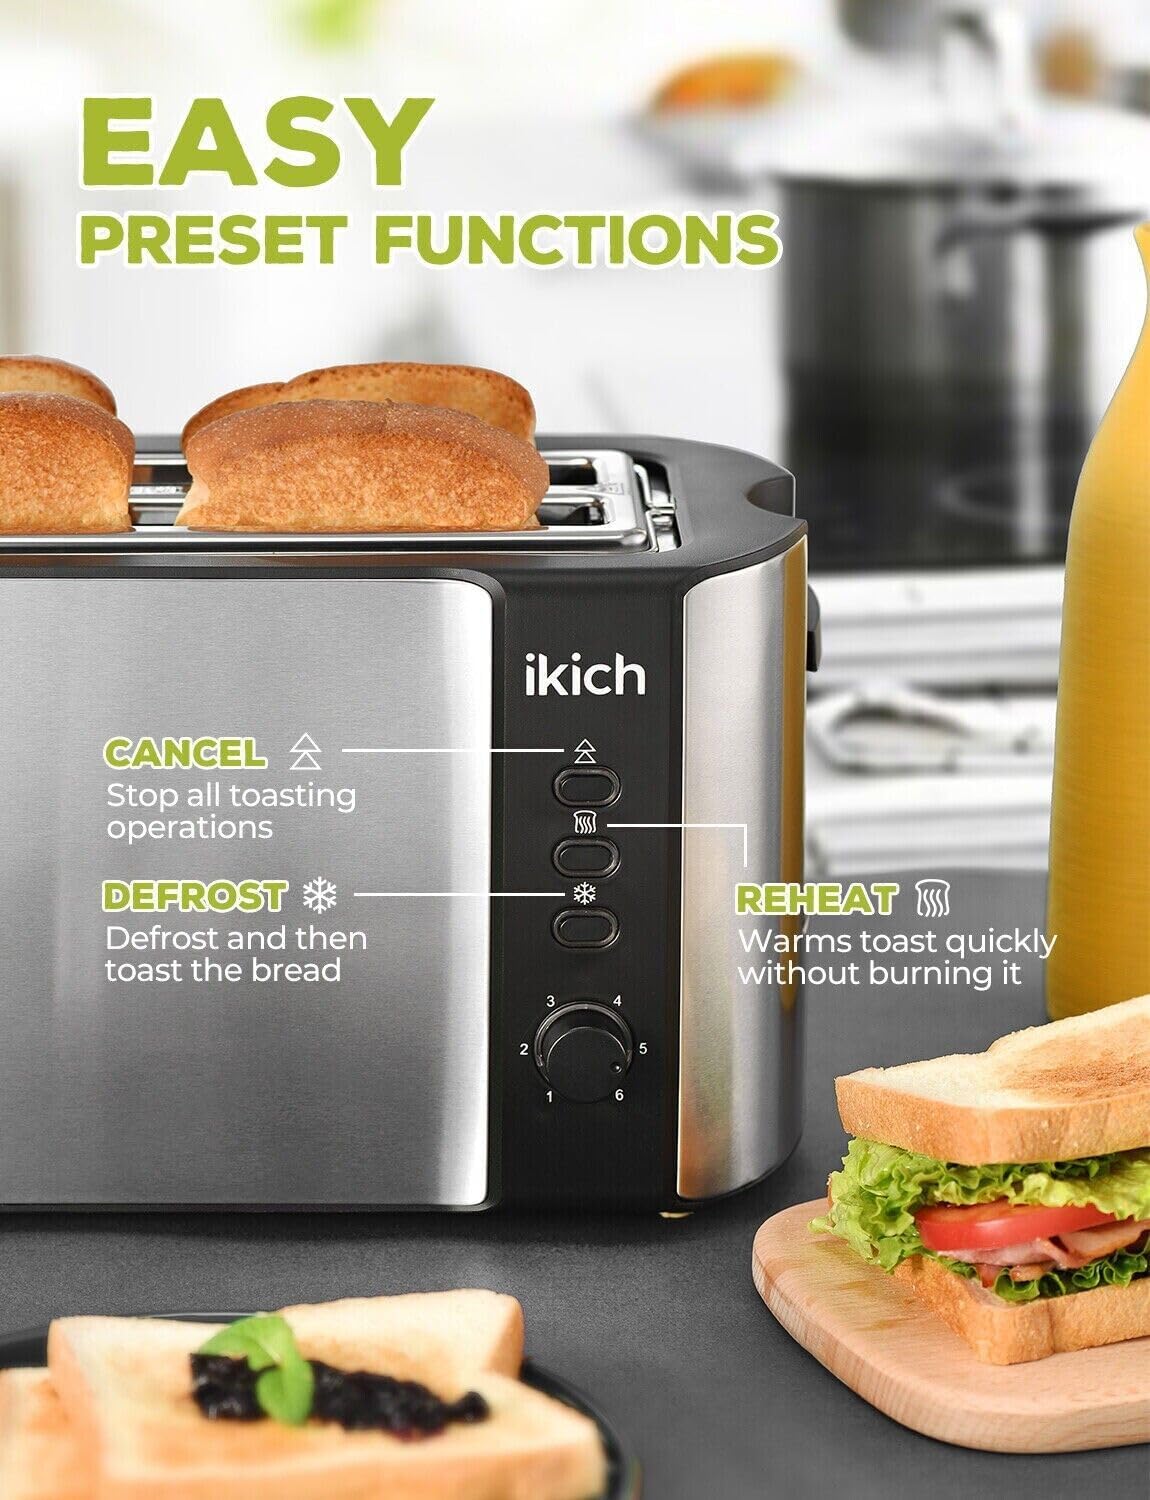
Image: Close-up of the toaster's control panel showing Cancel, Defrost, and Reheat buttons.
3. Setup
- Unpack the toaster and remove all packaging materials, including any protective films or stickers.
- Place the toaster on a stable, heat-resistant, and dry surface, away from flammable materials.
- Ensure the crumb tray is properly inserted.
- Plug the power cord into a grounded electrical outlet.
- Before first use, operate the toaster without bread on the highest browning setting (6) for a few cycles to burn off any manufacturing residues. A slight odor or smoke is normal during this process. Ensure adequate ventilation.
4. Operating Instructions
4.1 Basic Toasting

Image: Diagram illustrating the three simple steps for toasting bread: insert, set browning, and automatic pop-up.
- Insert bread slices into the toasting slots. The long slots can accommodate various bread types and sizes.
- Select your desired browning level using the browning control dial (settings 1-6). Setting 1 is for light toast, and setting 6 is for dark toast. Refer to the browning guide below for visual reference.
- Press the high-lift lever down until it locks into place. The toaster will begin toasting.
- Once the toasting cycle is complete, the toast will automatically pop up. Use the high-lift feature to raise smaller items for easier and safer removal.
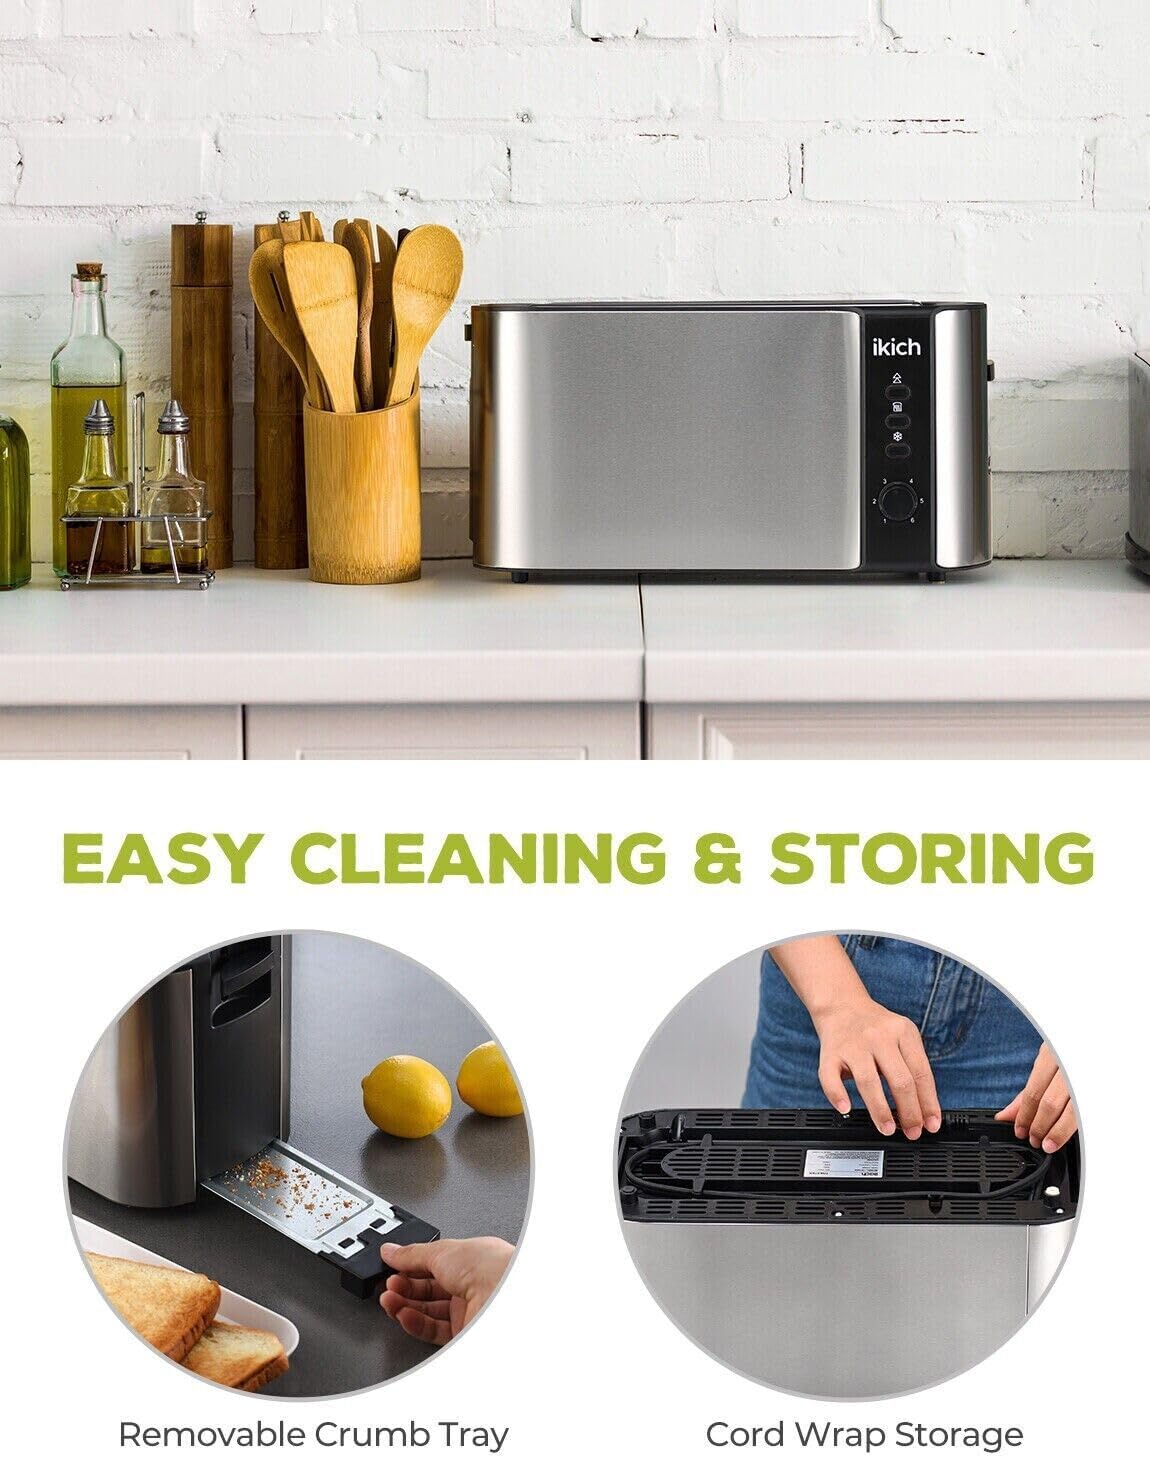
Image: Visual guide to the 6 browning shade settings, from light to dark.
4.2 Special Functions
- Cancel Button: Press this button at any time to stop the toasting cycle and eject the bread.
- Defrost Function: Use this function for toasting frozen bread. Insert frozen bread, select your desired browning level, then press the 'Defrost' button before pressing the high-lift lever down. The toaster will automatically adjust the toasting time to account for the frozen bread.
- Reheat Function: Use this function to warm up previously toasted bread without further browning. Insert the toast, press the 'Reheat' button, then press the high-lift lever down. This cycle is shorter and uses lower heat.
4.3 Using the Warming Rack
The integrated warming rack is ideal for gently heating pastries, rolls, or croissants.
- Gently push the warming rack levers on the sides of the toaster upwards to deploy the rack.
- Place the items to be warmed on the rack.
- Set the browning control to a low setting (e.g., 1 or 2).
- Press the high-lift lever down to start a short heating cycle. Monitor items closely to prevent burning.
- Once warmed, lift the warming rack levers to retract the rack.
5. Cleaning and Maintenance
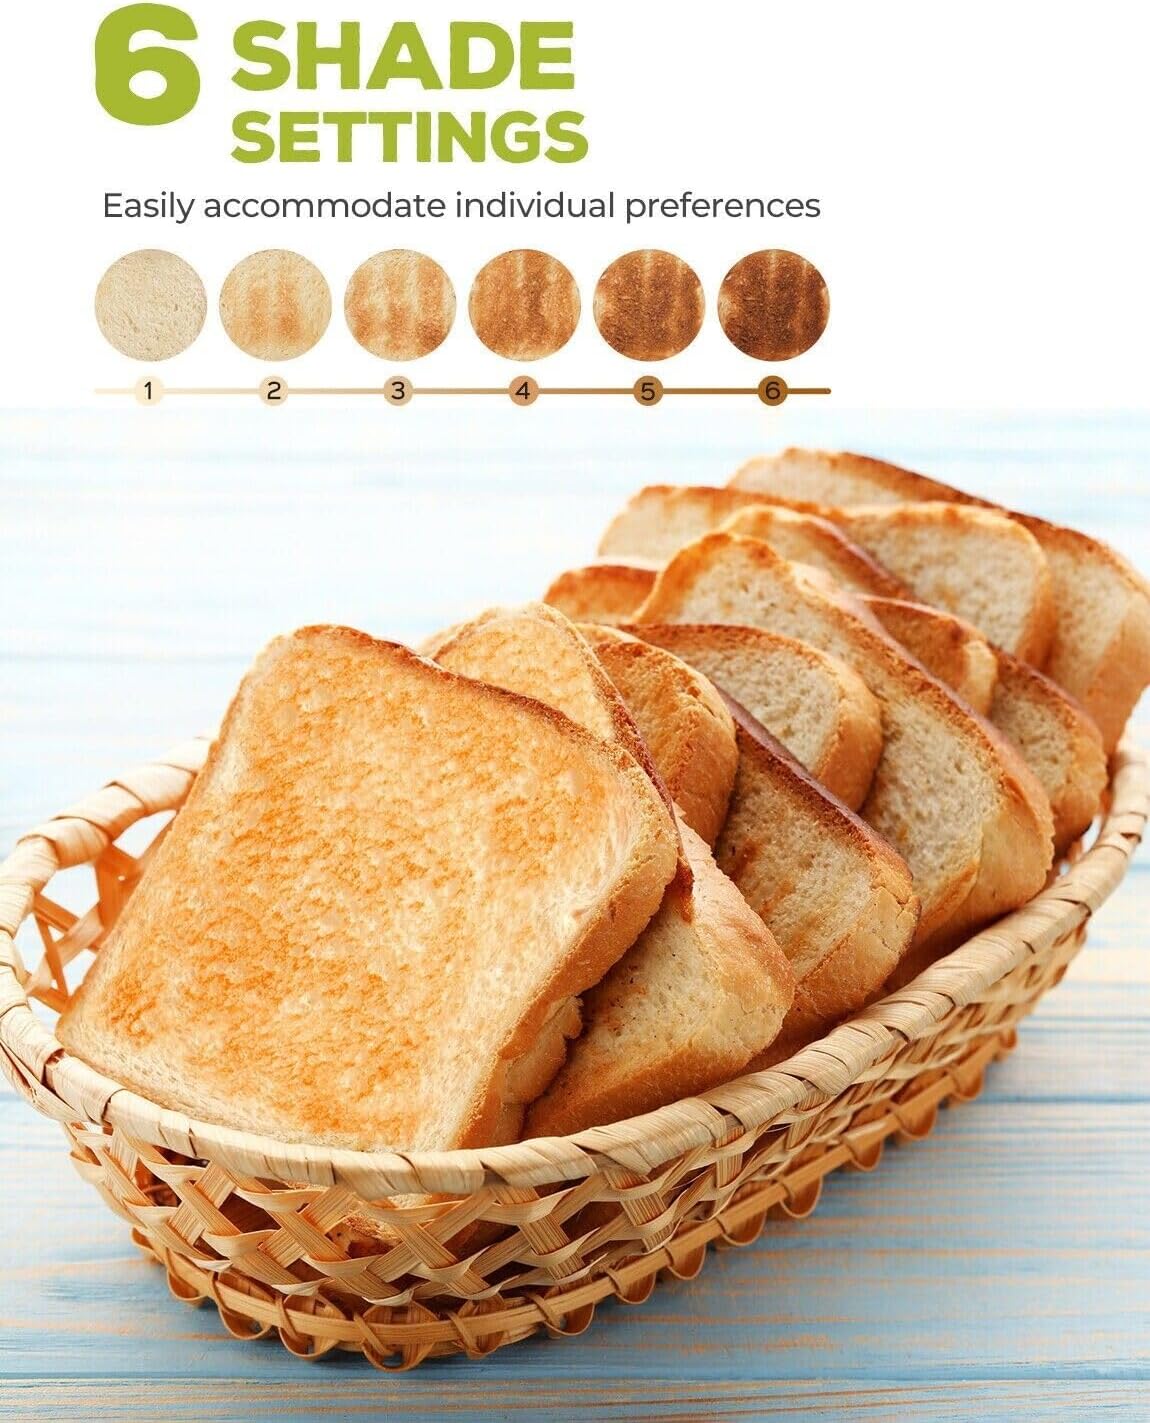
Image: Images showing the removable crumb tray and cord wrap storage.
- Always unplug the toaster from the power outlet and allow it to cool completely before cleaning.
- Cleaning the Crumb Tray: Pull out the removable crumb tray located at the bottom of the toaster. Discard crumbs and wipe the tray clean with a damp cloth. Dry thoroughly before reinserting. Clean the crumb tray regularly to prevent crumb buildup, which can be a fire hazard.
- Cleaning the Exterior: Wipe the exterior of the toaster with a soft, damp cloth. Do not use abrasive cleaners or metal scouring pads, as these can scratch the surface.
- Cleaning the Interior: Do not insert any objects into the toasting slots to clean them. If food becomes lodged, unplug the toaster and carefully turn it upside down to shake out the food.
- Storage: When not in use, the power cord can be wrapped around the cord storage area at the bottom of the toaster for neat storage. Store the toaster in a dry, clean place.
6. Troubleshooting
| Problem | Possible Cause | Solution |
|---|---|---|
| Toaster does not turn on. | Not plugged in; power outage; faulty outlet. | Ensure toaster is securely plugged in. Check household circuit breaker. Try a different outlet. |
| Bread does not toast. | Lever not fully depressed; toaster malfunction. | Ensure the high-lift lever is pushed down until it locks. If issue persists, contact support. |
| Toast is too light/dark. | Incorrect browning setting. | Adjust the browning control dial to a higher (darker) or lower (lighter) setting. |
| Smoke coming from toaster. | Crumbs in toaster; food stuck; first use residue. | Immediately press the 'Cancel' button and unplug. Clean crumb tray. If food is stuck, carefully remove after unplugging. Ensure adequate ventilation during first use. |
| Bread stuck in toaster. | Oversized bread; toaster malfunction. | Unplug the toaster. Use the high-lift lever to raise the bread. If still stuck, carefully remove with non-metallic tongs. |
7. Specifications
- Capacity: 4 Slices (Long Slot Design)
- Rated Voltage: 220-240 V~
- Power: 1500 W
- Browning Settings: 6 Levels
- Frequency: 50/60 Hz
- Material: Stainless Steel, Acrylonitrile Butadiene Styrene (ABS)
- Product Dimensions: Approximately 18"D x 28"W x 20"H (Note: These dimensions appear to be for packaging or a different product based on typical toaster sizes. Please refer to actual product for precise measurements.)
- Special Features: Reheat, Defrost, Cancel Functions, Warming Rack, Removable Crumb Tray, Cord Wrap Storage.
8. Warranty and Support
This Generic 4-Slice Stainless Steel Long Slot Toaster is designed for reliability and performance. For any questions, concerns, or technical support, please refer to the retailer's customer service or the contact information provided at the point of purchase. Please retain your proof of purchase for warranty claims.