1. Introduction
This manual provides detailed instructions for the safe and effective operation of your Pomya Fiber Optical Power Meter with Visual Fault Locator (OPM VFL), Model Pomyat7dpgfksex. Please read this manual thoroughly before using the device to ensure proper functionality and to prevent damage.
2. Safety Information
Observe the following safety precautions to prevent injury and damage to the device:
- Do not look directly into the optical output ports, especially when the Visual Fault Locator (VFL) is active. The laser light can cause eye damage.
- Ensure the device is powered off when not in use or during maintenance.
- Keep the device dry. Do not expose it to moisture or liquids.
- Avoid dropping the device. The silicone protective case offers some protection, but extreme impacts can cause internal damage.
- Use only specified battery types (2xAAA batteries). Do not mix old and new batteries or different battery types.
3. Product Overview
3.1. Features
- Integrated Optical Power Meter (OPM) and Visual Fault Locator (VFL) functions.
- High measurement accuracy of ±0.2dB.
- Universal 2.5mm optical connector interface.
- Supports 7 standard wavelengths: 850nm, 980nm, 1300nm, 1310nm, 1490nm, 1550nm, 1625nm.
- Wide measurement range: -70 to +6 dBm.
- Backlit LCD screen for clear visibility in various lighting conditions.
- Equipped with an LED light for illuminating work areas.
- Automatic shut-off function to conserve battery life.
- Durable silicone protective case for shock and drop resistance.
3.2. Package Contents
- 1 x Pomya Fiber Optical Power Meter (Model Pomyat7dpgfksex)
- 1 x User Manual (this document)
Note: 2xAAA batteries are not included and must be purchased separately.
3.3. Device Layout
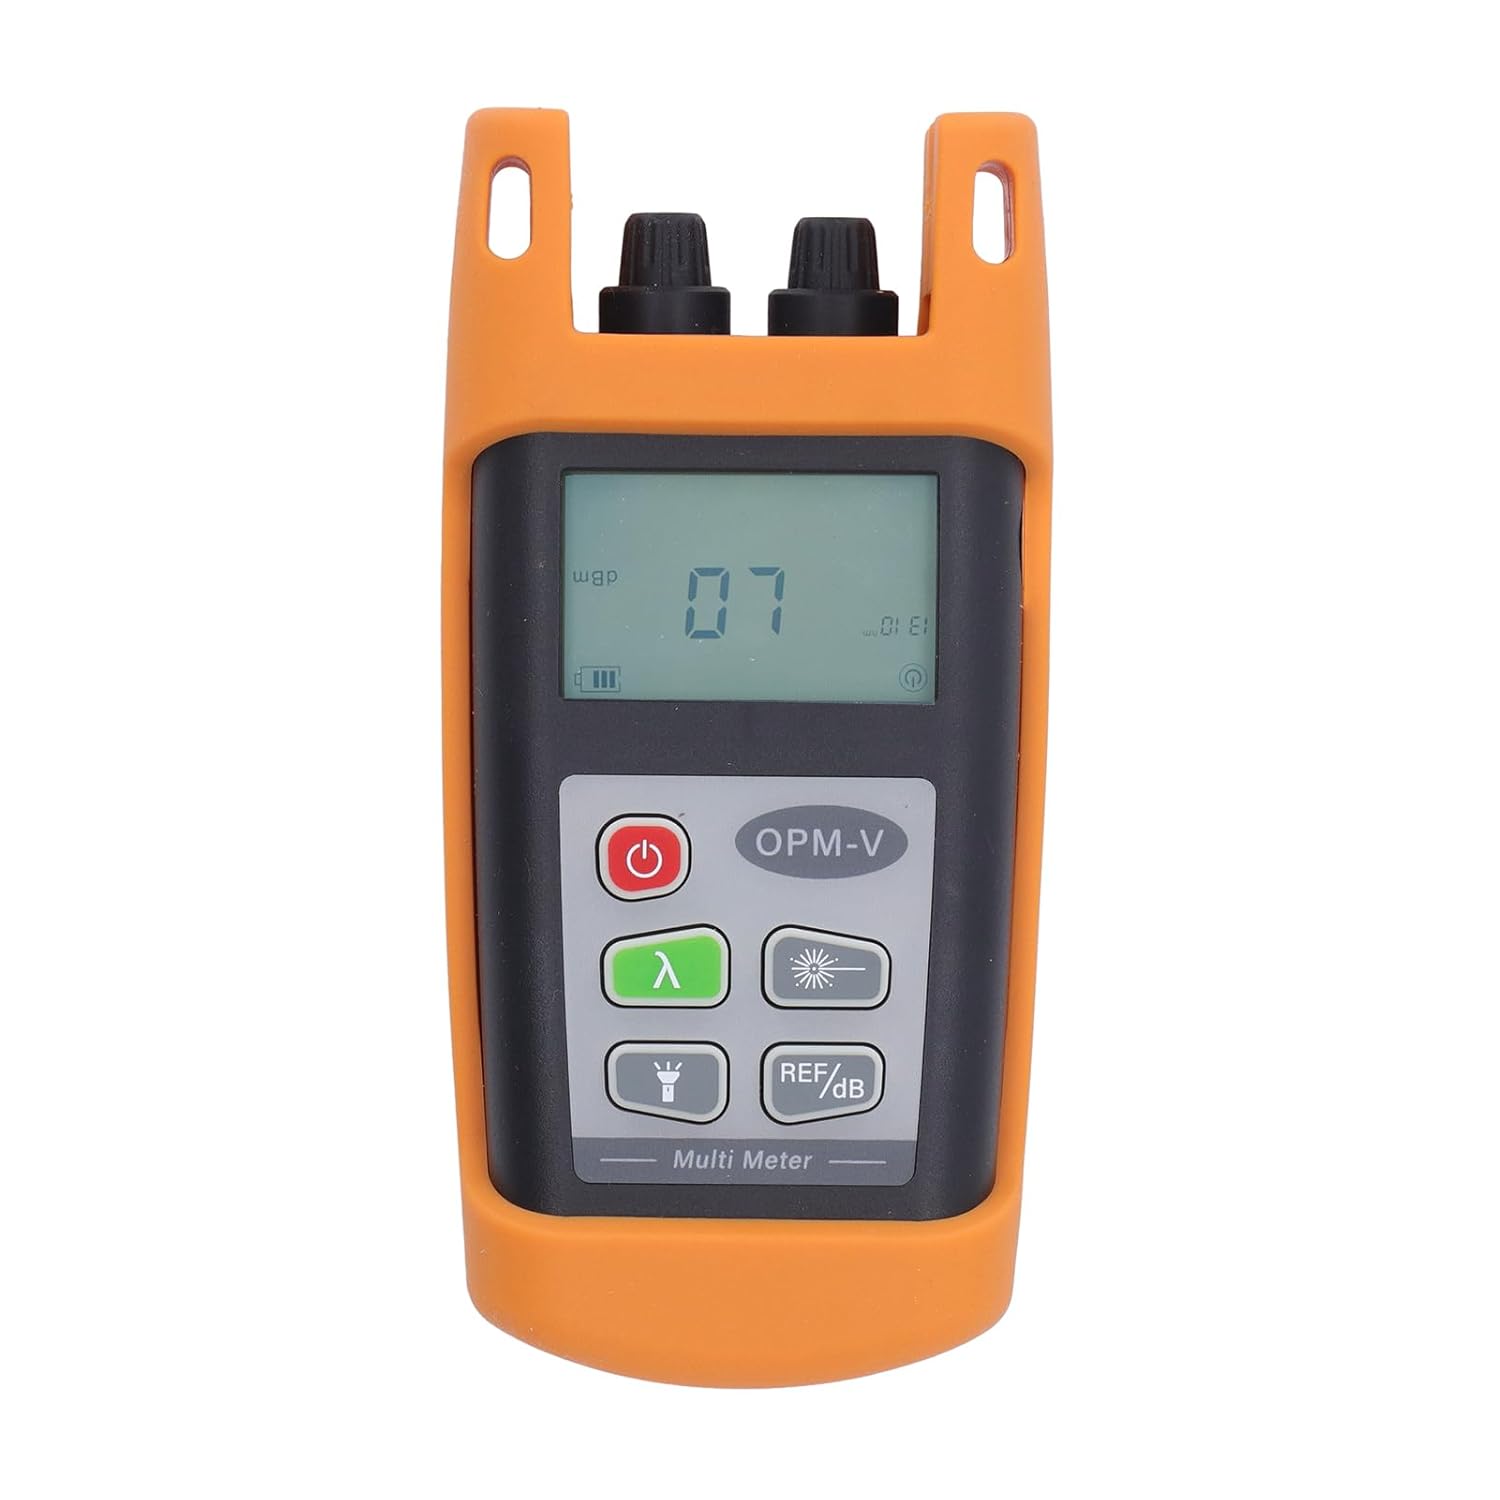
Figure 1: Front view of the Pomya Fiber Optical Power Meter, showing the LCD screen, control buttons, and optical ports.

Figure 2: Overview of the device's dual functionality as an Optical Power Meter and Visual Light Source, highlighting 7 available wavelengths, ±0.2dB accuracy, and LED lighting.

Figure 3: Icons representing key features: backlight display, one-key start, auto power-off, 0.01dB resolution, VFL function, and 7 wavelengths.
4. Setup
- Battery Installation: Open the battery compartment cover on the back of the device. Insert two (2) AAA batteries, ensuring correct polarity (+/-). Close the battery compartment cover securely.
- Initial Power On: Press and hold the power button ( ⑂ ) for approximately 2 seconds to turn on the device. The LCD screen will illuminate.
5. Operating Instructions
5.1. Power On/Off
- To power on: Press and hold the power button ( ⑂ ) for 2 seconds.
- To power off: Press and hold the power button ( ⑂ ) for 2 seconds. The device also features an auto shut-off function after a period of inactivity to save power.
5.2. Optical Power Measurement (OPM)
- Ensure the device is powered on.
- Connect the fiber optic cable to be tested to the OPM input port (typically labeled 'OPM') using the 2.5mm universal connector.
- Select the appropriate wavelength using the wavelength button (λ). Match the wavelength of the light source being measured.
- The measured optical power in dBm will be displayed on the LCD screen.

Figure 4: The device performing an optical power measurement, demonstrating its high precision with an error less than ±0.2dB.
5.3. Visual Fault Locator (VFL)
- Ensure the device is powered on.
- Connect the fiber optic cable to the VFL output port (typically labeled 'VFL').
- Press the VFL button (🔆) to activate the red laser light.
- Observe the fiber for any light leakage, which indicates breaks, bends, or poor connections.

Figure 5: The Visual Fault Locator (VFL) function in use, showing the red laser light emitted from the port to detect fiber discontinuities.
5.4. Wavelength Selection
Press the wavelength button (λ) repeatedly to cycle through the available wavelengths: 850nm, 980nm, 1300nm, 1310nm, 1490nm, 1550nm, 1625nm. The selected wavelength will be displayed on the LCD screen.

Figure 6: The device displaying various wavelength measurements, illustrating the ability to select from 7 different wavelengths.
5.5. Reference Power Setting
The device allows setting a reference power level for relative measurements. Press the REF/dB button (REF/dB) to enter or exit reference mode. In reference mode, the display will show the relative power difference (dB) from the set reference.
5.6. Backlight and LED Light
Press the light button (💡) to toggle the LCD backlight and the integrated LED light on or off. This feature enhances visibility in dark or low-light environments.

Figure 7: The device with its LED backlight activated, demonstrating improved visibility for the display and an additional LED light for illuminating the work area.
6. Maintenance
- Cleaning: Use a soft, dry cloth to clean the device's exterior. For optical ports, use specialized fiber optic cleaning tools to avoid contamination.
- Battery Replacement: Replace batteries when the low battery indicator appears on the LCD. Remove batteries if the device will not be used for an extended period.
- Storage: Store the device in a cool, dry place, away from direct sunlight and extreme temperatures.
- Protective Case: The silicone protective case is removable for cleaning or inspection. Ensure it is properly re-installed to maintain shock and drop protection.

Figure 8: The device shown with its removable silicone jacket, which provides drop resistance and protects against collision damage.
7. Troubleshooting
| Problem | Possible Cause | Solution |
|---|---|---|
| Device does not power on. | Low or dead batteries; incorrect battery installation. | Replace batteries with new AAA batteries, ensuring correct polarity. |
| Inaccurate OPM readings. | Incorrect wavelength selected; dirty optical connector; damaged fiber. | Verify wavelength setting matches the light source; clean optical connectors; inspect fiber for damage. |
| VFL light is dim or not visible. | Low batteries; VFL port obstruction; internal fault. | Replace batteries; ensure VFL port is clear; if problem persists, contact support. |
| LCD backlight or LED light not working. | Low batteries; light function not activated. | Replace batteries; press the light button (💡) to activate. |
8. Specifications
| Parameter | Value |
|---|---|
| Wavelength Range | 850nm to 1625nm (850/980/1300/1310/1490/1550/1625nm) |
| Measuring Range | -70 to +6 dBm |
| Optical Connector | 2.5mm Universal Connector |
| Power Supply | 2xAAA Batteries (Not Included) |
| Resolution | 0.01dB |
| Accuracy | ±0.2dB |
| Operating Temperature | -10 to +60 ℃ (14 to 140 ℉) |
| Storage Temperature | -25 to +70 ℃ (-13 to 158 ℉) |
| Product Dimensions | Approx. 137 x 60 x 37mm (5.4 x 2.36 x 1.5in) |
| Battery Operating Time | 20 hours (typical) |
| Material | ABS |
9. Warranty and Support
For warranty information or technical support, please refer to the contact details provided with your purchase or visit the official Pomya website. Keep your purchase receipt as proof of purchase for warranty claims.