
Luston LUS31
Luston Slim Smart Lock (Model LUS31) Instruction Manual
Model: LUS31 | Brand: Luston
1. Introduction
This manual provides detailed instructions for the installation, operation, and maintenance of the Luston Slim Smart Lock (Model LUS31). Please read this manual thoroughly before installation and use to ensure proper function and safety.
The Luston Slim Smart Lock offers multiple access methods including fingerprint, smartphone Bluetooth APP control, passcode, key fobs, mechanical keys, Apple Watch, and NFC (Android). It is designed for compatibility with 90% of multipoint locking systems.
2. Product Overview
2.1 Package Contents
The standard package includes:
- Luston Slim Smart Lock (Front and Back Panels)
- 3585 Mortise (default)
- 3 IC Cards
- 2 Mechanical Keys
- Installation Manual
- Hole-Drilling Drawing
- Accessories Package (screws, square shaft, springs, waterproof rubber plates)
2.2 Key Features
- 7-in-1 Unlocking Methods: Fingerprint, Bluetooth APP, Passcode, Key Fobs, Mechanical Keys, Apple Watch, NFC (Android).
- Remote Access Management: Grant permanent or time-limited access via smartphone app.
- Unlock Records: Track door activity through the app.
- Mortise Compatibility: Comes with 3585 mortise (85mm upper center to lower center, 35mm center to door edge).
- Door Compatibility: Designed for 90% multipoint locking systems. Handle angle limited to 45 degrees.
- Durable Construction: Stainless Steel material.
- Emergency Power: USB port for emergency power.
- Low Battery Alert: Notifies user when battery is low.
2.3 Product Diagram
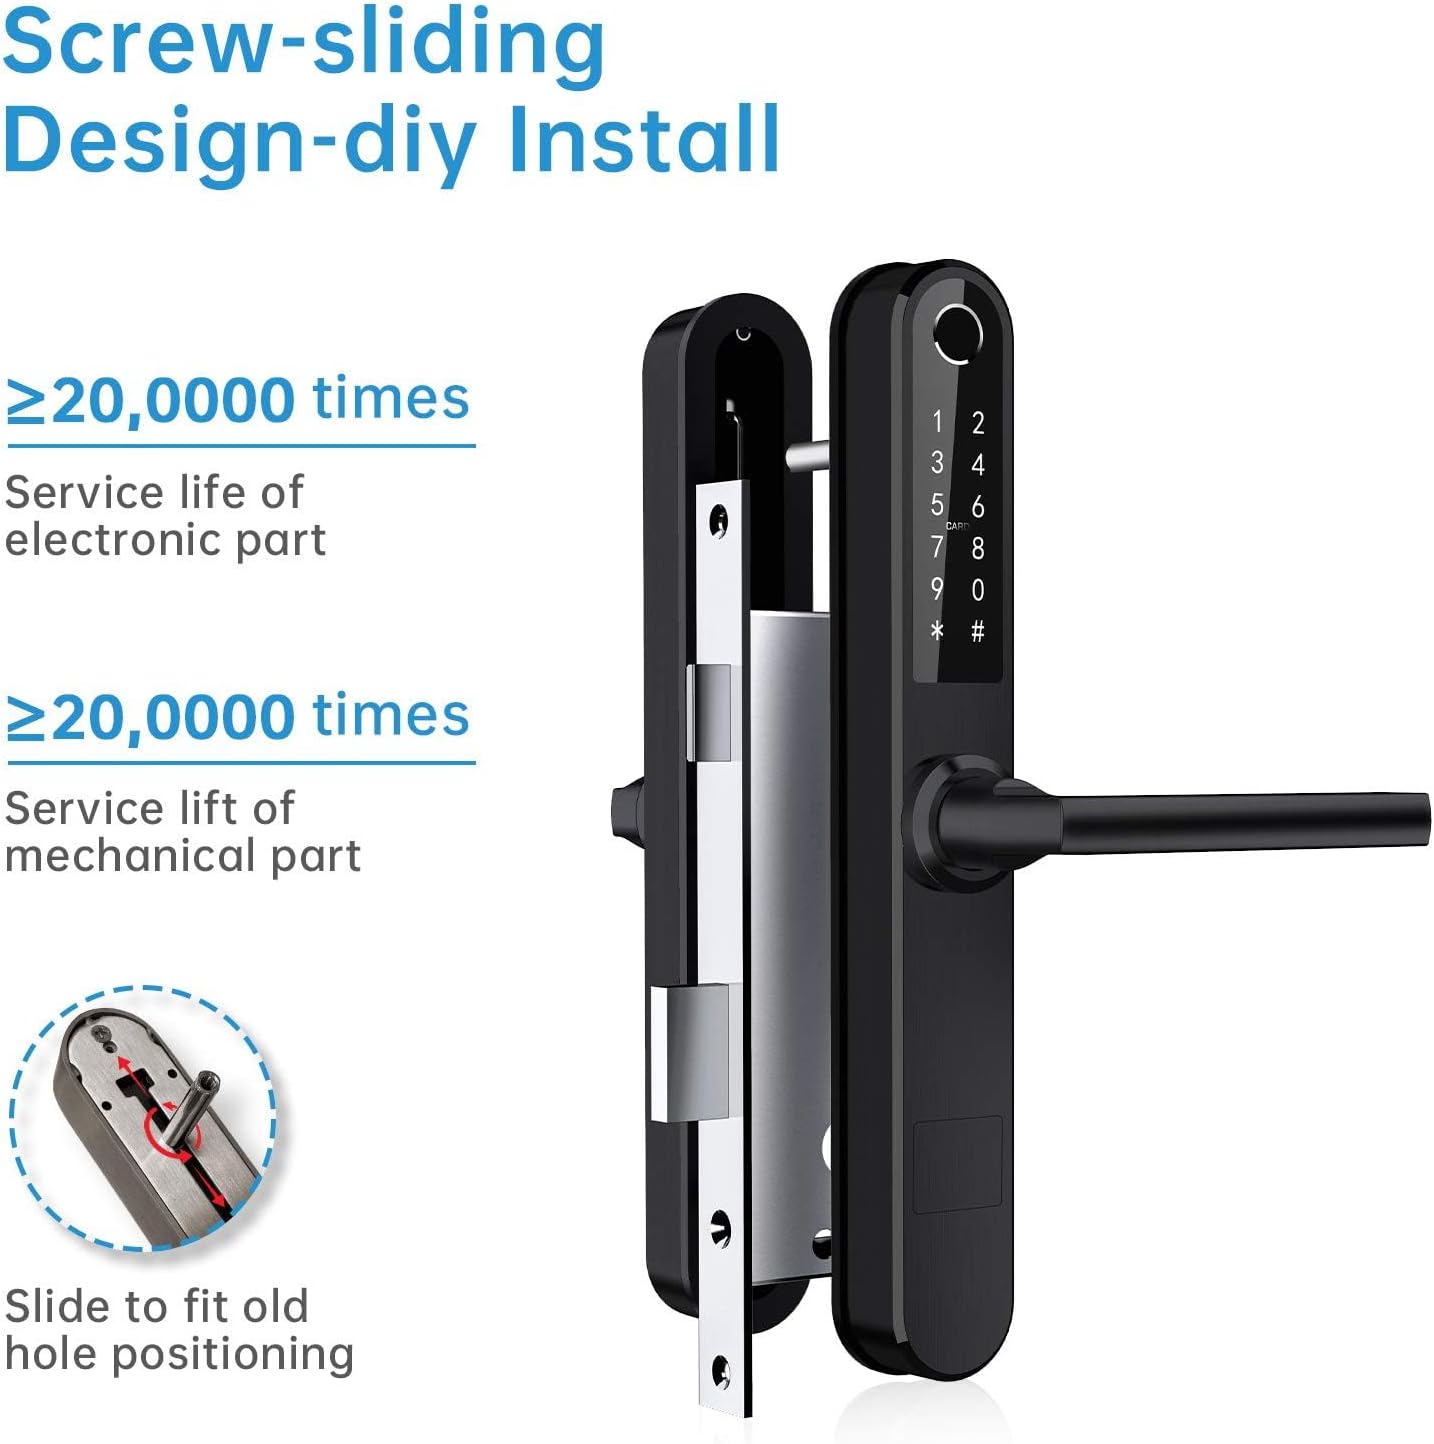
Figure 1: Diagram illustrating the various components of the Luston Slim Smart Lock, including the semi-conductor biometric fingerprint sensor, touchable digital keypad, Mifare card reader, hidden mechanical keyhole, and USB port for emergency power. It also highlights the stainless steel full plate and large capacity for codes, fingerprints, and IC cards.
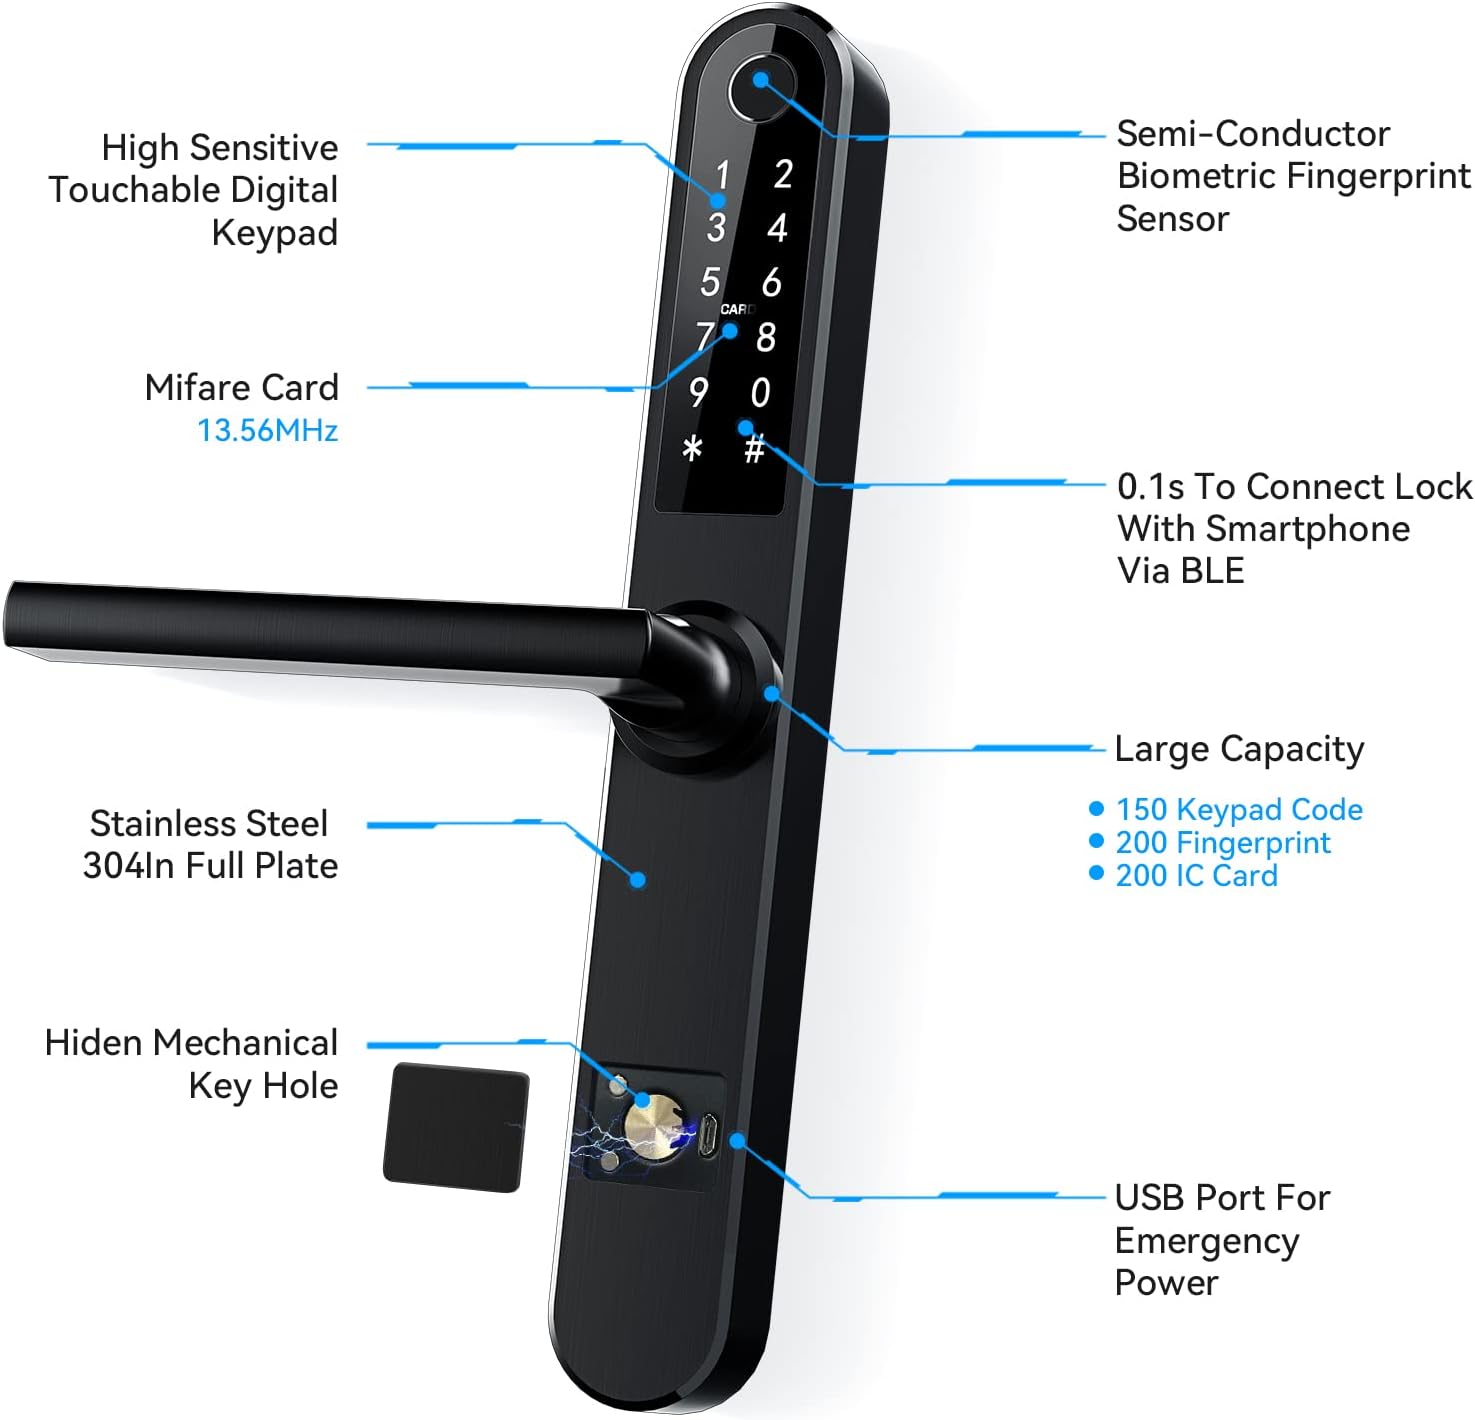
Figure 2: Detailed dimensions of the Luston Slim Smart Lock and the included 3585 mortise. This diagram shows the lock's height (280mm), width (38mm), and the mortise dimensions (240mm height, 47mm width, 35mm backset, 85mm center distance). It also indicates compatibility for door thicknesses between 30-80mm.

Figure 3: Front and back panel dimensions of the Luston Slim Smart Lock, showing the overall length, handle length, and thickness of the lock components. This helps in understanding the physical size and fit of the lock.
3. Installation Guide
Before beginning installation, ensure your door is compatible with the Luston Slim Smart Lock. The lock is designed for doors with a thickness of 30-80mm and is compatible with 3585 mortise locks. If your existing door handle's downward angle exceeds 45 degrees, it may not be compatible.
3.1 Door Compatibility Check

Figure 4: Visual guide for door compatibility, showing examples of compatible and incompatible door types. A green checkmark indicates compatibility, while red crosses indicate incompatibility. This helps users assess if their door is suitable for the smart lock.

Figure 5: Diagram illustrating the 3585 mortise dimensions and how to check compatibility with existing door holes. It shows measurements for the mortise and the lock's placement, emphasizing the sliding-screw design for easier installation without additional drilling.
3.2 Installation Steps
For a visual guide, please refer to the installation video below.
Video 1: This video provides a step-by-step guide on how to install the Luston S31B smart lock, covering mortise installation, front panel assembly, back panel connection, and battery insertion. It demonstrates the process clearly for users.
- Install Mortise: Insert the mortise into the door edge. Ensure the latch bolt direction is correct for your door swing.
- Fixed Screws: Secure the mortise with the provided screws.
- Install Front Panel:
- Install Sliding Screws Casing.
- Install Opposite Pull Screws Casing.
- Install Square Shaft: Ensure the triangle point on the shaft aligns with the handle direction (left for left-pointing handle, right for right-pointing handle).
- Install Spring: Use pliers to insert the bolt into the hole and bend its front end to fix the square shaft.
- Install Waterproof Rubber Plate.
- Fixed Front: Position the front panel onto the door.
- Install Back Panel:
- Screw Out The Battery Cover.
- Install Waterproof Rubber Plate.
- Connect Front And Back Panel Wires: Carefully connect the wiring harness between the front and back panels.
- Fixed Back Panel: Secure the back panel with screws.
- Install Batteries: Insert 4 AAA batteries into the battery compartment.
- Test Functionality: After installation, test all unlocking methods and ensure the handle operates smoothly.
4. Operating Instructions
The Luston Slim Smart Lock offers multiple ways to unlock. This section details how to set up and use these features via the mobile application.
4.1 Mobile App Setup and Unlocking
Download the "TTLock" app from your smartphone's app store (available on Android and iOS).

Figure 6: The mobile application interface demonstrating the unlock function. A large lock icon indicates the current status, and a notification confirms successful unlocking. This image shows the simplicity of app-based unlocking.
Video 2: This video demonstrates the app operation for the Luston S31B smart lock, including connecting the lock to the app, adding fingerprints, setting up passcodes, and adding IC cards. It provides a comprehensive overview of the app's features for managing access.
- Connect to App:
- Ensure Bluetooth is enabled on your smartphone.
- Open the app and register/login.
- Select "Add Lock" and choose "Door Lock".
- Touch any key on the lock's keypad to activate it.
- The app will detect nearby locks. Select your lock (e.g., "S31").
- Enter a name for your lock and confirm.
- App Unlock: Once connected, tap the lock icon in the app to unlock the door.
- Add Fingerprint:
- In the app, navigate to "Fingerprints" and select "Add Fingerprint".
- Enter a name for the fingerprint and set it as permanent or time-limited.
- Follow the on-screen prompts to place and remove your finger on the lock's sensor multiple times until successful.
- Add Passcode:
- In the app, navigate to "Generate Passcode".
- Choose between Permanent, Timed, One-Time, or Erase passcodes.
- Generate the passcode and note it down. You can also name the passcode.
- To unlock, enter the passcode on the lock's keypad followed by '#'.
- Add IC Card:
- In the app, navigate to "IC Cards" and select "Add IC Card".
- Enter a name for the card and set it as permanent or time-limited.
- Place the IC card against the card reader sensor on the smart lock until successful.
4.2 Other Unlocking Methods
- Mechanical Key: Insert the mechanical key into the hidden keyhole and turn to unlock.
- Key Fobs: Key fobs can be paired with the lock via the app for quick access.
- Apple Watch/NFC (Android): These methods require specific device setup and pairing with the app.
- Alexa Voice Unlock: Requires a separate WiFi Gateway (sold separately) for remote voice control.

Figure 7: An illustration of the Luston Smart Lock being controlled via Alexa voice commands. This feature requires an additional WiFi Gateway for remote functionality and integration with smart home ecosystems.
5. Maintenance
- Battery Replacement: Replace all four AAA batteries when the low battery alert is triggered. Do not mix old and new batteries.
- Cleaning: Wipe the lock's surface with a soft, dry cloth. Avoid abrasive cleaners or solvents that could damage the finish or electronic components.
- Fingerprint Sensor: Keep the fingerprint sensor clean and dry for optimal performance.
- Mechanical Parts: Periodically check screws and moving parts for tightness and smooth operation.
- Software Updates: Regularly check the mobile app for firmware updates to ensure optimal performance and security.
6. Troubleshooting
- Lock Not Responding: Check battery levels. If batteries are dead, use the mechanical key or emergency USB power.
- Fingerprint Not Recognized: Ensure your finger and the sensor are clean and dry. Re-register your fingerprint if issues persist.
- Passcode Not Working: Verify the correct passcode is entered. Ensure the lock is active (touch keypad first).
- App Connectivity Issues: Ensure Bluetooth is on and you are within range of the lock. Restart the app or your phone if necessary.
- Handle Not Retracting Latch Fully: This may indicate an incompatibility with your door's multipoint locking system if the handle angle is too large. Refer to the "Door Compatibility" section.
7. Specifications
| Feature | Detail |
|---|---|
| Brand | Luston |
| Model Name | LUS31 |
| Lock Type | Mortise Lock |
| Material | Stainless Steel |
| Color | Black |
| Item Dimensions (L x W x H) | 9.5 x 14.37 x 4.7 inches |
| Item Weight | 6.05 pounds (2.75 Kilograms) |
| Special Features | Fingerprint, WiFi (Gateway Required), Bluetooth, Key Fobs, Apple Watch, NFC, Alexa Voice Unlock (Gateway Required) |
| Connectivity Protocol | Bluetooth |
| Controller Type | Amazon Alexa, Android, iOS |
| UPC | 709226965796 |
| Batteries Required | Yes (4x AAA, not included) |
8. Warranty and Support
For warranty information and technical support, please refer to the contact details provided with your product packaging or visit the official Luston website. Keep your purchase receipt for warranty claims.
The mobile application for managing the smart lock is free for life.
no relevant documents
Ask a question about this manual
Ask about setup, troubleshooting, compatibility, parts, safety, or missing instructions. Manuals+ will review the question and use this page’s manual context to help answer it.