1. Introduction
This manual provides detailed instructions for the safe and effective use of your Eujgoov A1X Digital Multimeter. This smart diagnostic tool is designed for professionals and home users, offering auto-ranging capabilities for various electrical measurements. Please read this manual thoroughly before operation and retain it for future reference.
2. Safety Information
Always adhere to safety precautions to prevent electric shock or personal injury.
General Safety Guidelines:
- Do not exceed the maximum input value specified for each measurement range.
- Ensure the test leads are properly connected and in good condition before use.
- Do not use the multimeter if it appears damaged or if the casing is open.
- Exercise extreme caution when working with voltages above 30V AC RMS, 42V peak, or 60V DC. These voltages pose a shock hazard.
- Keep fingers behind the finger guards on the test probes during measurements.
- Do not operate the multimeter in explosive gas, vapor, or dusty environments.
- Always disconnect power to the circuit and discharge all high-voltage capacitors before testing resistance, continuity, diodes, or capacitance.
- The ABS casing provides electrical insulation and protection against accidental drops.
3. Package Contents
Verify that all items listed below are included in your package:
- 1 x Eujgoov Digital Multimeter (A1X)
- 2 x Test Probes (Red and Black)
- 1 x USB Charging Cable
- 1 x Storage Bag (may vary by package option)
- 1 x User Manual
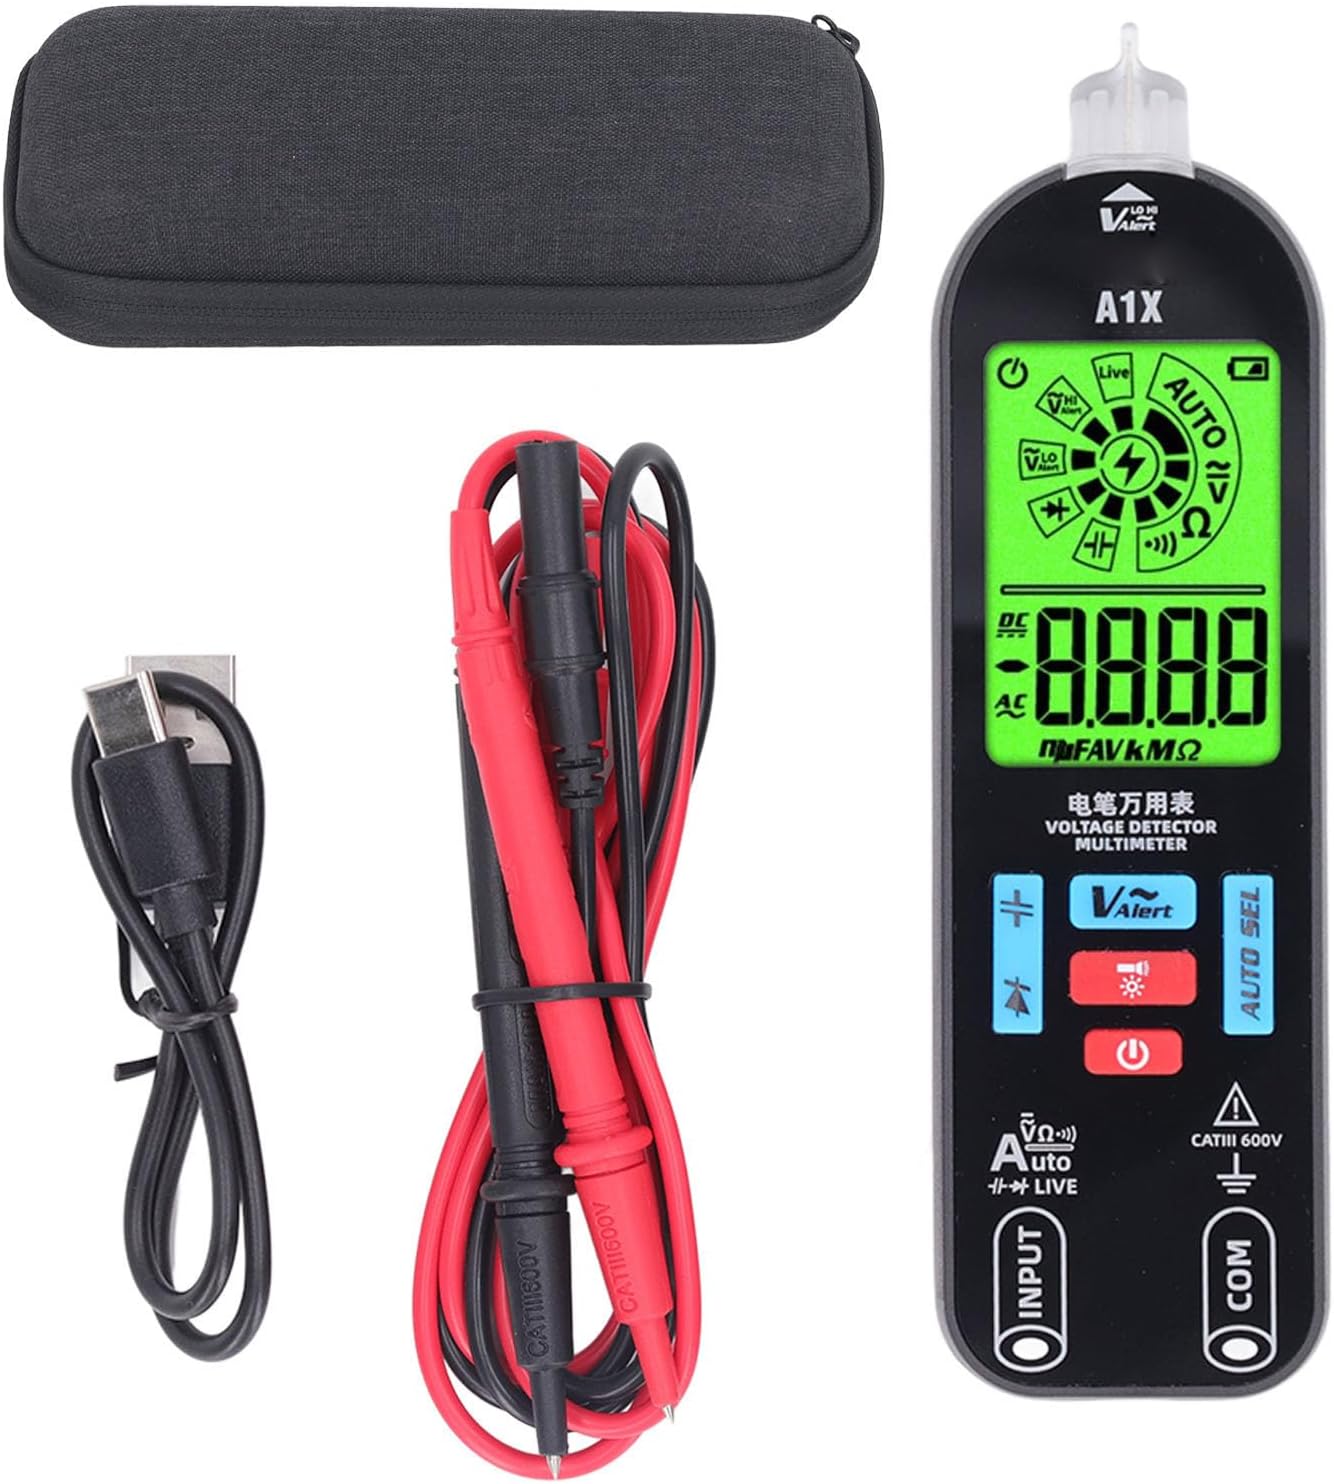
Image 3.1: Contents of the Eujgoov Digital Multimeter A1X package.
4. Product Features
The Eujgoov A1X Digital Multimeter offers a range of smart testing capabilities:
- Smart in Testing: Capable of testing voltage, capacitance, resistance, and diode.
- Simple Operation: Large screen display with auto-recognition and 10,000 counts digital display for ease of use and high accuracy.
- Great Protection: Durable ABS casing provides insulation and protection against drops and electrical leakage.
- Wider Utility: Suitable for various electrical testing, electronic component repair, and maintenance tasks.
- Convenient Carry: Lightweight and compact design for portability.

Image 4.1: Overview of the Eujgoov A1X Multimeter's key functions.
5. Product Overview and Components
Familiarize yourself with the components of your Eujgoov A1X Digital Multimeter:

Image 5.1: Labeled diagram of the Eujgoov A1X Digital Multimeter.
Key Components:
- NCV Sensing Area: Used for Non-Contact Voltage detection.
- Flashlight: Illuminates the test area.
- Display Screen: LCD screen showing measurement readings and mode indicators.
- Function Mode Switching Button: Cycles through various measurement modes.
- Capacitive Mode Button: Activates capacitance measurement.
- Diode Mode Button: Activates diode testing.
- Flashlight and Backlight Button: Toggles the flashlight and display backlight.
- Switch Button: Powers the device on or off.
- Black Pen Socket (COM): Common input for the black test lead.
- Red Probe Socket (INPUT): Input for the red test lead for most measurements.

Image 5.2: Front view of the Eujgoov A1X Digital Multimeter.

Image 5.3: Close-up of the control buttons and input jacks.
6. Setup
Initial Charging:
The multimeter is equipped with a built-in 3.7V lithium battery. Before first use, or if the battery indicator shows low power, connect the device to a USB power source using the provided USB cable. The display will indicate charging status.
Connecting Test Probes:
- Insert the black test lead into the 'COM' (Common) input jack.
- Insert the red test lead into the 'INPUT' jack for most voltage, resistance, capacitance, and diode measurements.
7. Operating Instructions
Power On/Off:
Press the Switch Button (power symbol) to turn the multimeter on. Press and hold the same button to turn it off. The device features automatic shutdown after a period of inactivity to conserve battery.
Automatic Measurement Mode:
Upon powering on, the multimeter defaults to 'AUTO' mode. In this mode, the device automatically identifies and measures AC/DC voltage, resistance, and continuity without manual range selection. Simply connect the probes to the circuit or component to be measured.
Manual Mode Selection:
Press the Function Mode Switching Button (labeled 'AUTO SEL' or with mode symbols) to cycle through specific measurement functions such as:
- Voltage (AC/DC): For measuring electrical potential difference.
- Resistance (Ω): For measuring electrical resistance.
- Capacitance (F): For measuring capacitance of components.
- Diode Test: For checking the functionality of diodes.
- Continuity: For checking if a circuit is complete (audible beep for continuity).
Non-Contact Voltage (NCV) Detection:
The NCV function allows for detecting AC voltage without direct contact with wires. Place the NCV sensing area (top of the multimeter) near the conductor. The device will indicate the presence of AC voltage through visual and audible alerts.

Image 7.1: Non-Contact Voltage (NCV) detection in use.
Live Wire Detection:
To identify live and neutral wires, select the 'LIVE' mode. Insert the red probe into the suspected live wire. The display will show a strong signal (often red indication) for a live wire and a weak signal (often green indication) for a neutral wire.

Image 7.2: Live and Neutral wire detection.
Flashlight and Backlight:
Press the Flashlight and Backlight Button to turn on the built-in flashlight for working in dimly lit areas. Press it again to turn off. The display backlight automatically adjusts or can be toggled with this button.

Image 7.3: Multimeter in use for electronic maintenance.
8. Maintenance
Cleaning:
Wipe the case with a damp cloth and mild detergent. Do not use abrasives or solvents. Ensure the device is powered off and disconnected from any circuits before cleaning.
Storage:
When not in use for extended periods, store the multimeter in its protective storage bag in a cool, dry place, away from direct sunlight and extreme temperatures. Ensure the battery is adequately charged before long-term storage.
9. Troubleshooting
- No Display/Power: Ensure the battery is charged. Connect to a USB power source to charge.
- Inaccurate Readings: Check test lead connections. Ensure the correct measurement mode is selected (if not in AUTO mode). Verify the component or circuit is properly isolated if required.
- No NCV Detection: Ensure the NCV sensing area is close enough to the AC voltage source.
- Device Not Responding: Try turning the device off and on again. If issues persist, contact customer support.
10. Specifications
| Specification | Value |
|---|---|
| Model Number | Eujgoovo15puw8s6c-11 |
| Display | LCD Screen, 10,000 Counts |
| Power Supply | Built-in 3.7V Lithium Battery, 400mAh |
| Measurement Type | Multimeter (Auto Ranging) |
| Measurement Accuracy | 0.003mm (General indication, specific electrical accuracies vary by range) |
| Item Weight | 8 ounces |
| Package Dimensions | 7 x 3.32 x 1.75 inches |
| Safety Rating | CAT III 600V |
11. Warranty and Support
Eujgoov products are designed for reliability and performance. For warranty information, technical support, or service inquiries, please refer to the contact details provided with your purchase or visit the official Eujgoov website. Please have your model number (Eujgoovo15puw8s6c-11) and purchase date available when contacting support.
You can visit the Eujgoov Store for more information: Eujgoov Official Store