
Introduction
This manual provides instructions for the proper installation, operation, and maintenance of your Blooy Gauge Set. This gauge set is designed for use with Brother LT2-B845 and Jack JK-58450B double needle industrial sewing machines, as well as many other compatible double needle sewing machine models. The 1-4 inch gauge set ensures precise and consistent stitching for various sewing applications.
Please read this manual thoroughly before installation and use to ensure optimal performance and longevity of the product.
Package Contents
The Blooy Gauge Set includes the following components:
- 1 x Needle Plate
- 1 x Presser Foot
- 1 x Feed Dog
- 1 x Left Needle Clamp
- 1 x Right Needle Clamp
Note: This gauge set does not include a thread trimmer.
Setup and Installation
Proper installation of the gauge set is crucial for accurate stitching. Always ensure the sewing machine is powered off and unplugged before attempting any installation or component changes.
1. Removing Existing Components
- Carefully loosen and remove the screws securing the existing needle plate, feed dog, and presser foot.
- Remove the existing left and right needle clamps by loosening their respective screws.
- Keep all removed screws in a safe place for potential future use or reinstallation of original parts.
2. Installing the New Gauge Set
- Install the Feed Dog: Position the new feed dog onto the machine bed, aligning it with the screw holes. Secure it gently with the appropriate screws. Do not overtighten initially.
- Install the Needle Plate: Place the new needle plate over the feed dog, ensuring the needle holes align correctly with the feed dog teeth. Secure it with its screws.
- Install the Presser Foot: Attach the new presser foot to the presser bar. Ensure it moves freely and aligns with the needle plate and feed dog. Secure it with its screw.
- Install Needle Clamps: Attach the left and right needle clamps to their respective positions on the needle bar. Ensure they are oriented correctly for the needles. Secure them with their screws.
- Final Tightening: Once all components are in place and properly aligned, carefully tighten all screws. Ensure all parts are secure but avoid excessive force.
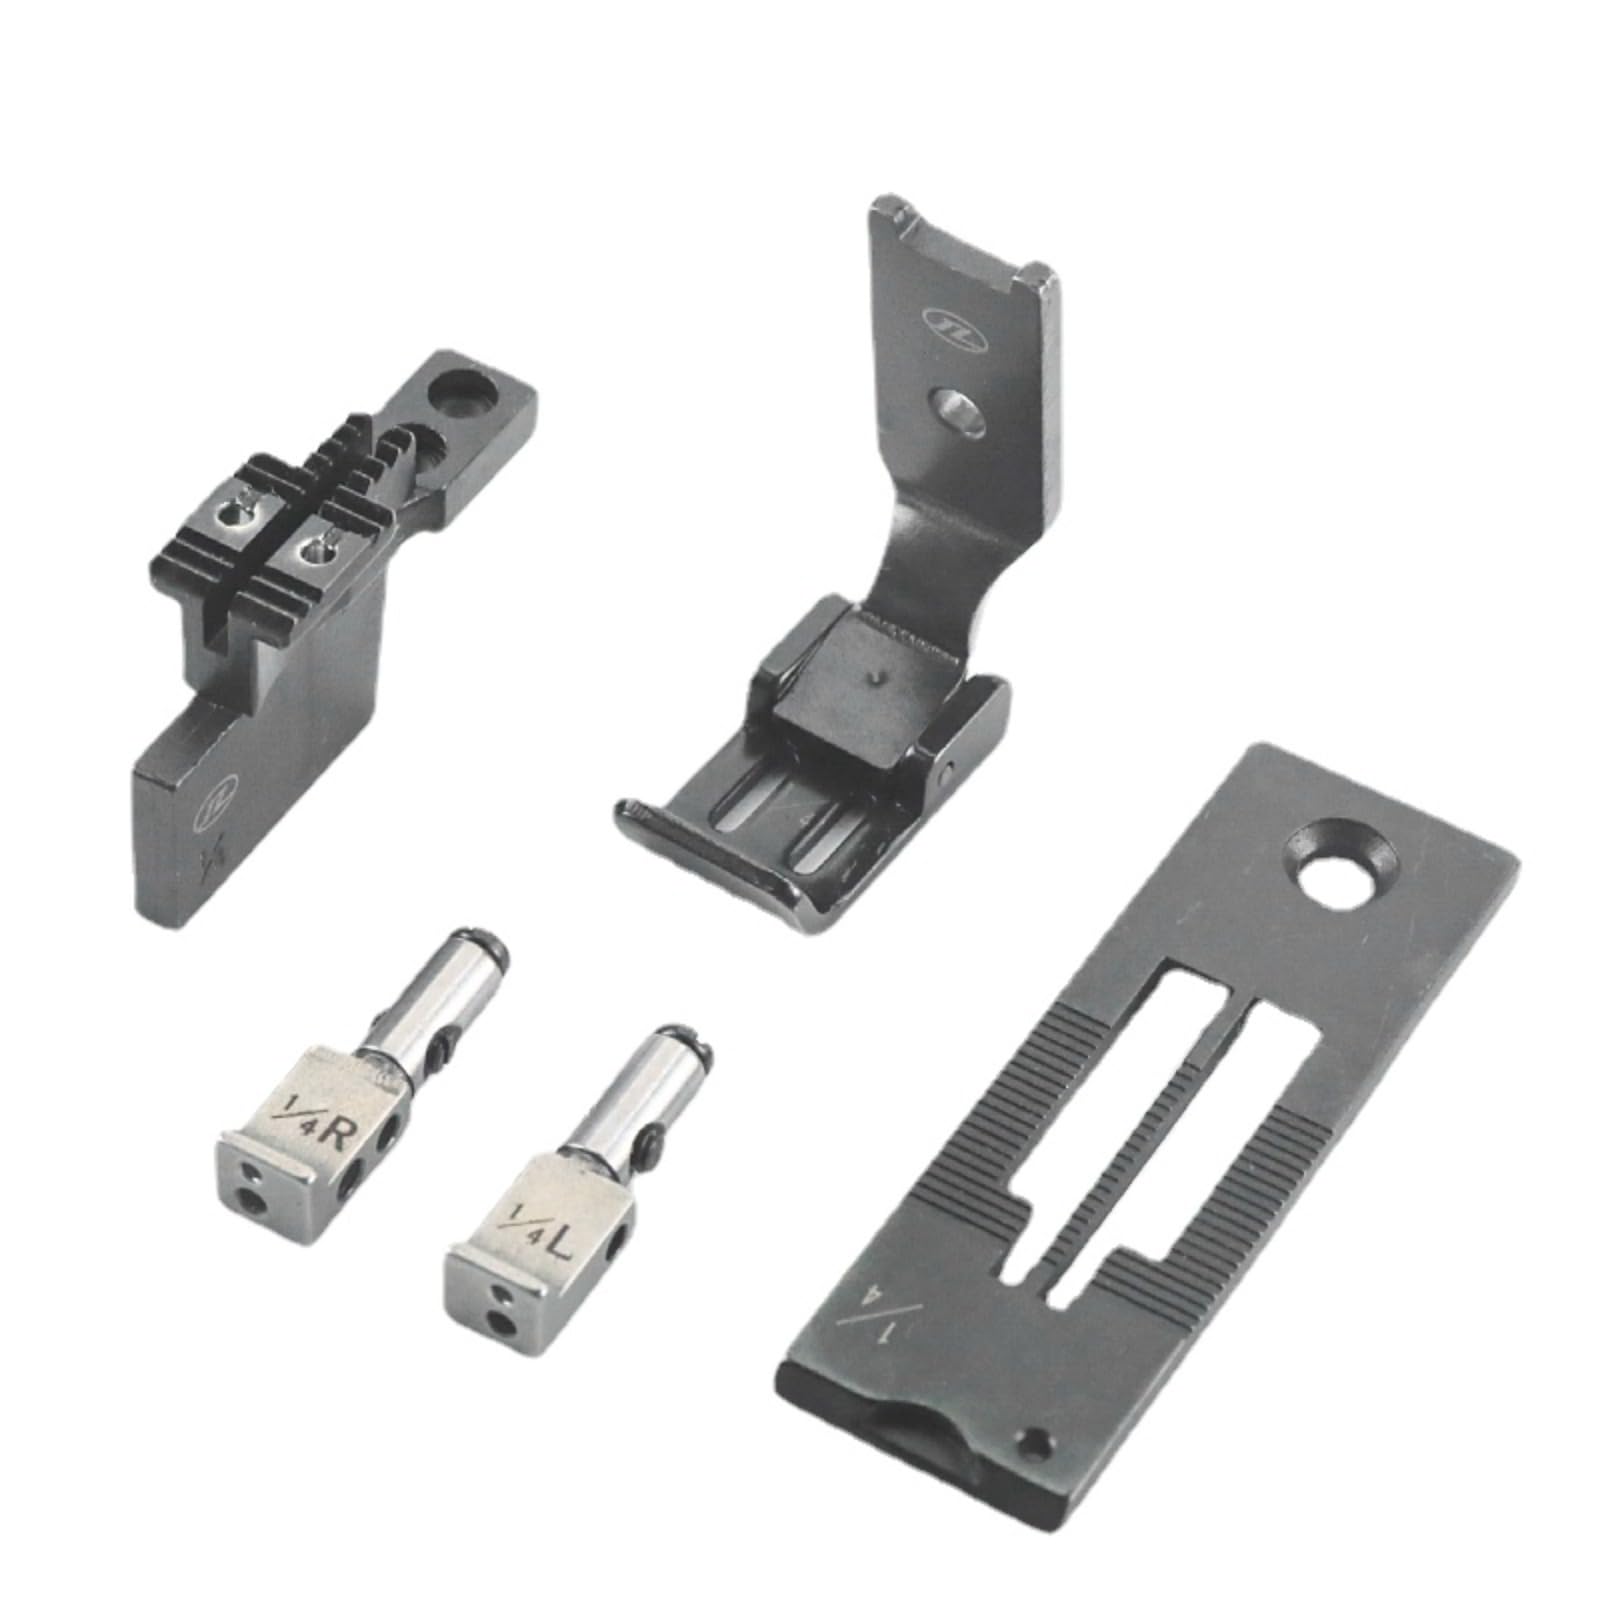
Image: Complete Blooy Gauge Set for double needle industrial sewing machines.

Image: Close-up of the presser foot component from the Blooy Gauge Set.
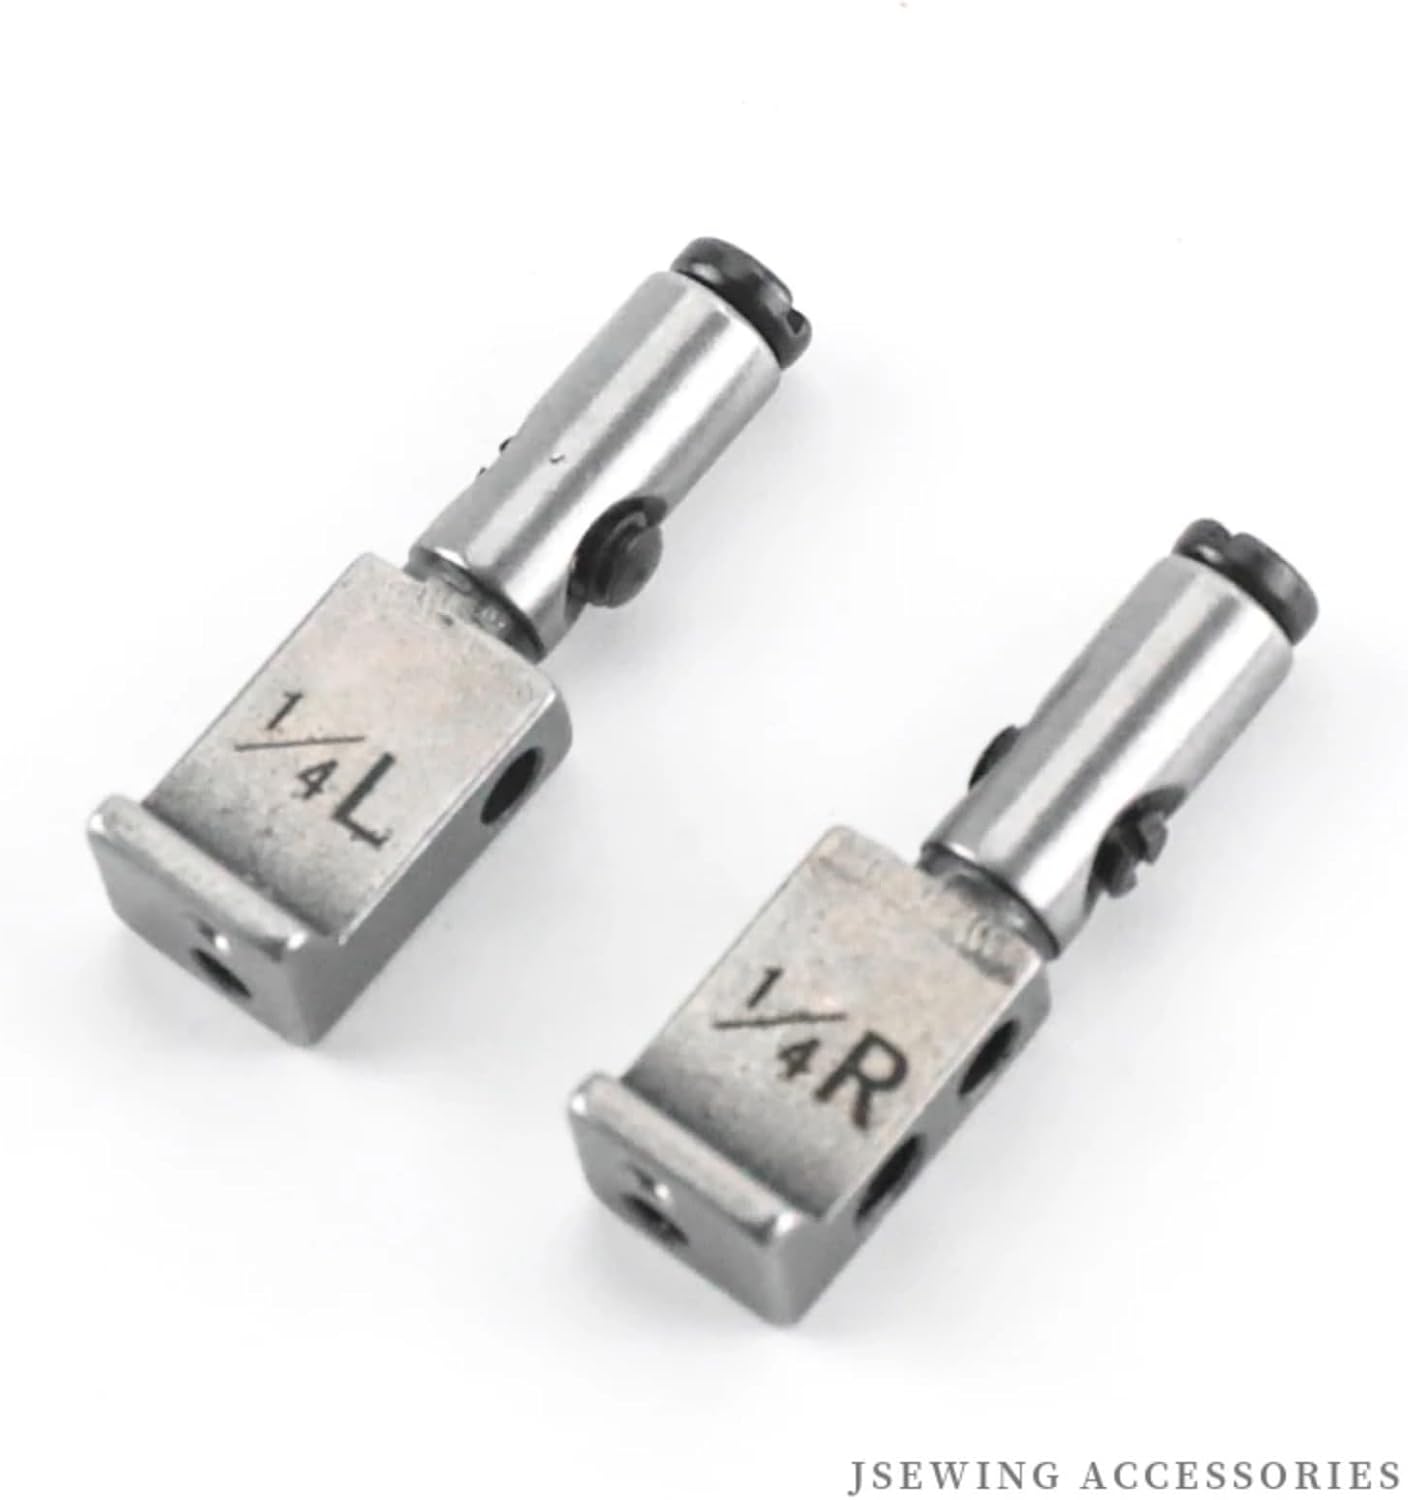
Image: Left and right needle clamps included in the Blooy Gauge Set.

Image: The feed dog component of the Blooy Gauge Set.

Image: The needle plate component of the Blooy Gauge Set.
Operating Instructions
Once the gauge set is correctly installed, you can begin operating your double needle industrial sewing machine. The gauge set is designed to maintain a consistent distance between the two needles, which is essential for parallel stitching.
- Needle Selection: Ensure you are using the correct type and size of needles for your fabric and thread, compatible with a double needle machine.
- Thread Tension: Adjust the upper and bobbin thread tensions as needed for your specific fabric and thread combination to achieve balanced stitches.
- Stitch Length: Set the desired stitch length according to your project requirements.
- Fabric Feeding: Guide the fabric smoothly under the presser foot. The feed dog will move the fabric consistently, ensuring even stitch formation.
- Test Stitching: Always perform a test stitch on a scrap piece of your fabric before starting your main project to verify settings and stitch quality.
The 1-4 inch gauge provides a fixed distance between the needles, ideal for applications requiring this specific spacing, such as topstitching, decorative seams, or creating parallel lines.
Maintenance
Regular maintenance will extend the life of your Blooy Gauge Set and ensure consistent performance.
- Cleaning: After each use, use a soft brush or cloth to remove any lint, dust, or thread residue from the needle plate, feed dog, and presser foot.
- Inspection: Periodically inspect all components for signs of wear, damage, or bending. Replace any worn or damaged parts immediately to prevent issues with stitching.
- Lubrication: Refer to your sewing machine's manual for specific lubrication points and schedules. While the gauge set itself does not require lubrication, ensuring the machine's moving parts are well-lubricated is important for overall function.
- Storage: When not in use, store the gauge set components in a clean, dry place to prevent rust or damage.
Troubleshooting
If you encounter issues while using the Blooy Gauge Set, consider the following common troubleshooting steps:
- Inconsistent Stitching:
- Check if the needle plate, feed dog, and presser foot are securely installed and properly aligned.
- Verify that the needles are inserted correctly and are not bent or dull.
- Adjust thread tension for both upper threads and the bobbin thread.
- Needle Breakage:
- Ensure the needles are the correct type and size for your machine and fabric.
- Check for proper needle insertion and ensure they are not hitting any part of the gauge set.
- Avoid pulling or pushing fabric forcefully while sewing.
- Fabric Not Feeding Properly:
- Clean any lint or debris from around the feed dog.
- Ensure the presser foot pressure is correctly adjusted for your fabric type.
- Verify the feed dog is installed correctly and its teeth are not worn.
For persistent issues, consult your sewing machine's comprehensive manual or contact a qualified sewing machine technician.
Specifications
| Product Name | Blooy Gauge Set |
| Model Number | LT2-B845 |
| Compatibility | Brother LT2-B845, Jack JK-58450B, and other compatible double needle industrial sewing machines |
| Gauge Size | 1-4 inch |
| Product Dimensions | 2.76 x 2.5 x 2 inches |
| Item Weight | 3.52 ounces |
| Manufacturer | Blooy |
Warranty and Support
For specific warranty information regarding your Blooy Gauge Set, please refer to the purchase documentation or contact the seller directly. Warranty terms may vary depending on the retailer and region of purchase.
If you require technical assistance or have questions not covered in this manual, please reach out to the seller or manufacturer's customer support. When contacting support, please have your product model number (LT2-B845) and purchase details readily available.


