Product Overview
This PEUTIER RV Pleated Shade Repair Kit is designed to restore functionality to worn or broken RV pleated window shades. It is compatible with most day, night, or day-night pleated shades, supporting both 2-wire and 4-wire configurations. The kit provides the necessary components to re-string your shades, extending their lifespan.
Kit Contents
The PEUTIER RV Pleated Shade Repair Kit includes the following components:
- 7 x Cords (each 2mm/0.08 inch in diameter and 20m/65.62ft long)
- 14 x Plugs
- 14 x Reel Tensioners
- 5 x Springs
- 1 x Threader
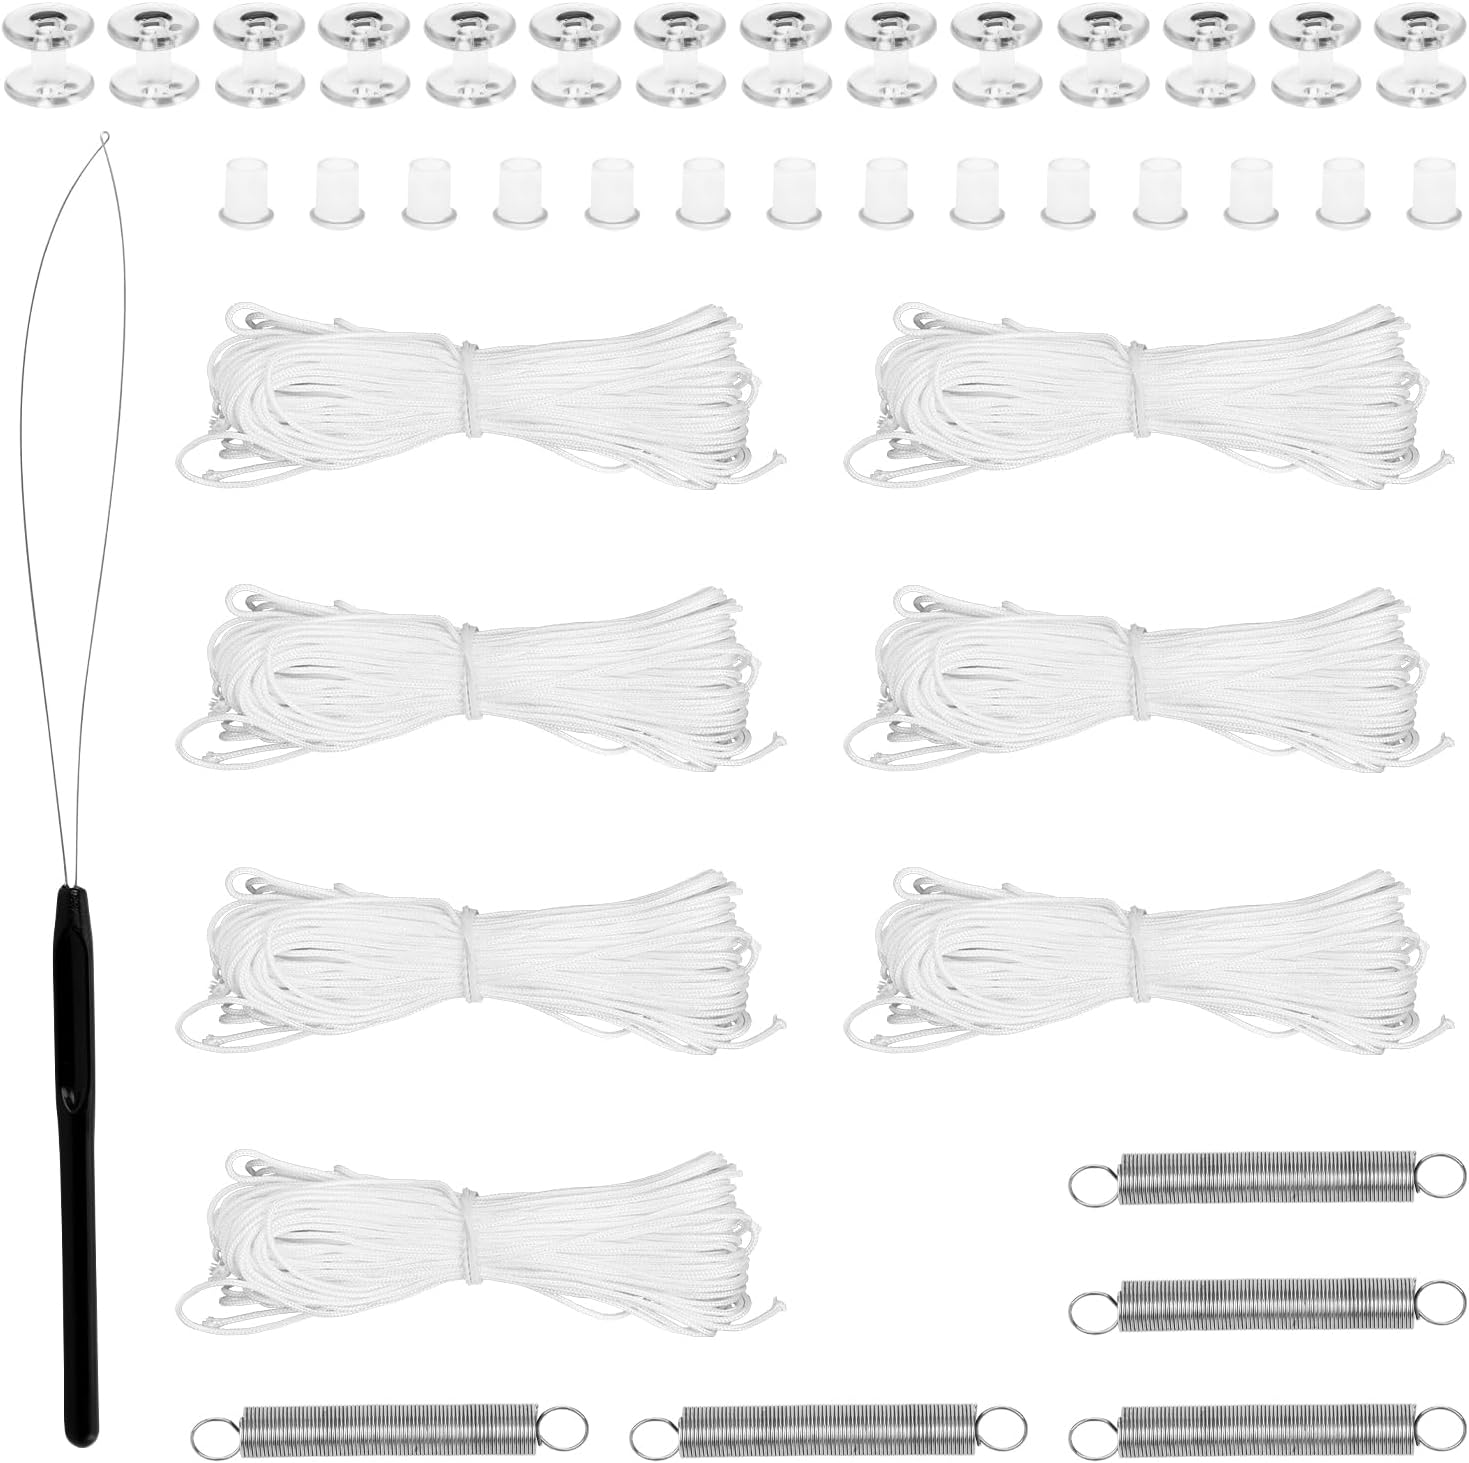
Image: All components of the PEUTIER RV Pleated Shade Repair Kit, including cords, plugs, reel tensioners, springs, and a threader.

Image: Detailed dimensions for the plugs, reel tensioners, springs, and cords included in the kit.
Specifications
| Brand | PEUTIER |
| Model Number | 122120 |
| Item Weight | 12 ounces |
| Package Dimensions | 9.49 x 7.01 x 1.73 inches |
| Cord Material | Nylon |
| Cord Diameter | 2mm (0.08 inch) |
| Cord Length (each bundle) | 20m (65.62ft) |
Installation and Restringing Instructions
This section provides detailed instructions for restringing your RV pleated shades. Before beginning, determine the type of shade (Day/Night, Night only, or Day only) and the number of cords required (two or four). You will need the following tools: scissors, flat head screwdriver, and Phillips head screwdriver.
Components in Use:

Image: A spring with cords attached, illustrating the connection point.

Image: A clear cord retainer with a cord threaded through it, showing how it secures the cord.
Step-by-Step Restringing Process:

Image: Comprehensive diagram and text outlining the 15 steps for restringing RV day and night shades, including cord routing and component placement for both 2-cord and 4-cord systems.
- Pry the end caps on all rails loose with a flat head screwdriver. The rails slide off horizontally. If the bottom rail gets hung up on a knob rivet, be firm and it will slide off.
- Cut off or remove existing cords.
- Pull out cord retainers from the top rail.
- Remove two cords from the kit. Attach one cord to each side of the spring by tying a double knot.
- Inspect the cord bushings in the fabric. If they are broken or worn, replace them with supplied bushings.
- Carefully thread the cord through the bushing, noting that the cord coming from the left will run down through the left side of the material. The cord coming from the right will run down through the right side of the fabric. A small piece of tape wrapped around the end of the cord will help.
- For 4-cord shades: The cords will cross at the bottom of the center rail so that the cord that runs down the left-hand portion of the shade will cross over and now come out through the right-hand side of the bottom rail. Do the same procedure for the right-hand side of the shade. Now thread the cord through the day portion of the shade. You will cross over the cords again in the bottom rail. Cords will come out each side of the bottom rail.
- Slide the top rail back onto the shade. Position the top rail so the bracket groove is toward the front of the shade. Reinstall top rail end caps.
- For 4-cord shades: Slide the day fabric onto the center rail, making sure the cords remain crossed.
- Slide the bottom rail back onto the shade, making sure the cords remain crossed.
- Thread the cord through the bottom rail end caps. Reinstall end caps.
- Thread cord retainers onto the ends of the cords. The flat side of the cord retainer is the top. The spool side is the bottom of the cord retainer. Thread cords up through the spool side first, and then back down through the flat side. The cord loop will be on top of the cord retainer.
- With a tape measure, measure from the top of the top rail to the desired drop of the shade. Tie knots below the cord retainer at that measurement.
- Reinstall the shade in the window. Let the entire shade drop. Screw each cord retainer into the wall.
- If the shade does not stay in the upright position, you may need to increase the tension of the cords. This is done by retying the knot in a shorter position.
Troubleshooting
- Shade Does Not Stay Upright: If the shade does not stay in the upright position, you may need to increase the tension of the cords. This can be achieved by retying the knot in a shorter position below the cord retainer.
- Cords Fraying or Breaking: Ensure that the cord bushings in the shade fabric are intact and smooth. Replace any broken or worn bushings with the supplied ones to prevent cord damage.
- Difficulty Threading Cords: Use the provided threader tool. A small piece of tape wrapped around the end of the cord can also make threading easier through tight spaces.
Maintenance
Once your RV pleated shades are restrung, minimal maintenance is required. Periodically inspect the cords for any signs of wear or fraying. Ensure the cord retainers are securely fastened to the wall. Clean the shade fabric according to the manufacturer's instructions for the shade itself.
Warranty and Support
No specific warranty information is provided with this product. For support or inquiries regarding the PEUTIER RV Pleated Shade Repair Kit, please refer to the retailer where the product was purchased.