1. Introduction
The SSIMDER MMA-140 is a versatile 3-in-1 welding machine designed for various welding tasks. It supports Stick welding (MMA), Pulse Stick welding, and Lift TIG welding. This manual provides essential information for safe operation, setup, maintenance, and troubleshooting to ensure optimal performance and longevity of your welding machine.

2. Safety Information
Always prioritize safety when operating welding equipment. Failure to follow safety guidelines can result in serious injury or death.
2.1 General Welding Safety
- Ensure the work area is well-ventilated to avoid inhaling welding fumes.
- Keep flammable materials away from the welding area.
- Always have a fire extinguisher readily available.
- Do not weld near children or unauthorized personnel.
2.2 Electrical Safety
- Ensure the welding machine is properly grounded.
- Inspect all cables and connections for damage before each use.
- Do not operate the welder in wet conditions.
- Use appropriate circuit protection.
2.3 Personal Protective Equipment (PPE)
- Wear a welding helmet with appropriate shade filter to protect eyes and face.
- Use flame-resistant gloves, clothing, and footwear.
- Protect bystanders with welding screens.
3. Package Contents
Verify that all items listed below are included in your package:
- SSIMDER MMA-140 Welding Machine
- Electrode Holder with Cable
- Ground Clamp with Cable
- 110V/220V Power Adapter
- Steel Brush
- User Manual

4. Product Features
The SSIMDER MMA-140 welding machine incorporates several features for enhanced performance and user experience.
4.1 3-in-1 Multi-Function Welding
This welder offers three distinct welding modes:
- Stick Welding (MMA): Standard arc welding with coated electrodes.
- Pulse Stick Welding: Provides precise heat control for high-precision stick welding, suitable for thin plates and various positions.
- Lift TIG Welding: Allows for quick arc initiation at low currents, compatible with WP17V 10-25 plug TIG torches (not included).

4.2 Adjustable Pulse Frequency
The pulse frequency can be adjusted from 1-5. Lower frequencies create pronounced ripples and facilitate deep penetration, while higher frequencies produce finer ripple patterns for faster completion.

4.3 Anti-Sticky Welding Functions
- Hot Start: Supplies extra current for fast arc initiation and ensures arc stability, minimizing splatter.
- ARC Force: Reduces the risk of welding rods sticking and minimizes arc interruptions, enhancing welding cleanliness.
- VRD MMA: Voltage Reduction Device enhances safety by lowering standby voltage, operating automatically.
4.4 Dual Voltage Capability
The welder automatically switches between 110V household outlets and 220V worksite power, offering flexibility for various applications.

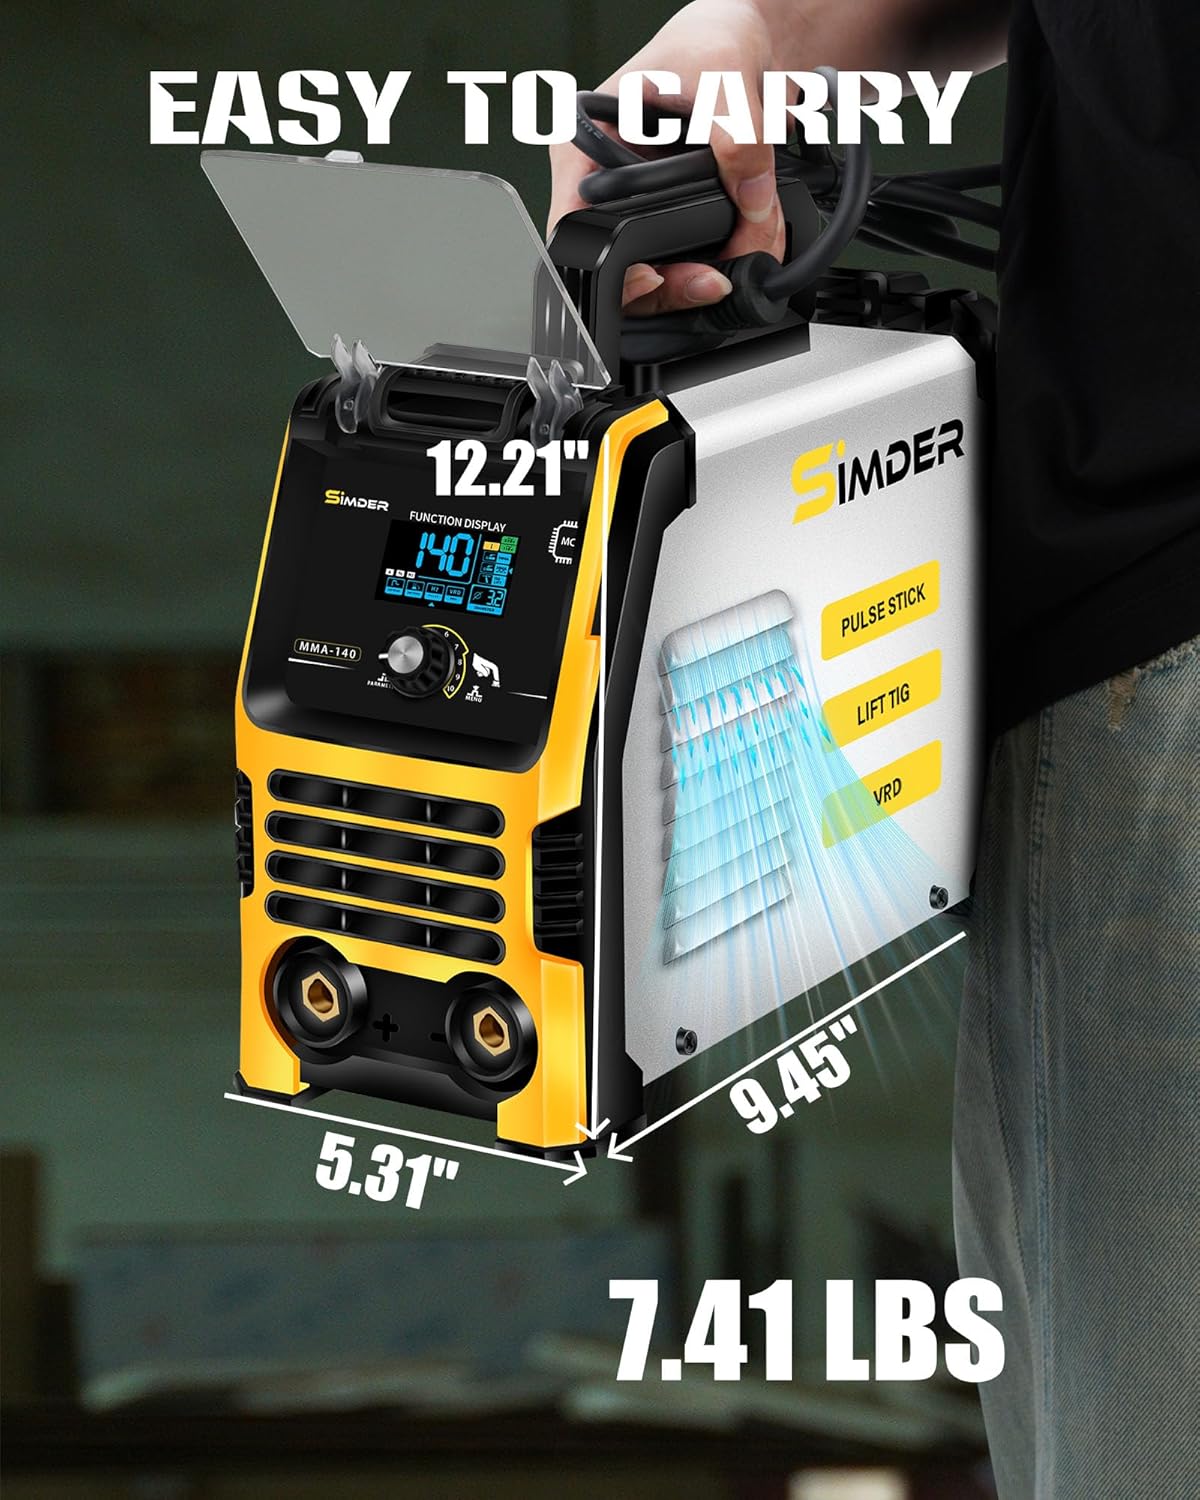
4.5 Portability and Design
Weighing only 7.41 lbs, this mini welder is highly portable. It features a smart LCD display for easy parameter adjustment.

4.6 Multiple Safeguards
The machine is equipped with automatic protection features:
- Over-current Protection
- Over-voltage Protection
- Overheat Protection
- Overload Protection

4.7 Advanced IGBT Technology
Utilizes advanced Insulated Gate Bipolar Transistor (IGBT) technology for stable and efficient welding performance.
4.8 Rapid Heat Dissipation System
Features a 360° large-area heat dissipation system with a high-speed fan for effective cooling and prolonged operation.
5. Setup
Follow these steps to set up your SSIMDER MMA-140 welding machine.
5.1 Connecting Welding Cables
- Connect the electrode holder cable to the positive (+) terminal on the front panel.
- Connect the ground clamp cable to the negative (-) terminal on the front panel.
- Ensure connections are secure by twisting them clockwise.
5.2 Power Connection
- Determine the available power supply (110V or 220V).
- If using 220V, attach the provided 110V/220V adapter to the power cord.
- Plug the power cord into a suitable electrical outlet.
- Turn on the power switch located on the rear panel of the machine.
5.3 Panel Introduction

6. Operating Modes
The MMA-140 offers three primary welding modes. Select the appropriate mode and adjust parameters using the control knob and buttons on the front panel.
6.1 Stick Welding (MMA)
This mode is suitable for general-purpose welding with various electrodes.
- Compatible Rods: E7018, E6013, E6011 (1.6-3.2mm).
- Parameter Adjustment: Use the control knob to set the desired amperage. Adjust Hot Start and ARC Force as needed.

6.2 Pulse Stick Welding
This mode provides enhanced control for delicate or precise welding applications.
- Benefits: Ideal for welding thin plates and pipelines, and for various welding positions (flat, vertical, horizontal, overhead).
- Parameter Adjustment: In addition to amperage, adjust the pulse frequency (1-5) to control heat input and ripple pattern.

6.3 Lift TIG Welding
For precise welding of various metals, including low carbon steel, copper, cast iron, and stainless steel.
- TIG Torch: Requires a WP17V 10-25 plug TIG torch (not included).
- Arc Initiation: Lift TIG allows for quick arc initiation at low currents, reducing contamination.
- Material Thickness: Works well with 0.3-3.0mm thick materials.

7. Maintenance
Regular maintenance ensures the longevity and safe operation of your welding machine.
7.1 Cleaning
- Periodically clean the exterior of the machine with a dry cloth.
- Use compressed air to clear dust and debris from the cooling vents.
- Inspect and clean the electrode holder and ground clamp for any buildup or damage.
7.2 Storage
- Store the welder in a dry, dust-free environment.
- Protect the machine from extreme temperatures and humidity.
- Coil cables neatly to prevent kinks and damage.
8. Troubleshooting
Refer to this section for common issues and their solutions.
| Problem | Possible Cause | Solution |
|---|---|---|
| No power to the machine | Power switch off, loose connection, circuit breaker tripped | Turn on power switch, check connections, reset circuit breaker |
| Welding arc is unstable or difficult to strike | Incorrect amperage setting, dirty workpiece, poor ground connection, damp electrodes | Adjust amperage, clean workpiece, ensure good ground, dry electrodes |
| Welding rod sticks to workpiece | Low amperage, incorrect electrode angle, Hot Start/ARC Force not optimized | Increase amperage, adjust electrode angle, check Hot Start/ARC Force settings |
| Overheat indicator active | Extended use, blocked ventilation, high ambient temperature | Allow machine to cool, clear vents, operate in cooler environment |
9. Specifications
Technical specifications for the SSIMDER MMA-140 welding machine.
| Feature | Specification |
|---|---|
| Model | MMA-140 |
| Input Voltage | 110V / 220V (Dual Voltage) |
| Max Current (220V) | 140A @ 60% Duty Cycle |
| Max Current (110V) | 122A @ 60% Duty Cycle |
| Welding Modes | Stick (MMA), Pulse Stick, Lift TIG |
| Compatible Electrode Diameter | 1.6-3.2mm (E7018, E6013, E6011) |
| Dimensions | 9.45 x 5.31 x 12.21 inches |
| Item Weight | 7.41 pounds |
| Material | Stainless steel |
| Power Source | AC/DC |
| Protection Features | Over-current, Over-voltage, Overheat, Overload |
10. Warranty and Support
For warranty information, technical support, or service inquiries, please refer to the contact details provided with your product packaging or visit the official S SIMDER website. Keep your purchase receipt as proof of purchase for warranty claims.