
1. Introduction
Thank you for choosing the AYIVG Brushed Nickel Shower System with Tub Spout. This system is designed to provide a luxurious and safe showering experience with its 12-inch high-pressure rain shower head, versatile handheld shower, and convenient tub spout. The integrated digital display offers real-time temperature and usage duration, powered by hydroelectric generation, eliminating the need for batteries. The pressure-balancing valve ensures consistent water temperature, preventing scalding.
2. Safety Information
- Professional Installation Recommended: Installation should be performed by a qualified plumber or experienced professional to ensure proper function and compliance with local plumbing codes.
- Water Supply: Ensure main water supply is turned off before beginning any installation or maintenance.
- Water Pressure: Verify that your home's water pressure is within the recommended range for optimal performance.
- Temperature Settings: The anti-scalding pressure balance valve is designed to prevent sudden temperature changes. However, always test water temperature before use, especially for children or individuals with sensitive skin.
- Component Handling: Handle all components with care to avoid damage to finishes or internal mechanisms.
3. Package Contents
Verify that all components are present and undamaged before beginning installation.

Visual representation of the components included in the shower system package: brass rough-in valve, rain shower head, handheld shower, and tub spout.
- Pressure Balancing Mixer Shower Diverter Valve Kit (Rough-in Valve with Digital Display)
- 12-inch Square Rain Shower Head
- Shower Arm for Rain Shower Head
- Handheld Shower
- 59-inch Stainless Steel Shower Hose
- Handheld Shower Holder (360° adjustable)
- Folding Tub Spout
- Mounting Hardware and Installation Accessories
4. Setup and Installation
This section outlines the general installation process. Consult a professional plumber for specific guidance and to ensure compliance with local building codes.
4.1 Rough-in Valve Installation
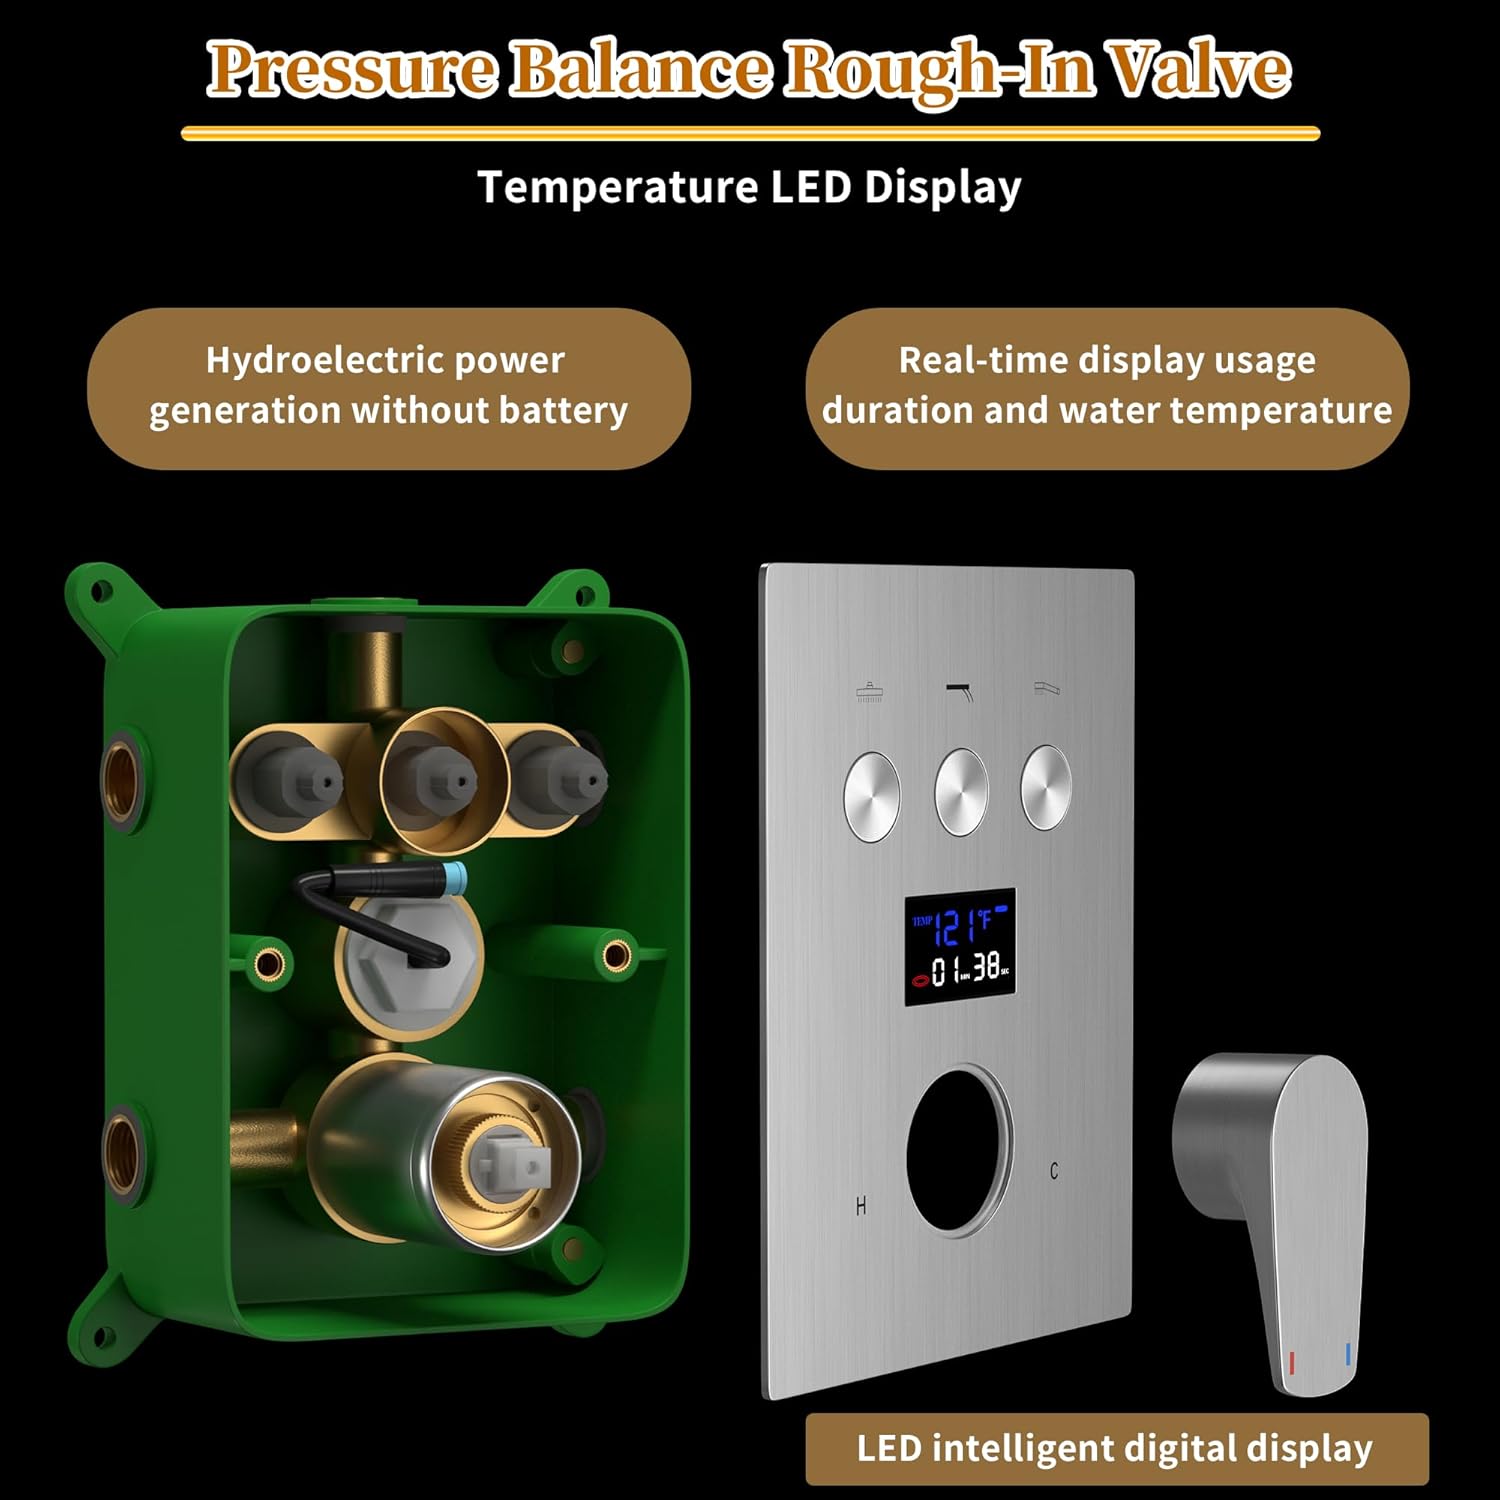
Internal view of the pressure balance rough-in valve and the external LED digital display.
- Prepare Wall: Ensure the wall opening is appropriately sized for the rough-in valve.
- Connect Water Lines: Connect the hot and cold water supply lines to the designated inlets on the rough-in valve. The connections are standard NPT 1/2 inch.
- Connect Outputs: Connect the output lines from the valve to the rain shower head, handheld shower, and tub spout.
- Secure Valve: Secure the rough-in valve firmly within the wall structure.
4.2 LED Digital Display Connection
The digital display is powered by hydroelectric generation, requiring no batteries. Proper connection is crucial for its function.
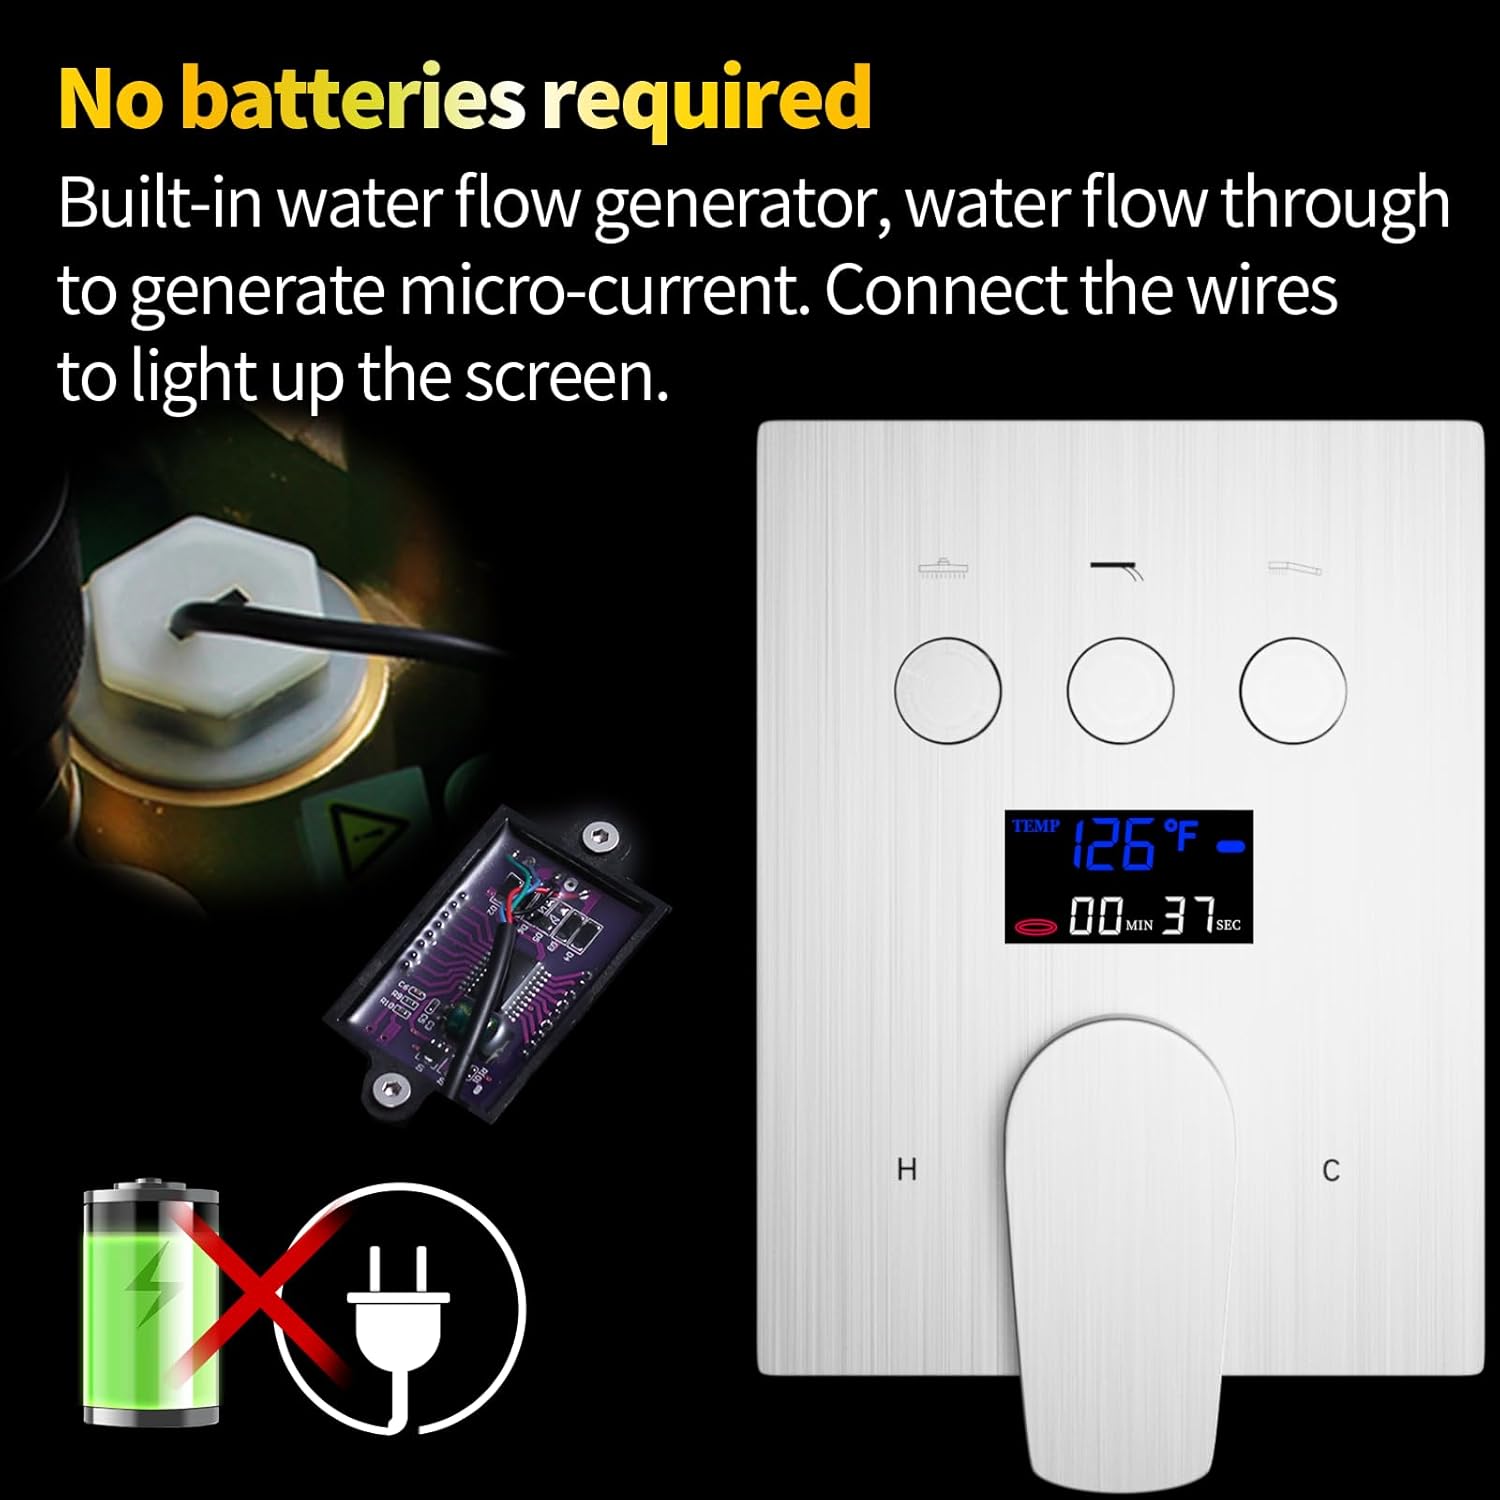
Hydroelectric power generation for the LED display.

Proper connection of female and male connectors for the LED digital display.
- Locate the female and male connectors for the LED display wiring.
- Ensure the connectors are aligned correctly according to the arrows or markings.
- Firmly connect the female and male connectors. A secure connection is essential for the display to light up when water flows.
4.3 Rain Shower Head Installation
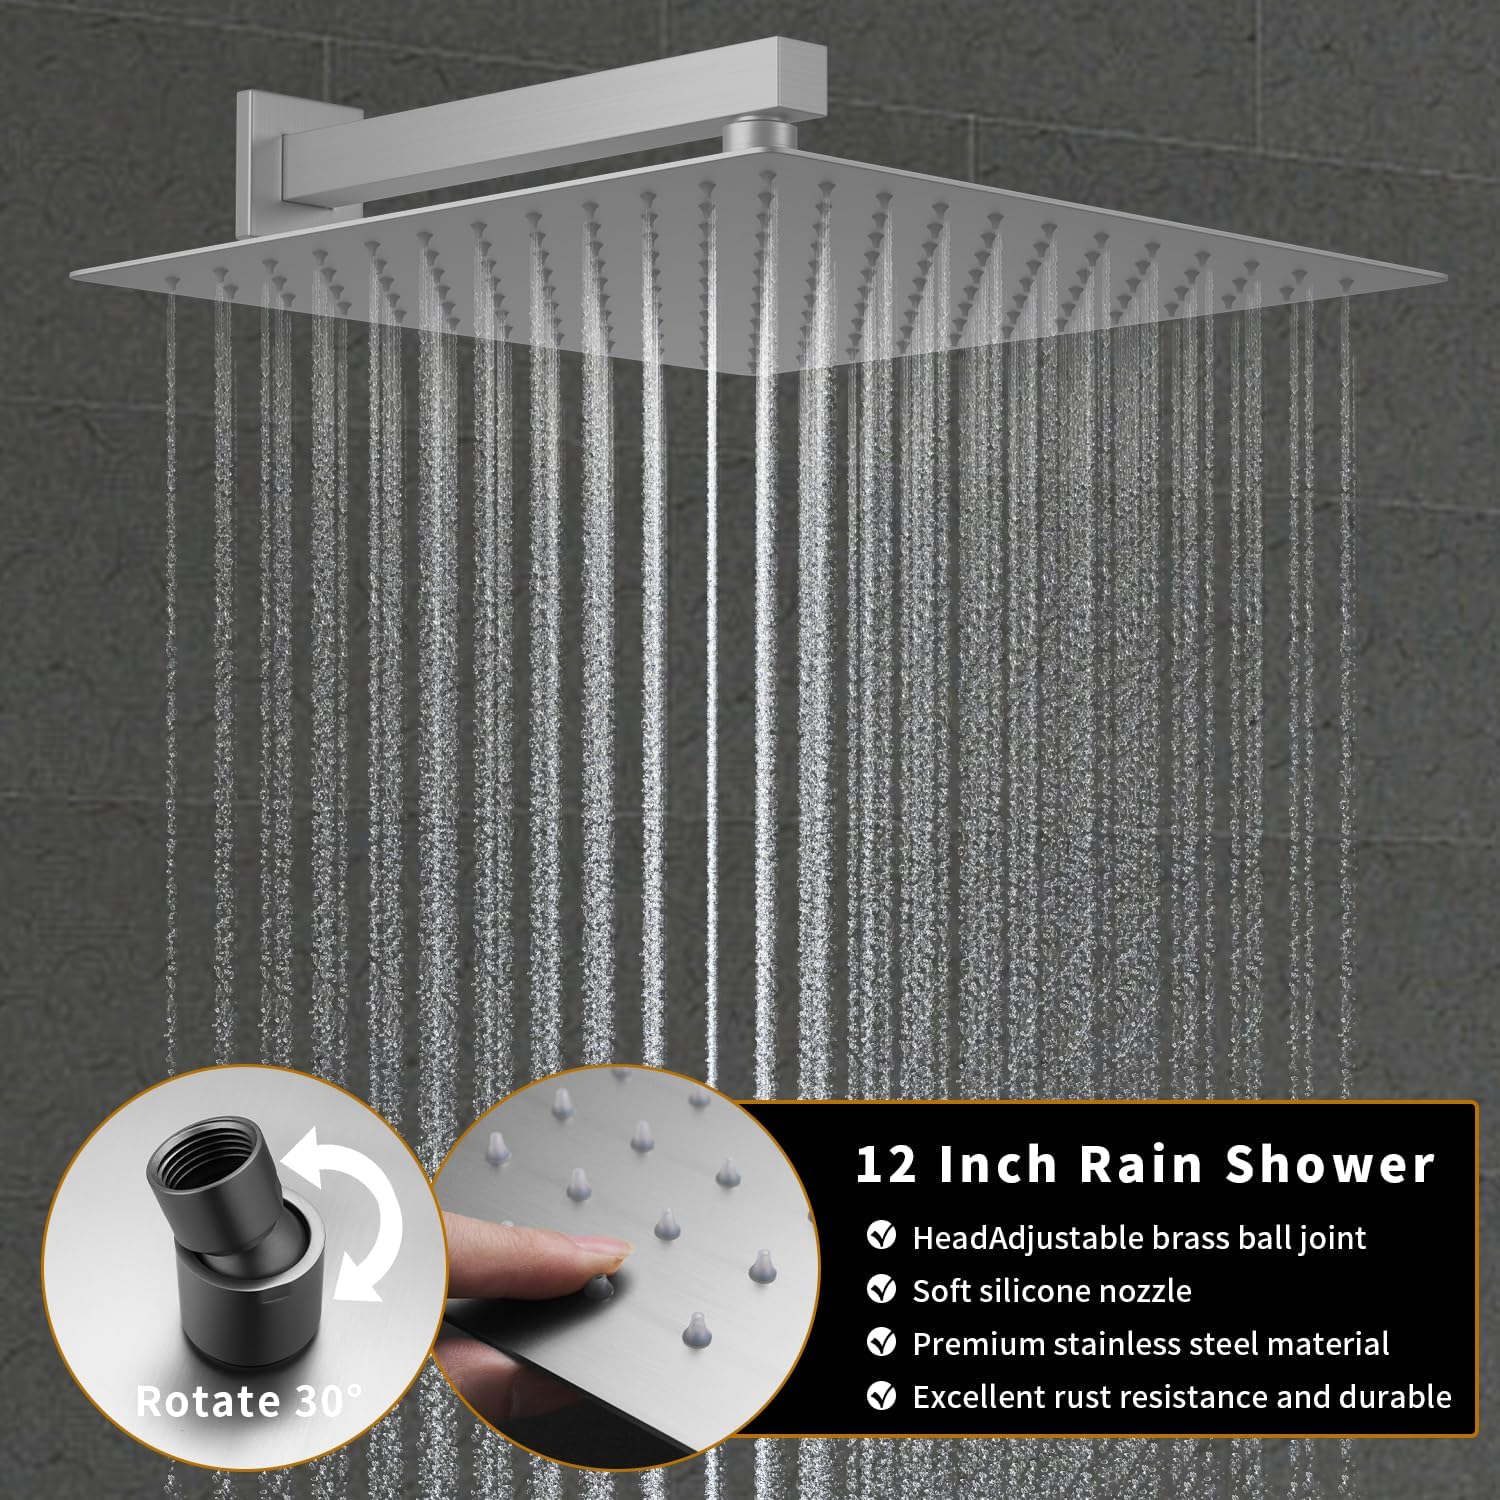
The 12-inch rain shower head with adjustable brass ball joint.
- Attach the shower arm to the wall connection.
- Thread the 12-inch rain shower head onto the shower arm. Ensure a tight seal using plumber's tape if necessary.
- The shower head features an adjustable brass ball joint, allowing you to tilt the shower head up to 30 degrees for desired angle.
4.4 Handheld Shower Installation
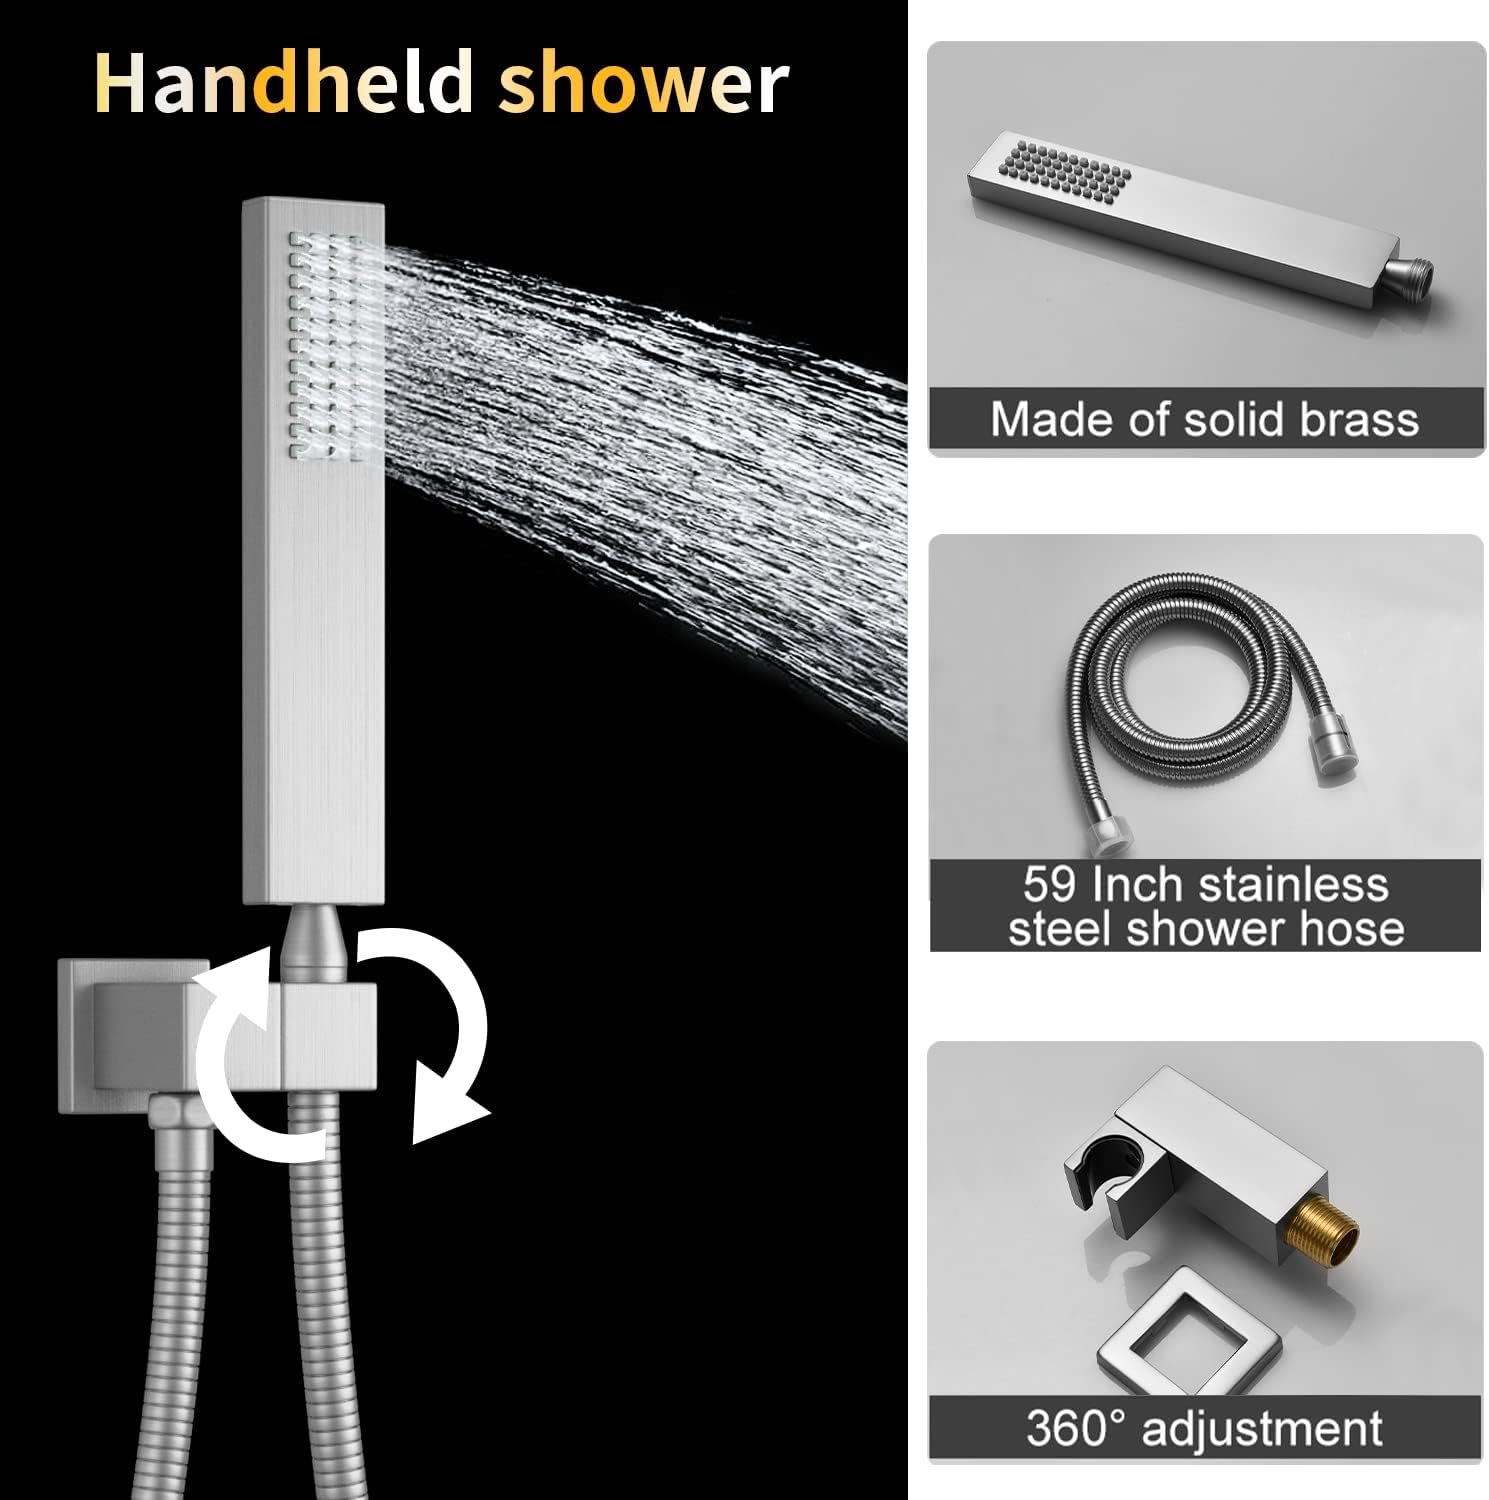
Handheld shower with 59-inch hose and 360-degree adjustable holder.
- Connect the 59-inch stainless steel shower hose to the handheld shower and the wall outlet.
- Mount the handheld shower holder to the wall at a convenient height. The holder allows for 360-degree adjustment.
4.5 Tub Spout Installation

The 180-degree rotating bathtub spout.
- Apply plumber's tape to the threads of the tub spout connection.
- Thread the tub spout onto the wall pipe. Ensure it is securely tightened and properly aligned.
- The tub spout is rotatable 180 degrees and foldable to save space.
4.6 General Plumbing Diagram

General plumbing installation diagram.

American Standard NPT 1/2 inch connections with check valves.

Internal view of the shower valve core and certifications.
4.7 Installation Video Guide
For a visual guide on the installation process, please refer to the official product video:
Official video demonstrating the installation and features of the AYIVG Bathtub Shower Faucet System.
5. Operating Instructions
The AYIVG Shower System offers three functions controlled by intuitive buttons and a temperature dial.

Modern shower control panel with buttons and temperature dial.
5.1 Water Flow Control
- To Turn Water Flow ON: Gently pull out the desired function button (Rainfall Shower, Handheld Shower, or Bath Faucet).
- To Turn Water Flow OFF: Press the activated function button back in.
- Multiple Functions: The system allows for multiple functions to operate simultaneously. Pull out all desired buttons for combined water flow.
5.2 Temperature Control
- Rotate the main dial at the bottom of the control panel to adjust the water temperature.
- Turn towards 'H' for hotter water and 'C' for colder water.
- The pressure balance valve maintains a consistent temperature, preventing sudden changes.
5.3 Digital Display
- The LED display activates automatically when water flows through the system.
- It shows the real-time water temperature in Fahrenheit (°F).
- It also displays the duration of water usage (action time).
- The display is powered by a built-in hydroelectric generator and requires no batteries.
6. Maintenance
6.1 Cleaning the Finish
- To maintain the brushed nickel finish, clean regularly with a soft, damp cloth.
- Avoid abrasive cleaners, harsh chemicals, or scouring pads, as these can damage the finish.
- For stubborn spots, use a mild soap solution and rinse thoroughly, then dry with a soft cloth.
6.2 Cleaning Shower Head Nozzles
- The rain shower head features soft silicone nozzles designed for easy cleaning.
- To remove mineral buildup or clogs, gently rub the silicone nozzles with your finger or a soft brush.
- For more extensive cleaning, the shower head can be unscrewed and soaked in a solution of white vinegar and water.
7. Troubleshooting
| Problem | Possible Cause | Solution |
|---|---|---|
| LED display not working | Loose or incorrect wiring connection for the hydroelectric generator. Insufficient water flow. | Ensure the female and male connectors for the LED display are securely and correctly connected. Check water pressure. |
| Low water pressure from shower head/handheld | Clogged nozzles. Low household water pressure. Debris in the system. | Clean silicone nozzles on the shower head. Check main water supply pressure. Flush the system or consult a plumber. |
| Water temperature fluctuates | Issue with pressure balance valve (unlikely if new). Inconsistent hot/cold water supply to the house. | Verify hot and cold water supply to the house. If problem persists, contact customer support or a plumber. |
| Leaking from connections | Loose connections. Insufficient plumber's tape. Damaged O-rings or washers. | Tighten connections. Reapply plumber's tape. Inspect and replace O-rings/washers if damaged. |
8. Specifications
| Feature | Detail |
|---|---|
| Brand | AYIVG |
| Model Number | AY-Shower System with Tub Spout-NK |
| Color | Brushed Nickel |
| Material | Brass |
| Finish Type | Brushed |
| Mounting Type | Wall Mount |
| Shower Head Size | 12 inch Square |
| Handheld Hose Length | 59 inches |
| Diverter Type | 3-Way Push Button |
| Temperature Display | Digital LED (Hydroelectric Powered) |
| Valve Type | Pressure Balancing |
| Connections | Standard NPT 1/2" |
| Included Components | Shower Fixture Set with High Pressure 12 inch Square Shower Head and Digital Display Temperature Control Pressure Balancing Mixer Shower Diverter Valve Kit |
9. Warranty and Support
9.1 Warranty Information
The AYIVG Brushed Nickel Shower System comes with a 5-year warranty. This warranty covers manufacturing defects and ensures the quality and longevity of your product. Please retain your proof of purchase for warranty claims.
9.2 Customer Support
If you encounter any problems during installation or use, such as missing accessories, damage, or improper product function, please contact AYIVG customer service immediately. Our team is dedicated to providing satisfactory solutions.
For support, please visit the AYIVG Store on Amazon or refer to the contact information provided with your purchase.


