HOMCOM 837-413V80WT
HOMCOM Shoe Cabinet User Manual
Model: 837-413V80WT
Brand: HOMCOM
Product Overview
The HOMCOM Freestanding Shoe Storage Cabinet is designed to organize footwear efficiently in entryways or hallways. It features a combination of closed and open storage options to keep your space tidy and accessible. This cabinet includes two flip drawers for concealed shoe storage and an open compartment for additional items or display.

Image: The HOMCOM Shoe Cabinet positioned in an entryway, demonstrating its compact design and integration into a home environment. It features an open top shelf and two lower flip-down compartments.

Image: A direct front view of the HOMCOM Shoe Cabinet, highlighting its clean white finish and black handles on the flip drawers. The open top compartment is visible.
Setup and Assembly
This HOMCOM Shoe Cabinet requires assembly. Please follow the detailed instructions provided in the packaging. Ensure all components are present before beginning assembly. A Phillips head screwdriver and a hammer may be required.
Assembly Steps Overview:
- Unpack and Identify Components: Carefully remove all parts from the packaging. Lay them out and compare them against the parts list in your instruction manual to ensure nothing is missing or damaged.
- Assemble the Main Frame: Begin by connecting the side panels to the base and top panels using the provided hardware (dowels, screws, cam locks). Ensure all connections are secure.
- Install Internal Shelves: Insert the fixed shelves into their designated slots within the main frame.
- Assemble Flip Drawers: Construct the two flip drawers according to the instructions. This typically involves attaching the front panel, side panels, and the internal shoe divider mechanism.
- Attach Flip Drawers to Frame: Secure the assembled flip drawers to the main cabinet frame using the hinge mechanisms. Test their smooth operation.
- Install Back Panel: Attach the back panel to the rear of the cabinet using small nails or screws to provide structural integrity.
- Attach Handles: Secure the black handles to the front of the flip drawers.
- Install Anti-Tipping Strap: For safety, attach the anti-tipping strap to the top rear of the cabinet and secure it to a wall stud. This is a critical step to prevent accidental tipping.

Image: A diagram illustrating the overall dimensions of the HOMCOM Shoe Cabinet, including height (41.3"), width (22.8"), and depth (9.4"), along with internal measurements for the flip drawers.

Image: A close-up view of the black metal handle on one of the flip drawers, showing its design and attachment point.
Operating Instructions
Using the Flip Drawers:
The cabinet features two flip-down drawers designed for shoe storage. To open a drawer, gently pull the handle outwards and downwards. The drawer will pivot open, revealing two internal compartments for shoes. To close, push the drawer upwards and inwards until it clicks securely into place.
Adjusting and Removing Shelves:
Each flip drawer contains internal shelves that are adjustable and removable to accommodate different shoe sizes and types, such as boots or high heels.
- To Adjust: Carefully lift the shelf and reposition it into the desired set of grooves or pegs. Ensure it is level and securely seated.
- To Remove: Lift the shelf completely out of its supports. This creates a larger single compartment within the drawer, ideal for taller footwear.

Image: A close-up view demonstrating the adjustable shelf feature within a flip drawer. The image shows how the shelf can be moved to different height levels to accommodate various shoe sizes.
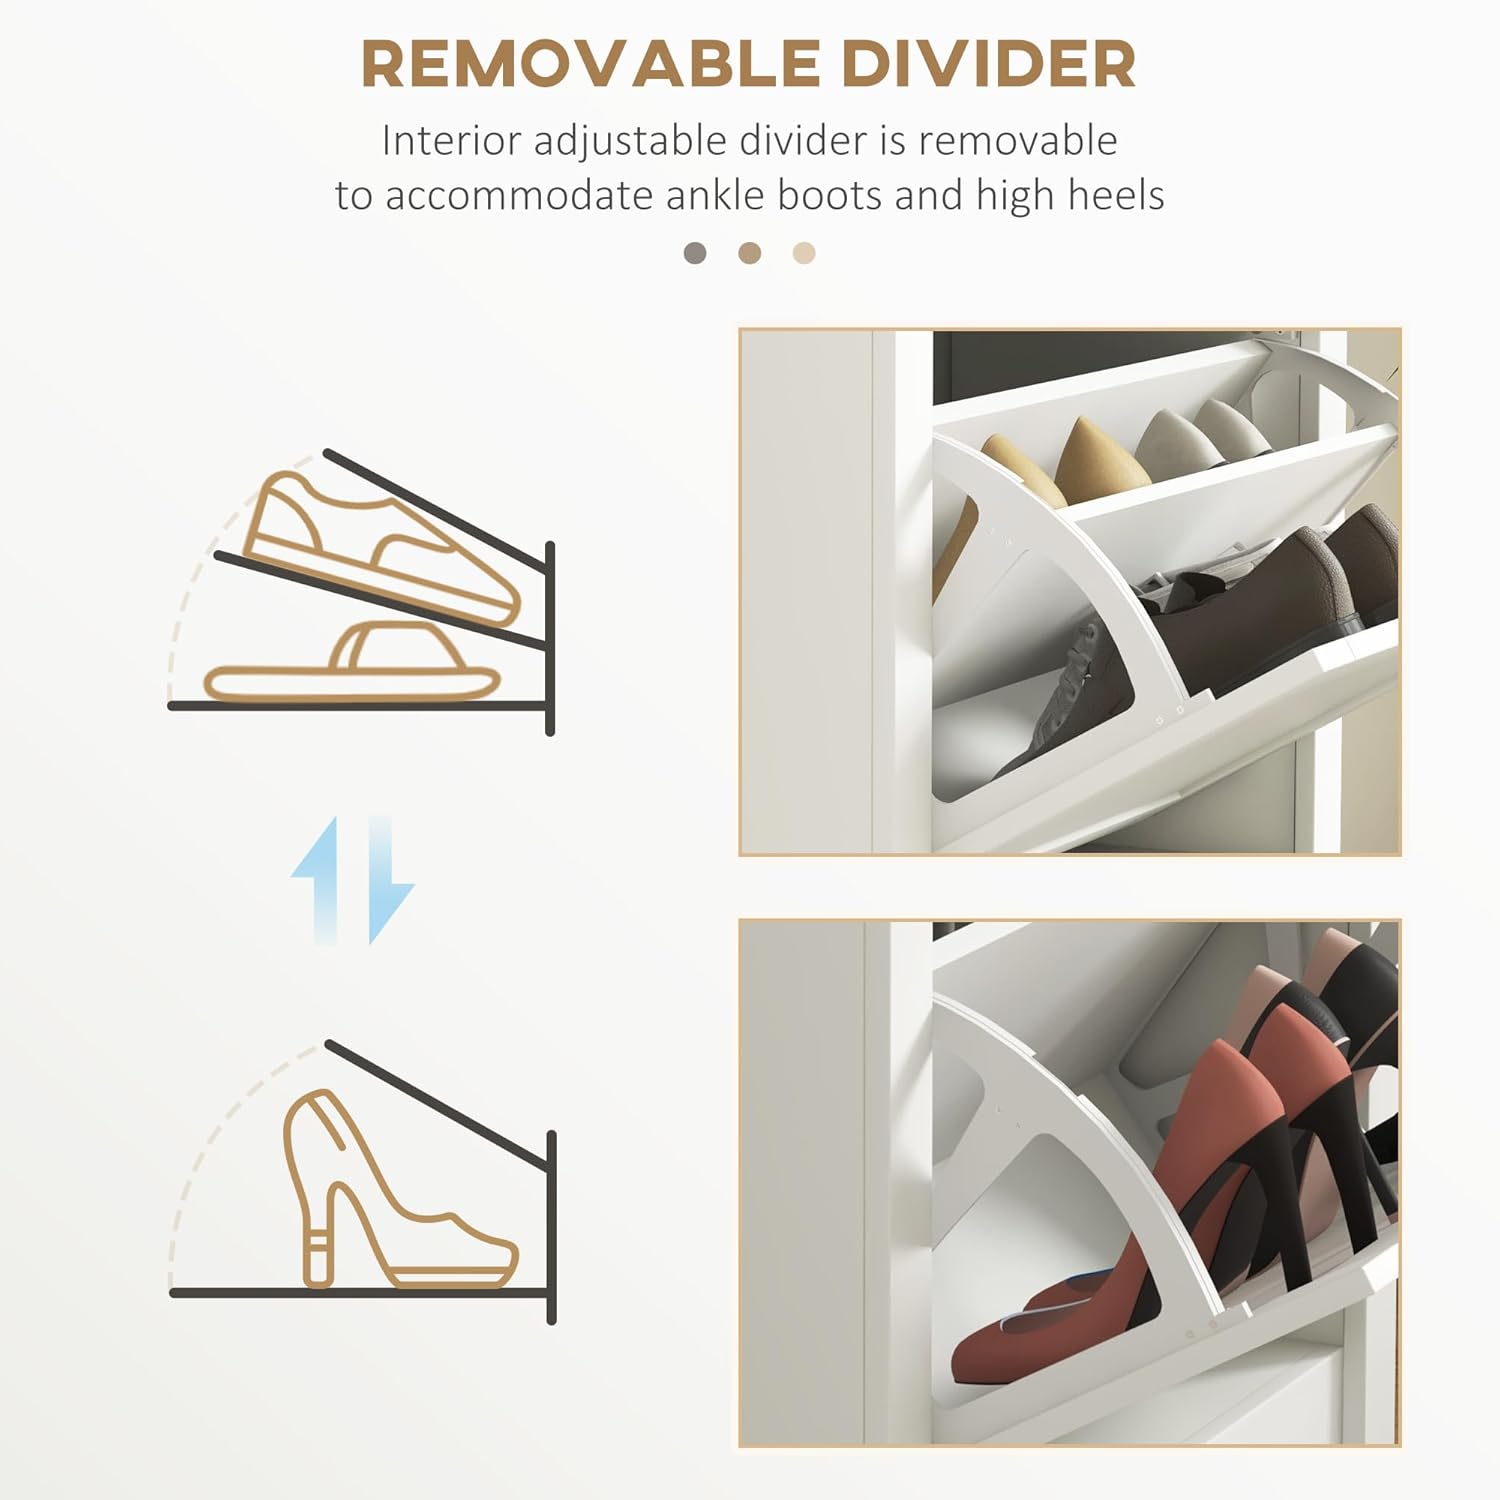
Image: A visual representation showing how the interior adjustable divider can be removed to accommodate taller items like ankle boots or high heels, illustrating the cabinet's versatility.
Open Compartment Usage:
The top open compartment can be used for quick access items, decorative pieces, or additional smaller shoes. Its open design allows for easy visibility and retrieval.
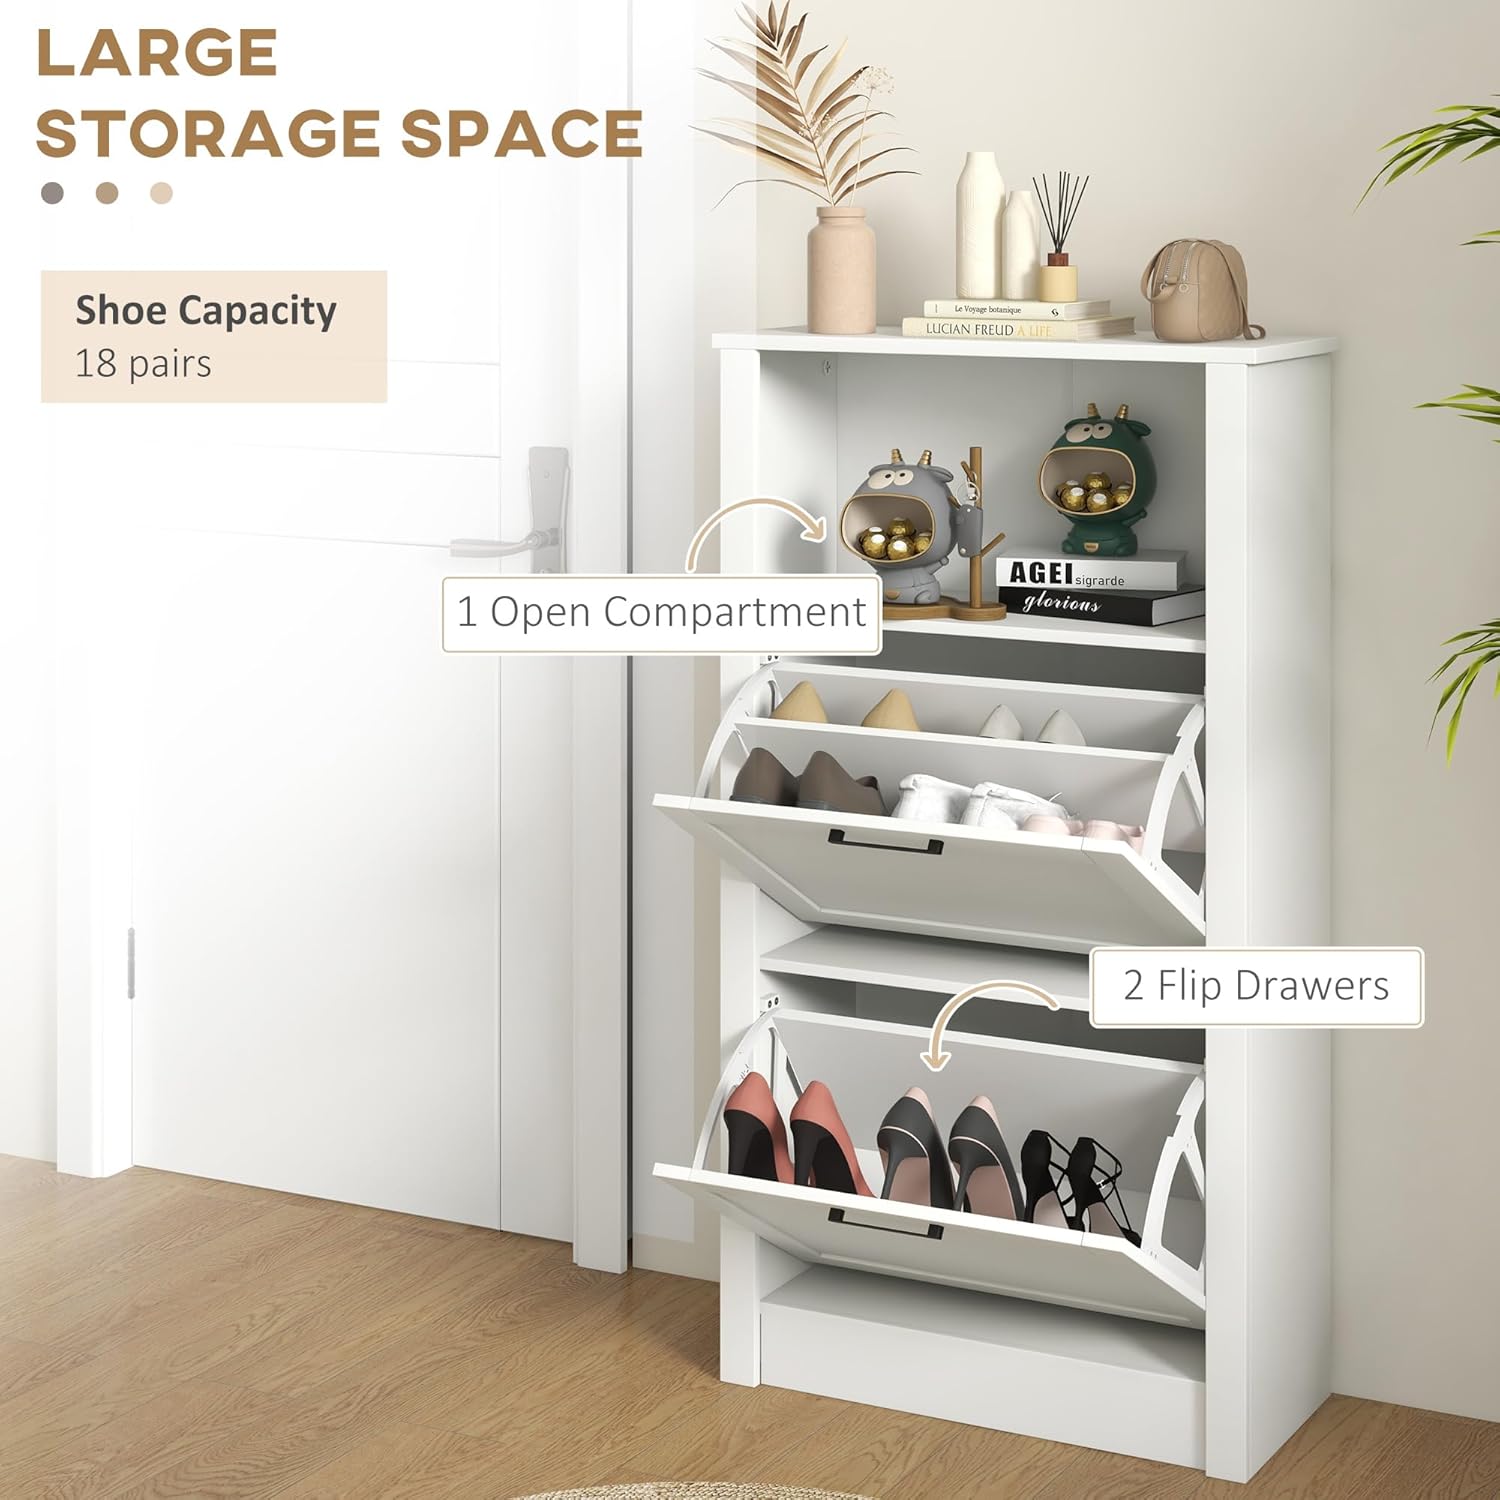
Image: An illustration highlighting the storage capacity, showing the open compartment and the two flip drawers in use. The cabinet is designed to hold approximately 10 pairs of shoes, depending on shoe size and type.
Maintenance and Care
- Cleaning: Wipe the cabinet surfaces with a soft, damp cloth. Avoid using harsh chemicals or abrasive cleaners, as these can damage the finish. For stubborn marks, a mild soap solution can be used, followed by drying with a clean cloth.
- Dusting: Regularly dust the cabinet with a dry, soft cloth to prevent dust buildup.
- Hardware Check: Periodically check all screws and fittings to ensure they remain tight. Retighten if necessary to maintain stability and proper function of the flip drawers.
- Avoid Overloading: Do not exceed the recommended weight capacity for shelves and drawers to prevent damage or instability.
- Moisture Protection: While the cabinet is suitable for entryways, avoid prolonged exposure to excessive moisture or direct water contact to prevent material damage.
Troubleshooting
| Problem | Possible Cause | Solution |
|---|---|---|
| Flip drawers do not close properly or slam shut. |
|
|
| Cabinet feels unstable or wobbly. |
|
|
| Shoes do not fit in the drawers. |
|
|
Product Specifications
| Feature | Detail |
|---|---|
| Brand | HOMCOM |
| Model Name | Shoe Cabinet |
| Model Number | 837-413V80WT |
| UPC | 196393244753 |
| Color | White |
| Product Dimensions (D x W x H) | 9.5"D x 22.75"W x 41.25"H |
| Item Weight | 37.8 Pounds |
| Weight Capacity (Overall) | 88 lbs. |
| Weight Capacity (Shelf / Drawer / Top) | 22 lbs. |
| Material | Engineered Wood (Frame, Top, Back) |
| Handle Material | Metal |
| Number of Flip Drawers | 2 |
| Number of Open Compartments | 1 |
| Shoe Capacity | Up to 10 pairs (varies by shoe size) |
| Special Features | Adjustable Shelf, Anti-tipping Strap, Space-Saving Design |
| Mounting Type | Floor Mount (Freestanding) |
| Assembly Required | Yes |
Safety Information
To ensure the safety of your household, especially children and pets, it is imperative to secure the shoe cabinet to a wall using the provided anti-tipping strap. Furniture tip-overs can cause serious or fatal crushing injuries. Always install the anti-tipping device as instructed.
- Always use the anti-tipping strap to anchor the cabinet to a wall.
- Do not allow children to climb on or play with the cabinet.
- Place heavier items in the lower compartments to improve stability.
- Ensure the cabinet is placed on a level surface.

Image: A diagram illustrating the anti-tipping strap mechanism, showing how it attaches to the cabinet and the wall to provide extra stability and prevent accidental tipping.
Warranty and Support
For specific warranty details, please refer to the documentation included with your purchase or contact the retailer where the product was acquired. HOMCOM products typically come with a manufacturer's warranty covering defects in materials and workmanship.
For customer support, missing parts, or assembly assistance, please visit the official HOMCOM website or contact their customer service department. Keep your purchase receipt and model number (837-413V80WT) readily available for faster service.
HOMCOM Official Website: www.aosom.com/homcom/
Ask a question about this manual
Ask about setup, troubleshooting, compatibility, parts, safety, or missing instructions. Manuals+ will review the question and use this page’s manual context to help answer it.