1. Introduction
This manual provides instructions for the DUCLUS 50x50x50cm Foldable Photography Light Box, designed for product photography of small to medium-sized items. This light box features integrated LED lighting, multiple shooting angles, and various backdrops to enhance your product images.
Please read this manual thoroughly before using the product to ensure proper operation and to maximize its lifespan.

Image 1.1: The DUCLUS 50x50x50cm Foldable Photography Light Box set up for product photography.
2. Safety Information
- Ensure the power adapter is compatible with your local voltage before connecting.
- Do not expose the light box or its electrical components to water or excessive moisture.
- Avoid disassembling the LED light strips or dimmer. Refer to qualified personnel for repairs.
- Keep the product away from flammable materials.
- Unplug the power adapter when not in use or before cleaning.
- This product is intended for indoor use only.
3. Package Contents
Verify that all components are present in the package:
- 1 x DUCLUS Photography Light Box (50x50x50cm)
- 1 x Power Adapter
- 1 x Dimmer with European Standard Plug
- 1 x Diffuser Cloth with Hole
- 1 x Diffuser Cloth without Hole
- 6 x PVC Backdrops (White, Black, Grey, Light Orange, Blue, Green)
- 1 x Carry Bag
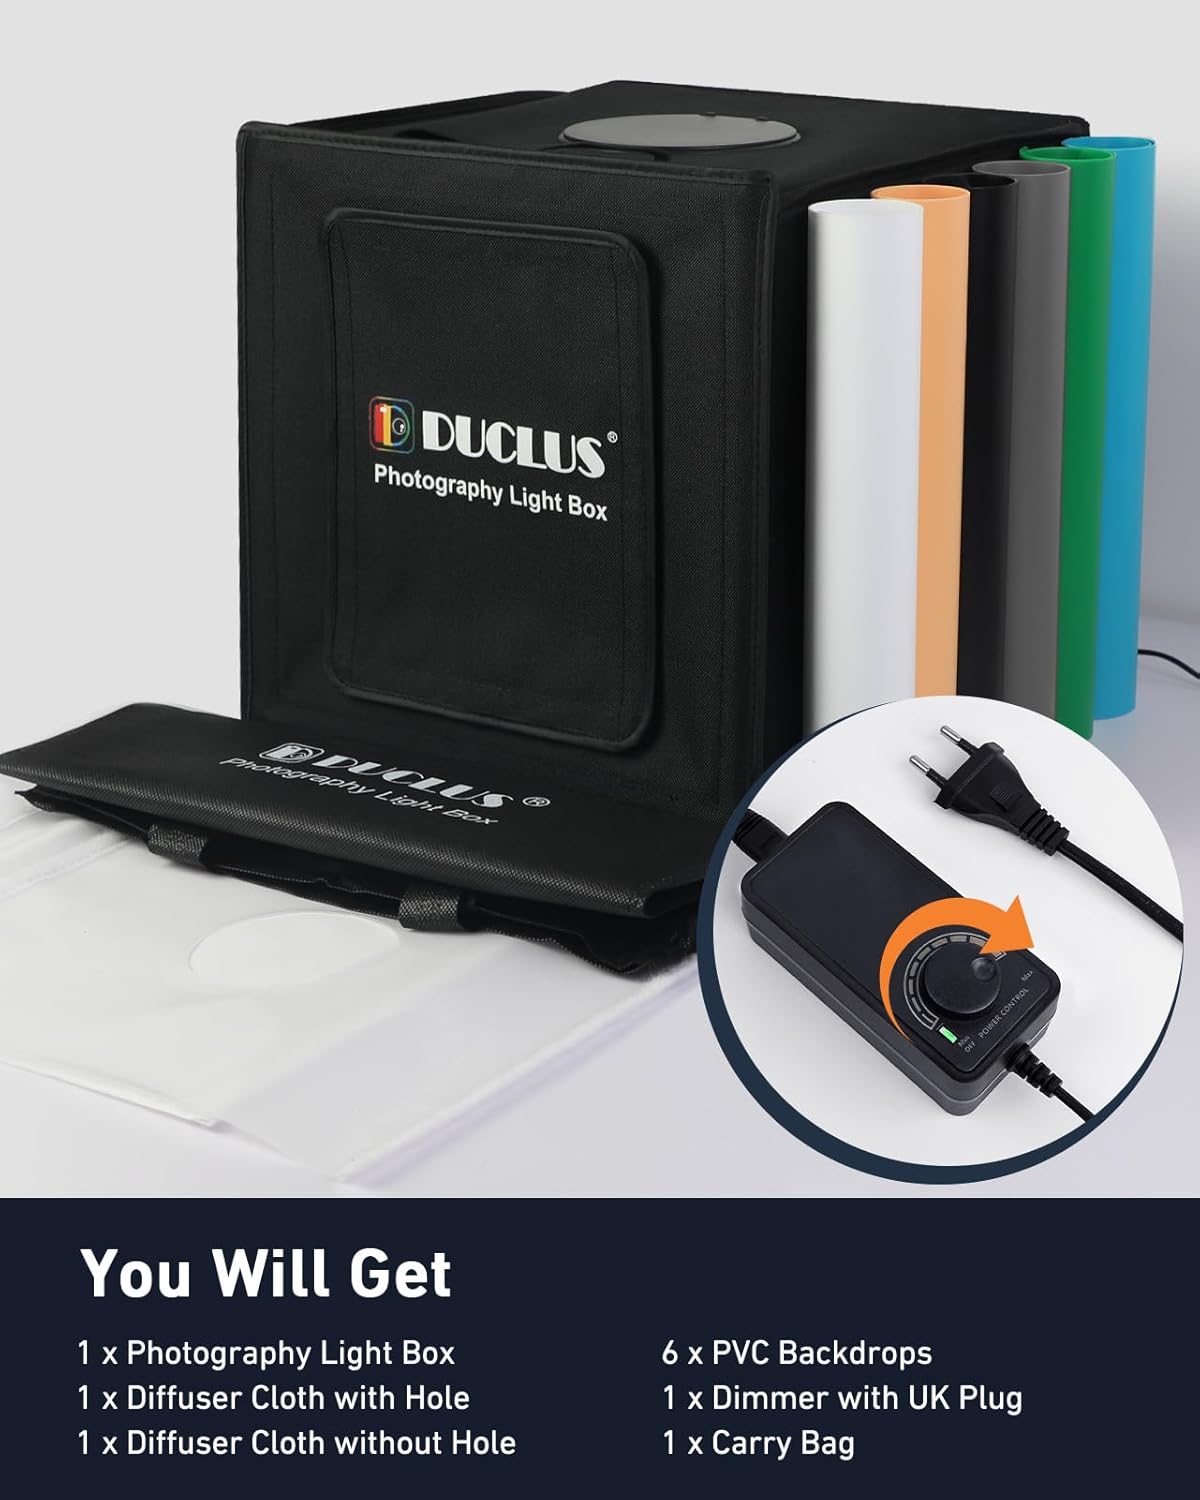
Image 3.1: All included components of the DUCLUS Photography Light Box.
4. Setup Instructions
- Unfold the Light Box: The DUCLUS light box features an integrated, foldable design. Carefully unfold the box until it forms a stable cube structure. The internal magnetic clasps will help secure its shape.
- Install Backdrops: Select one of the six PVC backdrops. Hook the top edge of the backdrop onto the designated clips inside the top rear of the light box. Allow the backdrop to curve gently down to the front.
- Connect Power: Connect the LED light strips to the dimmer control. Then, connect the dimmer control to the power adapter. Finally, plug the power adapter into a standard European power outlet.
- Adjust Lighting: Use the dimmer knob to adjust the brightness of the LED lights to your desired level.
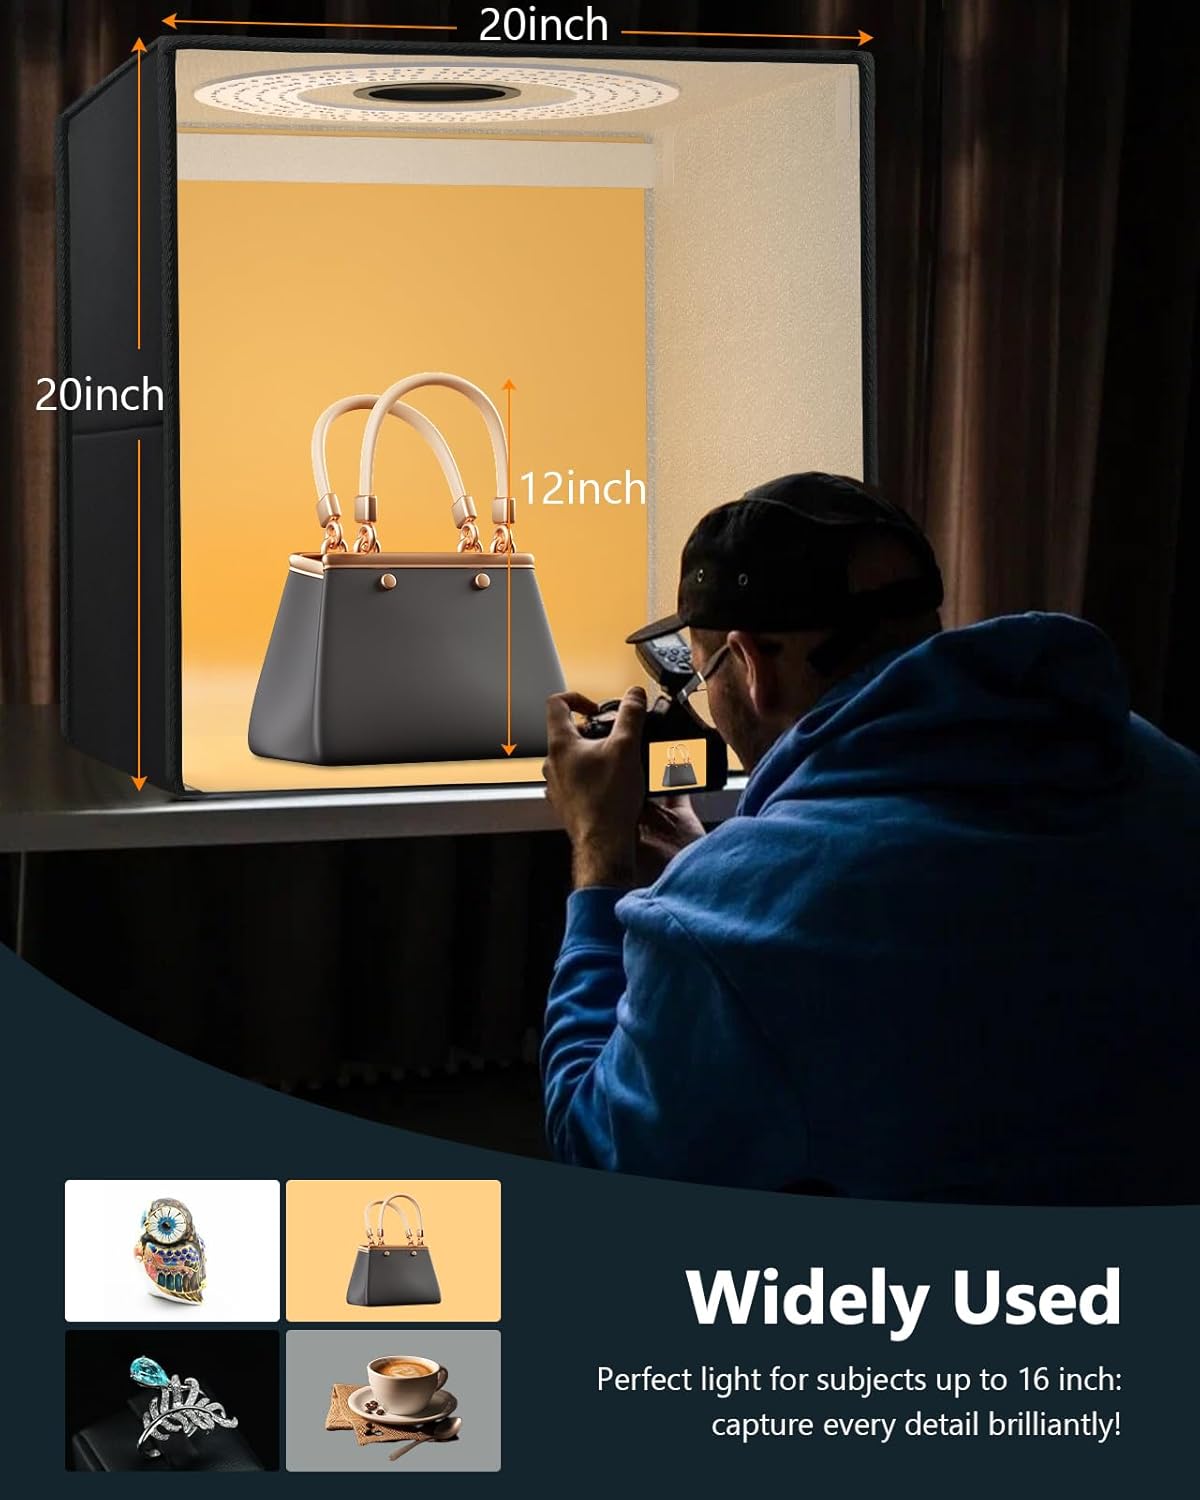
Image 4.1: The 50x50x50cm dimensions of the light box, suitable for items up to approximately 40cm.
5. Operating Instructions
5.1. Lighting Control
The light box is equipped with 216 ultra-bright LEDs, offering a high Color Rendering Index (CRI) of 95+ and a daylight color temperature of 5500K. This ensures natural and vibrant colors in your photographs.
The continuous dimmer allows precise adjustment of light intensity from 0% to 100% to achieve optimal exposure for your subjects.

Image 5.1: Stepless dimming control and LED specifications.
5.2. Reducing Reflections and Softening Light
For highly reflective objects, use the provided diffuser cloths. The light box features professional micro-particle silver reflective fabric on its inner walls for even light distribution.
- Diffuser Cloth (without hole): Place this cloth over the LED light strips to soften the light and reduce harsh reflections.
- Diffuser Cloth (with hole): This cloth can be used for overhead shooting, allowing the camera lens to pass through the hole while still diffusing the light.

Image 5.2: Effect of using a diffuser cloth to soften light and reduce reflections.
5.3. Multi-Angle Shooting
The light box is designed with multiple access points to accommodate various shooting angles:
- Large Front Window: Ideal for general shots of items up to 40 cm.
- Small Front Window: Suitable for macro photography of smaller items, typically under 30 cm.
- Top Window: Allows for overhead or flat lay photography.
- The light source direction can also be altered by positioning the light box on its side, offering additional lighting flexibility.

Image 5.3: Various shooting angles provided by the light box design.
5.4. Using Backdrops
The light box includes six PVC backdrops (white, black, grey, light orange, blue, green). These backdrops are wrinkle-free, waterproof, and easy to clean, providing a variety of backgrounds for your product photography.
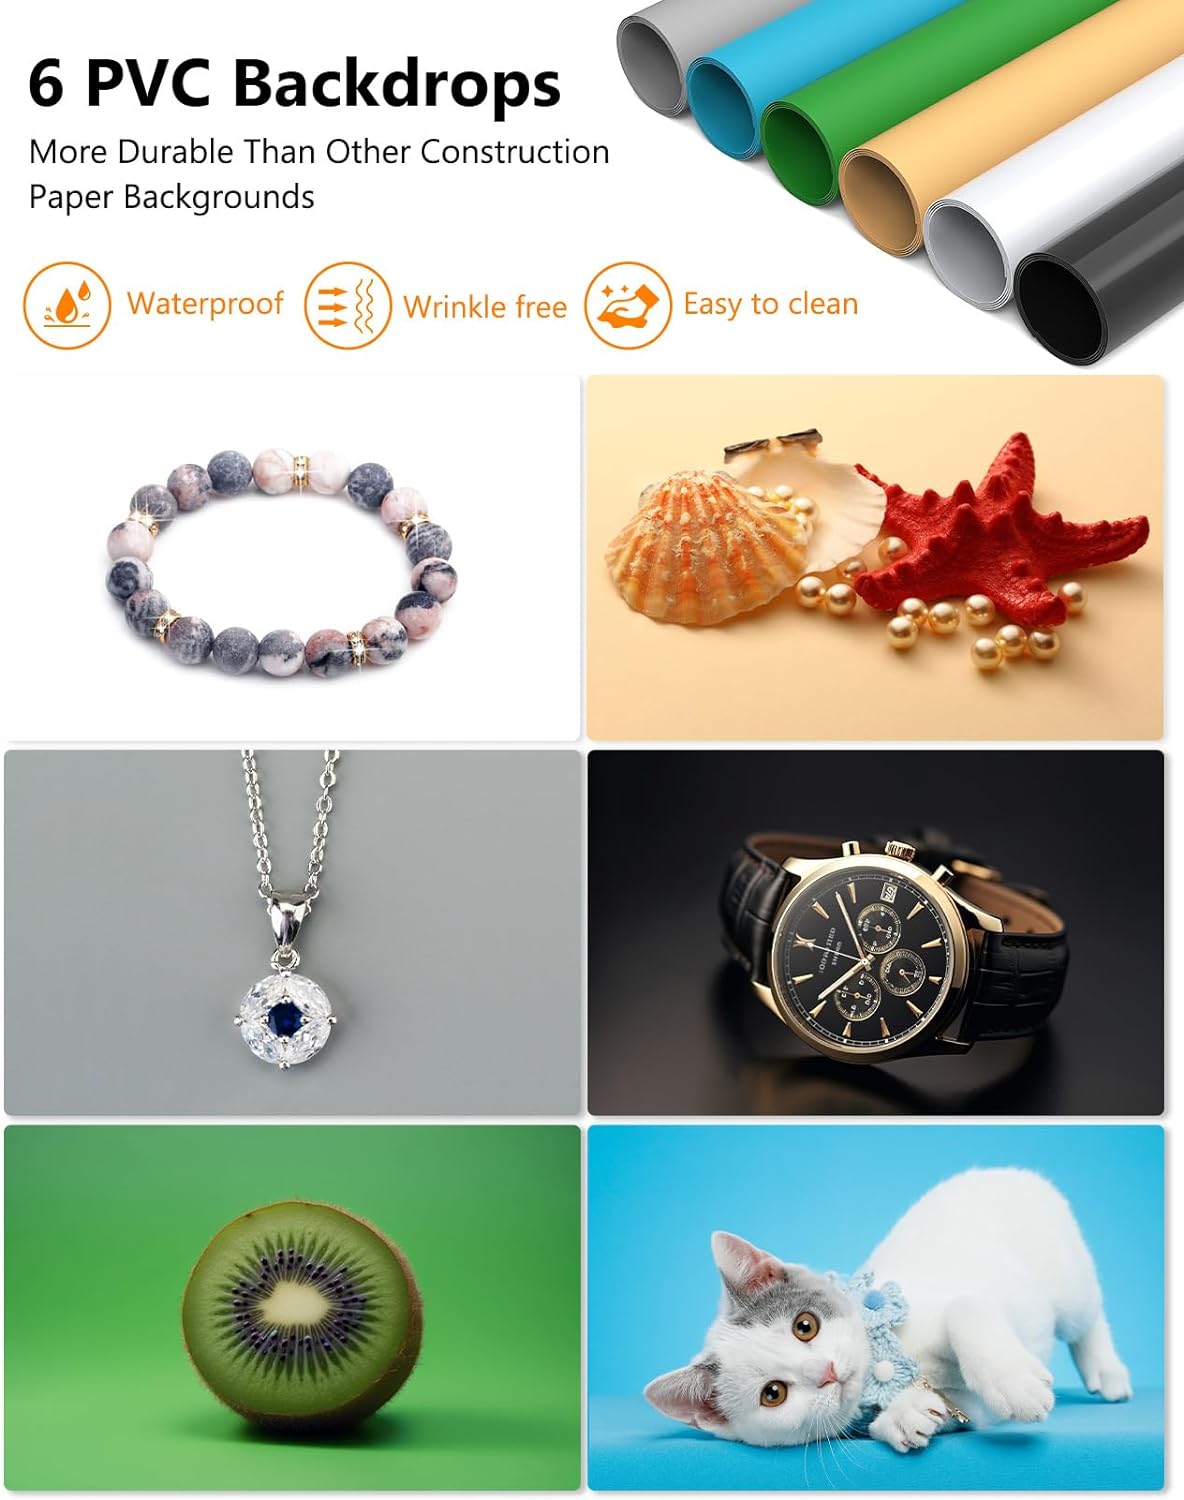
Image 5.4: Examples of product photography using the included PVC backdrops.
6. Maintenance
- Cleaning: Wipe the exterior of the light box with a soft, dry cloth. For the PVC backdrops, use a damp cloth and mild soap if necessary, then dry thoroughly. Do not use abrasive cleaners.
- Storage: When not in use, fold the light box and store it in the provided carry bag. Store in a dry, cool place away from direct sunlight.
- LED Care: The LED lights are designed for long-term use and do not require user maintenance. Avoid touching the LED strips directly.
7. Troubleshooting
- Lights not turning on:
- Check if the power adapter is securely plugged into both the light box and the wall outlet.
- Ensure the dimmer knob is turned on and adjusted to a sufficient brightness level.
- Verify that the power outlet is functional by testing it with another device.
- Uneven lighting or shadows:
- Ensure the diffuser cloth is properly installed over the LED strips.
- Adjust the position of your product within the light box.
- Experiment with different shooting angles using the multiple windows.
- Reflections on shiny objects:
- Always use the diffuser cloth when photographing reflective items.
- Adjust the angle of your camera relative to the object and light source.
8. Specifications
| Brand | DUCLUS |
| Model Number | DU5050 |
| Dimensions (L x W x H) | 50 x 50 x 50 cm (Product); 58 x 53 x 5.5 cm (Folded) |
| Weight | 5 Kilograms |
| Material | Polyvinyl Chloride (PVC) |
| Light Source Type | LED |
| Number of LEDs | 216 |
| Color Temperature | 5500K (Daylight) |
| Color Rendering Index (CRI) | 95+ |
| Voltage | 230 Volts (AC) |
| Compatible Devices | Smartphones, Cameras, iPads |
| Included Components | 1 Power Adapter, 1 Photo Box, 1 Diffuser Cloth with Hole, 1 Diffuser Cloth without Hole, 6 PVC Backdrops |
For detailed energy efficiency information, please refer to the EU Energy Label (EPREL).
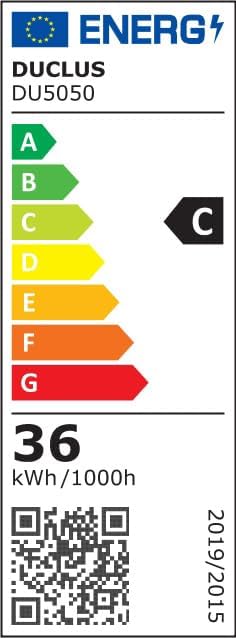
Image 8.1: EU Energy Label for Model DU5050.
9. Warranty and Support
Information regarding specific warranty terms is not provided in the product details. For warranty claims or technical support, please contact your retailer or the manufacturer, DUCLUS, directly. Retain your proof of purchase for any warranty-related inquiries.
For further assistance, you may refer to the seller's contact information on the platform where the product was purchased.