VEVOR MD-50E
VEVOR MD-50E Magnetic Drill Press User Manual
Model: MD-50E | Brand: VEVOR
1. Introduction
This manual provides essential information for the safe and effective operation, setup, and maintenance of your VEVOR MD-50E Magnetic Drill Press. Please read this manual thoroughly before operating the machine to ensure proper usage and to prevent injury or damage.
1.1 General Safety Instructions
- Always wear appropriate personal protective equipment (PPE), including safety glasses, hearing protection, and gloves.
- Ensure the work area is clean, well-lit, and free from obstructions.
- Verify the magnetic base is securely attached to a ferromagnetic surface before starting any drilling operation.
- Never operate the drill press if the power cord is damaged.
- Keep hands and loose clothing away from moving parts.
- Disconnect power before performing any adjustments, maintenance, or when changing accessories.
2. Product Features
The VEVOR MD-50E Magnetic Drill Press is designed for versatile drilling applications with the following key features:
- Multiple Functions: Combines annular drilling, twist drilling, and tapping capabilities.
- Stable Magnetic Base: Features a 10000 N (2248 lbf) magnetic base for secure attachment to flat steel and curved pipes (Ø3.15-11.81 in), supporting various drilling orientations.
- Precision Speed Control: A 10-level speed dial allows adjustment from 0-750 RPM to suit different materials and bit types.
- Extended Travel: Offers an 8.66 inch (220 mm) stroke with a clear scale for consistent and accurate drilling depth.
- Dual Protection System: Integrated cooling and lubrication system maintains optimal bit temperature, while a 15A overload fuse protects the motor from misuse.

Figure 2.1: The VEVOR MD-50E supports annular drilling, tapping, and twist drilling.
3. Components and Package Contents
The VEVOR MD-50E Magnetic Drill Press package typically includes the following items:
- VEVOR MD-50E Magnetic Drill Press Unit
- Drill Attachment (e.g., chuck, arbor)
- Coolant Tank and Hose
- Safety Strap
- Hex Wrenches
- User Manual
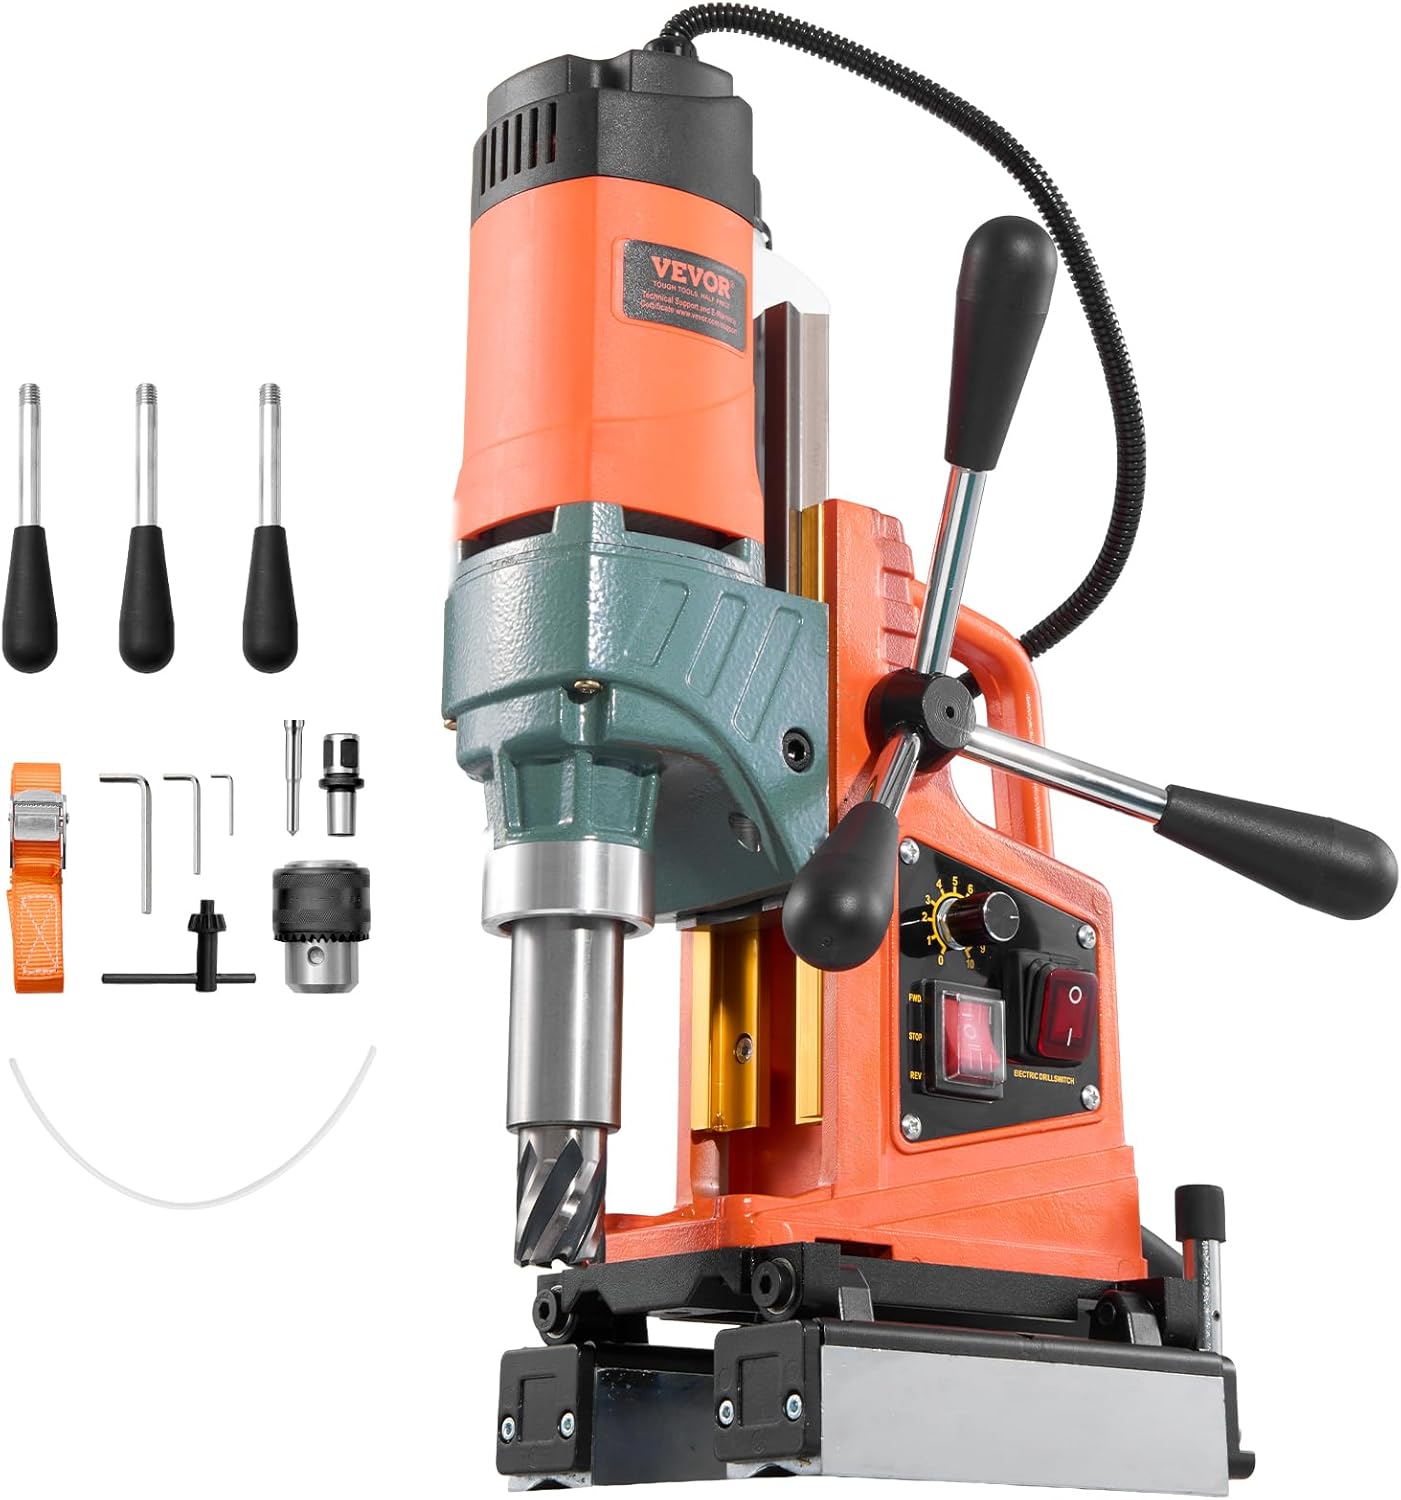
Figure 3.1: Main unit and typical accessories included with the VEVOR MD-50E.
4. Setup
4.1 Magnetic Base Attachment
- Ensure the work surface is clean, flat, and made of a ferromagnetic material. Remove any debris, rust, or paint that may interfere with magnetic adhesion.
- Position the magnetic drill press on the desired drilling location.
- Engage the magnetic base switch to activate the magnet. Verify the drill press is firmly secured before proceeding. For curved surfaces, ensure the magnetic base is properly adapted and secured with the provided safety strap.
- Attach the safety strap to a stable anchor point to prevent the drill from falling in case of power loss or magnetic failure.
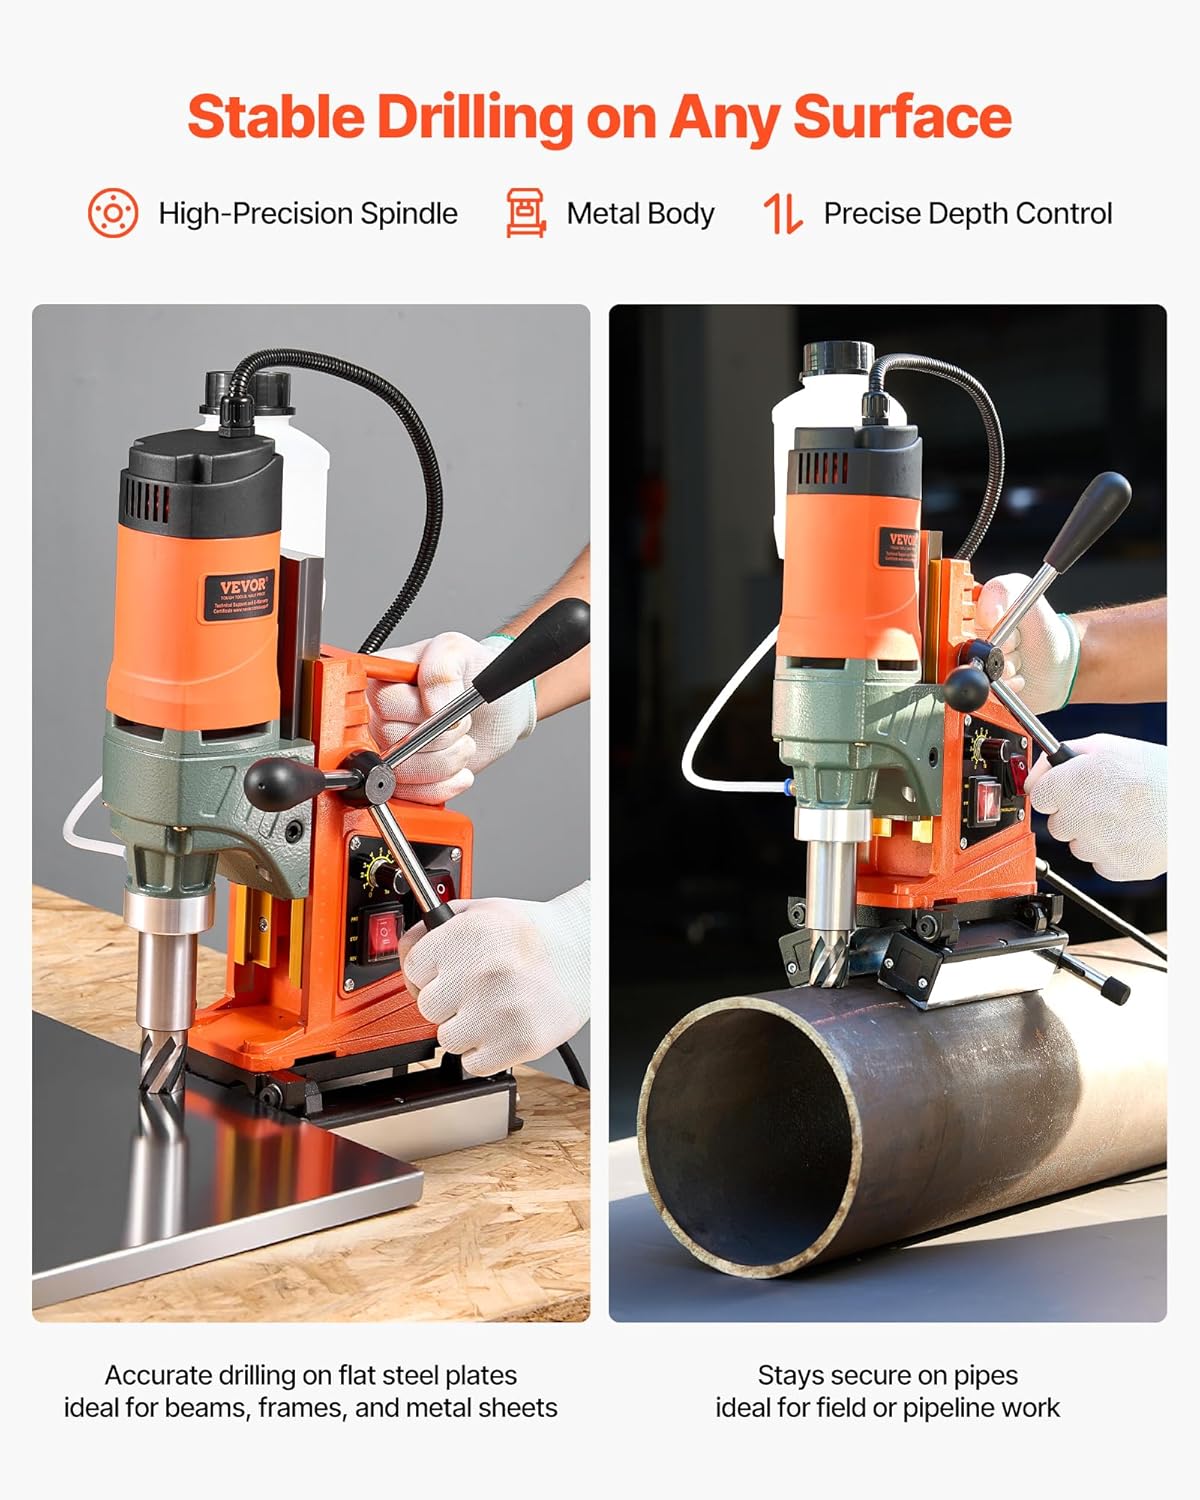
Figure 4.1: Securely attaching the magnetic drill press to flat and curved surfaces.
4.2 Drill Bit Installation
- Ensure the drill press is unplugged from the power source.
- For annular cutters, insert the cutter into the arbor and secure it with the set screws.
- For twist drill bits, insert the appropriate chuck into the spindle, then secure the twist drill bit firmly in the chuck.
- Verify the bit is centered and tightened to prevent slippage during operation.
4.3 Coolant System Setup
- Fill the coolant tank with an appropriate cutting fluid for the material being drilled.
- Connect the coolant hose securely to the drill press and ensure the nozzle is positioned to deliver fluid to the cutting area.
- Check for any leaks in the coolant system before operation.
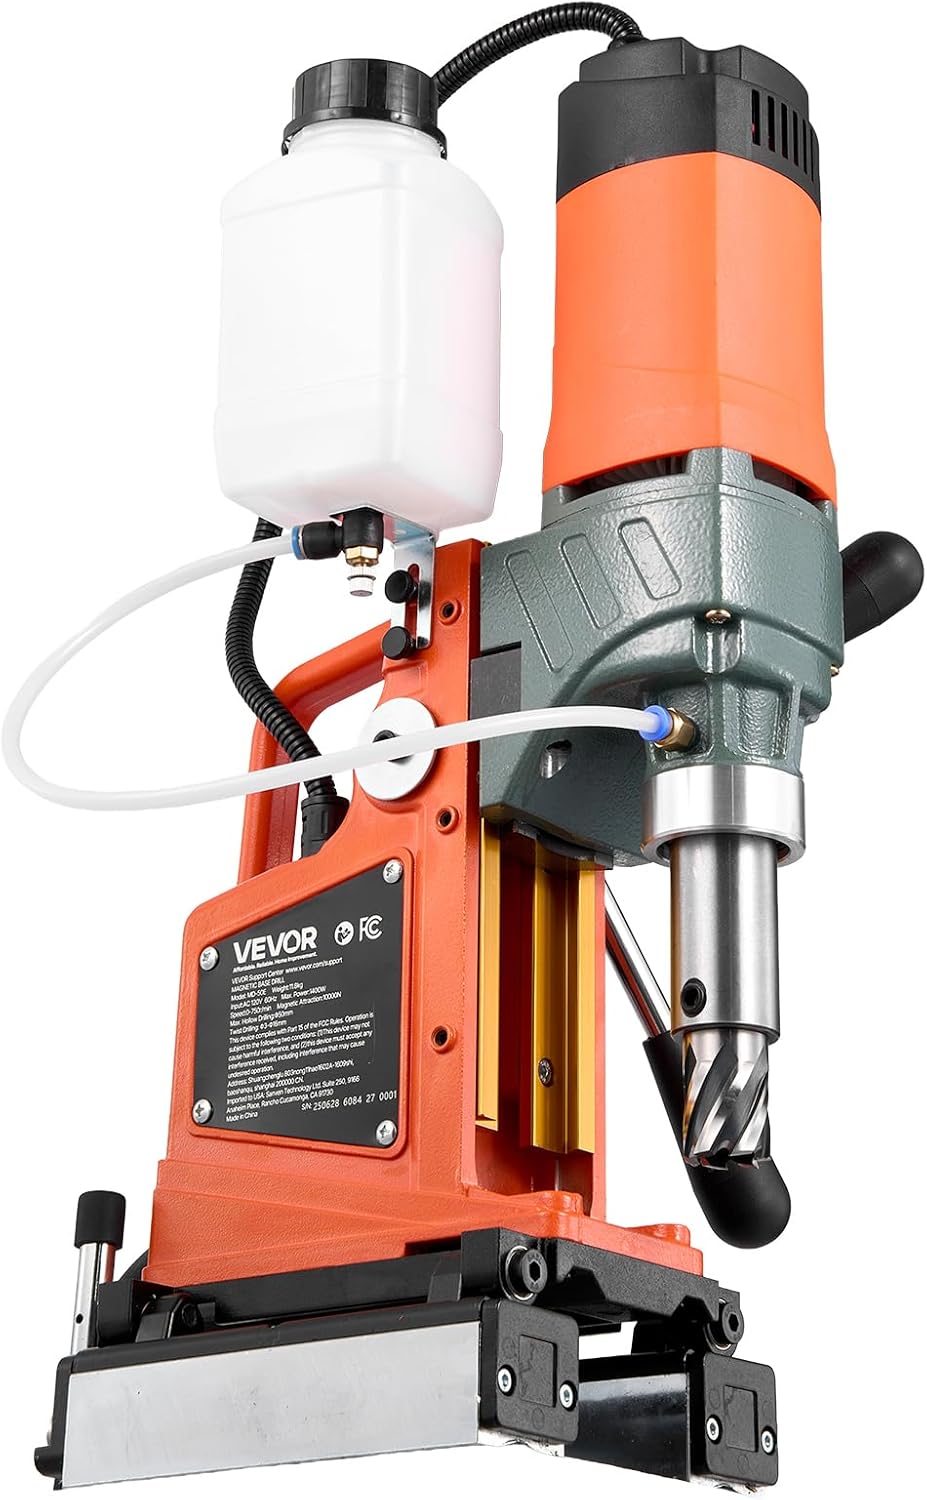
Figure 4.2: Coolant tank and hose assembly on the VEVOR MD-50E.
5. Operating Instructions
5.1 Power On/Off
- Connect the power cord to a suitable 110V power outlet.
- Ensure the magnetic base is engaged and the drill press is stable.
- Use the main power switch on the control panel to turn the drill press ON or OFF.
5.2 Speed Adjustment
- The MD-50E features a 10-level speed dial for variable speed control (0-750 RPM).
- Rotate the speed dial to select the appropriate RPM for your material and drill bit type. Lower speeds are generally used for harder materials and larger diameter bits, while higher speeds are for softer materials and smaller bits.

Figure 5.1: Adjusting the stepless speed control dial.
5.3 Drilling Operations (Annular & Twist)
- With the drill press powered on and the correct speed selected, slowly lower the drill bit towards the workpiece using the feed handles.
- Apply steady, even pressure. Avoid excessive force, which can damage the bit or motor.
- Ensure continuous coolant flow during drilling to prolong bit life and improve cut quality.
- Once the hole is complete, retract the drill bit slowly and turn off the motor.

Figure 5.2: Drilling into a metal pipe with the magnetic drill press.
5.4 Tapping Operations
- Install the appropriate tap into the chuck.
- Select a very low speed for tapping.
- Use the forward/reverse switch to control the tapping direction. Engage forward to cut the thread, and reverse to retract the tap.
- Apply cutting fluid generously during tapping.

Figure 5.3: The magnetic base allows for drilling in various orientations: horizontal, overhead, and vertical.
6. Maintenance
Regular maintenance ensures the longevity and optimal performance of your VEVOR MD-50E Magnetic Drill Press.
6.1 Cleaning
- After each use, disconnect the power and clean the machine, especially the magnetic base and spindle area, to remove metal chips and coolant residue.
- Use a brush or compressed air for cleaning. Avoid using solvents that may damage plastic components.
6.2 Lubrication
- Periodically lubricate the moving parts, such as the feed handles and slide rails, with light machine oil to ensure smooth operation.
- Check the coolant system for blockages and clean the tank and hoses as needed.
6.3 Inspection
- Regularly inspect the power cord for any signs of damage (cuts, fraying). Replace immediately if damaged.
- Check the magnetic base for wear or damage that could affect its holding force.
- Ensure all fasteners are tight.

Figure 6.1: Integrated cooling system components for continuous operation.
7. Troubleshooting
This section addresses common issues you might encounter with your magnetic drill press.
| Problem | Possible Cause | Solution |
|---|---|---|
| Drill does not start | No power supply; Damaged power cord; Overload fuse tripped | Check power connection; Inspect power cord; Reset overload fuse. |
| Magnetic base not holding | Surface not ferromagnetic; Surface dirty/uneven; Power loss to magnet | Ensure proper material; Clean and flatten surface; Check power supply to magnet. |
| Excessive vibration/noise | Loose drill bit; Worn bearings; Incorrect speed | Tighten drill bit; Contact service for bearing replacement; Adjust speed. |
| Drill bit overheating | Insufficient coolant; Incorrect speed; Dull drill bit | Ensure coolant flow; Adjust speed; Replace or sharpen drill bit. |
8. Specifications
Technical specifications for the VEVOR MD-50E Magnetic Drill Press:
| Specification | Value |
|---|---|
| Model Number | MD-50E |
| Maximum Power | 1400 W |
| Voltage | 110 Volts |
| Amperage | 15 Amps |
| Maximum Rotational Speed | 750 RPM (10-level speed control) |
| Hole Diameter (Annular Drill) | 1.97 inches / 50 mm |
| Twist Drill Diameter | 0.12-0.63 inches / Ø3-Ø16 mm |
| Tapping Capacity | 0.12-0.63 inches / M3-M16 |
| Direction of Rotation | Forward / Reverse |
| Magnetic Attraction | 2248 lbf / 10000 N |
| Maximum Stroke | 8.66 inches / 220 mm |
| Product Dimensions (L x W x H) | 11.02" x 8.27" x 15.75" |
| Item Weight | 28 Pounds / 12.7 kg |
9. Applications
The VEVOR MD-50E Magnetic Drill Press is suitable for a wide range of demanding environments and tasks, including:
- Construction projects
- Shipbuilding and marine repairs
- Power tower installation and maintenance
- Railway infrastructure development
- Industrial plant retrofits and maintenance
- Fabrication of outdoor steel frames

Figure 9.1: Diverse applications of the VEVOR MD-50E Magnetic Drill Press.
10. Warranty and Support
For warranty information, technical support, or service inquiries, please refer to the VEVOR official website or contact VEVOR customer service directly. Keep your purchase receipt for warranty claims.
Ask a question about this manual
Ask about setup, troubleshooting, compatibility, parts, safety, or missing instructions. Manuals+ will review the question and use this page’s manual context to help answer it.