1. Introduction
Thank you for choosing the TKWSER NV5180 Night Vision Binoculars. This device is designed to provide clear observation in low light conditions and complete darkness, making it ideal for night hunting, camping, wildlife monitoring, and security. Please read this manual carefully before using the device to ensure proper operation and to maximize its performance and lifespan.
2. Product Overview and Features
The TKWSER NV5180 features a high-definition TFT LCD screen, powerful digital zoom, and an adjustable infrared illuminator to enhance your viewing experience.
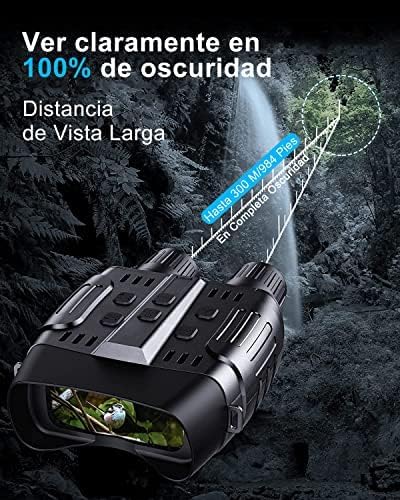
- Clear Night Vision: Observe targets up to 300 meters (984 feet) in 100% complete darkness with the 7-level infrared illuminator.
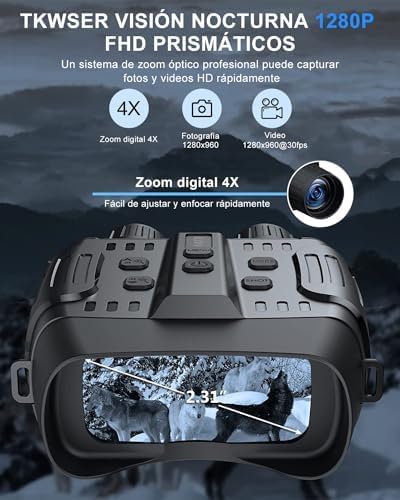
- High-Resolution Display: Integrated 2.31-inch HD TFT LCD screen for comfortable viewing.
- Photo and Video Capture: Record 1280x960 pixel images and 1280x960@30FPS videos.
- 4X Digital Zoom: Easily adjust and quickly focus on distant objects.
- Long Battery Life: Up to 5-6 hours of continuous operation with IR illuminator on, or 7-8 hours without IR. Powered by 6x AA 1.5V alkaline batteries (not included).
- Storage: Includes a 32GB memory card, expandable from 4GB to 32GB.
- Multifunctional Use: Suitable for night hunting, camping, night fishing, wildlife observation, search and rescue, and bird watching.


3. Setup
- Battery Installation:
- Locate the battery compartment on the underside of the device.
- Open the compartment cover.
- Insert 6x AA 1.5V alkaline batteries, ensuring correct polarity (+/-). Batteries are not included with the device.
- Close the battery compartment cover securely.
- Memory Card Insertion:
- Locate the memory card slot, typically on the side of the device.
- Insert the included 32GB SD card into the slot until it clicks into place. Ensure the card is oriented correctly.
- Power On:
- Press and hold the Power button (usually marked with an Ⓘ symbol) for a few seconds until the screen illuminates.
4. Operating Instructions
4.1 Basic Operation
- Power On/Off: Press and hold the Power button to turn the device on or off.
- Mode Selection: Use the Mode button to switch between Photo, Video, and Playback modes.
- Infrared (IR) Adjustment:
- In night vision mode, press the IR button to cycle through 7 levels of infrared illumination.
- Higher IR levels provide brighter images in darker conditions but consume more battery power.
- Digital Zoom:
- Use the Zoom In/Out buttons (often marked with “+” and “-” or arrow symbols) to adjust the 4X digital zoom.
- Manual Focus:
- Rotate the objective lens ring (located at the front of the binoculars) to achieve a sharp image. Adjust until the image on the screen is clear.
4.2 Capturing Photos and Videos
- Taking Photos:
- Switch to Photo mode.
- Frame your subject on the screen.
- Press the Shutter/OK button to take a picture.
- Recording Videos:
- Switch to Video mode.
- Press the Shutter/OK button to start recording. A red indicator or timer will appear on the screen.
- Press the Shutter/OK button again to stop recording.
4.3 Playback and Settings
- Viewing Media:
- Switch to Playback mode.
- Use the navigation buttons (Up/Down or Left/Right) to browse through your captured photos and videos.
- Press the Shutter/OK button to play a video.
- Language Settings:
- Access the menu (usually by pressing a dedicated Menu button).
- Navigate to the Language option and select your preferred language from the 12 available options.
5. Maintenance
- Cleaning: Use the included cleaning cloth to gently wipe the lenses and screen. Do not use abrasive materials or harsh chemicals.
- Storage: Store the binoculars in a cool, dry place, away from direct sunlight and extreme temperatures. If storing for extended periods, remove the batteries to prevent leakage.
- Battery Replacement: Replace all 6x AA batteries simultaneously when the low battery indicator appears or performance degrades. Do not mix old and new batteries or different battery types.
- Water Resistance: The device is designed to be waterproof (Type de poignée : étanche). However, avoid submerging it in water.
6. Troubleshooting
| Problem | Possible Cause | Solution |
|---|---|---|
| Device does not power on. | Low or dead batteries; incorrect battery installation. | Replace with fresh AA alkaline batteries; ensure correct polarity. |
| Image is blurry or out of focus. | Incorrect manual focus adjustment. | Rotate the objective lens ring to adjust focus until the image is clear. |
| Cannot see clearly in darkness. | IR illuminator off or set to low level. | Increase the IR level using the IR button. Ensure batteries have sufficient charge. |
| Cannot take photos or record videos. | Memory card full or not inserted correctly; incorrect mode selected. | Check memory card insertion; delete old files or replace card; ensure device is in Photo or Video mode. |
| Short battery life. | High IR usage; old batteries. | Reduce IR level if possible; replace batteries with new, high-quality alkaline batteries. |
7. Specifications
| Feature | Specification |
|---|---|
| Brand | TKWSER |
| Model Name | NV5180 |
| Model Number | WFTKNV5180DE-AA1-2 |
| Color | Black |
| Material | Plastic |
| Dimensions (L x W x H) | 17.8 x 7.5 x 13.7 cm (7 x 2.95 x 5.39 inches) |
| Item Weight | 1.17 kilograms (2.58 lbs) |
| Maximum Magnification | 40x |
| Objective Lens Diameter | 24 Millimeters |
| Field of View | 70 Degrees |
| Night Vision | Yes |
| Digital Zoom | 4X |
| IR Illuminator Levels | 7 Gears |
| Viewing Range (100% Darkness) | Up to 300 meters (984 feet) |
| Display Screen | 2.31-inch HD TFT LCD |
| Image Resolution | 1280x960 pixels |
| Video Resolution | 1280x960@30FPS |
| Storage Capacity | 4GB to 32GB (32GB SD card included) |
| Power Source | 6x AA 1.5V Alkaline Batteries (not included) |
| Battery Life (IR On) | 5-6 hours |
| Battery Life (IR Off) | 7-8 hours |
| Included Components | Soft case, Neck strap, 32GB SD card, Data cable, User manual, Cleaning cloth |
| UPC | 768553168195 |
| GTIN | 768553168195 |
8. Warranty and Support
For warranty information, technical support, or service inquiries, please refer to the product packaging or contact the manufacturer directly through their official website or customer service channels. Keep your purchase receipt as proof of purchase.