1. Introduction
This manual provides essential information for the safe and efficient use of your Swan SMF2 Host 500W Stainless Steel Milk Frother and Warmer. Please read these instructions carefully before first use and retain them for future reference.
The Swan SMF2 is designed to heat up to 250ml of liquid and froth up to 115ml of liquid, making it suitable for preparing various hot beverages such as cappuccinos, lattes, and hot chocolates.
2. Important Safety Instructions
- Read all instructions before using the appliance.
- Do not immerse the frother base, cord, or plug in water or other liquids.
- Ensure the voltage indicated on the appliance corresponds to your local mains voltage before connecting.
- This appliance is for household use only. Do not use outdoors.
- Always place the appliance on a stable, level, heat-resistant surface.
- Do not operate the appliance with a damaged cord or plug, or after the appliance malfunctions or has been damaged in any manner.
- Keep the appliance and its cord out of reach of children.
- Do not fill above the maximum fill line to prevent overflow.
- Always ensure the lid is securely in place during operation.
- Unplug from the outlet when not in use and before cleaning. Allow to cool before putting on or taking off parts, and before cleaning the appliance.
- The frother jug is not dishwasher safe. Hand wash only.
3. Product Overview
Familiarize yourself with the components of your Swan Milk Frother.
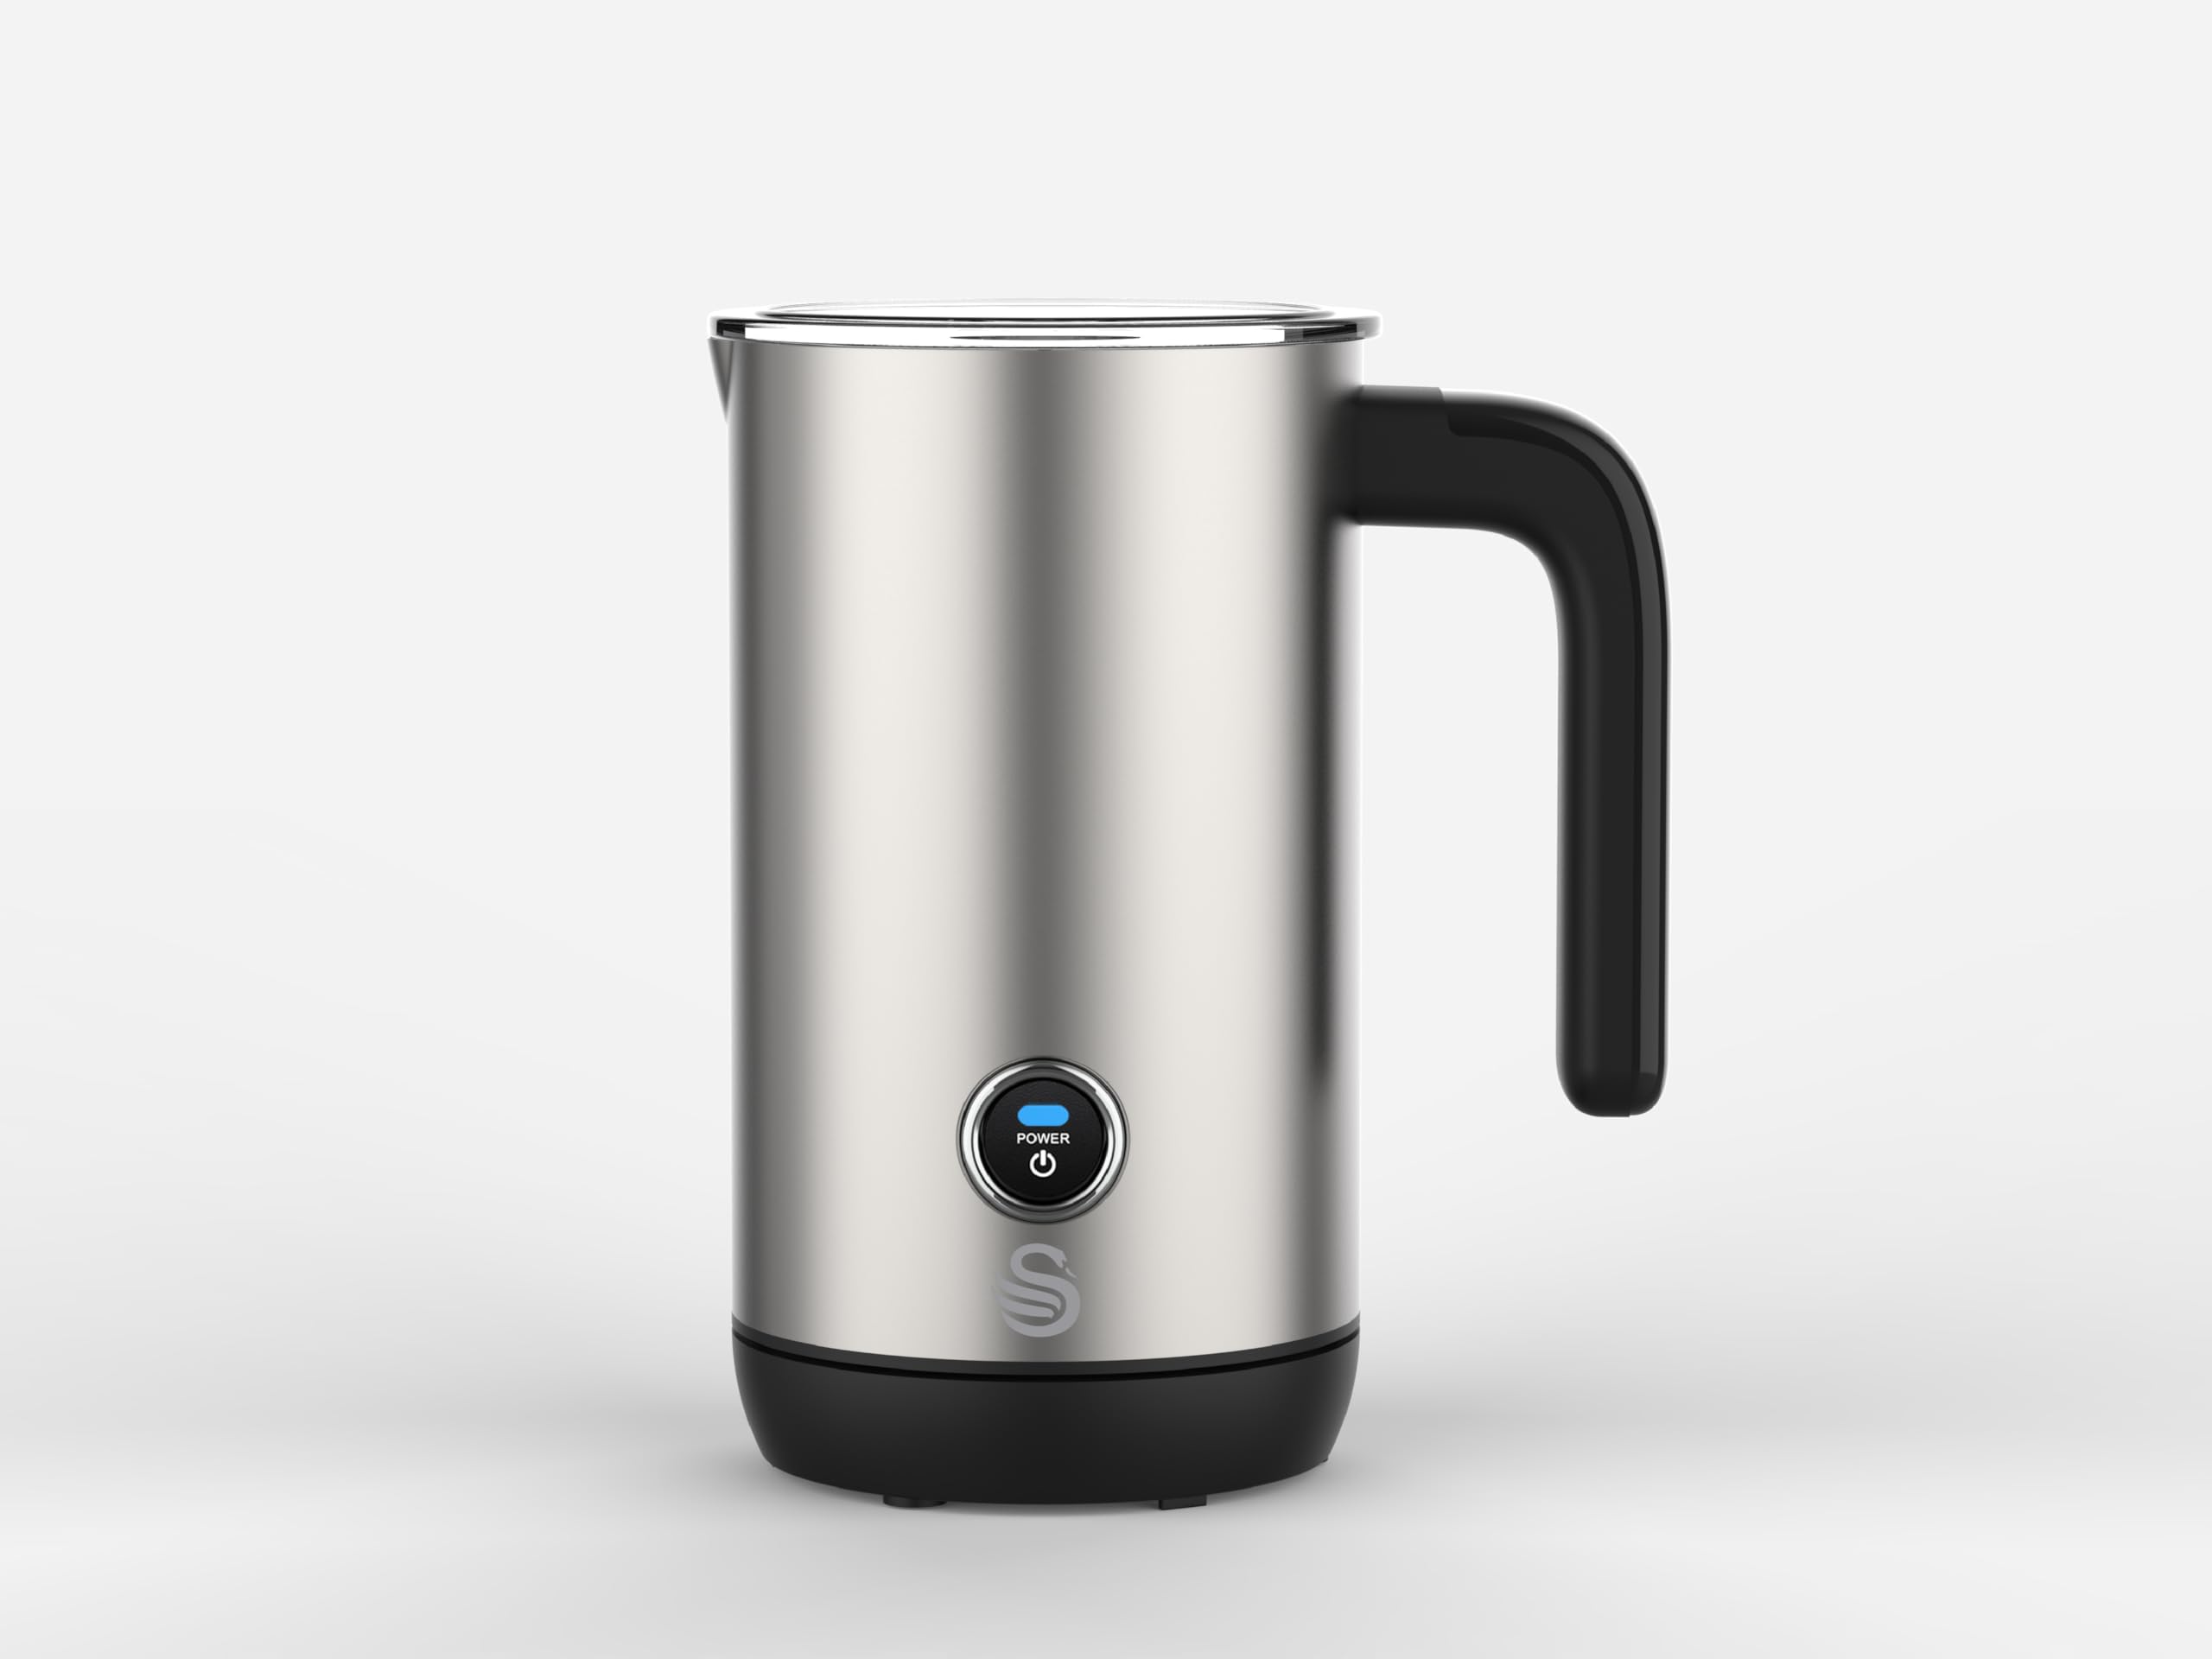
Figure 1: Front view of the Swan SMF2 Host Milk Frother, showing the stainless steel jug, handle, power button, and base.

Figure 2: The Swan SMF2 Host Milk Frother jug separated from its 360-degree power base, illustrating the cordless design for easy handling.

Figure 3: Top-down view of the Swan SMF2 Host Milk Frother, showing the interior with the spring whisk attachment for frothing.
Components:
- Frother Jug: Stainless steel jug with non-stick interior coating.
- Lid: Transparent lid to cover the jug during operation.
- Spring Whisk: Detachable whisk for frothing milk.
- Heating Whisk: Used for heating milk without frothing (often the spring whisk removed).
- Power Base: 360-degree rotational base with power cord.
- Power Button: Located on the front of the jug for operation.
4. Setup
- Unpack the appliance and all accessories. Remove any packaging materials.
- Clean the frother jug and whisk attachments according to the 'Cleaning and Maintenance' section before first use.
- Place the power base on a dry, stable, and heat-resistant surface.
- Ensure the frother jug is dry on the outside before placing it on the power base.
5. Operating Instructions
5.1 Frothing Milk
- Ensure the spring whisk is securely attached to the bottom of the frother jug.
- Pour cold milk into the jug. Do not exceed the 'MAX FROTH' fill line (typically 115ml). Using full cream milk is recommended for best frothing results.
- Place the lid on the jug.
- Place the jug onto the power base.
- Press the power button once. The indicator light will illuminate, and the frother will begin operation.
- The frother will automatically stop when the milk reaches the optimal temperature and froth consistency. The indicator light will turn off.
- Carefully remove the jug from the base and pour the frothed milk.
5.2 Heating Milk (without frothing)
- Remove the spring whisk from the frother jug.
- Pour cold milk into the jug. Do not exceed the 'MAX HEAT' fill line (typically 250ml).
- Place the lid on the jug.
- Place the jug onto the power base.
- Press the power button once. The indicator light will illuminate, and the frother will begin heating.
- The frother will automatically stop when the milk reaches the optimal temperature. The indicator light will turn off.
- Carefully remove the jug from the base and pour the heated milk.
Note: For optimal results, use fresh, cold milk. The frother is designed for dairy milk; results with non-dairy alternatives may vary.
6. Cleaning and Maintenance
Proper cleaning ensures the longevity and hygiene of your milk frother.
6.1 Cleaning Instructions
- Always unplug the appliance from the power outlet and allow it to cool completely before cleaning.
- Remove the whisk from the jug.
- Wash the frother jug interior, lid, and whisk attachments with warm, soapy water using a soft sponge or cloth. Rinse thoroughly.
- Important: The frother jug is not dishwasher safe. Do not immerse the exterior of the jug or the power base in water.
- Wipe the exterior of the jug and the power base with a damp cloth. Do not use abrasive cleaners or scouring pads.
- Ensure all parts are completely dry before storing or next use.
6.2 Storage
Store the frother in a clean, dry place when not in use. Ensure the power cord is neatly wrapped and not kinked.
7. Troubleshooting
If you encounter issues with your frother, refer to the following table for common problems and solutions.
| Problem | Possible Cause | Solution |
|---|---|---|
| Frother does not turn on. | No power supply. | Check if the power base is plugged in and the outlet is functional. |
| Milk is not frothing or heating properly. | Incorrect whisk used or whisk not properly attached. Milk level too high or too low. | Ensure the spring whisk is used for frothing. Check milk levels against MAX FROTH/HEAT lines. Use cold, fresh milk. |
| Frother stops prematurely or requires multiple presses. | Overheating protection activated. Residue on heating plate. | Allow the frother to cool down for a few minutes. Ensure the bottom of the jug and heating plate are clean and dry. |
| Burnt smell or residue. | Milk residue left after previous use. | Clean the frother jug thoroughly after each use. Do not let milk dry inside. |
8. Specifications
- Model: SMF2 Host
- Brand: Swan
- Power: 500W
- Material: Stainless Steel
- Frothing Capacity: 115ml
- Heating Capacity: 250ml
- Dimensions (W x H): 16W x 13H centimetres
- Item Weight: 0.4 Kilograms
- Special Feature: Ergonomic Handle, 360 Degree jug placement on base
- Product Care: Hand Wash Only
9. Warranty and Support
This product comes with a standard manufacturer's warranty. Please refer to the warranty card included with your purchase for specific terms and conditions, including the warranty period and coverage details.
For technical support, spare parts, or warranty claims, please contact Swan customer service through their official website or the retailer from whom you purchased the product. Keep your proof of purchase for warranty validation.