EternaHora EN8831
EternaHora Projection Alarm Clock User Manual
Model: EN8831
1. Introduction
Thank you for purchasing the EternaHora Projection Alarm Clock. This device combines a digital alarm clock with an 8-inch curved LED display, FM radio, and a rotatable projection feature to display time on your wall or ceiling. It also includes a USB charging port for your mobile devices, dual alarms, snooze function, and adjustable brightness. Please read this manual carefully before use to ensure proper operation and to keep it for future reference.

Image 1.1: Front view of the EternaHora Projection Alarm Clock, showcasing its curved display and the time projection feature.
2. Package Contents
Please check the box for the following items:
- 1x Clock Projector
- 1x 1.5m USB Cable
- 1x User Manual
- 1x 2032 Coin Cell Battery (pre-installed or included separately)
- 1x Packaging Box
Note: An AC adapter is not included and must be supplied by the user (5V/1.2A recommended).
3. Product Overview and Features
The EternaHora Projection Alarm Clock is designed with user convenience and functionality in mind. Key features include:
- 8-inch Curved LED Display: Large, clear display for easy readability.
- 180° Rotatable Projection: Projects time onto walls or ceilings with adjustable angle and image flip.
- FM Radio: Automatic search and storage for up to 15 stations (76.0-108.0MHz).
- Dual Alarms: Set two independent alarms for different wake-up times.
- Snooze Function: Adjustable snooze duration from 5 to 60 minutes.
- USB Charging Port: Convenient 5V output for charging mobile devices.
- Adjustable Brightness: 4 levels of display brightness (Bright-Medium-Dim-Off) and auto-dimmer.
- Memory Function: Built-in CR2032 battery retains time settings during power outages.
- 12/24-Hour Display: Switch between time formats as preferred.

Image 3.1: Visual representation of the alarm clock's dimensions and its primary features.
4. Setup
4.1 Power Connection
- Connect the provided 1.5m USB cable to the DC 5V input port on the back of the alarm clock.
- Plug the other end of the USB cable into a 5V/1.2A (or higher) USB power adapter (not included) and then into a wall outlet.
- The display will light up, indicating the clock is powered on.
4.2 Battery Installation (Memory Function)
The clock comes with a pre-installed or separately included CR2032 coin cell battery. This battery is for memory backup only and does not power the display or functions. It ensures that time settings are retained during a power outage.
- Locate the battery compartment on the bottom of the clock.
- If not already installed, insert the CR2032 battery with the positive (+) side facing up.
- Close the battery compartment cover securely.
5. Operating Instructions
5.1 Time Setting (12/24-Hour Format)
- In time display mode, press and hold the 'TIME SET' button (usually labeled with a clock icon or 'SET'). The hour digits will start flashing.
- Use the 'UP' or 'DOWN' buttons to adjust the hour.
- Press 'TIME SET' again to confirm the hour and move to minute setting. The minute digits will flash.
- Use the 'UP' or 'DOWN' buttons to adjust the minutes.
- Press 'TIME SET' again to confirm the minutes.
- To switch between 12-hour and 24-hour format, press the '12/24H' button (or 'TIME SET' repeatedly until the format option appears, then use 'UP'/'DOWN').
5.2 Alarm Setting (Dual Alarms)
This clock supports two independent alarms (Alarm 1 and Alarm 2).

Image 5.1: Illustration of setting two distinct alarms for different daily activities.
- Press the 'ALARM 1' button (or 'ALARM' button repeatedly until 'AL1' appears). The alarm hour digits will flash.
- Use the 'UP' or 'DOWN' buttons to adjust the alarm hour.
- Press 'ALARM 1' again to confirm and move to alarm minute setting. The alarm minute digits will flash.
- Use the 'UP' or 'DOWN' buttons to adjust the alarm minutes.
- Press 'ALARM 1' again to select the alarm sound (Buzzer or FM Radio). Use 'UP' or 'DOWN' to choose.
- Press 'ALARM 1' again to confirm and activate Alarm 1. The 'AL1' icon will appear on the display.
- Repeat the process for 'ALARM 2' using the 'ALARM 2' button (or 'ALARM' button until 'AL2' appears).
- To deactivate an alarm, press the corresponding 'ALARM' button until the 'AL' icon disappears.
- To adjust alarm volume, use the 'VOL' buttons during alarm sound or FM radio playback. The clock offers 10 levels of adjustable alarm volume.
5.3 Snooze Function
When the alarm sounds, press the large 'SNOOZE' button on top of the clock to temporarily silence the alarm.

Image 5.2: How to use the snooze function for additional sleep time.
- The alarm will sound again after the set snooze duration.
- The default snooze duration is 9 minutes. To adjust it (5-60 minutes), press and hold the 'SNOOZE' button, then use 'UP' or 'DOWN' buttons to set the desired duration. Press 'SNOOZE' again to confirm.
- To turn off the alarm completely, press any other button (e.g., 'ALARM 1', 'ALARM 2', 'FM') or wait for the alarm to automatically turn off after 60 minutes if not snoozed.
5.4 Projection Function
The clock can project the time onto a wall or ceiling.

Image 5.3: Demonstrates the time projection feature and its adjustability.
- In clock mode, press the 'PROJECTOR' button (often labeled with a projection icon or 'UP' button) to turn the projection on/off.
- Rotate the projector lens (located on top of the clock) 180° to adjust the projection angle.
- Long press the 'PROJECTOR' button (or 'UP' button) to flip the projected numbers 180° for optimal viewing.
- Adjust the focus ring on the projector lens to sharpen the projected image. Optimal projection distance is up to 16.4 feet (approx. 5 meters).
5.5 FM Radio Operation
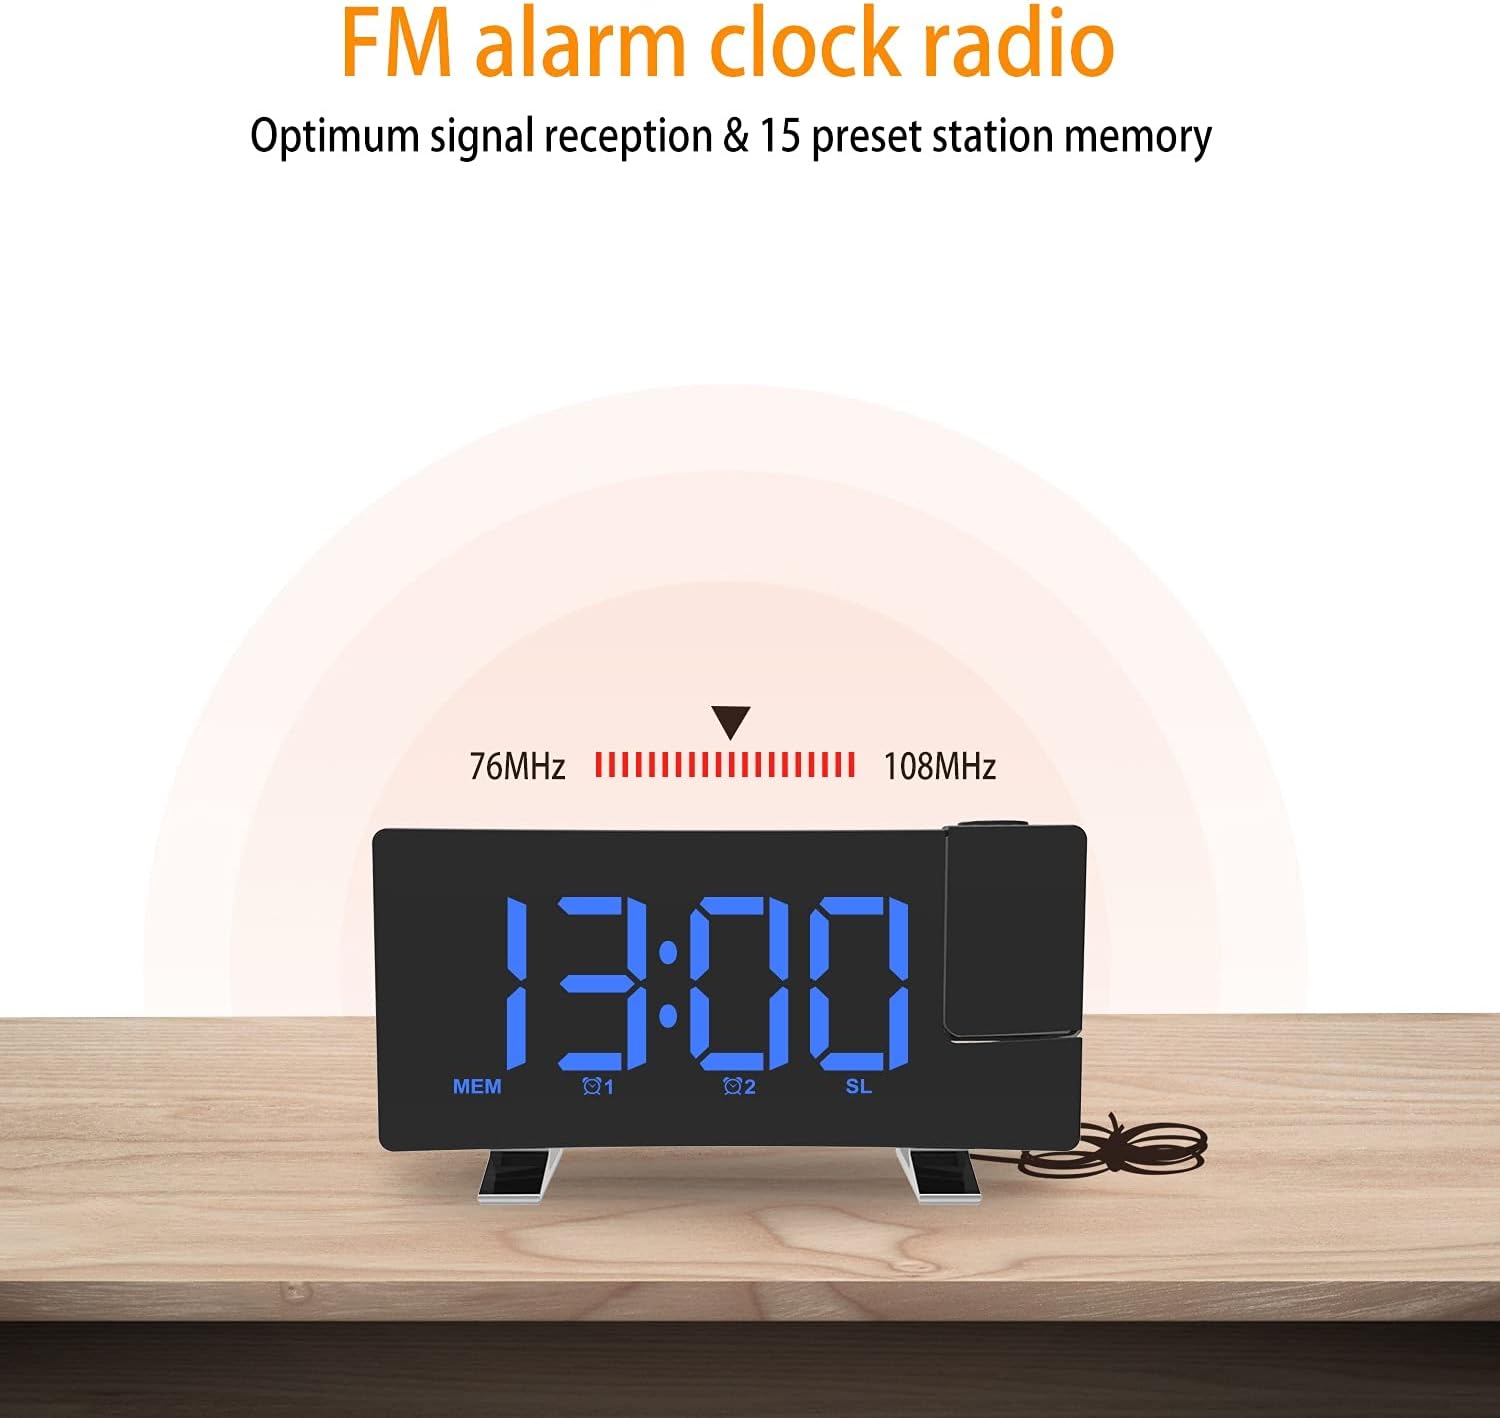
Image 5.4: Overview of the FM radio capabilities, including frequency range and station memory.
- Press the 'FM' button to turn the FM radio on/off.
- Auto-Scan: Press and hold the 'FM' button to automatically scan and save available stations. The clock can store up to 15 stations.
- Manual Tuning: Use the 'UP' or 'DOWN' buttons to manually tune to a specific frequency.
- Recall Stations: Briefly press the 'FM' button to cycle through saved stations.
- Volume Adjustment: Use the 'VOL+' or 'VOL-' buttons to adjust the radio volume (10 levels).
- Sleep Timer: While the radio is playing, press the 'SLEEP' button (or 'FM' button repeatedly until 'SLEEP' appears) to set a sleep timer (5-90 minutes). The radio will automatically turn off after the set time.
5.6 Display Brightness Adjustment
The display has 4 levels of brightness and an auto-dimmer function.

Image 5.5: Visual comparison of the three adjustable brightness levels of the display.
- Press the 'DIMMER' button (often integrated with 'SNOOZE') to cycle through the 4 brightness levels: Bright > Medium > Dim > Off.
- The clock also features a highly sensitive sensor for auto-dimming, which adjusts the display brightness based on ambient light.
5.7 USB Charging Port
A 5V output USB port is located on the back of the clock.

Image 5.6: The USB charging port in use, demonstrating its convenience for charging mobile devices.
- Connect your smartphone, tablet, or other electronic devices to this port using their respective USB charging cables.
- This port provides a convenient charging solution while the clock is powered.
6. Maintenance
- Cleaning: Use a soft, dry cloth to clean the clock's surface. Do not use abrasive cleaners or solvents.
- Battery Replacement: If the memory function fails (time resets after power outage), replace the CR2032 coin cell battery in the compartment on the bottom of the clock.
- Storage: If storing the clock for an extended period, disconnect it from power and remove the CR2032 battery to prevent leakage.
7. Troubleshooting
| Problem | Possible Cause | Solution |
|---|---|---|
| Display is off / No power | Power adapter not connected or faulty. | Ensure USB cable is securely connected and power adapter is working. Use a 5V/1.2A adapter. |
| Time resets after power outage | CR2032 memory battery is dead or missing. | Replace the CR2032 coin cell battery. |
| Projection is blurry | Focus not adjusted or too far/close. | Rotate the focus ring on the projector lens. Adjust distance to wall/ceiling (optimal 16.4 feet). |
| FM Radio reception is poor | Antenna not extended or interference. | Fully extend the FM antenna. Try repositioning the clock to reduce interference. |
| Alarm does not sound | Alarm not activated or volume too low. | Ensure the alarm icon (AL1/AL2) is displayed. Check alarm volume setting. |
8. Specifications
- Model Number: EN8831
- Product Dimensions: 7.08 x 1.81 x 3.74 inches (18 x 4.6 x 9.5 cm)
- Item Weight: 7.8 ounces (220g)
- Power Input: DC 5V/1.2A (USB cable included, adapter not included)
- USB Output: 5V (for charging external devices)
- Memory Battery: 1 x CR2032 (included)
- FM Frequency: 76.0 - 108.0 MHz
- Projection Distance: Up to 16.4 feet (approx. 5 meters)
- Display Colors: Blue Text (as per product variant)
- Manufacturer: EternaHora
- Country of Origin: China
9. Warranty and Support
For any questions, issues, or support needs regarding your EternaHora Projection Alarm Clock, please refer to the contact information provided with your purchase or visit the official EternaHora website. Please retain your proof of purchase for warranty claims.
Always read the user manual carefully before using the product and keep it for future reference.
Related Documents - EN8831
 |
ThreeH FM Radio Alarm Clock User Manual Comprehensive user manual for the ThreeH FM Radio Alarm Clock, detailing features, setup, settings, alarm functions, radio operation, sleep timer, brightness control, charging, factory reset, and precautions. |