
1. Introduction
Thank you for choosing the VASAGLE Electric Height Adjustable Desk. This manual provides essential information for the safe assembly, operation, and maintenance of your new desk. Please read all instructions carefully before use and retain this manual for future reference.

Image 1.1: The VASAGLE Electric Height Adjustable Desk, showcasing its monitor stand, integrated power strip, and overall design.
2. Safety Instructions
- Ensure all components are present and undamaged before assembly. Do not use if any parts are missing or broken.
- Keep children and pets away during assembly. Small parts can be a choking hazard.
- Assemble the desk on a soft, clean surface to prevent scratches.
- Do not exceed the maximum load capacity of 80 kg (176 lbs).
- Ensure the power cord is not pinched or damaged during operation.
- Keep liquids away from electrical components.
- Do not attempt to disassemble or repair the motor or control panel yourself. Contact qualified personnel for service.
- The anti-collision feature is designed to prevent damage, but always be aware of objects in the desk's path during height adjustment.
3. Package Contents
Please verify that all the following components are included in your package:
- Desktop Panel
- Monitor Stand with Drawers
- Desk Legs (2)
- Feet/Wheels (4)
- Control Panel
- Power Adapter and Cable
- LED Light Strip (Optional)
- Headphone Hook
- Assembly Hardware (screws, Allen wrench, etc.)
- Instruction Manual
4. Assembly Instructions
Follow these steps carefully to assemble your VASAGLE Electric Height Adjustable Desk. It is recommended to have two people for assembly.
- Prepare the Workspace: Lay out all components on a clean, soft surface to prevent damage. Identify all parts using the provided parts list.
- Attach Desk Legs: Securely attach the desk legs to the desktop panel using the provided screws. Ensure they are aligned correctly.
- Install Feet/Wheels: Decide whether to use the adjustable feet or the lockable wheels. Attach them to the bottom of the desk legs. The wheels allow for easy movement, while the feet provide stationary stability.
- Assemble Monitor Stand: Attach the side panels and back panel to the main monitor stand shelf. Insert the two fabric drawers into their designated slots.
- Mount Monitor Stand: Place the assembled monitor stand onto the desktop. The central shelf of the monitor stand is height adjustable, allowing you to customize your monitor's position.
- Install Control Panel and Power Strip: Attach the control panel to the underside of the desktop in the desired location. Install the integrated power strip into the designated opening on the monitor stand. This power strip includes 2 AC outlets and 2 USB ports.
- Connect Wiring: Connect all necessary cables from the control panel, motor, and power strip according to the wiring diagram in the separate assembly guide. Ensure all connections are secure.
- Attach Headphone Hook: Secure the headphone hook to the side of the desk.
- Install LED Light Strip (Optional): If included, attach the LED light strip to the underside of the monitor stand or desktop as desired.
- Final Check: Double-check all screws and connections to ensure the desk is stable and secure.
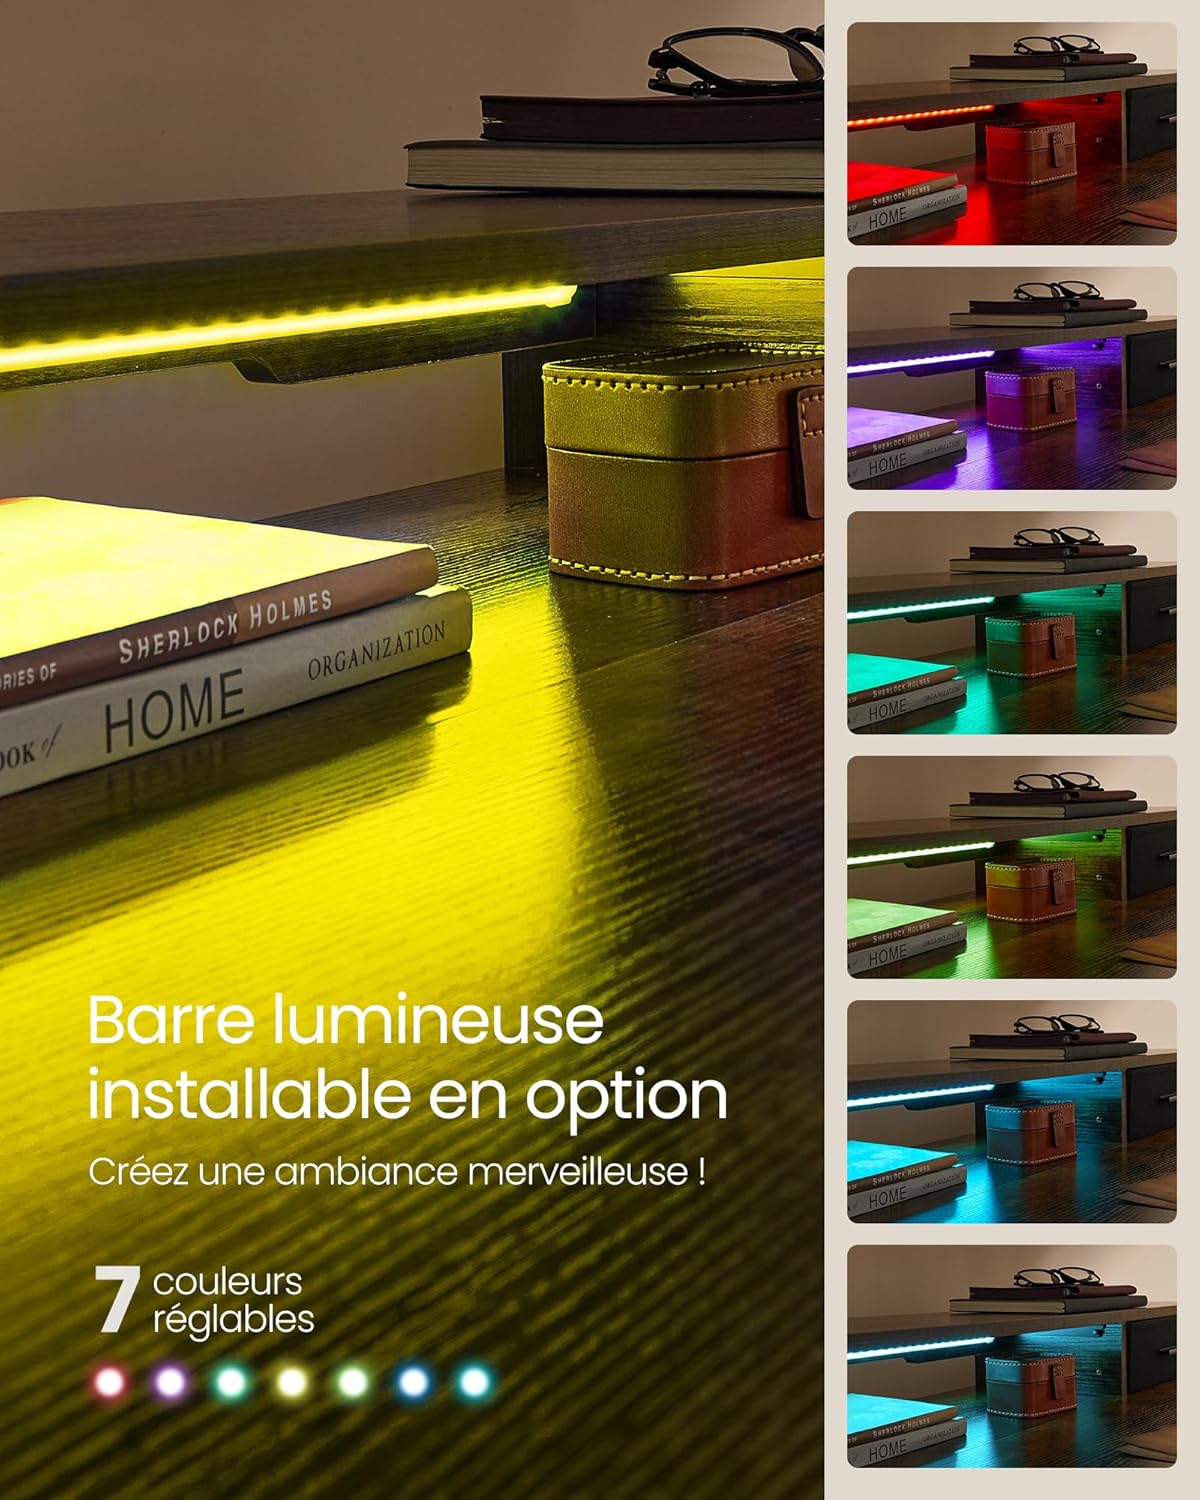
Image 4.1: Detail showing the adjustable feet and optional lockable wheels for the desk base.
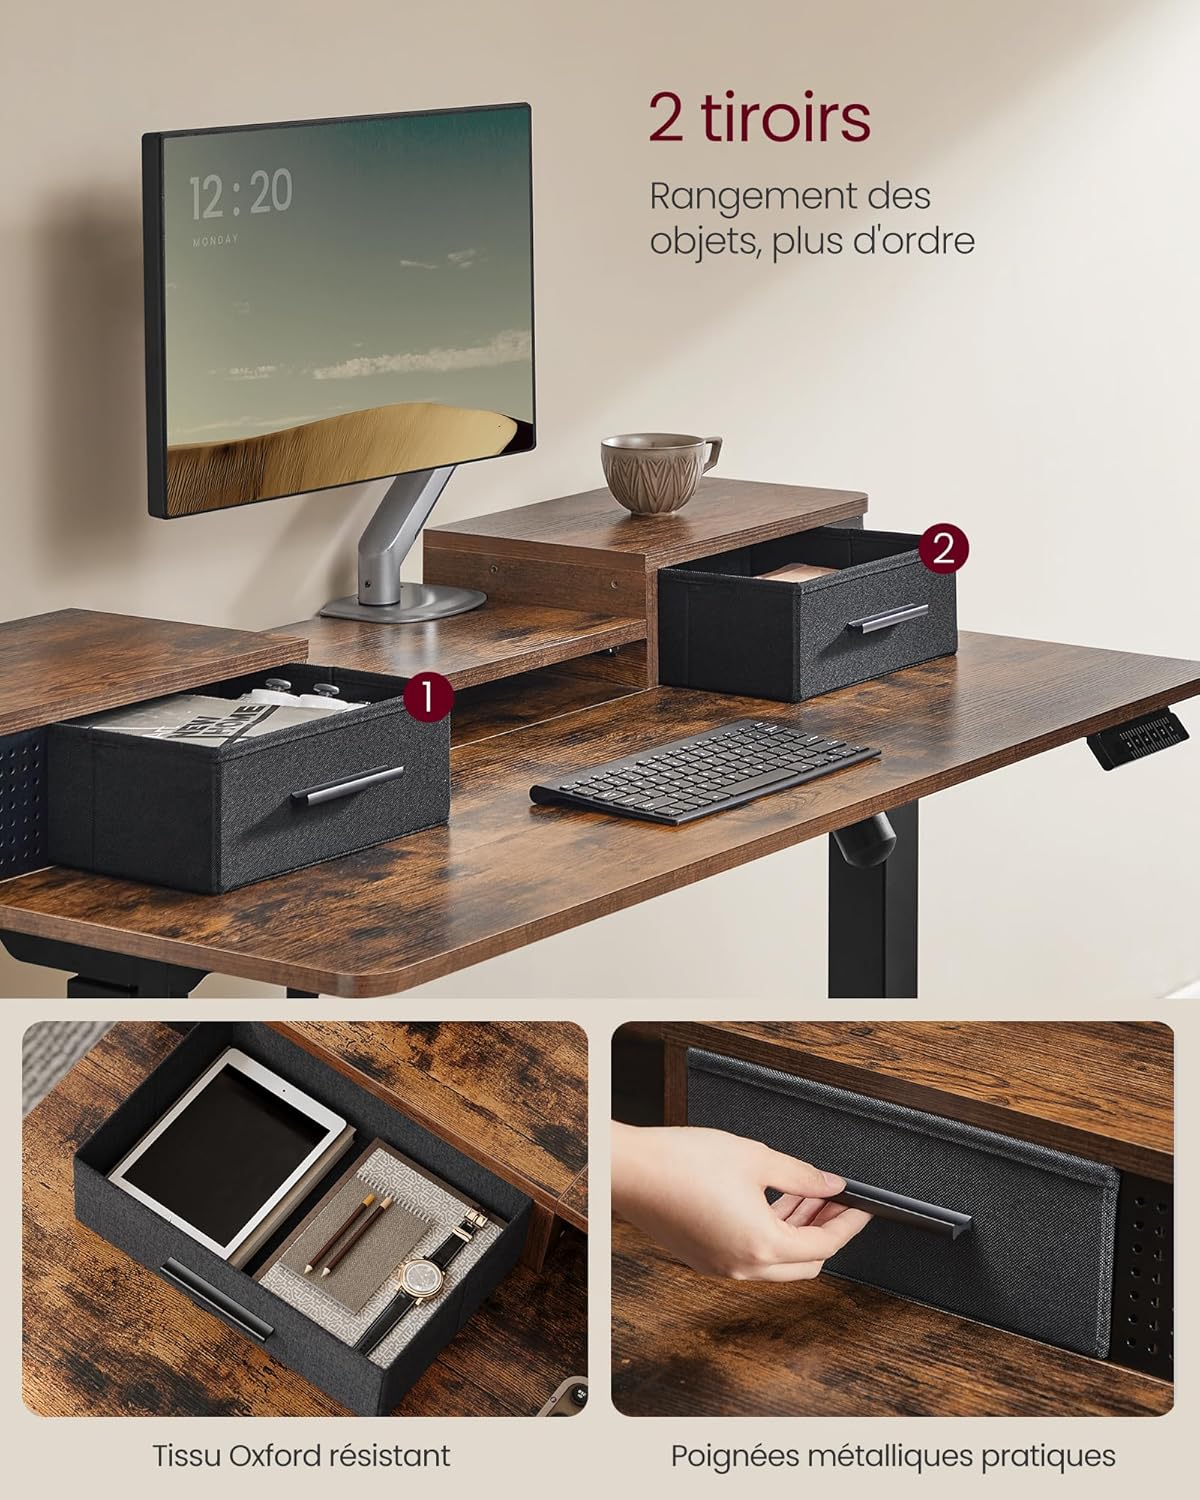
Image 4.2: The monitor stand features two convenient fabric drawers for organized storage.

Image 4.3: The central shelf of the monitor stand can be adjusted to accommodate different monitor setups, including clamp-on arms.
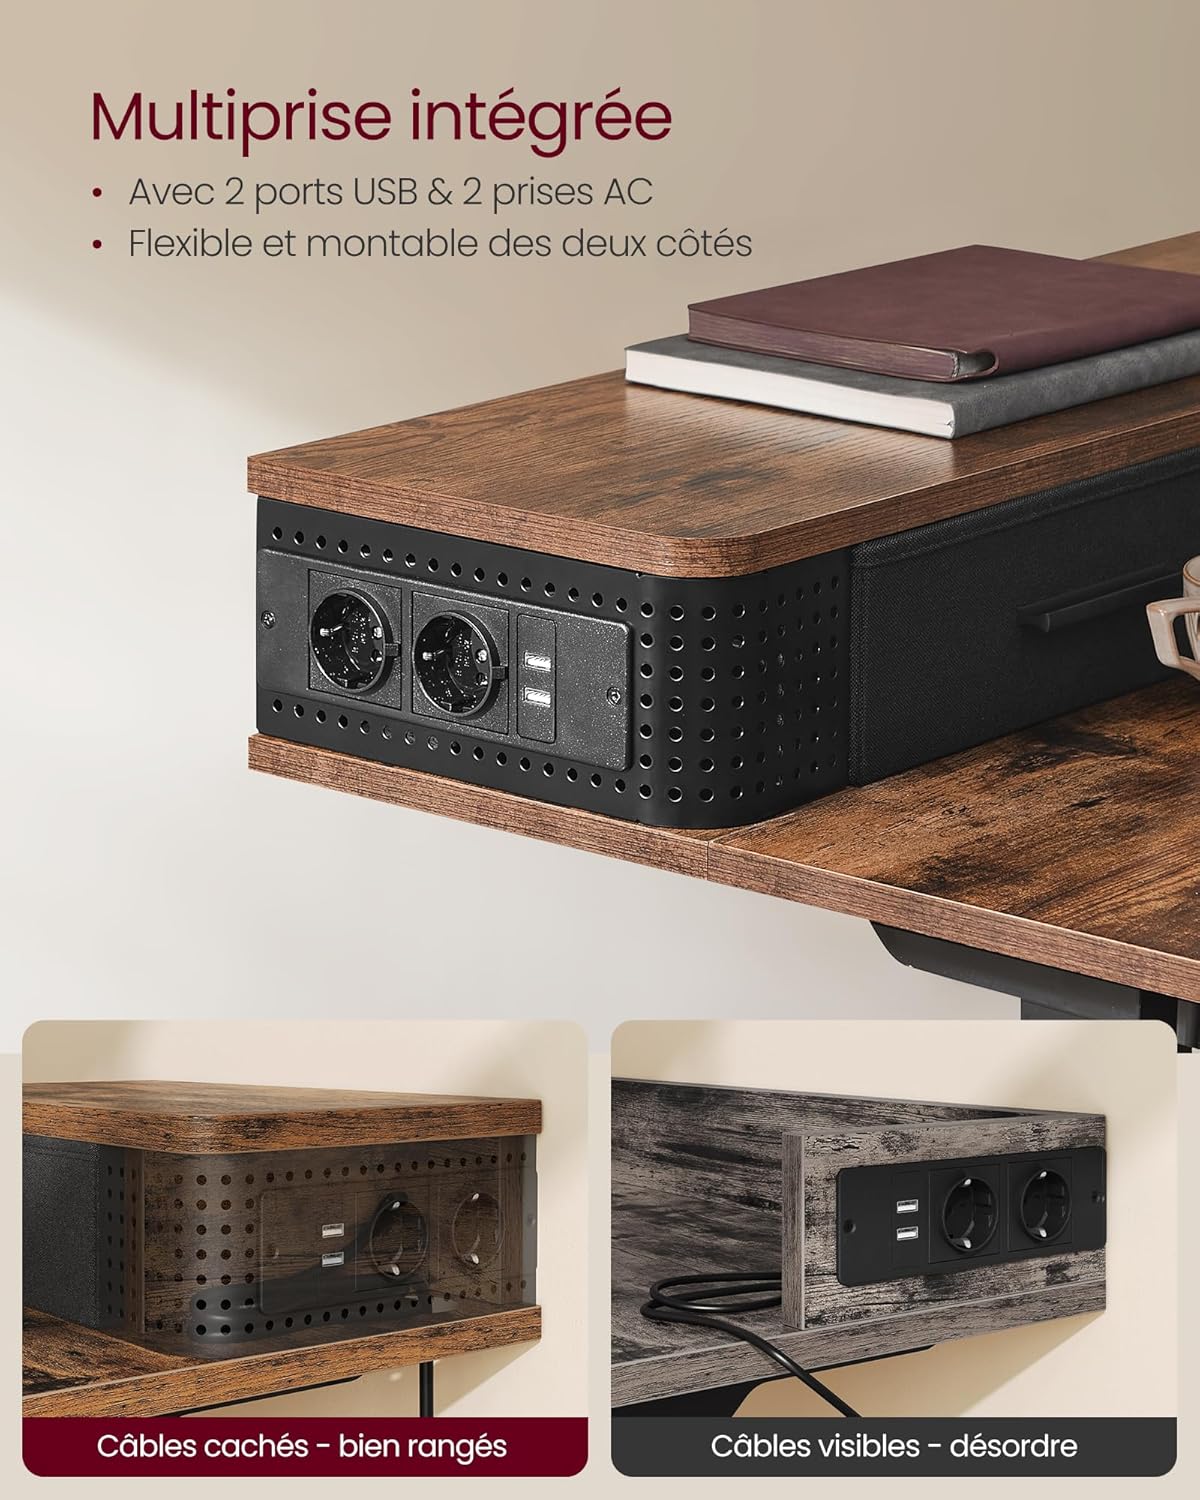
Image 4.4: The integrated power strip provides convenient access to power and charging for your devices.
Image 4.5: The optional LED light bar can be installed to add ambient lighting with multiple color choices.
5. Operating Instructions
Your VASAGLE Electric Height Adjustable Desk is designed for ease of use and flexibility.
5.1. Height Adjustment
Use the control panel to adjust the desk height:
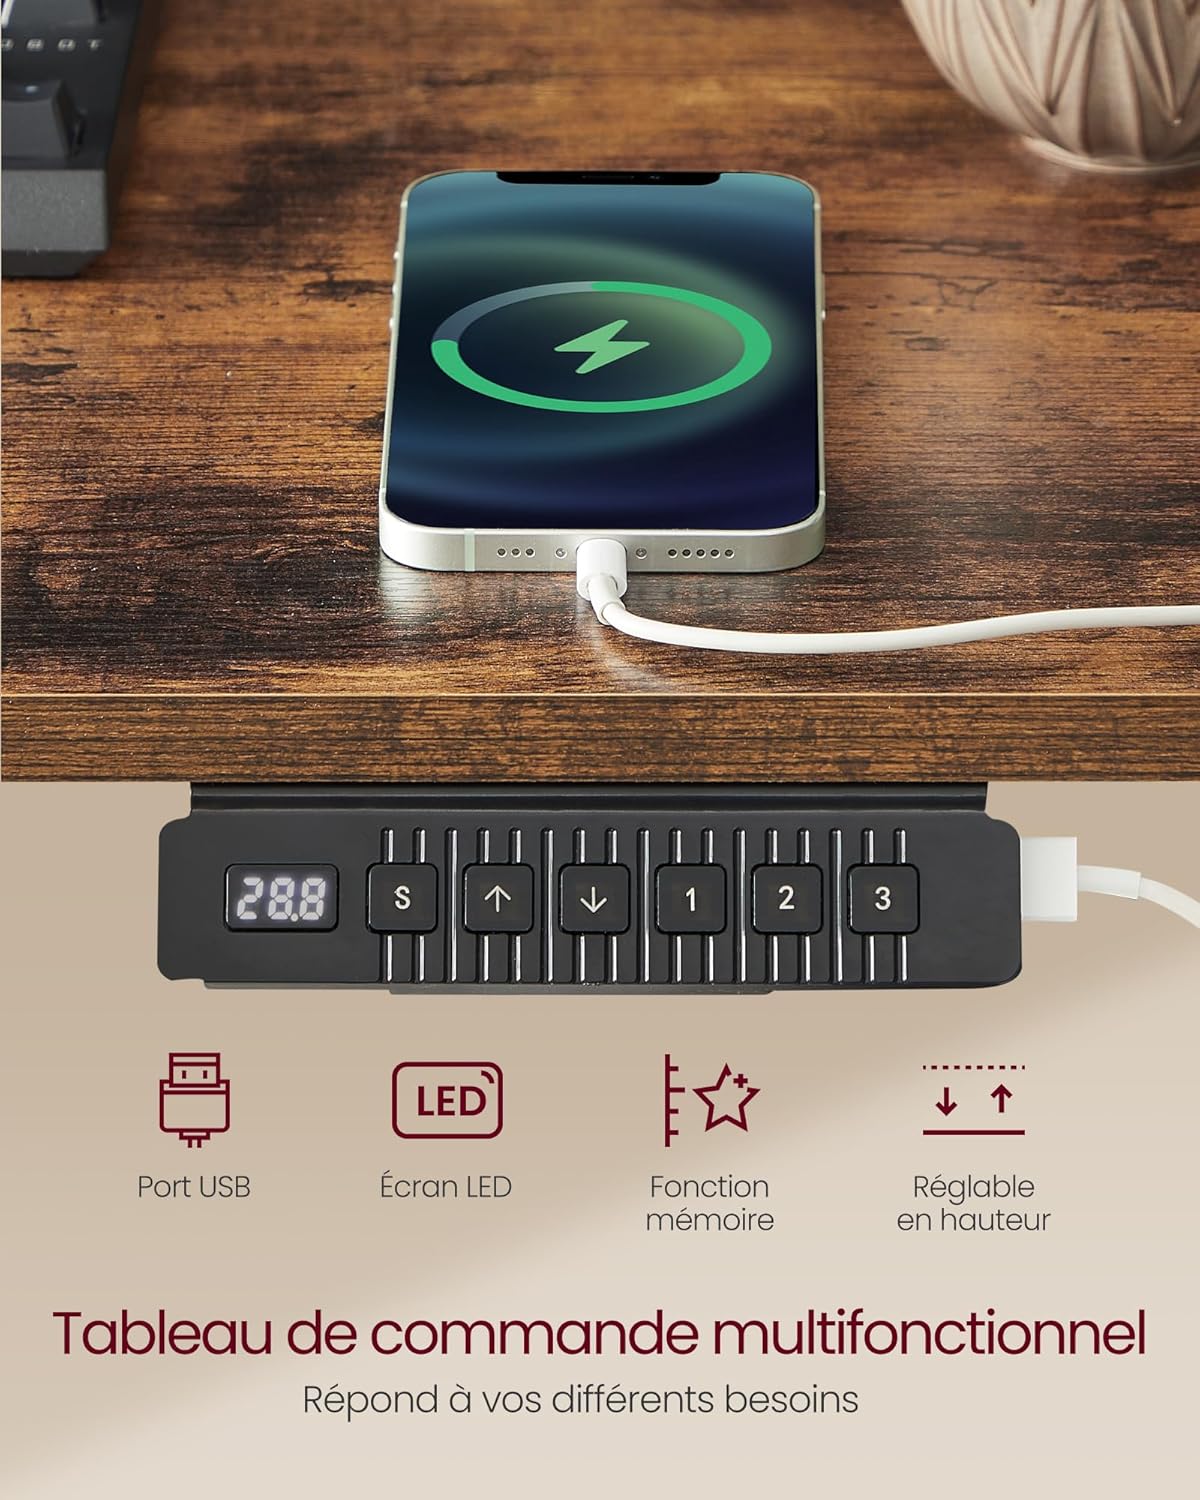
Image 5.1: The multifunctional control panel for height adjustment and memory settings.
- Press the Up Arrow button to raise the desk.
- Press the Down Arrow button to lower the desk.
- The LED display will show the current height in centimeters.
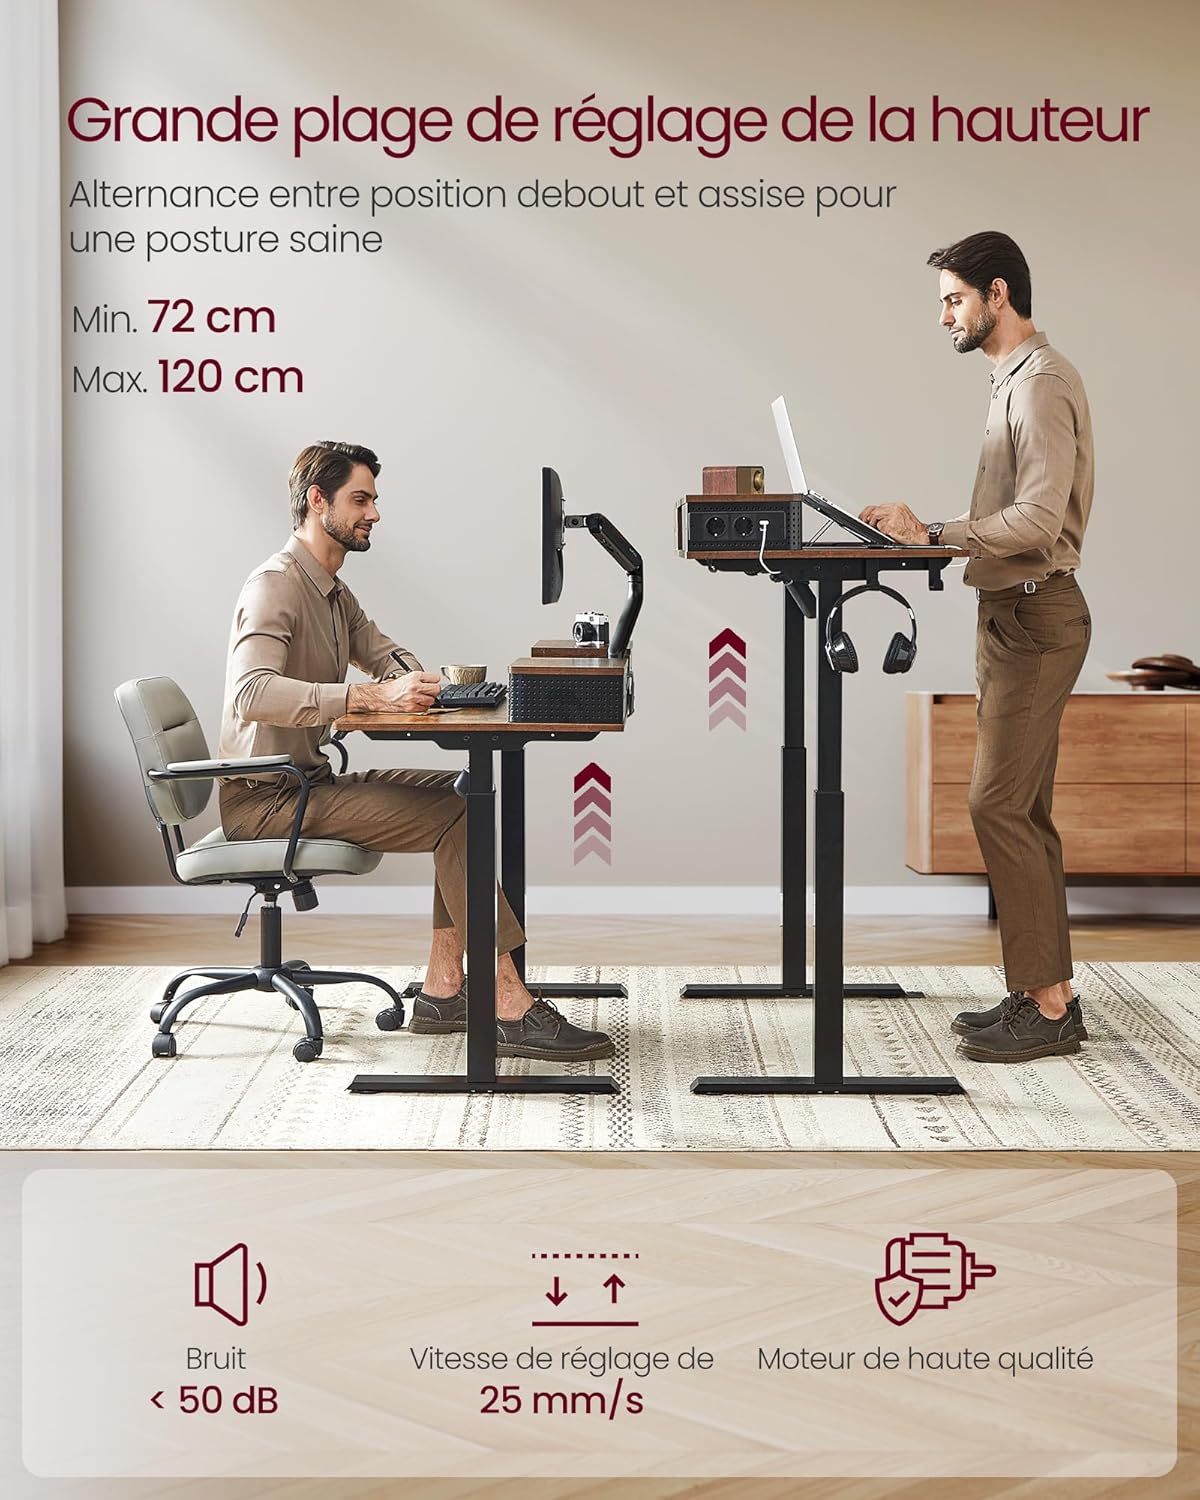
Image 5.2: The desk offers a wide height adjustment range from 72 cm to 120 cm for ergonomic flexibility.
5.2. Memory Function
The desk allows you to save up to three preferred height settings:
- Adjust the desk to your desired height.
- Press the 'S' (Save) button. The display will flash.
- Press one of the numbered memory buttons ('1', '2', or '3') within 3 seconds to save the current height to that preset.
- To recall a saved height, simply press the corresponding numbered memory button. The desk will automatically move to that position.
5.3. Charging Ports
The integrated power strip provides convenient charging options:
- Use the AC outlets for devices requiring standard power.
- Use the USB ports (5V/2.1A) to charge compatible electronic devices like smartphones or tablets.
5.4. LED Light (Optional)
If you have installed the optional LED light strip:
- Refer to the separate instructions provided with the LED light for specific operation and color changing functions.
6. Maintenance
To ensure the longevity and optimal performance of your desk, follow these maintenance guidelines:
- Cleaning: Wipe the desk surface and legs with a soft, damp cloth. Avoid abrasive cleaners or harsh chemicals that could damage the finish.
- Electrical Components: Keep the control panel, motor, and power strip dry. Do not spray water directly onto electrical parts.
- Cable Management: Periodically check that all cables are neatly routed and not pinched or tangled.
- Fasteners: Occasionally check and tighten any loose screws to maintain stability.
- Movement: If using wheels, ensure they are clean and free of debris for smooth movement. Lock the wheels when the desk is in a stationary position.
7. Troubleshooting
If you encounter any issues with your desk, refer to the following common problems and solutions:
| Problem | Possible Cause | Solution |
|---|---|---|
| Desk does not move. | Power cable disconnected; Motor overload; Control panel issue. | Check power connection. Unplug for 10 minutes and retry. Reduce load on desk. |
| Desk moves unevenly or makes unusual noise. | Uneven load; Loose connections; Obstruction. | Distribute weight evenly. Check all assembly connections. Clear any obstructions. |
| Memory function not working. | Incorrect saving procedure. | Refer to '5.2. Memory Function' section for correct saving steps. |
| Anti-collision feature triggers too often. | Sensitive setting; Obstruction. | Ensure no objects are in the path of the desk's movement. Consult customer support if issue persists. |
If the problem persists after attempting these solutions, please contact VASAGLE customer support for assistance.
8. Specifications
| Feature | Detail |
|---|---|
| Brand | VASAGLE |
| Model Number | LSD182X01 |
| Color | Vintage Brown |
| Dimensions (L x W x H) | 120 x 60 x (72-120) cm (47.2 x 23.6 x (28.3-47.2) inches) |
| Weight | 31 kg (68.3 lbs) |
| Material | Engineered Wood, Alloy Steel |
| Max. Load Capacity | 80 kg (176 lbs) |
| Noise Level | < 50 dB |
| USB Output | 5V/2.1A |
| AC Outlets | 2 (230-250V/16A) |
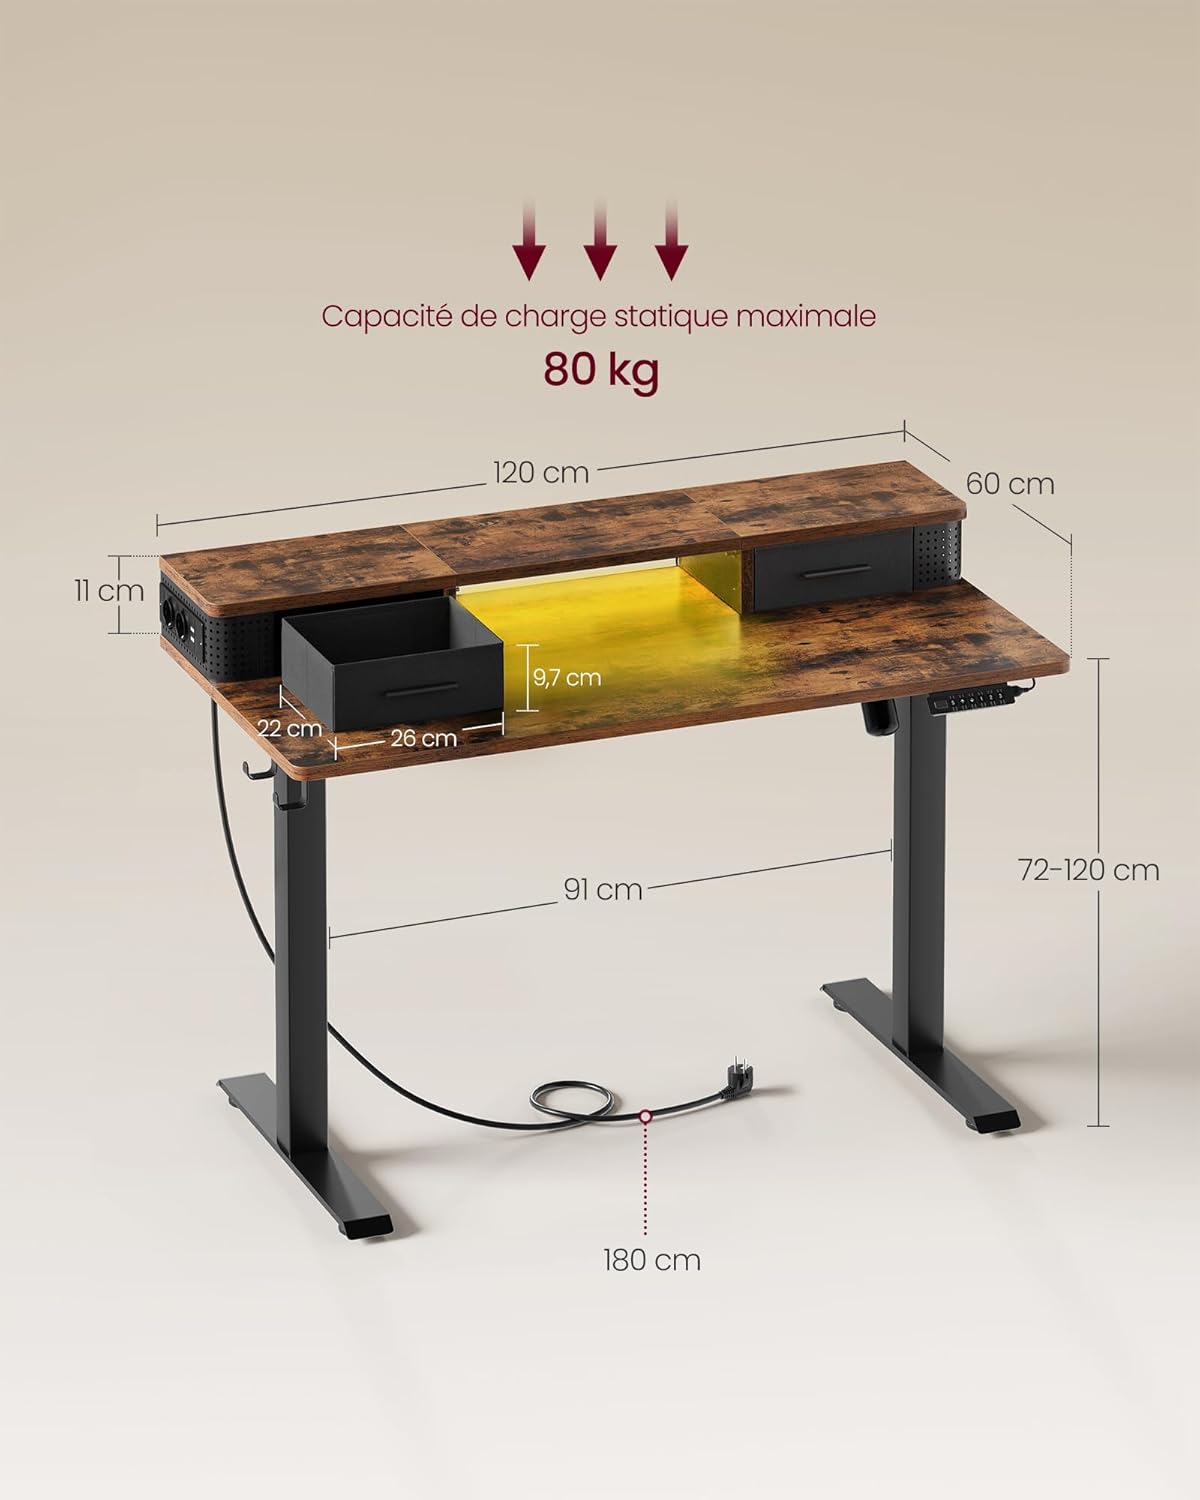
Image 8.1: Detailed dimensions and maximum static load capacity of the desk.
9. Warranty and Support
For warranty information and customer support, please refer to the documentation provided with your purchase or visit the official VASAGLE website. If you have any questions or require assistance with your product, do not hesitate to contact our customer service team.


