1. Introduction
This manual provides detailed instructions for the installation and proper use of your SRJTEK OLED Screen Replacement for the Google Pixel 7. Please read all instructions carefully before beginning the installation process to ensure a successful repair and to prevent damage to your device or the new screen.
This replacement screen is designed for the Google Pixel 7 models GVU6C and GQML3. It features OLED material and supports fingerprint functionality, though calibration may be required.

Image 1: SRJTEK OLED Screen Replacement for Google Pixel 7, highlighting key specifications like 1080*2400 resolution, 416ppi density, and 6.3-inch size.
2. Product Overview
2.1. Parameters and Compatibility
- Compatibility: Specifically designed for Google Pixel 7 models GVU6C and GQML3. Not compatible with Google Pixel 7 Pro.
- Material: OLED display.
- Fingerprint Functionality: Supports fingerprint unlock. The fingerprint flex cable must be carefully removed from your original screen and may require calibration after installation.
2.2. Application Scenarios
This replacement screen is capable of resolving various display issues, including:
- Cracked or shattered screens.
- Dead pixels or display abnormalities.
- Unresponsive or faulty touch functionality.
- Color inaccuracies or distorted images.
- Completely non-functional screens.
It aims to restore smooth display performance for all everyday uses, from browsing to high-definition video playback.
3. Safety Precautions
Adhering to these precautions is crucial to prevent damage to your device and ensure a safe installation.
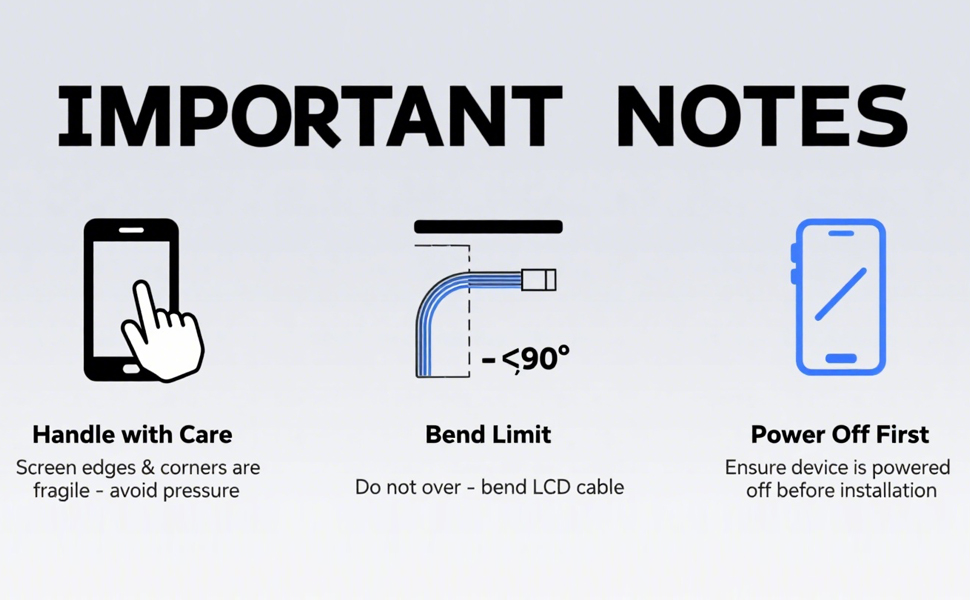
Image 2: Visual reminder of important installation notes: handle screen edges and corners with care, do not over-bend the LCD cable (limit to less than 90 degrees), and ensure the device is powered off before installation.
- Electrostatic Protection: Before handling any components, wash your hands thoroughly to discharge static electricity. Wearing an anti-static wristband is highly recommended.
- Power Off: Always ensure your device is completely powered off before beginning any disassembly or reassembly.
- Flex Cable Handling: When unplugging or plugging in flex cables, hold only the plastic part of the connector. Avoid pulling directly on the cable or damaging the clips. Handle clips gently to prevent breakage.
- Avoid Forced Operation: Do not apply excessive force when prying or pulling components. If you encounter resistance, re-evaluate the step or apply gentle heat if adhesive is involved.
- Fragile Component: The screen is made of glass and is very fragile. Handle with extreme care, especially around the edges and corners.
4. Installation Guide
A complete repair kit is included with your purchase, providing the necessary tools for an easy and safe screen replacement. Please follow these steps carefully.
4.1. Tools Included

Image 3: The complete repair kit includes various screwdrivers, plastic prying tools, a suction cup, a SIM ejector tool, and adhesive strips for installation.
4.2. Pre-Installation Checks
- Inspect the new screen for any visible damage before proceeding.
- Test the screen functionality (display, touch) by temporarily connecting it to the motherboard without fully installing it. Do not remove any protective films or labels during this testing phase.
4.3. Step-by-Step Installation
For a visual guide, please refer to the official installation video provided by SRJTEK:
Video 1: Official SRJTEK guide on how to install the Google Pixel 7 screen replacement. This video demonstrates the full process from disassembly to reassembly and testing.
- Power Off Device: Ensure your Google Pixel 7 is completely turned off.
- Remove SIM Tray: Use the SIM ejector tool to remove the SIM card tray.
- Heat and Separate Screen: Gently heat the edges of the old screen to soften the adhesive. Use a suction cup and prying tools (like the metal or plastic spudgers provided) to carefully separate the old screen from the phone frame. Work slowly around all edges.
- Disconnect Flex Cables: Once the screen is partially lifted, carefully disconnect the flex cables connecting the screen to the motherboard. Use a plastic spudger to avoid damaging connectors.
- Remove Old Fingerprint Sensor: If your old screen has an integrated fingerprint sensor flex cable, carefully remove it. This component will be transferred to the new screen.
- Clean Frame: Remove any remaining adhesive or glass fragments from the phone frame. Ensure the surface is clean and smooth for the new screen.
- Transfer Components: Transfer the fingerprint sensor flex cable and any other necessary small components from the old screen to the new replacement screen.
- Apply Adhesive: Apply new adhesive strips or liquid adhesive (if provided and recommended) around the perimeter of the phone frame where the screen will sit.
- Connect New Screen: Carefully connect the flex cables of the new screen to the motherboard. Ensure they are securely seated.
- Position and Secure New Screen: Align the new screen with the phone frame and gently press it into place. Apply even pressure around the edges to ensure proper adhesion.
- Secure with Bands: Use rubber bands or clamps to hold the screen firmly in place while the adhesive cures. Allow sufficient time for the adhesive to set (typically several hours).
- Reinstall SIM Tray: Once the adhesive is cured, reinsert the SIM card tray.
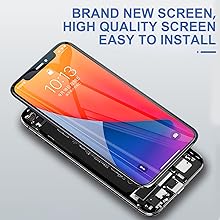
Image 4: A visual representation of the screen replacement process, from initial disassembly to final reassembly and securing the new screen.
5. Testing the New Screen
After installation, perform the following tests to confirm full functionality:
- Power On: Turn on your device. Check if the display powers on correctly and shows a clear image.
- Touch Functionality: Test the touch response across the entire screen. Drag an app icon around the screen to ensure there are no dead spots.
- Color and Brightness: Verify that colors are accurate and the brightness adjusts properly.
- Camera Functionality: Open the camera app and test both front and rear cameras to ensure they are working correctly and the screen does not interfere.
6. Fingerprint Functionality
This OLED screen replacement supports fingerprint functionality. However, it requires the transfer of the fingerprint flex cable from your original screen. After installation, it is essential to calibrate the fingerprint sensor for optimal performance. Refer to your phone's settings for fingerprint calibration options.
7. Troubleshooting
- Black Screen After Installation: If your phone displays a black screen after installation, press and hold the power key and volume down key simultaneously for about 10-15 seconds until the phone vibrates. If it vibrates, try reinstalling the screen, ensuring all flex cables are properly connected.
- Touch Not Responding: Check all flex cable connections, especially the digitizer cable. Ensure no debris is obstructing the connection.
- Display Issues (Lines, Flickering): Recheck the display flex cable connection. Ensure it is not bent or damaged.
8. Specifications
| Feature | Detail |
|---|---|
| Package Dimensions | 7.52 x 4.09 x 1.1 inches |
| Item Weight | 3.66 ounces |
| ASIN | B0CLRTY8J9 |
| Other Display Features | Wireless |
| Manufacturer | SRJTEK |
| Date First Available | October 25, 2023 |
9. Warranty and Support
SRJTEK is committed to providing quality service and attentive support. We offer guaranteed replacements for product defects. For any issues or further assistance, please contact SRJTEK customer service through the platform where you made your purchase.
Video 2: A short video showcasing the SRJTEK Google Pixel 7 screen replacement, emphasizing quality and reliability.