iSunirm 8DT-WO
iSunirm 96-inch Closet Organizer System Instruction Manual
Model: 8DT-WO
Introduction
Thank you for choosing the iSunirm 96-inch Closet Organizer System. This manual provides essential information for the safe and efficient assembly, operation, and maintenance of your new closet system. Please read all instructions carefully before beginning installation and retain this manual for future reference.
Safety Information
- Always follow all assembly instructions carefully.
- Ensure all hardware is securely fastened before use.
- Do not overload shelves or hanging rods beyond their stated weight capacity. The system is designed to hold over 1000 lbs when properly installed.
- For safety and ease of installation, it is recommended that two people assemble this system.
- When cutting components to fit, use appropriate safety equipment and tools.
- Keep small parts away from children during assembly.
Parts List
Please verify that all components are present and undamaged before beginning assembly. If any parts are missing or defective, please contact iSunirm customer support.
- Wooden shelving towers (3 units)
- Expandable hanging rods (3 units)
- Shelves (various sizes, including adjustable interior shelves)
- Mounting hardware (screws, anchors, brackets)
- Safety lock attachments
- Instruction manual
Setup and Installation
This closet system is designed for wall-mount installation and can be adjusted to fit closets from 5 feet to 8 feet wide. The wooden shelving towers can be cut to fit specific dimensions if required (saws not included).
Step 1: Plan Your Layout
Determine the desired configuration for your closet system. The system includes three shelving towers and three expandable hanging rods, offering various installation methods to suit your space. Consider the placement of the shelving towers and the length of the hanging rods.

Image: Various installation methods for the iSunirm closet system, showing different configurations of shelving units and hanging rods.
Step 2: Assemble Shelving Towers
Follow the detailed instructions provided in the assembly hardware package to construct the three wooden shelving towers. Ensure all connections are tight and stable. The interior shelves of the left shelving tower are adjustable, allowing for customization based on your storage needs, such as hanging long coats.

Image: Detailed view of the shelving towers, highlighting the sturdy construction, expandable depth rods, built-in safety lock attachments, and the adjustable left shelving tower.
Step 3: Mount to Wall
Securely mount the shelving towers and hanging rod brackets to the wall using the provided hardware. Ensure the wall can support the weight of the system and its contents. Use a level to ensure all components are straight and properly aligned.
Step 4: Install Hanging Rods
Insert the expandable hanging rods into their designated brackets. To secure the rods, twist them clockwise to tighten and counter-clockwise to loosen. The rods can be expanded to fit the width between the shelving towers or wall mounts.

Image: Technical diagram illustrating the overall dimensions of the closet system (96 x 16 x 75 inches) and a close-up of the expandable rod mechanism, showing how to twist to tighten or loosen.
Operation and Usage
The iSunirm closet system offers versatile storage solutions for your clothing and accessories.
- Hanging Rods: Utilize the three expandable hanging rods for shirts, pants, jackets, and other garments. Each rod can hold approximately 60-80 clothes.
- Shelving Towers: The four storage shelves and three top shelving towers provide ample space for folded clothes, bags, shoes, and other items. The interior shelves of the left tower can be adjusted to accommodate varying item heights.
- Capacity: The system is designed to hold over 300+ pieces of clothing and has a total weight capacity of over 1000 lbs.
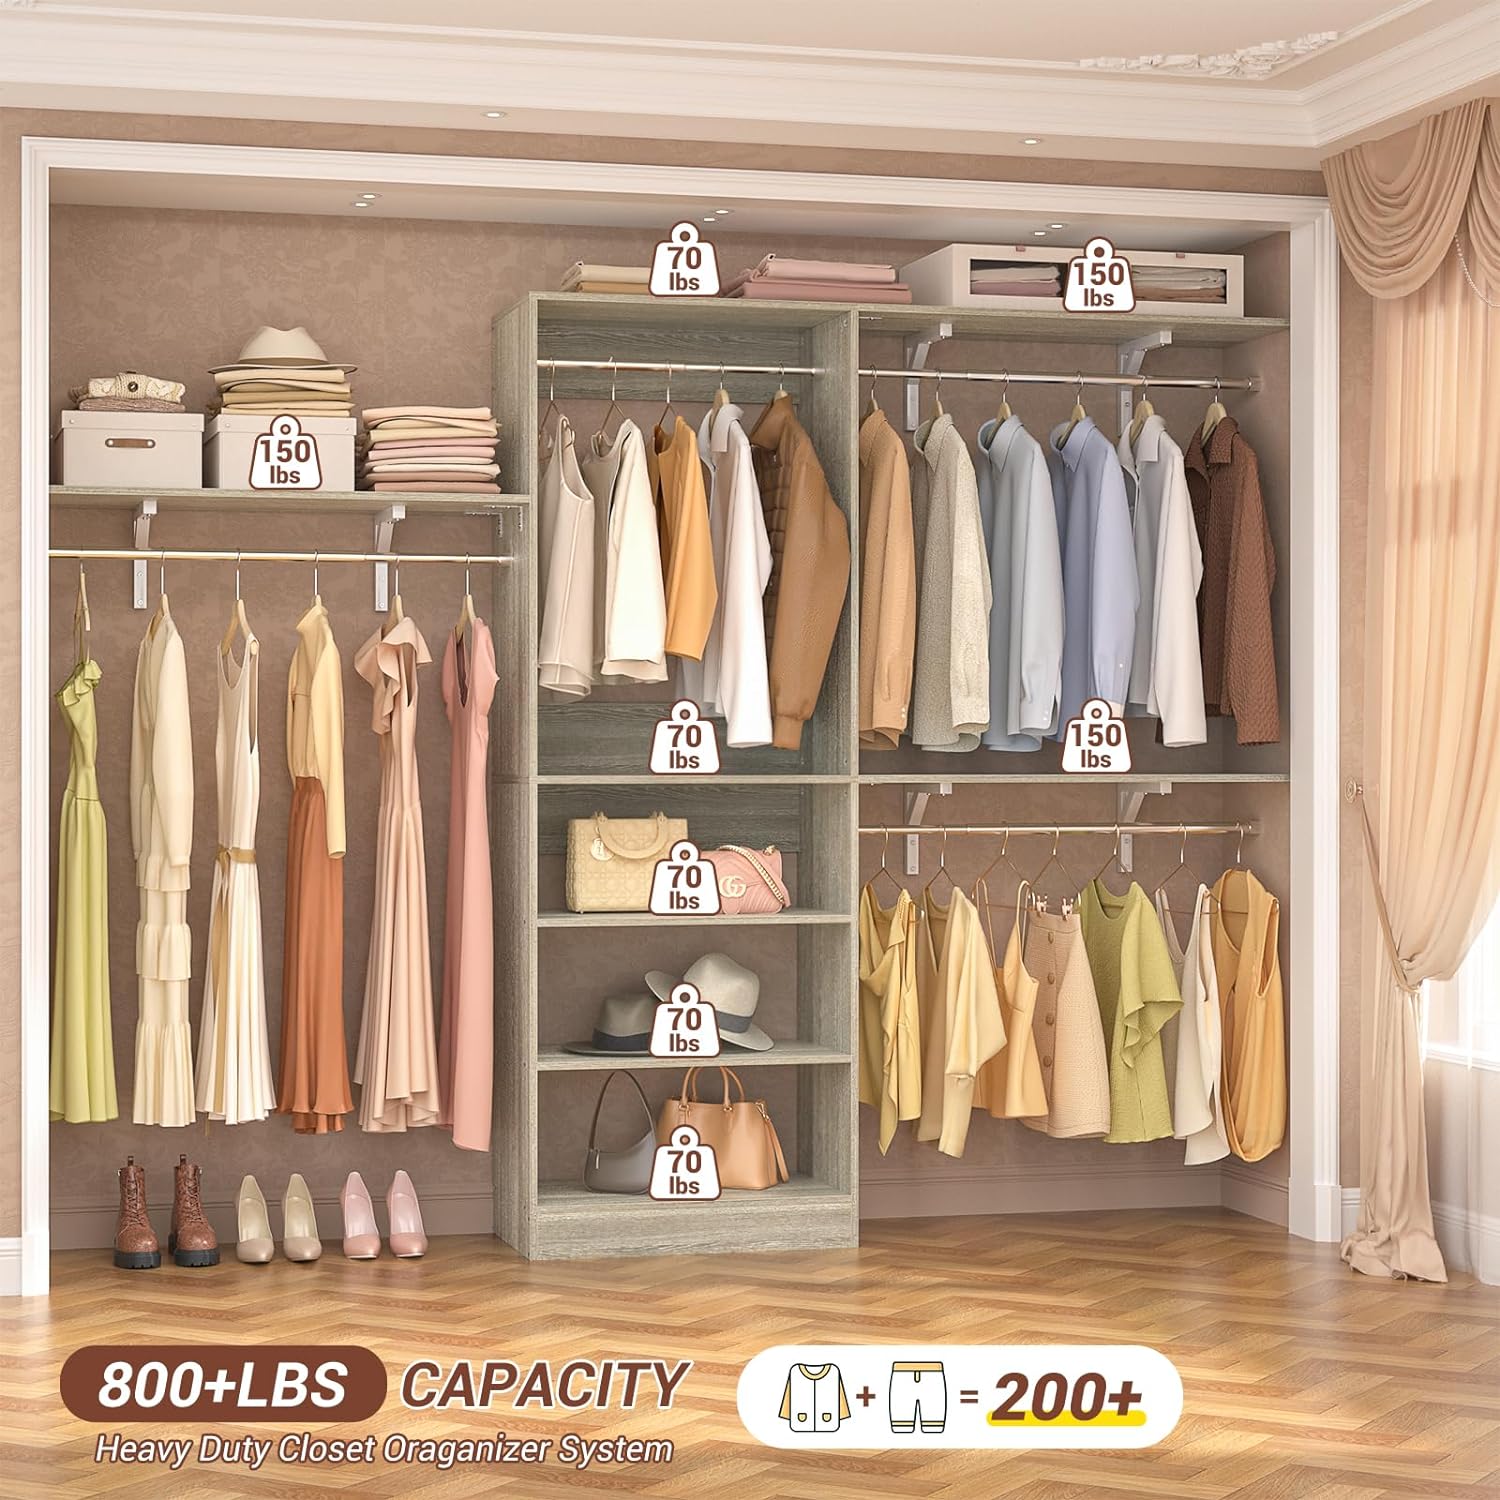
Image: A fully organized closet system displaying various clothes, bags, and shoes, illustrating its substantial storage capacity of over 800 lbs and space for more than 200 garments.
Maintenance
- Cleaning: Wipe surfaces with a soft, damp cloth. Avoid harsh chemicals or abrasive cleaners that may damage the wood finish.
- Inspection: Periodically check all screws and connections to ensure they remain tight. Re-tighten if necessary to maintain stability.
- Weight Distribution: Distribute weight evenly across shelves and hanging rods to prevent stress on the system.
Troubleshooting
| Problem | Possible Cause | Solution |
|---|---|---|
| System feels unstable or wobbly. | Loose connections or improper wall mounting. | Check all screws and wall anchors. Ensure they are securely tightened. Verify proper installation into wall studs or with appropriate anchors. |
| Hanging rod is not secure. | Rod not twisted tightly or incorrect length. | Twist the expandable rod clockwise until it is firmly secured. Ensure the rod is extended to the correct length for the space. |
| Missing or damaged parts. | Shipping error or manufacturing defect. | Contact iSunirm customer support immediately for assistance. |
Specifications
| Feature | Detail |
|---|---|
| Model Number | 8DT-WO |
| Brand | iSunirm |
| Product Dimensions (L x W x H) | 96 x 16 x 75 inches |
| Adjustable Width | Fits closets 5 to 8 feet wide |
| Material | Metal, Wood |
| Mounting Type | Wall Mount |
| Total Weight Capacity | Over 1000 lbs |
| Color | White Oak |
Warranty and Support
The iSunirm 96-inch Closet Organizer System comes with a 1-Year Guarantee. For any questions, missing parts, defective components, or support needs, please contact iSunirm professional after-sales support. We aim to resolve any issues within 24 hours.
Contact information can typically be found on the product packaging or the retailer's website where the product was purchased.
Related Documents - 8DT-WO
 |
Martha Stewart California Closets Everyday System Installation Guide Comprehensive installation guide for the Martha Stewart California Closets Everyday System, covering uprights, shelves, cabinets, and closet rods. Includes safety warnings, component lists, and step-by-step assembly instructions. |
 |
Crown Shades Grill Gazebo 5ft x 8ft with Shelves - Assembly and Use Instructions Detailed instructions for setting up, using, and taking down the Crown Shades 5ft x 8ft Grill Gazebo with Shelves. Includes parts list, safety warnings, and contact information. |
 |
Simba 8ft Pool Table Assembly Instructions Detailed assembly instructions for the Simba 8ft pool table, including a comprehensive parts list and step-by-step guidance for setup. |
 |
Assembly Instructions & User Manual for Patio Wooden Swing Chair Comprehensive assembly instructions and user manual for a patio wooden swing chair and hanging porch swing bench. Includes safety warnings, package contents, product dimensions, step-by-step assembly, installation guidance, care and maintenance tips, and warranty information for outdoor garden and backyard use. |
 |
Ozarké JEE-8FT T8 LED Tube User Manual and Installation Guide Comprehensive user manual and installation instructions for the Ozarké JEE-8FT T8 LED Tube. Includes safety warnings, installation requirements, warranty voiding conditions, and detailed electrical connection information for direct AC power integration. |
 |
Zipro Jump Pro 8FT Premium Trampoline User Manual Comprehensive user manual and assembly instructions for the Zipro Jump Pro 8FT Premium trampoline, including safety guidelines, technical specifications, and maintenance procedures. |
Ask a question about this manual
Ask about setup, troubleshooting, compatibility, parts, safety, or missing instructions. Manuals+ will review the question and use this page’s manual context to help answer it.