1. Introduction
This manual provides detailed instructions for the installation, setup, and operation of the SaiFfe SMC5326 Remote Control Receiving Controller. This device is designed to receive signals from compatible remote controls, operating at either 330MHz or 433MHz, and features an 8-bit DIP switch for code matching. Please read this manual thoroughly before use to ensure proper functionality and safety.
2. Product Overview
The SMC5326 receiving controller is a compact unit designed for various remote control applications. It typically comes with a receiver module and compatible remote controls (sold separately or as a kit). The core functionality relies on matching the DIP switch settings between the remote and the receiver.

Figure 2.1: SaiFfe SMC5326 Remote Control Receiving Controller module with connected wires.

Figure 2.2: SaiFfe SMC5326 receiver module shown alongside four compatible remote controls.

Figure 2.3: Detailed view of the SMC5326 receiver's internal circuit board and a remote control's internal components, highlighting the DIP switches and main chip.
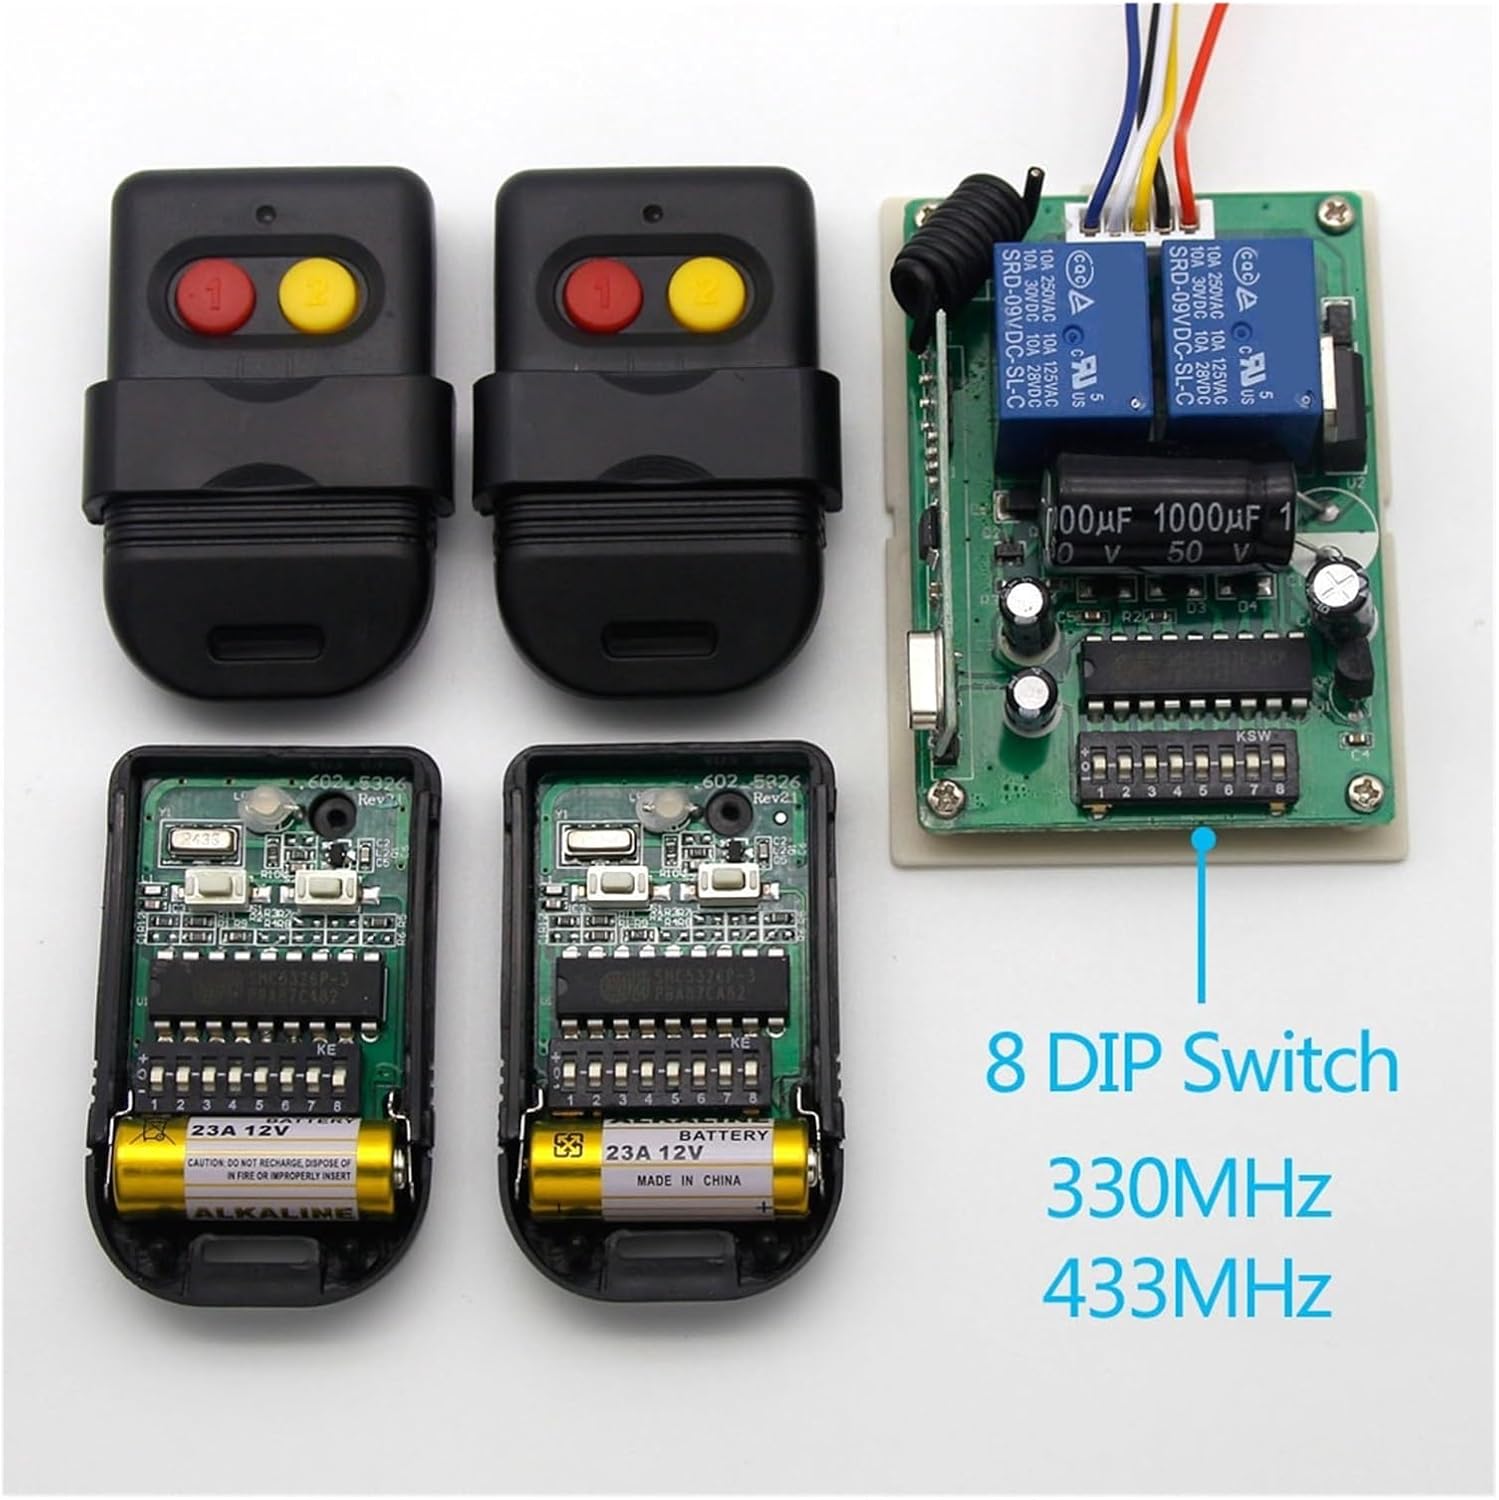
Figure 2.4: The SMC5326 receiver circuit board displayed with two remote controls, showing their internal DIP switch configurations.
3. Setup Instructions
Proper setup involves connecting the receiver and configuring the DIP switches to match your remote control.
3.1. Compatibility Check
Before proceeding, ensure your existing remote control is compatible. The remote control should use a 5326, SMC5326, or SMC5326P-3 chip and have an 8-position DIP switch.
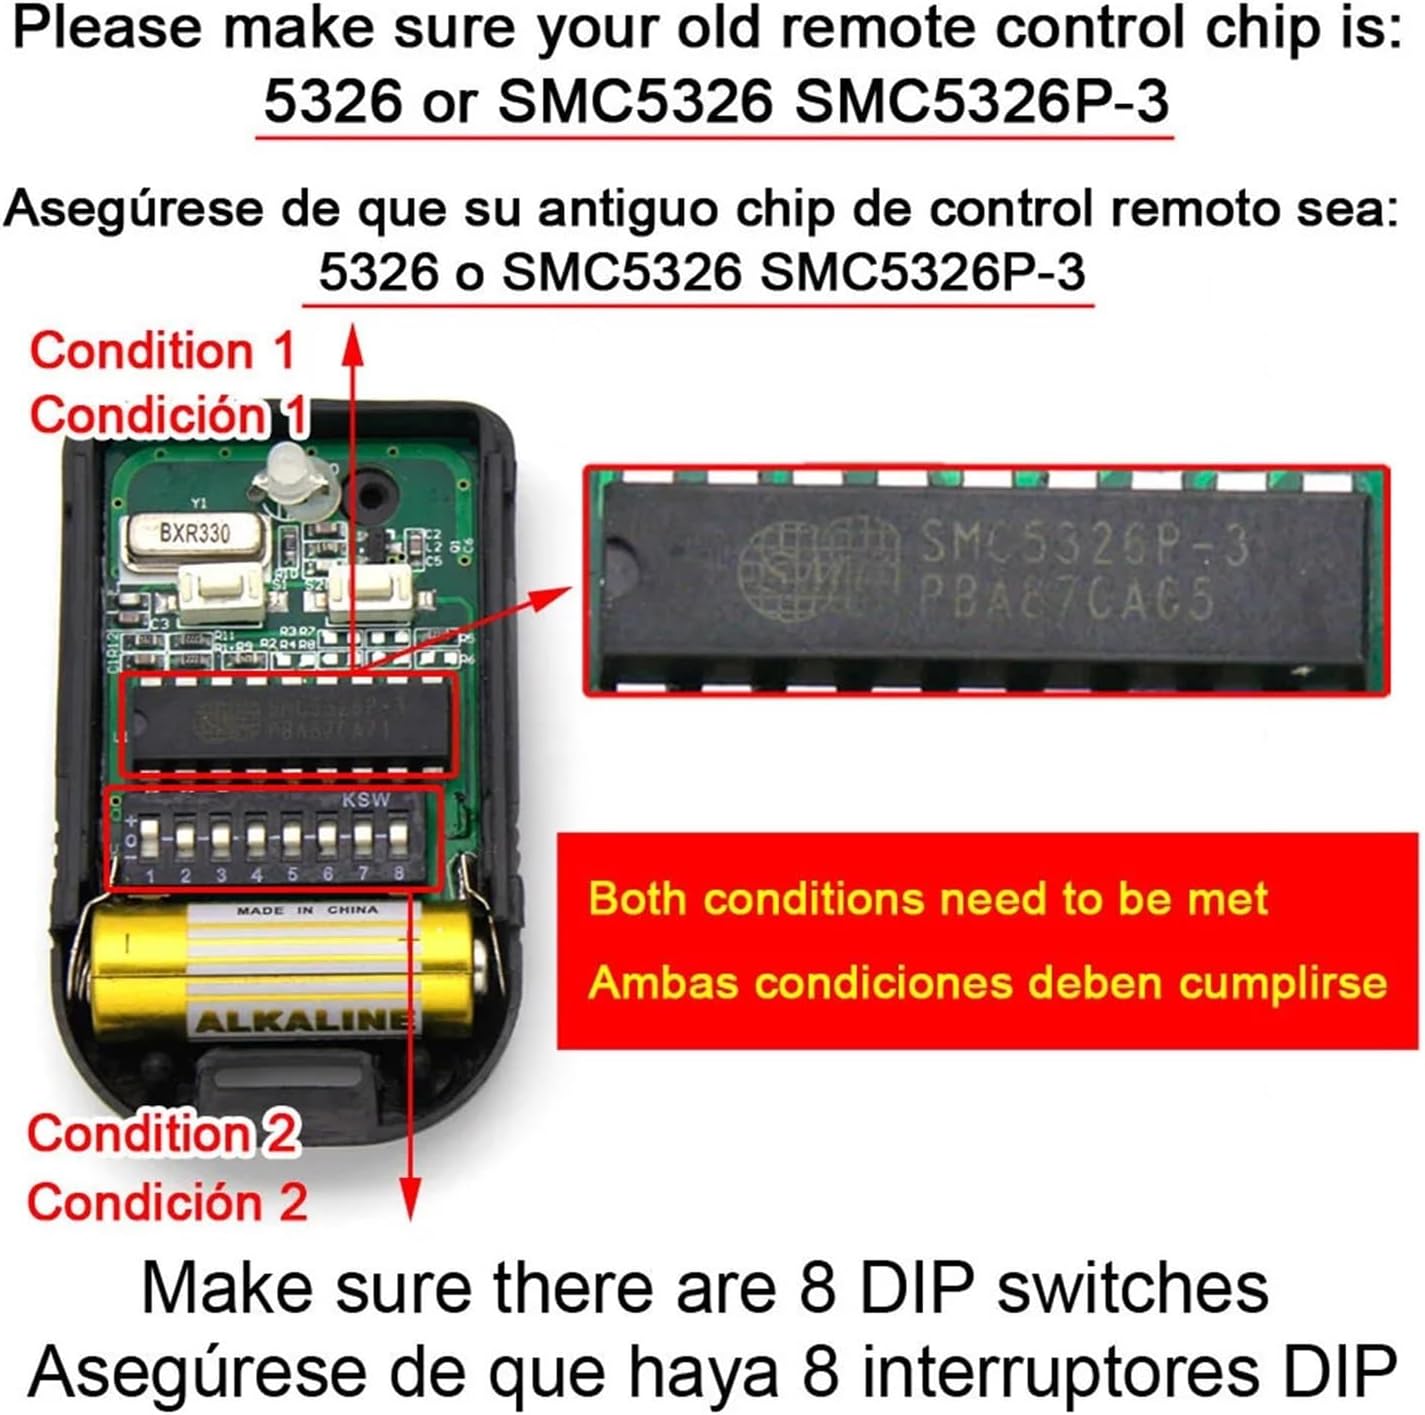
Figure 3.1: Close-up of a remote control's internal circuit, showing the SMC5326P-3 chip and 8-position DIP switch.
3.2. Wiring the Receiver
The receiver module has multiple wires for power and output connections. Refer to the labels on the circuit board (U+, U-, C1, C2, COM) for correct wiring. Typically:
- U+ / U-: Power input (e.g., 12V DC).
- C1 / C2 / COM: Output contacts for controlling external devices. These are usually relay outputs.

Figure 3.2: SMC5326 receiver module with casing opened, showing internal circuit board.

Figure 3.3: Top-down view of the SMC5326 receiver's circuit board with wiring connections.
3.3. DIP Switch Configuration
The 8-position DIP switches on both the receiver and the remote control must be set identically for them to communicate. Each switch can be in an 'ON' (or '1') or 'OFF' (or '0') position. To set up:
- Open the casing of both the receiver and the remote control to access their respective DIP switches.
- Carefully observe the current settings of the 8 DIP switches on your existing remote control.
- Using a small tool (e.g., a toothpick or small screwdriver), adjust the 8 DIP switches on the receiver board to exactly match the pattern of your remote control.
- Ensure all 8 switches are set correctly. An incorrect setting on even one switch will prevent communication.
4. Operating Instructions
Once the receiver is wired and the DIP switches are correctly matched, the system is ready for operation.
- Ensure the receiver is powered on.
- Press a button on your compatible remote control.
- The receiver should respond by activating its relay outputs (C1/C2/COM) according to the remote's signal. The specific action (e.g., momentary, toggle, latched) depends on the receiver's internal configuration or mode setting, if available.
5. Maintenance
The SMC5326 receiving controller requires minimal maintenance.
- Cleaning: Keep the unit free from dust and moisture. Use a dry, soft cloth for cleaning.
- Battery Replacement (for Remote Controls): If your remote control stops responding, check its battery. Most small remote controls use a 12V 23A battery or similar. Replace as needed, ensuring correct polarity.
- Environmental Conditions: Avoid exposing the receiver to extreme temperatures, direct sunlight, or corrosive environments.
6. Troubleshooting
If the remote control system is not functioning as expected, consider the following:
- No Response from Receiver:
- Verify the receiver is powered correctly.
- Check the remote control's battery.
- Re-verify that the 8-bit DIP switch settings on both the remote and receiver are identical. Even one incorrect switch will prevent communication.
- Ensure the remote control uses a compatible chip (5326, SMC5326, or SMC5326P-3).
- Limited Range:
- Ensure there are no major obstructions (e.g., thick walls, metal structures) between the remote and receiver.
- Check for sources of radio interference in the vicinity.
- Verify the antenna on the receiver is properly connected and positioned.
- Incorrect Frequency: This specific model is available in 330MHz and 433MHz variants. Ensure your receiver and remote control operate on the same frequency. This is typically determined at the time of purchase and cannot be changed via DIP switches.
7. Specifications
| Model Number | SMC5326 |
| Brand | SaiFfe |
| Operating Frequencies | 330MHz, 433MHz (variant dependent) |
| Encoding Method | 8-bit DIP Switch |
| Package Dimensions | 1.18 x 0.79 x 0.39 inches (approximate) |
| Item Weight | 1.76 ounces (approximate) |
| Manufacturer | SAIFFE |
8. Warranty Information
This product is sold without an explicit warranty. Please refer to the seller's return policy for any issues upon receipt.
9. Support
For further assistance or technical inquiries not covered in this manual, please contact the seller or manufacturer directly through their official support channels.