Important Safety Instructions
Please read all instructions carefully before operating the TECSPACE Commercial Ice Maker Machine. Retain this manual for future reference.
- Electrical Safety: Ensure the unit is connected to a properly grounded 115 Volt electrical outlet. Do not use extension cords. Disconnect power before any maintenance or cleaning.
- Water Connection: Connect the unit to a potable water supply using approved plumbing materials. Ensure all connections are secure to prevent leaks.
- Placement: Install the ice maker on a level, stable surface in a well-ventilated area, away from direct sunlight or heat sources. Maintain adequate clearance around the unit for proper airflow.
- Children and Pets: Keep children and pets away from the ice maker during operation and maintenance.
- Maintenance: Only qualified personnel should perform repairs. Do not attempt to repair the unit yourself.
Product Overview
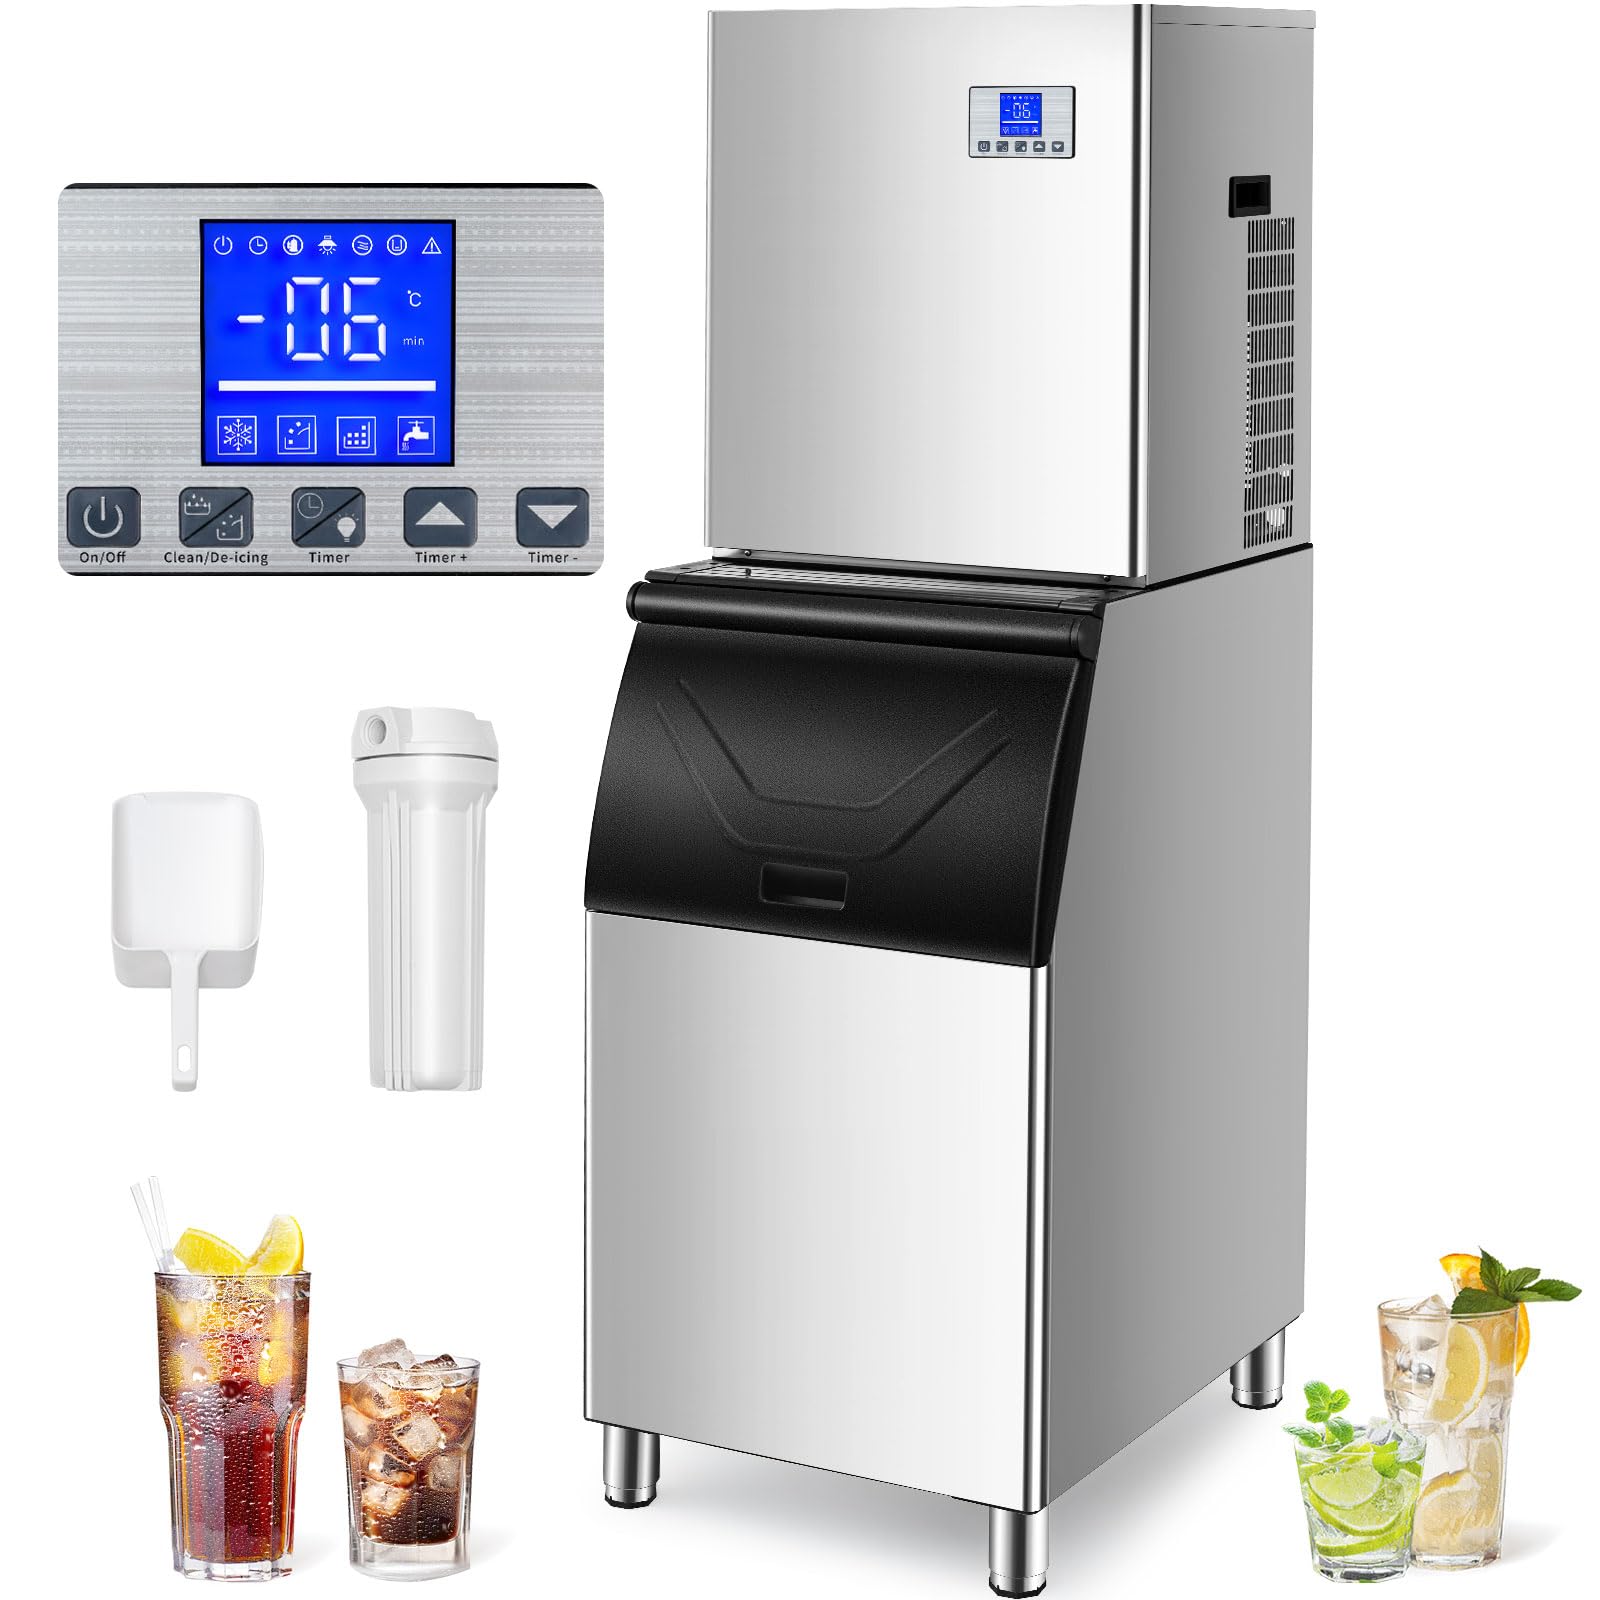
The TECSPACE Commercial Ice Maker Machine Model ZBJ is designed for high-efficiency ice production, capable of producing up to 344 lbs of ice per 24 hours with a large 165 lbs storage bin. It features smart scheduling and robust construction for commercial use.

Setup and Installation
1. Unpacking
- Carefully remove the ice maker from its packaging.
- Inspect the unit for any shipping damage. Contact your supplier immediately if damage is found.
- Remove all packing materials, tape, and protective films from the unit.
2. Placement Requirements
- Place the ice maker on a strong, level surface capable of supporting its weight when full of ice.
- Ensure adequate ventilation. Maintain at least 6 inches (15 cm) of clearance around the back and sides of the unit for proper airflow.
- Avoid placing the unit near heat-generating appliances or in direct sunlight.
- The unit dimensions are approximately 22.2"D x 26"W x 63.4"H. Use the adjustable feet to fine-tune the height within a 1.2-inch range for optimal leveling and stability.
3. Water Supply Connection
- Connect the ice maker to a cold, potable water supply using the provided water inlet hose.
- Ensure the water pressure is within the recommended range (typically 15-80 PSI).
- Install a water filter (if not already integrated) to improve ice quality and prolong machine life.
- Connect the drain hose to a suitable drain point, ensuring a continuous downward slope for proper drainage.
4. Electrical Connection
- Plug the ice maker into a dedicated, grounded 115 Volt, 60 Hz electrical outlet.
- Do not use adapter plugs or extension cords.
5. Initial Cleaning
- Before first use, clean the interior of the ice maker and the ice storage bin with a mild detergent and warm water. Rinse thoroughly.
- Run a cleaning cycle as described in the Maintenance section.
Operation
1. Control Panel Overview
The ice maker features an intuitive control panel for easy operation. Refer to the detailed image in the Product Overview section for button identification. Common functions include Power ON/OFF, Ice Making Mode selection, and Cleaning Cycle activation.
2. Ice Production Cycle
- Once powered on and water supply is connected, the machine will begin the ice-making process.
- The first batch of ice can be ready in approximately 15 minutes.
- The machine is capable of producing up to 344 lbs (14.3 lbs/hour) of ice in a 24-hour period under optimal conditions.
3. Smart Appointment Scheduling
Utilize the 24-hour smart appointment scheduling feature to program ice production according to your business needs. This allows you to have ice ready precisely when required, optimizing energy consumption and ensuring a continuous supply.

4. Ice Storage
The integrated storage bin has a capacity of 165 lbs. The bin features a thickened foam layer for superior thermal insulation, designed to keep ice frozen for over 10 hours even after the machine is powered off, minimizing ice melt and waste.

Maintenance and Cleaning
1. One-Touch Cleaning Feature
The ice maker is equipped with a user-friendly one-touch cleaning function. Refer to the control panel instructions to initiate an automatic cleaning cycle. This feature helps maintain hygiene and extends the lifespan of the unit.
2. Water Filter Maintenance
The unit includes a PP cotton filter to remove impurities from the water supply. Regularly inspect and replace the filter cartridge as needed to ensure optimal ice quality and prevent mineral buildup in the machine. Frequency of replacement depends on water quality and usage.

3. Exterior and Interior Cleaning
- Exterior: Wipe the stainless steel exterior with a soft cloth and mild detergent. Avoid abrasive cleaners.
- Interior: Periodically clean the ice storage bin and ice-making components with a food-grade sanitizer. Rinse thoroughly to remove any residue.
- Condenser Coils: Keep the condenser coils clean and free of dust and debris to ensure efficient operation. Use a soft brush or vacuum cleaner.
Troubleshooting
This section provides solutions to common issues you might encounter. If the problem persists, contact customer support.
- No Ice Production: Check power supply, water connection, and ensure the unit is not in a cleaning cycle or defrost mode. Verify water filter is not clogged.
- Slow Ice Production: Ensure ambient temperature is within operating limits. Check for proper ventilation around the unit. Clean condenser coils if dusty.
- Ice is Thin or Soft: Verify water pressure is adequate. Check water filter for clogs. Ensure the water temperature is not too high.
- Water Leakage: Inspect all water inlet and drain connections for tightness. Check drain hose for obstructions or kinks.
- Unusual Noise: Ensure the unit is level. Check for any loose components or obstructions in the fan or ice-making area.
Specifications
| Feature | Specification |
|---|---|
| Brand | TECSPACE |
| Model Name | ZBJ |
| Product Dimensions (D x W x H) | 22.2" x 26" x 63.4" (565mm x 660mm x 1610mm) |
| Daily Ice Production | 344 lbs / 24 hours |
| Ice Storage Capacity | 165 lbs |
| Voltage | 115 Volts |
| Refrigerant | R410 |
| Material | 304 Stainless Steel |
| UPC | 758283255500 |
| ASIN | B0CLRGMG9B |

Warranty and Support
For warranty information, please refer to the warranty card included with your product or contact TECSPACE customer service. If you require technical assistance, troubleshooting, or have questions regarding your ice maker, please contact TECSPACE support through their official website or the contact information provided in your purchase documentation. Please have your model number (ZBJ) and purchase date available when contacting support.