1. Introduction
Thank you for choosing the Yehtta Kids Instant Print Camera, Model BLL2. This camera is designed to provide a fun and educational photography experience for children, allowing them to capture moments and print them instantly. Please read this manual carefully to ensure proper use and to maximize your enjoyment of the product.
Video: Overview of the Yehtta Kids Instant Print Camera, highlighting its features and appeal for children.
2. Product Overview
Key Features:
- Dual-Lens Design: Equipped with both front and rear lenses for standard photos and selfies.
- Instant Thermal Printing: Utilizes inkless thermal printing technology for immediate black and white photo prints.
- High-Resolution Capture: Supports 1080P video recording and color photo shooting.
- 2.4-inch IPS Screen: Provides a clear, eye-protecting display for viewing and navigating.
- 16x Digital Zoom: Allows for closer shots.
- Creative Modes: Includes flash, burst shooting, time-lapse, 5 filters, and 10 creative photo frames.
- Multimedia Functions: Features a built-in MP3 player and several pre-installed games.
- Long Battery Life: Integrated 2000mAh battery supports up to 3 hours of continuous shooting.
- Expandable Storage: Comes with a 32GB SD card, capable of storing approximately 60,000 photos.
What's in the Box:
- Yehtta Kids Instant Print Camera (Model BLL2)
- 32GB SD Card
- 3 Rolls of Thermal Print Paper (one pre-installed)
- Type-C Charging Cable
- Camera Lanyard

Image: The Yehtta Kids Instant Print Camera shown with its accessories, including the Type-C cable, lanyard, and thermal paper rolls.

Image: Icons illustrating the camera's multi-functional capabilities, such as selfie camera, 1080P HD video, games player, music player, instant printing, doodle picture, filter effects, and video playback.
3. Setup
3.1. Charging the Camera
Before first use, fully charge the camera using the provided Type-C cable. Connect the cable to the camera's charging port and a compatible USB power source. The charging indicator light will show the charging status.
3.2. Inserting the SD Card
The camera comes with a 32GB SD card pre-installed or included separately. If not pre-installed, locate the SD card slot on the side of the camera, open the protective cover, and gently insert the SD card until it clicks into place. Ensure the camera is powered off before inserting or removing the SD card.
3.3. Installing Thermal Print Paper
One roll of thermal paper is typically pre-installed. To install or replace paper:
- Locate and open the paper slot cover on the bottom front of the camera.
- Insert a new roll of thermal paper into the compartment, ensuring the paper feeds out from the top of the roll.
- Pull approximately 1 inch of paper out of the slot before closing the cover.
- Close the paper slot cover securely.

Image: Visual guide for installing the thermal print paper: open the slot, insert the paper roll correctly, and pull out about 1 inch of paper.
4. Operating Instructions
4.1. Power On/Off and Navigation
- Power On: Press and hold the power button (usually located on the top or side) until the screen lights up.
- Power Off: Press and hold the power button until the "Goodbye" screen appears and the device shuts down.
- Navigation: Use the directional buttons (up, down, left, right) to navigate through the menu options on the 2.4-inch IPS screen. Press the "OK" button (often a central button) to select an option.
4.2. Taking Photos
From the main menu, select the "Camera" icon.
- Switching Lenses: Use the designated button (refer to camera layout) to switch between the front and rear lenses for standard photos or selfies.
- Zoom: Use the zoom buttons (often directional arrows) to adjust the 16x digital zoom.
- Filters & Frames: Access the settings or a dedicated button to apply 5 different filters or 10 creative photo frames before taking a picture.
- Timed Shots: Set a timer (e.g., 3s, 5s, 10s) for delayed photos.
- Burst Shooting: Capture multiple photos in quick succession.
- Flash: Activate the flash for low-light conditions.
- Capture: Press the shutter button (usually the "OK" button or a dedicated camera button) to take a photo.
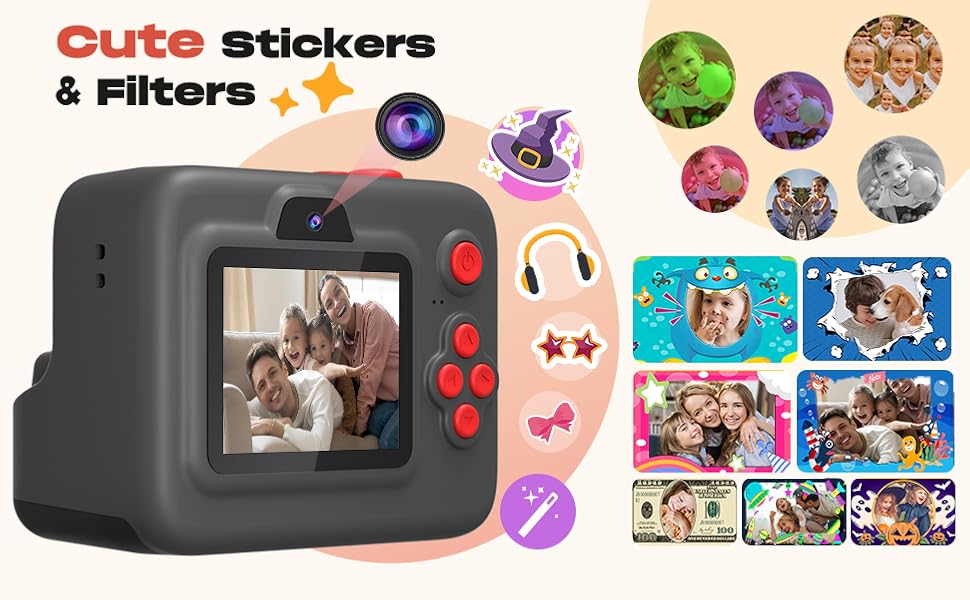
Image: Illustrates the camera's photography options, including dual-lens digital camera, 3s/5s/10s time-lapse, 3/5 photo burst, and three printing densities (low, medium, high).

Image: Demonstrates instant photo and selfie capabilities, showing the front camera, SD card storage for color photos, instant black & white printing, and various fun frames and filters.
4.3. Recording Videos
From the main menu, select the "Video" icon.
- Start Recording: Press the shutter/OK button to begin recording 1080P HD video.
- Stop Recording: Press the shutter/OK button again to stop recording.
- Playback: Access recorded videos through the "Playback" option in the main menu.
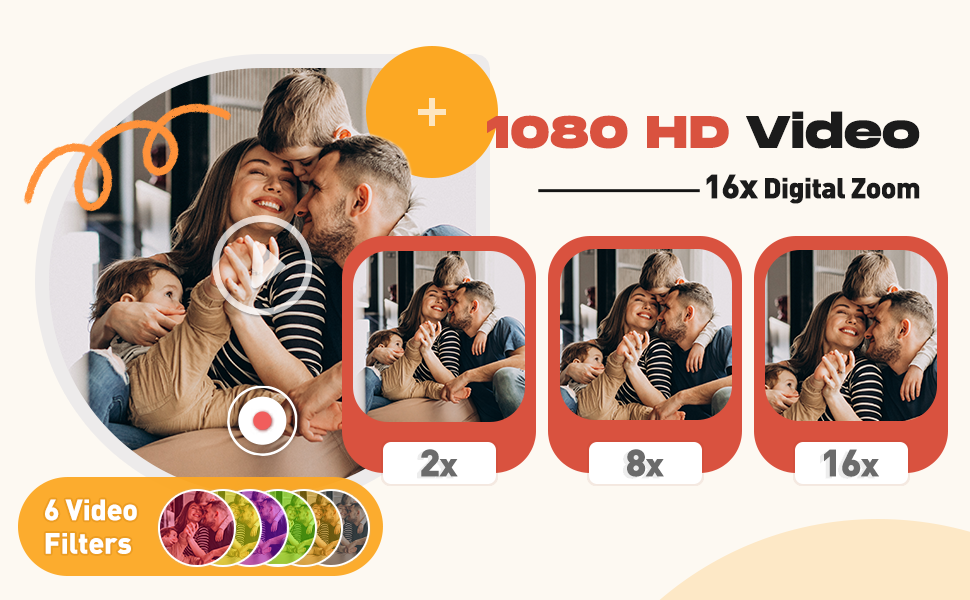
Image: Highlights HD recording capabilities, including 16x digital zoom and fun timed shooting options (3s, 5s, 10s).
4.4. Printing Photos
The camera supports instant black and white thermal printing. You can choose to print immediately after taking a photo or print saved photos from the SD card.
- Instant Print: In camera mode, after taking a photo, the camera can be set to automatically print. This setting can be adjusted in the "Settings" menu.
- Printing Saved Photos: Go to "Playback", select the desired photo, and choose the print option.
- Printing Density: Adjust the printing consistency (low, medium, high) in the settings for desired print quality.
4.5. Games and Music
- Games: Select the "Games" icon from the main menu to access pre-installed games.
- Music: Select the "Music" icon. To play music, MP3 files must be uploaded to the SD card via a computer.
5. Maintenance
- Cleaning: Use a soft, dry cloth to clean the camera body and screen. Avoid abrasive materials or harsh chemicals.
- Paper Replacement: Always use compatible thermal print paper rolls. Ensure proper installation as described in Section 3.3.
- Battery Care: Charge the camera regularly. Avoid fully draining the battery frequently to prolong its lifespan.
- Storage: Store the camera in a cool, dry place away from direct sunlight and extreme temperatures.
6. Troubleshooting
- Camera not turning on: Ensure the battery is charged. Connect to a power source and try again.
- Photos not printing: Check if thermal paper is correctly installed and there is enough paper. Verify printing settings in the menu.
- Poor print quality: Adjust printing density in the settings. Ensure the thermal paper is not old or damaged.
- SD card error: Ensure the SD card is correctly inserted. Try reinserting or formatting the card (this will erase all data).
- Screen unresponsive: Try restarting the camera. If the issue persists, contact customer support.
7. Specifications
| Feature | Detail |
|---|---|
| Model Name | BLL2 |
| Brand | Yehtta |
| Dimensions | 5.47 x 4.92 x 2.87 inches |
| Item Weight | 15.5 ounces (0.44 Kilograms) |
| Battery | 1 Lithium Ion battery (included), 2000mAh capacity |
| Video Resolution | 1080P HD |
| Digital Zoom | 16x |
| Screen | 2.4-inch IPS |
| Printing Technology | Thermal (Inkless), Black and White |
| Storage | 32GB SD card (included) |
| Shutter Speed | Max 30s |
| Shutter Type | Electronic |
8. Warranty and Support
For warranty information and customer support, please refer to the contact details provided on the product packaging or the official Yehtta website. Keep your purchase receipt for any warranty claims.


