
Introduction
Welcome to the world of diamond painting with your Awesome Pattern Studio Monsters Collection DS1736 kit. This manual provides detailed instructions to help you successfully complete your diamond art project, ensuring a relaxing and rewarding creative experience. Please read through all sections before beginning.
What's Included
Your Awesome Pattern Studio Diamond Painting Kit contains all the necessary items to create your masterpiece:
- Printed pattern for diamond painting design (full drill, 30x40.5 cm / 12"x16" / 120x162 cell / 21 Colors)
- Presorted Eco-Friendly Resin Diamonds
- Extra Resealable Bags
- Storage Stickers
- Applicator Pen x2
- Diamond Tray x2
- Glue (wax)
- Instructions
- Cover page and a color chart page

Image: Kit Contents Overview. This image displays the complete contents of a typical Awesome Pattern Studio Diamond Painting Kit, including the rolled canvas, bags of diamonds, tools, and instructional materials.
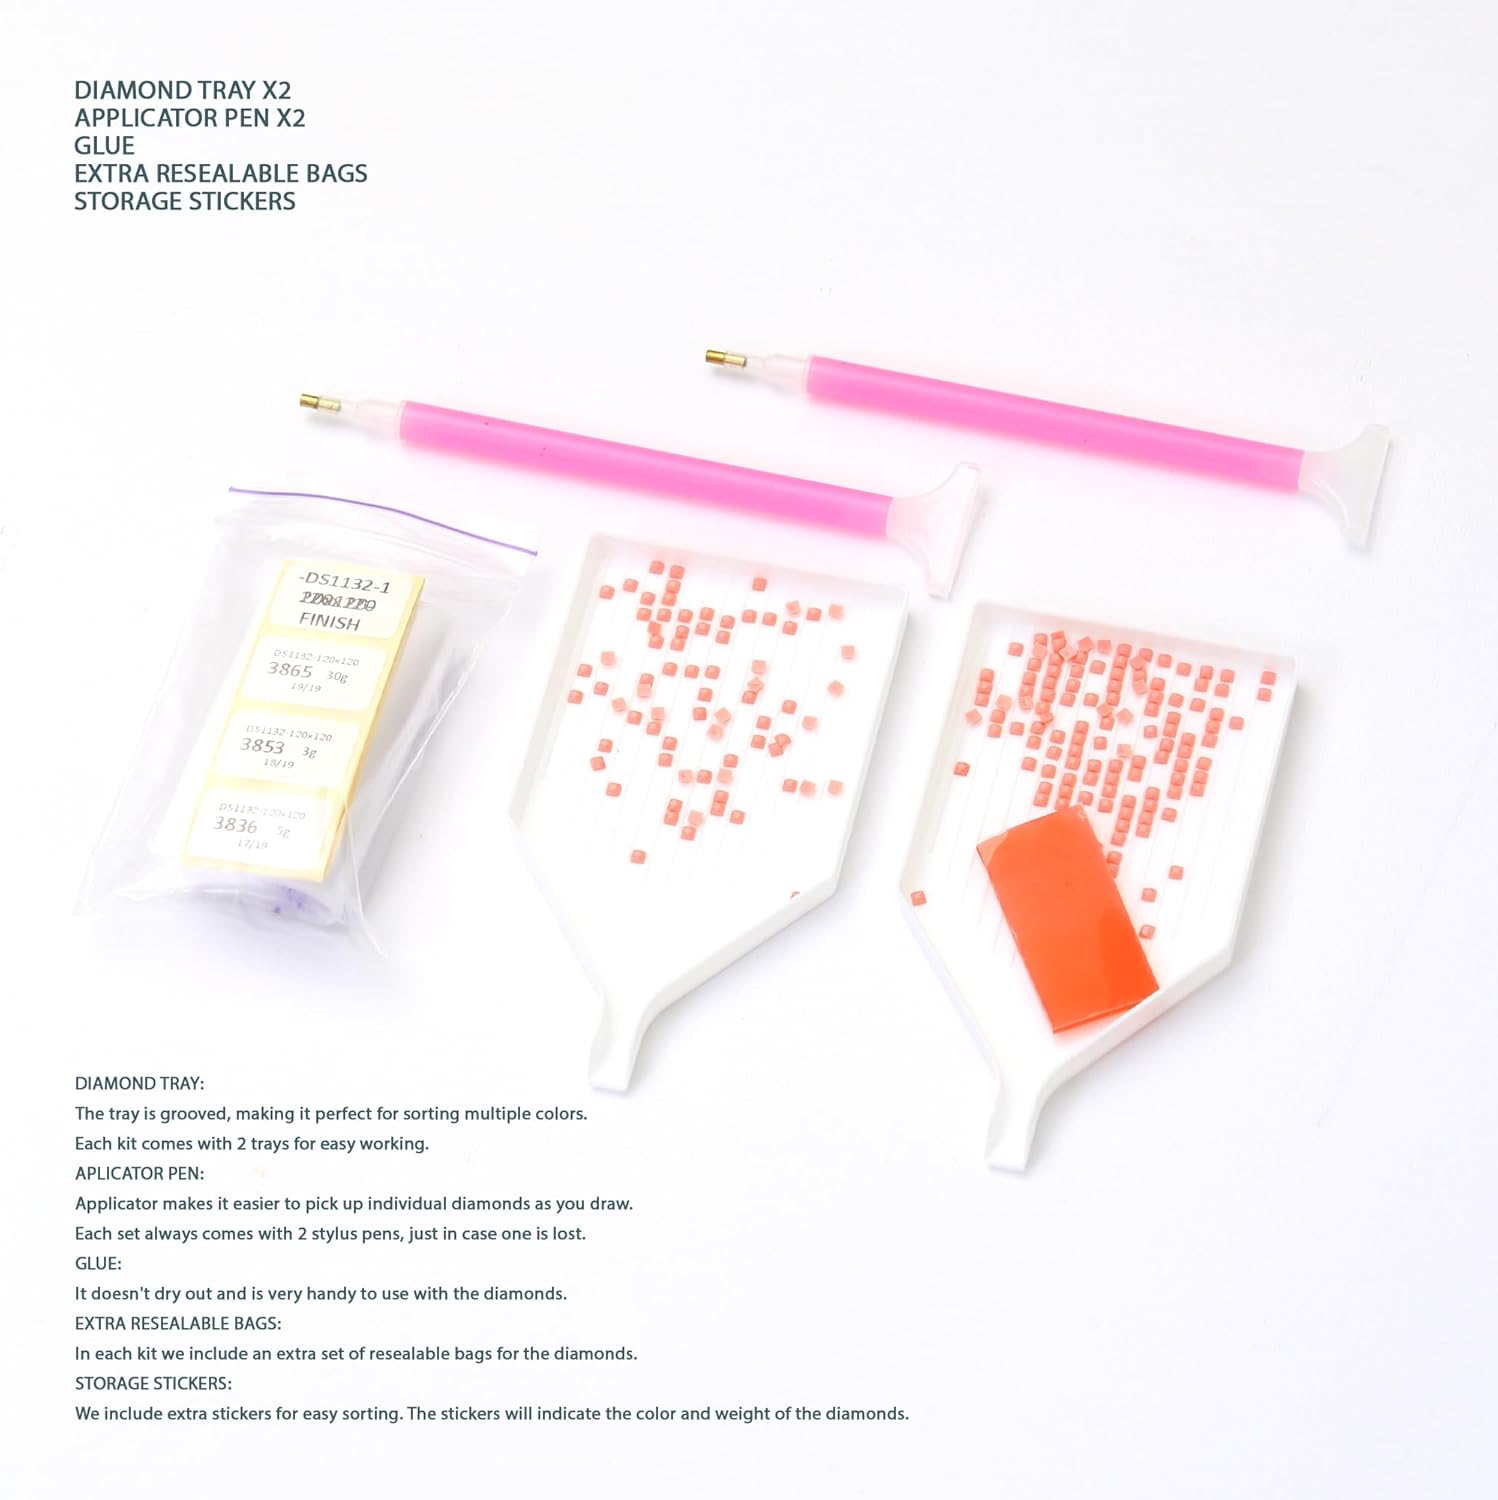
Image: Essential Tools. This image shows the diamond trays, applicator pens, glue wax, extra resealable bags, and storage stickers. The trays are grooved for easy diamond sorting, and the kit includes two pens and two trays for convenience.

Image: Resin Diamonds. This image displays various colors of presorted eco-friendly resin diamonds, sealed in resealable bags with color and weight indicators. The kit includes extra diamonds to ensure completion even if a few are lost.
Setup Instructions
- Prepare Your Workspace: Choose a clean, flat, and well-lit surface. Ensure it is free from dust and debris.
- Unpack the Kit: Carefully remove all items from the branded tube packaging.
- Unroll the Canvas: Gently unroll the printed pattern canvas. If it curls, place heavy objects on the corners for a few hours to flatten it. Do not fold the canvas, as this can create creases.
- Review the Color Chart: Locate the color chart page included in your kit. This chart maps symbols on the canvas to specific diamond colors and their corresponding codes.
- Organize Diamonds: Open the resealable bags of diamonds. Use the provided storage stickers to label the extra resealable bags if you transfer diamonds for better organization.

Image: Kit Packaging. This image shows the branded tube in which your diamond painting kit is delivered. This tube protects the kit during shipping and provides a safe storage solution for all components.

Image: Printed Pattern. This image displays a sample of the printed pattern canvas, featuring the design and the color/symbol code legend at the bottom. The pattern is printed on thick paper with double-sided lamination for durability and moisture protection.

Image: Instructional Materials. This image shows the cover page, a user-friendly color chart, and the step-by-step instructions included in the kit. These materials are designed to guide users through the diamond painting process effectively.
Operating Instructions (How to Diamond Paint)
Follow these steps to apply the diamonds and bring your artwork to life:
- Peel Back Protective Film: The canvas has a protective film over the adhesive area. Peel back only a small section at a time to prevent the adhesive from drying out or collecting dust.
- Identify Symbols and Colors: Refer to your color chart to match the symbols on the exposed canvas section with the corresponding diamond color codes.
- Prepare Diamonds: Pour a small amount of the required diamond color into one of the diamond trays. Gently shake the tray to arrange the diamonds flat side down.
- Load Applicator Pen: Dip the tip of your applicator pen into the glue wax. This will pick up a small amount of wax, allowing the pen to pick up diamonds.
- Pick Up and Place Diamonds: Use the applicator pen to pick up a single diamond from the tray. Carefully place the diamond onto the corresponding symbol on the canvas, pressing down gently to secure it.
- Continue Section by Section: Work on one color or one small section at a time. As you complete a section, peel back more of the protective film and repeat the process.
- Flatten Finished Areas: Periodically, gently press down on completed areas with a flat object (like a book) to ensure all diamonds are firmly adhered.

Image: Finished Artwork Example. This image showcases a completed diamond painting from the Monsters Collection DS1736, framed in wood. It illustrates the vibrant and detailed result achievable with the kit.
Maintenance
Proper care ensures the longevity and beauty of your diamond painting:
- Sealing (Optional): For added protection and shine, you may choose to apply a diamond painting sealant once the artwork is fully completed and dried. Follow the sealant product's instructions carefully.
- Cleaning: If dust accumulates on your finished diamond painting, gently wipe it with a soft, dry cloth. Avoid using water or harsh cleaning agents.
- Storage of Unused Diamonds: Keep any leftover diamonds in their resealable bags, labeled with the storage stickers, in a cool, dry place away from direct sunlight.
- Framing: The pattern is designed to be easily framed. Once complete, you can place your finished artwork directly into a standard picture frame (frame not included). No canvas stretcher bars are needed.
Troubleshooting
- Diamonds not sticking:
- Ensure the protective film is peeled back only from the area you are working on. If the adhesive feels weak, gently press the diamond firmly onto the canvas. Ensure your applicator pen has enough glue wax.
- Missing diamonds:
- Each kit includes extra diamonds in reserve. If you find you are short on a particular color, check your resealable bags. If you still encounter issues, please contact customer support.
- Canvas creases:
- If the canvas has creases from shipping, gently unroll it and place it under heavy books for several hours or overnight to flatten. Avoid ironing directly on the adhesive side.
Product Specifications
| Feature | Detail |
|---|---|
| Brand | Awesome Pattern Studio |
| Model Name | DS1736N120x162 |
| Pattern Size | Rectangular shape / 30x40.5 cm (12"x16") / 120x162 cell |
| Number of Colors | 21 Colors |
| Diamond Type | Eco-Friendly Resin Diamonds |
| Canvas Material | Thick paper with double-sided lamination |
| Item Dimensions (L x W x H) | 3.15 x 14.57 x 3.15 inches (packaged) |
| Item Weight | 400 Grams (14.1 ounces) |
| Manufacturer | Awesome Pattern Studio |
Warranty and Support
For any questions, concerns, or support regarding your Awesome Pattern Studio Diamond Painting Kit, please contact the seller directly through the platform where you made your purchase. You can also visit the official Awesome Pattern Studio Store for more information and to explore other products.