Introduction
Thank you for choosing the Dalugo Automatic Soap Dispenser. This device provides a hygienic and convenient way to dispense liquid soap, featuring a touchless sensor, adjustable dispensing levels, and a rechargeable battery. Please read this manual carefully before use to ensure proper operation and maintenance.
Product Features
- Touchless Operation: Equipped with a fast infrared sensor for hygienic, non-contact soap dispensing in 0.25 seconds.
- Adjustable Dispensing Levels: Four adjustable settings (0.4s, 0.8s, 1.5s, 2.0s) to control the amount of soap dispensed.
- USB-C Rechargeable: Built-in 1500mAh battery, fully charges in 2 hours and provides over 60 days of use.
- Dual Installation Options: Can be used as a countertop dispenser or wall-mounted with included nail-free stickers.
- IPX5 Waterproof: Designed to withstand splashes, making it suitable for bathrooms and kitchens.
- Large Capacity: 380 ml tank reduces the frequency of refills.
- Versatile Compatibility: Suitable for various liquid soaps, including hand soap, dish soap, shower gel, and shampoo.
Package Contents
Please check the package for the following items:
- Automatic Soap Dispenser (1 unit)
- USB-C Charging Cable (1 unit)
- Nail-free Wall Stickers (2 units)
- User Manual (1 unit)

Figure 1: Package Contents
Product Diagram

Figure 2: Key Components of the Dispenser
- Infrared Sensor: Detects hand movement for automatic dispensing.
- Dispensing Nozzle: Where the liquid soap is released.
- Power/Adjustment Button: Controls power and dispensing levels.
- USB-C Charging Port: For recharging the internal battery.
- Liquid Soap Tank: Holds up to 380 ml of liquid soap.
- Battery Indicator: Shows battery status.
Setup
1. Filling the Dispenser
- Gently twist the top section of the dispenser counter-clockwise to separate it from the liquid soap tank.
- Pour your desired liquid soap (hand soap, dish soap, shower gel, shampoo) into the 380 ml tank. Do not overfill.
- Align the top section with the tank and twist clockwise until securely fastened.

Figure 3: Filling the Soap Tank
2. Charging the Dispenser
- Locate the USB-C charging port, usually on the side or back of the top unit.
- Connect the provided USB-C cable to the dispenser and plug the other end into a standard USB power adapter (not included).
- The battery indicator light will show charging status. A full charge typically takes 2 hours.
- Once fully charged, disconnect the cable. The dispenser can operate for over 60 days on a single charge.
3. Installation
The dispenser offers two installation methods:
Countertop Placement:
Simply place the dispenser on a flat, stable surface near your sink. Ensure it is not directly exposed to excessive water splashes.
Wall Mounting:
- Clean and dry the desired wall surface. Ensure it is smooth and free of dust or grease.
- Peel off the protective film from one of the nail-free wall stickers.
- Firmly press the sticker onto the wall at the desired height, ensuring the hook faces upwards.
- Wait for at least 24 hours to allow the adhesive to fully cure before hanging the dispenser.
- Align the dispenser's mounting slot with the hook on the wall sticker and slide it down to secure.
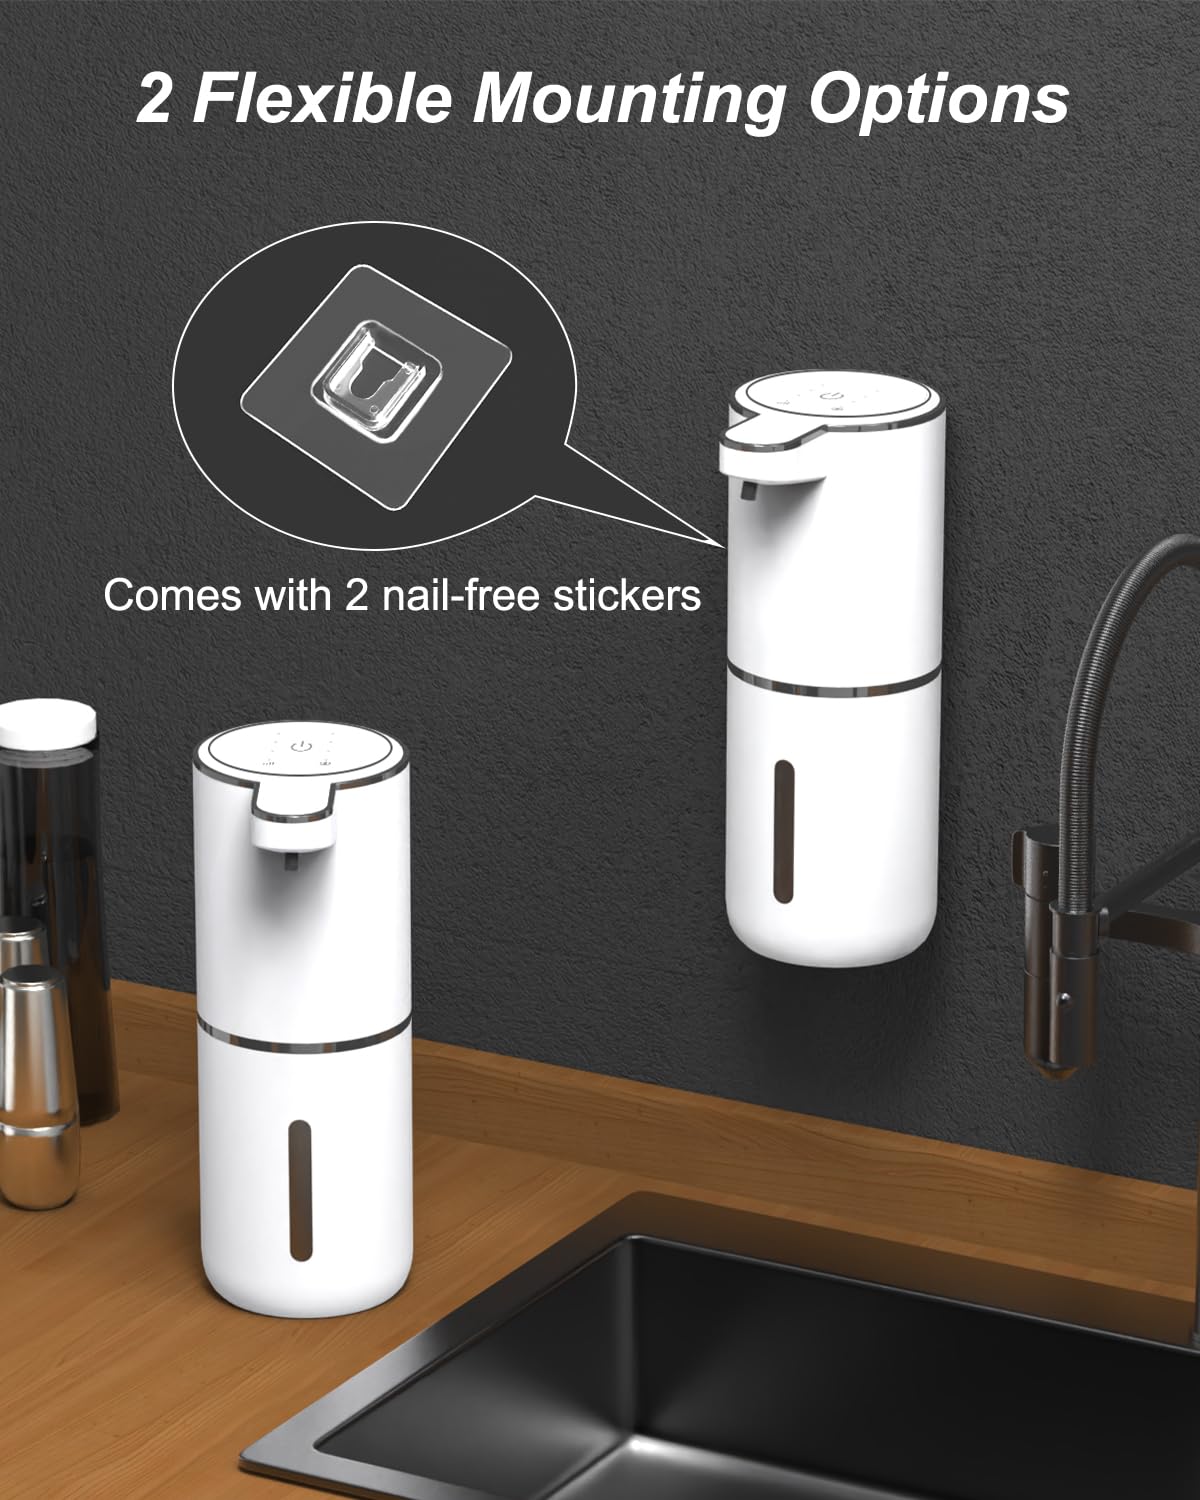
Figure 4: Wall Mounting and Countertop Options
Operating Instructions
1. Power On/Off
- To Power On: Press and hold the power button (usually located on the top) for a few seconds until the indicator light illuminates.
- To Power Off: Press and hold the power button again for a few seconds until the indicator light turns off.
2. Adjusting Dispensing Levels
The dispenser has four adjustable levels to control the amount of soap dispensed:
- Level 1: 0.4 seconds dispensing time
- Level 2: 0.8 seconds dispensing time
- Level 3: 1.5 seconds dispensing time
- Level 4: 2.0 seconds dispensing time
To adjust the level, briefly press the power/adjustment button. Each press will cycle through the levels, indicated by a change in the light or a brief display. Select the level that best suits your needs.

Figure 5: Adjustable Dispensing Levels
3. Using the Dispenser
- Ensure the dispenser is powered on and filled with liquid soap.
- Place your hand flat under the dispensing nozzle. The infrared sensor will detect your hand.
- The dispenser will automatically release the pre-set amount of liquid soap onto your hand.
- Remove your hand once the soap is dispensed.

Figure 6: Automatic Dispensing in Action
Maintenance
Cleaning
- Turn off the dispenser before cleaning.
- Wipe the exterior of the dispenser with a soft, damp cloth. Do not use abrasive cleaners or immerse the unit in water.
- If the nozzle becomes clogged, gently clean it with a small brush or cotton swab.
- For thorough cleaning of the tank, empty any remaining soap, rinse with warm water, and allow it to air dry completely before refilling.
Refilling
When the soap level is low, refill the tank following the steps outlined in the "Filling the Dispenser" section under Setup.
Troubleshooting
| Problem | Possible Cause | Solution |
|---|---|---|
| Dispenser does not turn on. | Low battery. | Charge the dispenser using the provided USB-C cable. |
| No soap dispensed. |
|
|
| Soap dispenses too much/too little. | Dispensing level is incorrectly set. | Adjust the dispensing level using the power/adjustment button. |
| Dispenser makes unusual noise. | Air in the pump or thick soap. | Run the dispenser a few times to clear air. If using thick soap, dilute it slightly with water. |
Specifications
| Brand | Dalugo |
| Model | B0CLM9JH5K |
| Material | Plastic |
| Color | White |
| Liquid Volume Capacity | 380 ml |
| Battery Capacity | 1500 mAh |
| Charging Port | USB-C |
| Sensor Response Time | 0.25 seconds |
| Waterproof Rating | IPX5 |
| Product Dimensions (Approx.) | 21.9 cm (Height) x 7 cm (Width) |
| Item Weight | 360 g |
Safety Information
- Do not immerse the entire unit in water. The IPX5 rating protects against splashes, not submersion.
- Keep out of reach of children.
- Use only the provided USB-C cable for charging.
- Do not mix different types of liquid soaps in the tank without cleaning it first.
- Avoid direct sunlight or extreme temperatures.
- If the product is damaged, do not attempt to repair it yourself. Contact customer support.
Warranty and Support
For warranty information or technical support, please refer to the contact details provided with your purchase or visit the official Dalugo website. Please have your model number (B0CLM9JH5K) ready when contacting support.