1. Introduction
This manual provides comprehensive instructions for the installation, operation, and maintenance of your HEXEH Aluminum Step Servo Motor Mount. This product is designed to securely fix and support stepper or servo motors in various applications, ensuring stable and precise operation.
Please read this manual thoroughly before installation and use to ensure correct assembly and optimal performance.
2. Product Overview
The HEXEH motor mount is an integrated bracket crafted from durable aluminum, designed for longevity and reliable performance. Its primary function is to provide a stable mounting solution for various NEMA-sized stepper and servo motors, facilitating connection to ball screws.
Key features include:
- Integrated Design: Combines motor mounting and bearing support for enhanced precision.
- Durable Construction: Made from high-quality aluminum for strength and corrosion resistance.
- Easy Installation: Designed for straightforward setup and replacement.
- Versatile Compatibility: Supports a range of NEMA motor sizes and SFU ball screw diameters.

Figure 1: Front view of the HEXEH HM12-60 Aluminum Step Servo Motor Mount, showing the integrated bearing housing and mounting base.
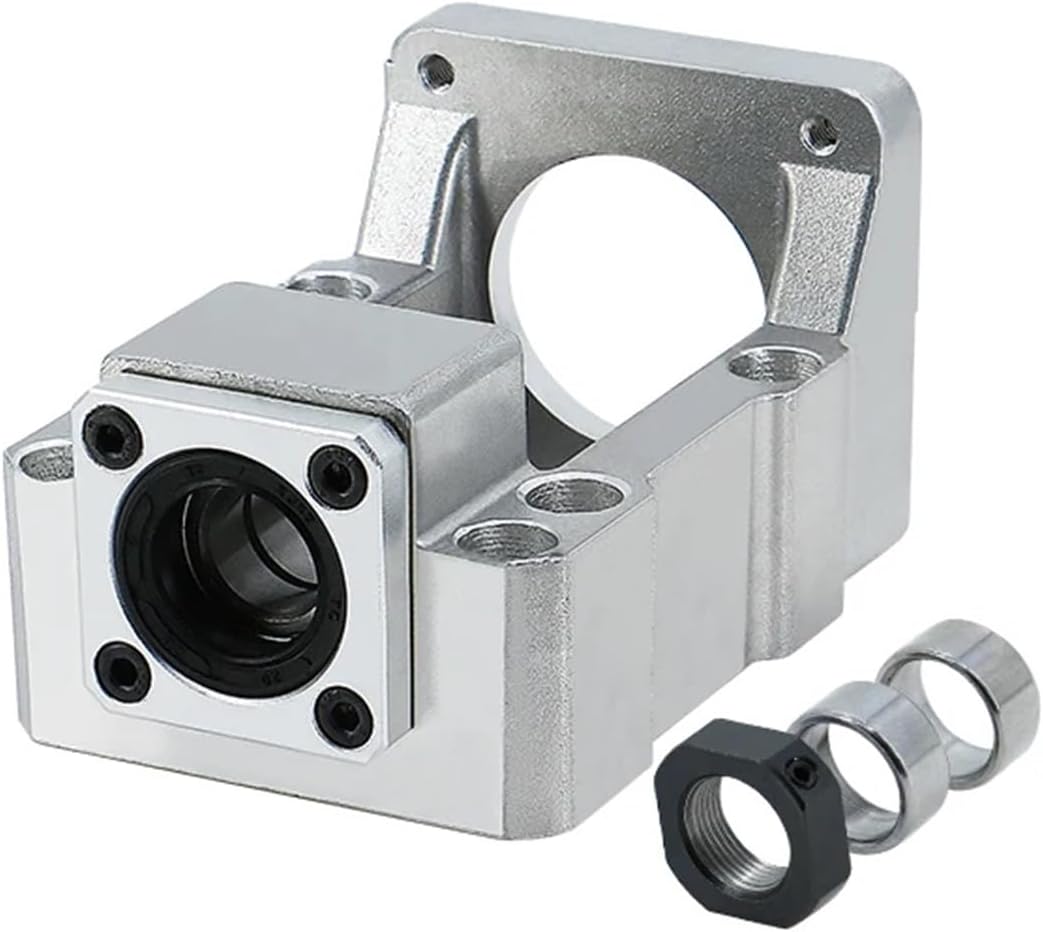
Figure 2: Side view of the HEXEH HM12-60 mount, highlighting the robust aluminum construction and mounting points.

Figure 3: Top view of the HEXEH HM12-60 mount, illustrating the bearing assembly and motor attachment interface.
3. Compatibility
The HEXEH motor mounts are available in various models, each designed for specific NEMA motor sizes and SFU ball screw series. Refer to the table below to select the appropriate mount for your application.
| Mount Model | Compatible NEMA Motor Size | Compatible SFU Ball Screw Series |
|---|---|---|
| HM10-57 | NEMA23 | SFU1204/1205/1210 |
| HM10-60 | NEMA24 | SFU1204/1205/1210 |
| HM12-57 | NEMA23 | SFU1604/1605/1610 |
| HM12-60 | NEMA24 | SFU1604/1605/1610 |
| HM15-57 | NEMA23 | SFU2004/2005/2010 |
| HM15-60 | NEMA24 | SFU2004/2005/2010 |
| HM15-80 | NEMA32 | SFU2004/2005/2010 |
| HM15-86 | NEMA34 | SFU2004/2005/2010 |
| HM20-80 | NEMA32 | SFU2505/2510 |
| HM20-86 | NEMA34 | SFU2505/2510 |
4. Packing List
Upon opening the package, please verify that all components are present and undamaged:
- 1x Motor Integrated Seat (Mount)
- 1x Locking Nut
- Set of Spacers/Rings (Quantity may vary by model)
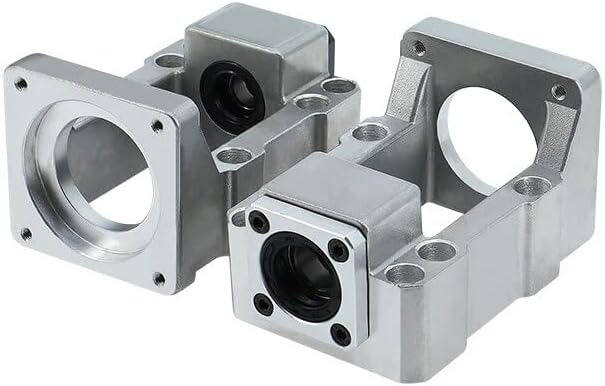
Figure 4: Example of different HEXEH motor mount configurations, illustrating the variety of designs.
5. Setup and Installation
Proper installation is crucial for the performance and longevity of your motor and ball screw system. Follow these general steps, referring to the specific technical diagrams for your model.
- Select the Correct Mount: Ensure you have chosen the appropriate motor mount model based on your NEMA motor size and SFU ball screw series, as detailed in the Compatibility section. Pay close attention to mounting hole diameters and center distances.
- Prepare the Mounting Surface: Ensure the surface where the mount will be installed is clean, flat, and stable.
- Attach the Motor: Secure your stepper or servo motor to the motor mount using appropriate fasteners. Ensure the motor shaft is correctly aligned with the bearing bore of the mount.
- Install the Ball Screw: Insert the ball screw into the bearing housing of the mount. For models with angular contact bearings (e.g., C5 Angular Contact), ensure proper pre-load is applied during assembly as per standard bearing installation practices. Use the provided locking nut and spacers to secure the ball screw.
- Mount the Assembly: Secure the entire motor and mount assembly to your machine frame or desired structure using suitable bolts through the base mounting holes. Ensure all fasteners are tightened to the manufacturer's recommended torque specifications (if available) to prevent vibration and misalignment.
Note: For optimal performance, especially with angular contact bearings, ensure proper pre-loading during installation. Always use the most appropriate ball screw for your application.

Figure 5: Technical diagram for HM12-57 and HM12-60 series mounts, including dimensions and assembly details.
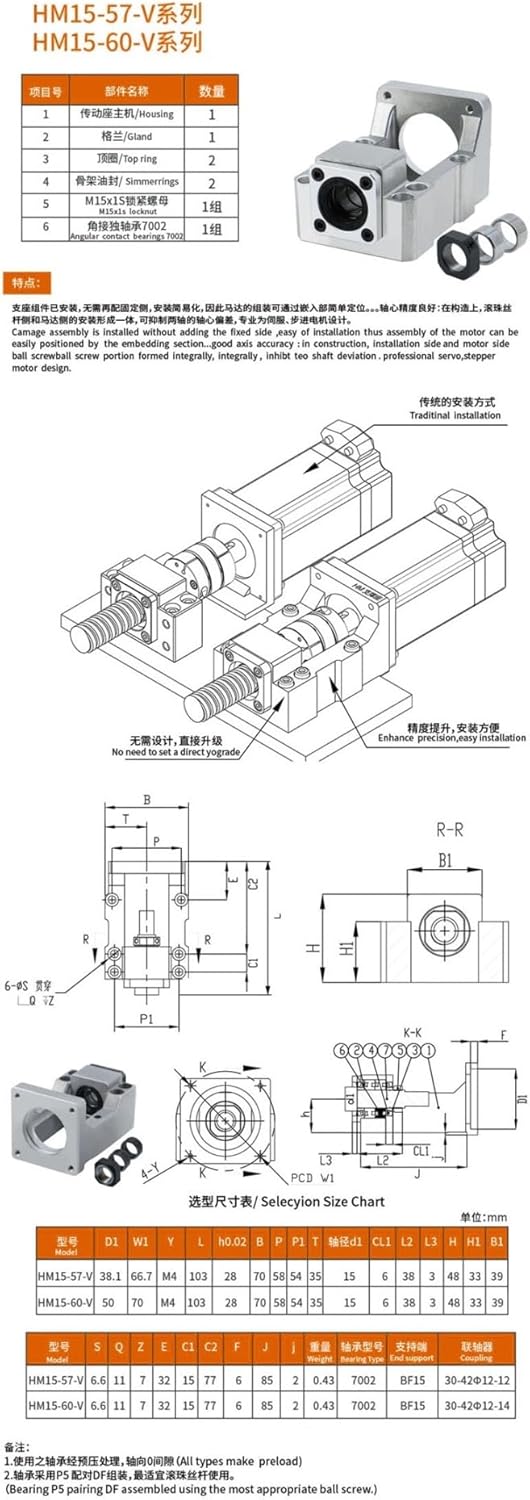
Figure 6: Technical diagram for HM15-57 and HM15-60 series mounts, including dimensions and assembly details.

Figure 7: Technical diagram for HM15-80 and HM15-86 series mounts, including dimensions and assembly details.
6. Operating
Once installed, the motor mount functions as a passive support component. Ensure that the motor and ball screw operate smoothly without excessive vibration or noise. Any unusual sounds or movements may indicate an installation issue or component misalignment.
7. Maintenance
The HEXEH motor mount requires minimal maintenance. Regular inspection is recommended to ensure continued optimal performance:
- Visual Inspection: Periodically check the mount for any signs of wear, damage, or corrosion.
- Fastener Check: Verify that all mounting bolts and the ball screw locking nut remain securely tightened. Re-tighten if necessary.
- Cleanliness: Keep the mount and surrounding area free from dust, debris, and lubricants that could interfere with operation or cause premature wear.
8. Troubleshooting
If you experience issues with your motor and ball screw assembly, consider the following troubleshooting steps:
- Excessive Vibration or Noise: This often indicates misalignment between the motor and ball screw, or loose mounting fasteners. Re-check all connections and ensure proper alignment.
- Motor Not Seating Properly: Verify that the correct mount model has been selected for your motor and ball screw. Check for any obstructions or manufacturing defects.
- Ball Screw Play: Ensure the locking nut is securely tightened and that any required bearing pre-load has been correctly applied.
If problems persist after performing these checks, please contact technical support.
9. Specifications
| Specification | Detail |
|---|---|
| Brand | HEXEH |
| Product Type | Aluminum Step Servo Motor Mount / Integrated Bracket |
| Material | Aluminum |
| Item Weight | 3.53 ounces (100 Grams) |
| Package Dimensions | 1.18 x 0.79 x 0.39 inches |
| Assembly Required | No (assembly of motor/ball screw to mount is required) |
| Number of Pieces | 1 (motor integrated seat) |
10. Warranty and Support
Warranty: This product is provided without an explicit warranty.
Technical Support: We are committed to providing assistance for our products. If you encounter any technical problems or have questions regarding the installation or operation of your HEXEH motor mount, please do not hesitate to contact us via email. We typically respond to inquiries within 24 hours.
For support, please visit our official website or contact us at support@hexah.com.