1. Introduction
Thank you for choosing the JACKYLED 4 Heads Solar Flood Lights. This product is designed to provide bright, efficient, and adjustable outdoor lighting using solar power. With its 4 independent light heads and 299 LED units, it offers extensive coverage and enhanced security for your outdoor spaces. This manual will guide you through the installation, operation, and maintenance of your new solar flood light.
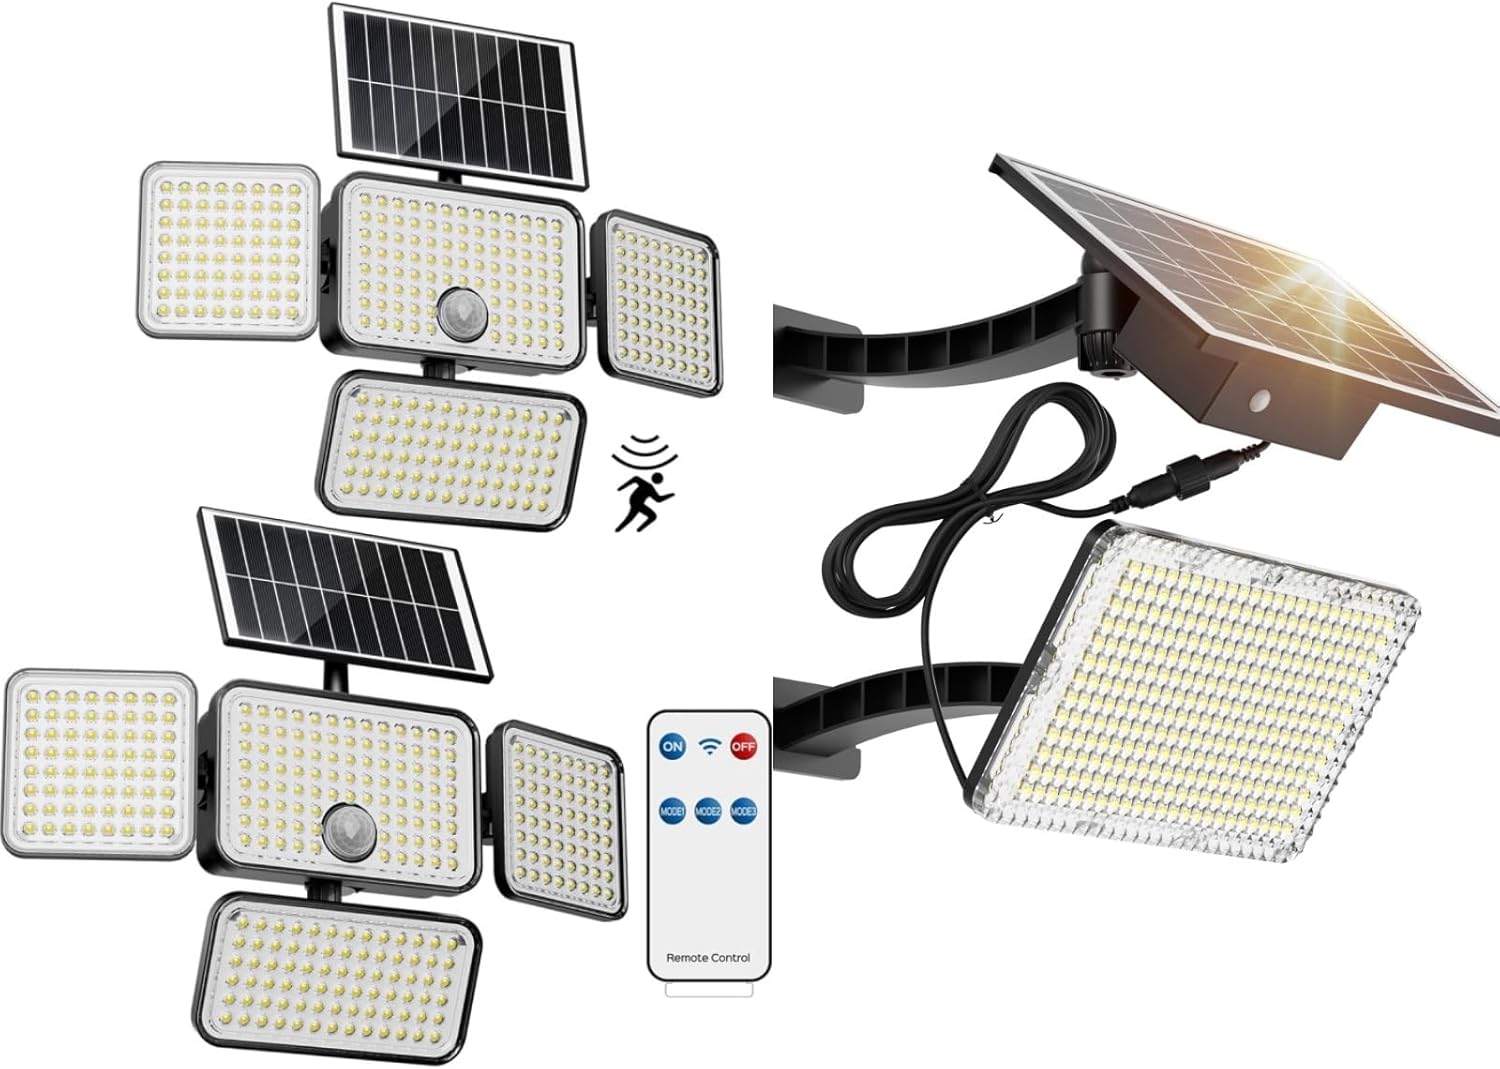
Figure 1.1: Overview of the JACKYLED 4 Heads Solar Flood Lights, showing the main unit with four adjustable light heads, two solar panels, and the included remote control.
2. Product Components
The JACKYLED 4 Heads Solar Flood Lights package includes the following components:
- Solar panel
- LED lamp panel (with 4 adjustable heads)
- Bracket(s) for mounting
- Extension cord (optional for installation)
- Mounting hardware (screws, anchors)
- Remote control
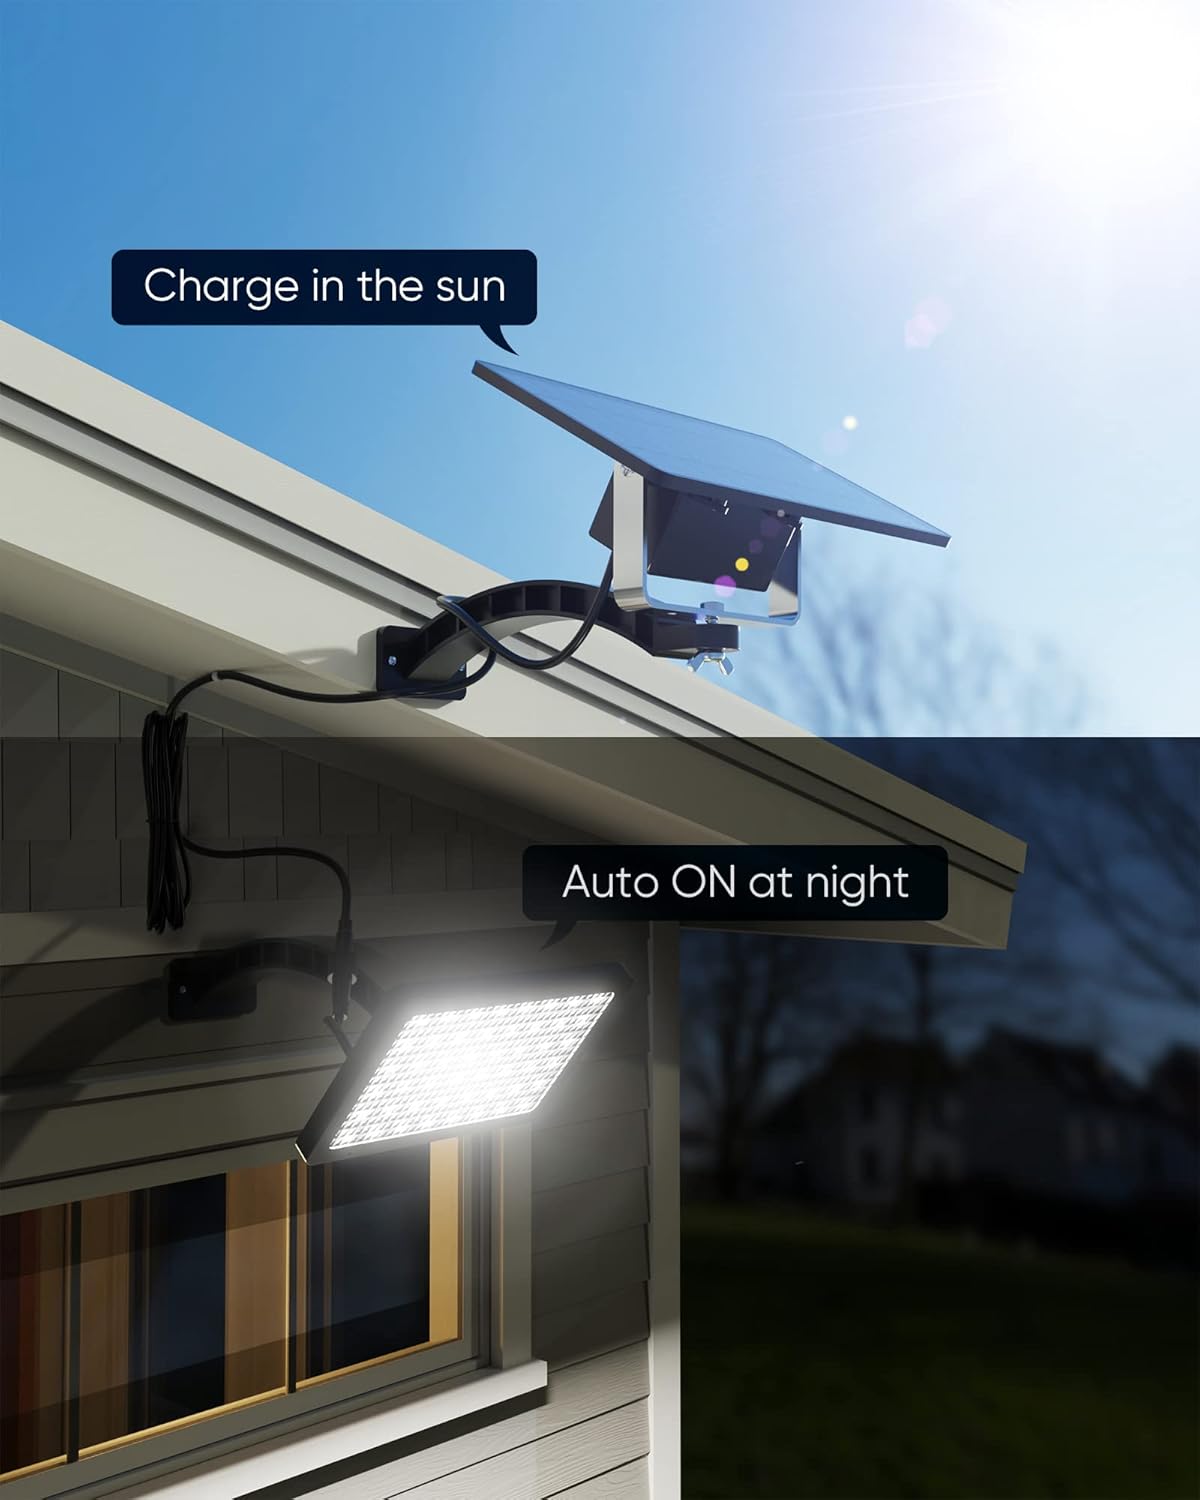
Figure 2.1: Dimensions of the solar panel (8.8" x 4.8") and the LED lamp panel (7.5" x 4.3"), along with the mounting hardware.
3. Setup and Installation
The JACKYLED solar flood light offers two primary installation methods to suit various lighting needs and solar exposure requirements.
3.1 Choosing an Installation Location
For optimal performance, the solar panel must receive direct sunlight for 6-8 hours daily. Choose a location for the solar panel that is free from obstructions like trees, buildings, or shadows. The LED lamp panel should be positioned to illuminate the desired area.
3.2 Installation Methods
You can install the light with or without the included extension cord:
- Without Extension Cord: The solar panel and LED lamp panel are mounted together as a single unit. This is suitable when both the desired lighting area and the solar panel's optimal sun exposure location are close to each other.
- With Extension Cord: The extension cord allows you to separate the solar panel from the LED lamp panel. This is ideal for situations where the best location for solar charging (e.g., on a roof) is different from the desired lighting area (e.g., under an eave or inside a shed/garage).

Figure 3.1: Demonstrates the two installation methods: with the extension cord allowing separation of the solar panel and light unit, and without the extension cord where they are mounted as one unit.
3.3 Installation Steps
- Mount the Bracket(s): Securely attach the provided bracket(s) to your chosen wall or surface using the appropriate screws and anchors. Ensure the bracket is level and firmly fixed.
- Attach Solar Panel and Light Panel: Once the bracket(s) are installed, align the solar panel and/or LED lamp panel with the bracket(s) and secure them using the butterfly nut. This design allows for easy removal of the panels if needed (e.g., during severe weather).
- Adjust Angles: The solar panel, LED lamps, and supporting frame are adjustable. Angle the solar panel to face the sun for maximum exposure. Adjust the 4 LED lamp heads to direct light to your desired areas, providing up to 270° lighting coverage.

Figure 3.2: An example of the solar flood light installed with the extension cord, allowing the solar panel to be placed in an optimal sun-exposed location while the light illuminates a different area.
4. Operating Instructions
The JACKYLED solar flood light operates automatically based on light conditions and can be controlled via the included remote.
4.1 Automatic Operation (Dusk to Dawn)
The light is equipped with a light sensor. During the day, the solar panel charges the internal battery. At dusk, the light will automatically turn on. At dawn, it will automatically turn off and begin charging again.

Figure 4.1: Illustration of the solar panel charging during the day and the light automatically activating at night.
4.2 Remote Control Functions
Use the remote control to manually turn the light ON/OFF or select different lighting modes. Refer to the remote control's markings for specific button functions (e.g., ON, OFF, various mode settings).
4.3 Light Brightness and Coverage
The light features 299 ultra-bright LEDs, providing up to 1,000 lumens of cool white light (8500K). The 4 adjustable heads allow for a 270° lighting area, covering approximately 377 sq.ft. Each LED unit is amplified by optical convex lenses for enhanced brightness and light projection.

Figure 4.2: Visual representation of the light's brightness, highlighting 2500 Lumens (peak) and 8500K cool white light with 304 LED lenses.

Figure 4.3: Depiction of the wide coverage provided by the 4 adjustable heads, ensuring no dark corners around the illuminated area.

Figure 4.4: Detailed view of the LED lenses, which help to uniformly distribute and amplify the light for increased brightness.
5. Maintenance
Regular maintenance ensures the longevity and optimal performance of your solar flood light.
- Clean the Solar Panel: Periodically wipe the solar panel with a soft, damp cloth to remove dust, dirt, leaves, or snow. A clean panel ensures maximum sunlight absorption and efficient charging.
- Inspect Wiring: If using the extension cord, periodically check the wiring for any signs of wear, damage, or loose connections.
- Battery Care: The light contains a 4000mAh battery. While designed for durability, consistent exposure to extreme temperatures (very hot or very cold) can affect battery life over many years. Ensure the light receives adequate sunlight for charging.
- Seasonal Removal: In areas prone to severe weather like hurricanes or tornadoes, the panels can be easily removed from their brackets by unscrewing the butterfly nut, protecting the unit from damage.
6. Troubleshooting
If your JACKYLED solar flood light is not functioning as expected, try the following troubleshooting steps:
- Light Not Turning On at Night:
- Ensure the solar panel is receiving direct sunlight for at least 6-8 hours during the day.
- Check if the solar panel is dirty or obstructed. Clean it if necessary.
- Verify that the light is not installed under another light source (e.g., street light) that might prevent its dusk-to-dawn sensor from activating.
- Confirm the remote control has not turned the light off or set it to an incorrect mode.
- Light is Dim or Short-Lived:
- The battery may not be fully charged. Ensure the solar panel gets sufficient direct sunlight.
- Environmental factors like prolonged cloudy weather or winter months with shorter daylight hours can reduce charging efficiency.
- The battery may be reaching the end of its lifespan.
- Remote Control Not Working:
- Check the battery in the remote control and replace if needed.
- Ensure there are no obstructions between the remote and the light's receiver.
7. Specifications
| Feature | Description |
|---|---|
| Brand | JACKYLED |
| Model | B0CLGPP3H1 |
| Light Source | 299 LED units |
| Lumen Output | Up to 1,000 Lumens |
| Color Temperature | 8500K (Cool White) |
| Lighting Area | Up to 270° (approx. 377 sq.ft) |
| Power Source | Solar Powered, Battery Powered |
| Battery Capacity | 4000mAh |
| Installation Type | Wall-mount (with extension cord option) |
| Control Method | Remote |
| Indoor/Outdoor Usage | Outdoor |
| Included Components | Solar panel, LED lamp panel, bracket(s) |

Figure 7.1: Comparison of charging times, indicating JACKYLED's monocrystalline solar panel charges faster (4-6 hours) than typical solar lights (6-8 hours).
8. Warranty and Support
JACKYLED stands behind the quality of its products. For specific warranty details, please refer to the product packaging or contact JACKYLED customer support directly.
8.1 Customer Support
If you encounter any issues or have questions not covered in this manual, please contact JACKYLED customer support through the retailer's platform or the official JACKYLED website. Please have your product model number (B0CLGPP3H1) and purchase information ready when contacting support.