1. Introduction
This user manual provides essential information for the installation, maintenance, and troubleshooting of your BBQration Grill Replacement Parts. This kit is designed to restore the optimal performance of your Nexgrill gas grill by replacing worn or damaged heat plates and burners. Please read this manual thoroughly before proceeding with installation.
2. Product Compatibility
This replacement kit is specifically designed for various Nexgrill models. Please verify your grill model number to ensure compatibility.
- For Nexgrill 5-Burner Grills: 720-0888, 720-0888A, 720-0888B, 720-0888N
- For Nexgrill 4-Burner Grills: 720-0830H, 720-0830X, 720-0830, 720-0830A, 720-0830D, 720-0830HM, 720-0830MC, 720-0830T, 720-0958A, 720-0958AE, 730-0958A, 730-0958AE, 730-0830H, 730-0830MB, 730-0830MC
- For Nexgrill 3-Burner Grills: 720-0894F, 720-0925S
- For Nexgrill 2-Burner Grills: 720-0864, 720-0864M, 730-0864, 730-0864M
- For Expert Grill Models: 720-0968, 720-0968C, VIPRB-720-0968C
- For Backyard Grill Models: 720-0789D, 720-0888M
- For BBQ Pro Models: 122.47207610, 122.57901710
- For Kenmore Models: 122.20148510
- For Member's Mark Models: 720-0830F, 720-0830G
- For Tera Gear Models: GSC2817 (MADERA)
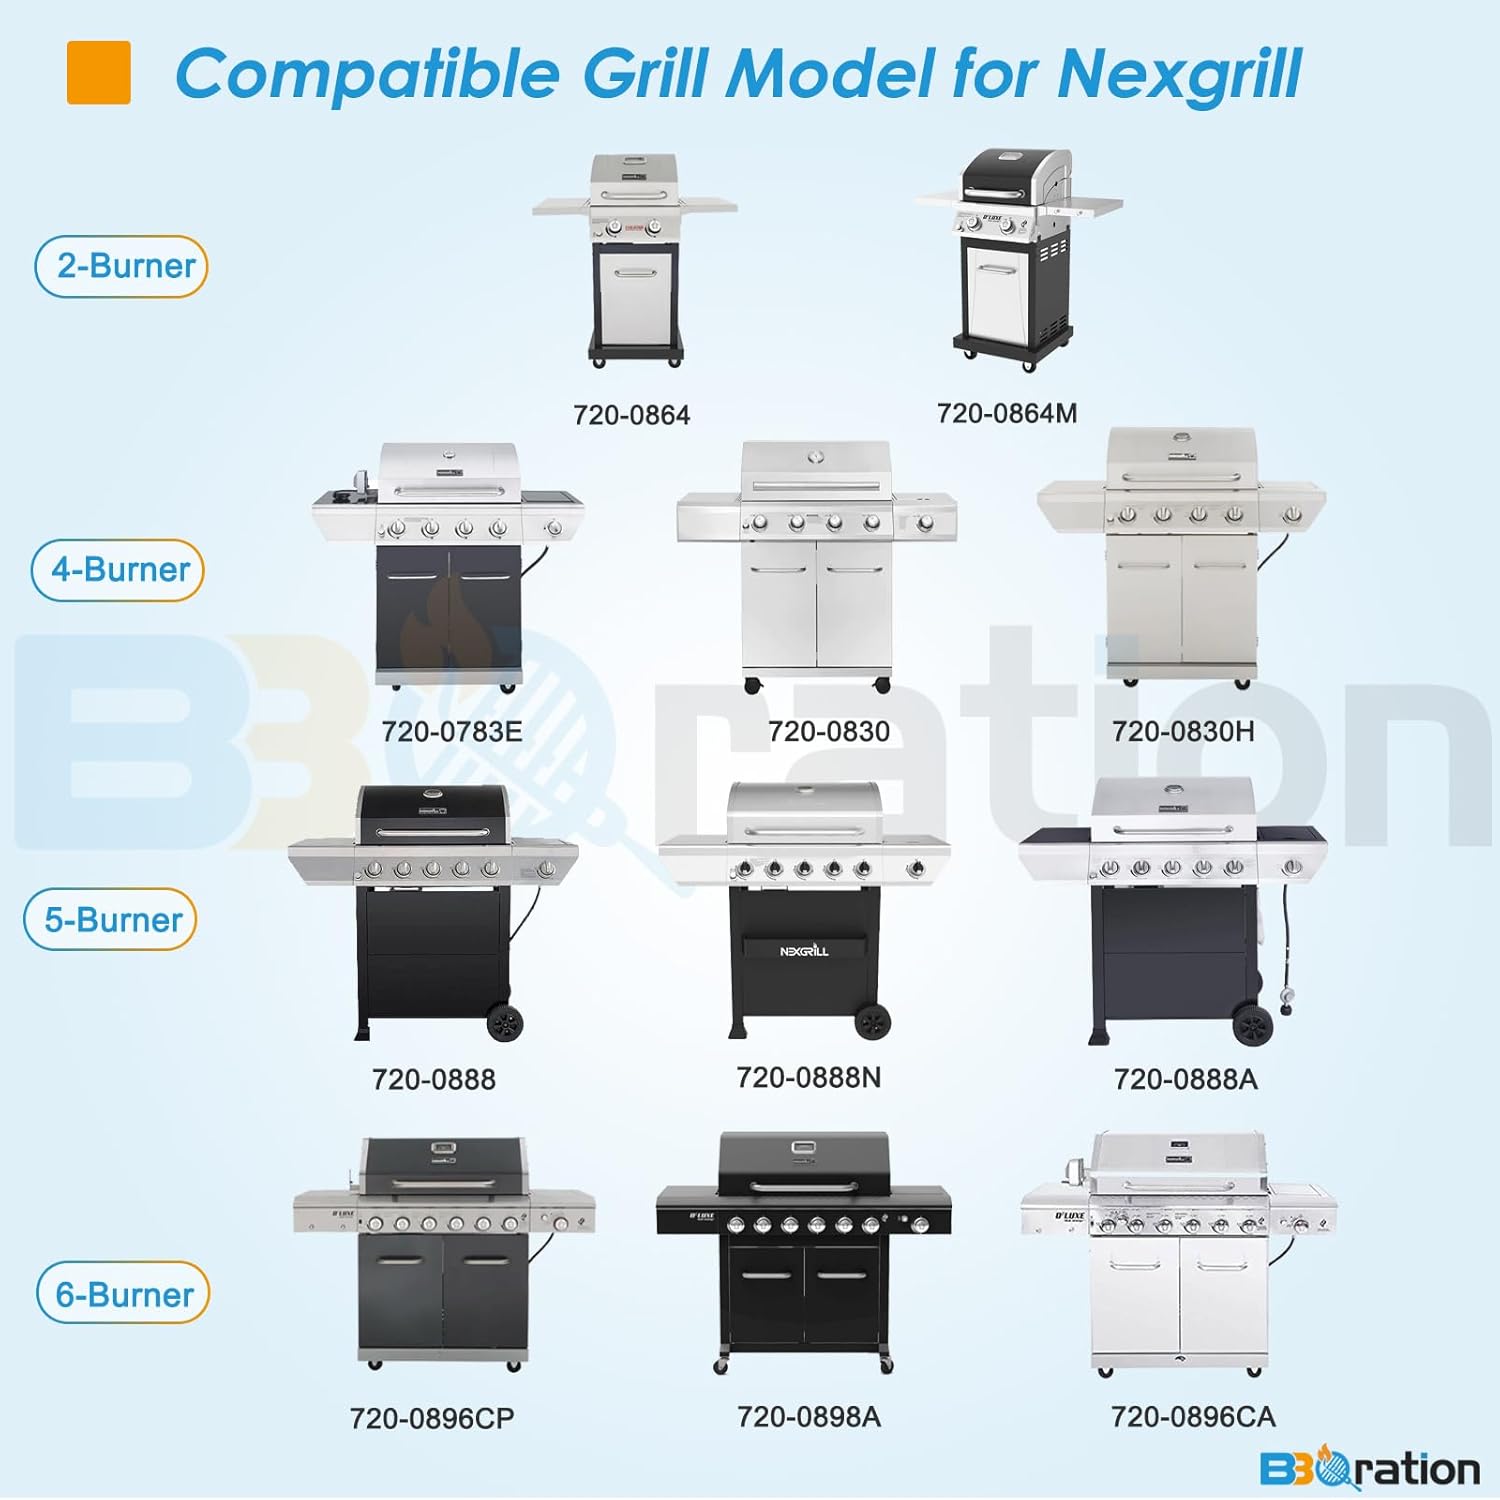
Figure 2.1: Visual chart of compatible Nexgrill models, including 2-burner, 4-burner, 5-burner, and 6-burner configurations.
3. Package Contents
Your BBQration replacement kit includes the following components:
- 5 x Heat Plates (Heat Tents)
- 5 x Burners
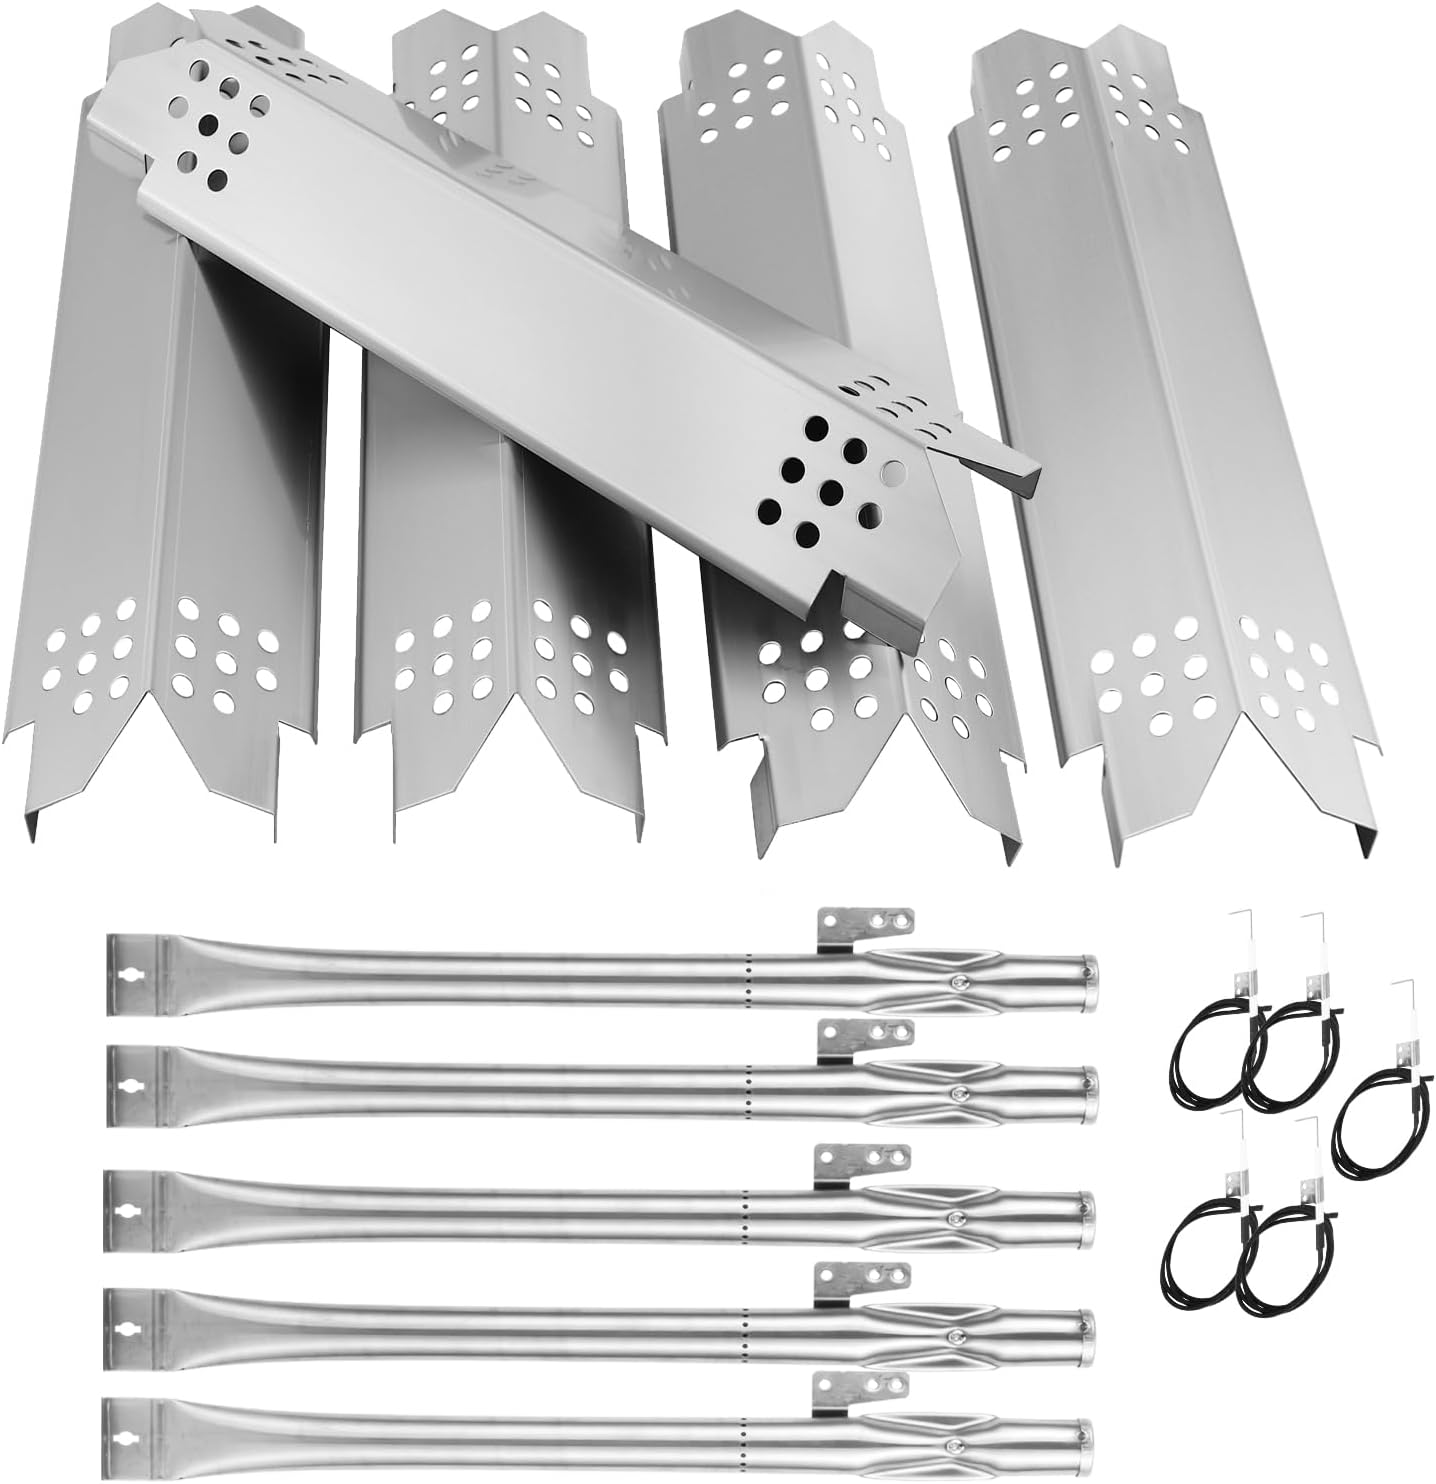
Figure 3.1: Image showing the complete set of 5 heat plates and 5 burners included in the package.
4. Product Dimensions
Ensure these dimensions match your existing grill components for a proper fit.
- Heat Plate Dimension: 14 9/16 inches x 4 3/16 inches
- Burner Dimension: 14 7/8 inches
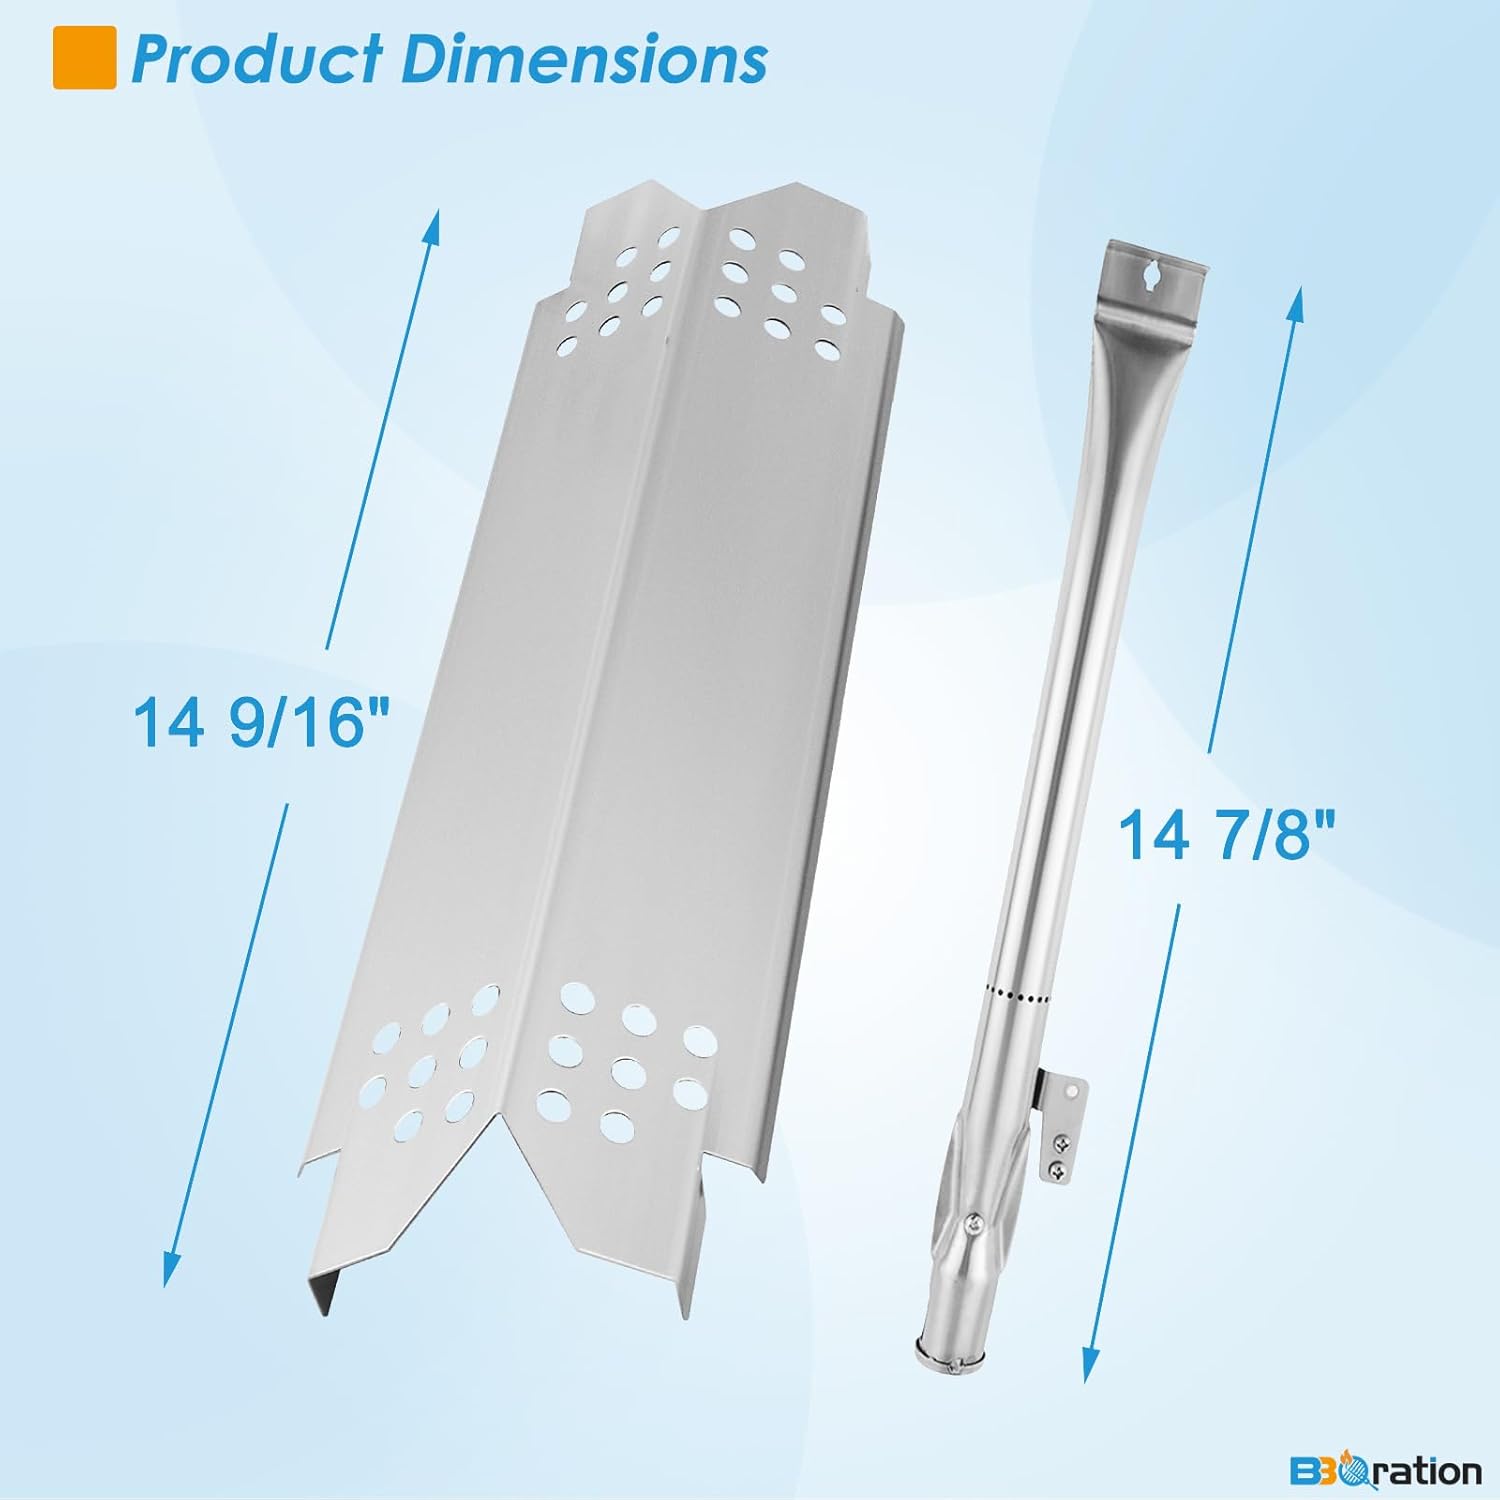
Figure 4.1: Diagram illustrating the precise measurements of both the heat plate (14 9/16" x 4 3/16") and the burner (14 7/8").
5. Installation Guide
Safety First: Before beginning any installation, ensure your grill is completely cool and disconnected from its gas supply. Wear appropriate protective gloves.
5.1 Tools Required
- Needle-nose pliers
- Wrench
- Screwdriver (Phillips and/or flathead, depending on your grill's fasteners)
- Optional: Wire cutters (if old igniter wires need to be cut)
5.2 Step-by-Step Installation
- Remove Grill Grates and Old Heat Plates: Carefully lift out the cooking grates. Then, remove the old, worn heat plates from the grill's firebox.
- Remove Old Burners:
- Identify how your old burners are secured. Some are held by pins, others by screws.
- If secured by pins, use needle-nose pliers to carefully remove the cotter pins. Note: New cotter pins are typically not included with this kit, so retain your old ones if they are reusable.
- If secured by screws, use a screwdriver to loosen and remove them. Be aware that rusted screws may be difficult to remove.
- Disconnect any igniter wires attached to the old burners. It is advisable to take photos of the original wiring configuration before disconnecting to aid in reassembly.
- Carefully slide out the old burners.
- Install New Burners:
- Slide the new burners into their respective positions, ensuring they are properly seated in the gas manifold openings.
- Secure the new burners using the original pins or screws.
- Connect the igniter wires to the new burners. Ensure a secure connection. If the new wires are longer than necessary, they can be carefully tied or secured to prevent interference.
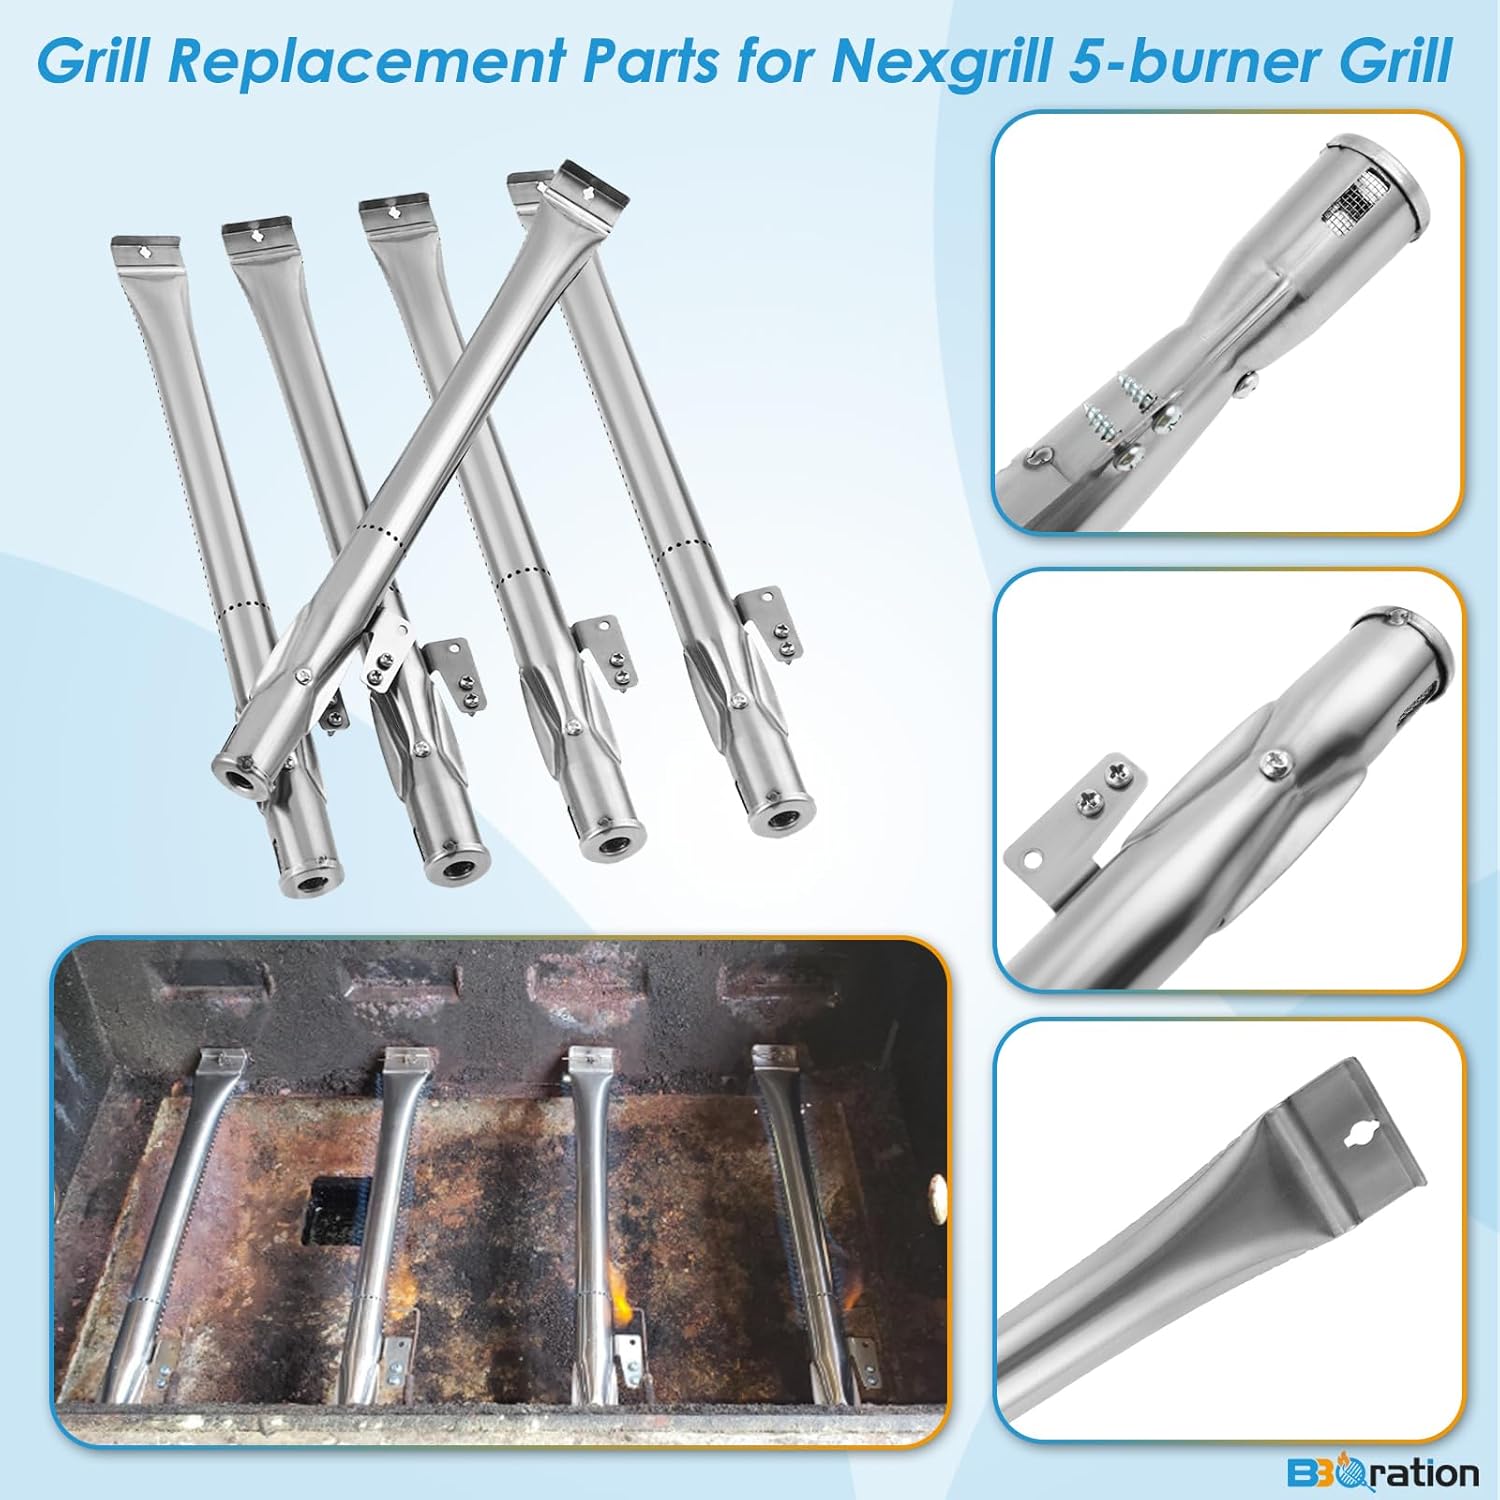
Figure 5.1: View of the new burners properly installed within the grill's firebox.
- Install New Heat Plates: Place the new heat plates over the installed burners. Ensure they sit correctly and cover the burners evenly.
- Replace Grill Grates: Carefully place the cooking grates back into the grill.
- Reconnect Gas Supply and Test: Reconnect the gas supply and perform a leak test according to your grill's original manual. Then, test the burners to ensure they ignite properly and produce an even flame.
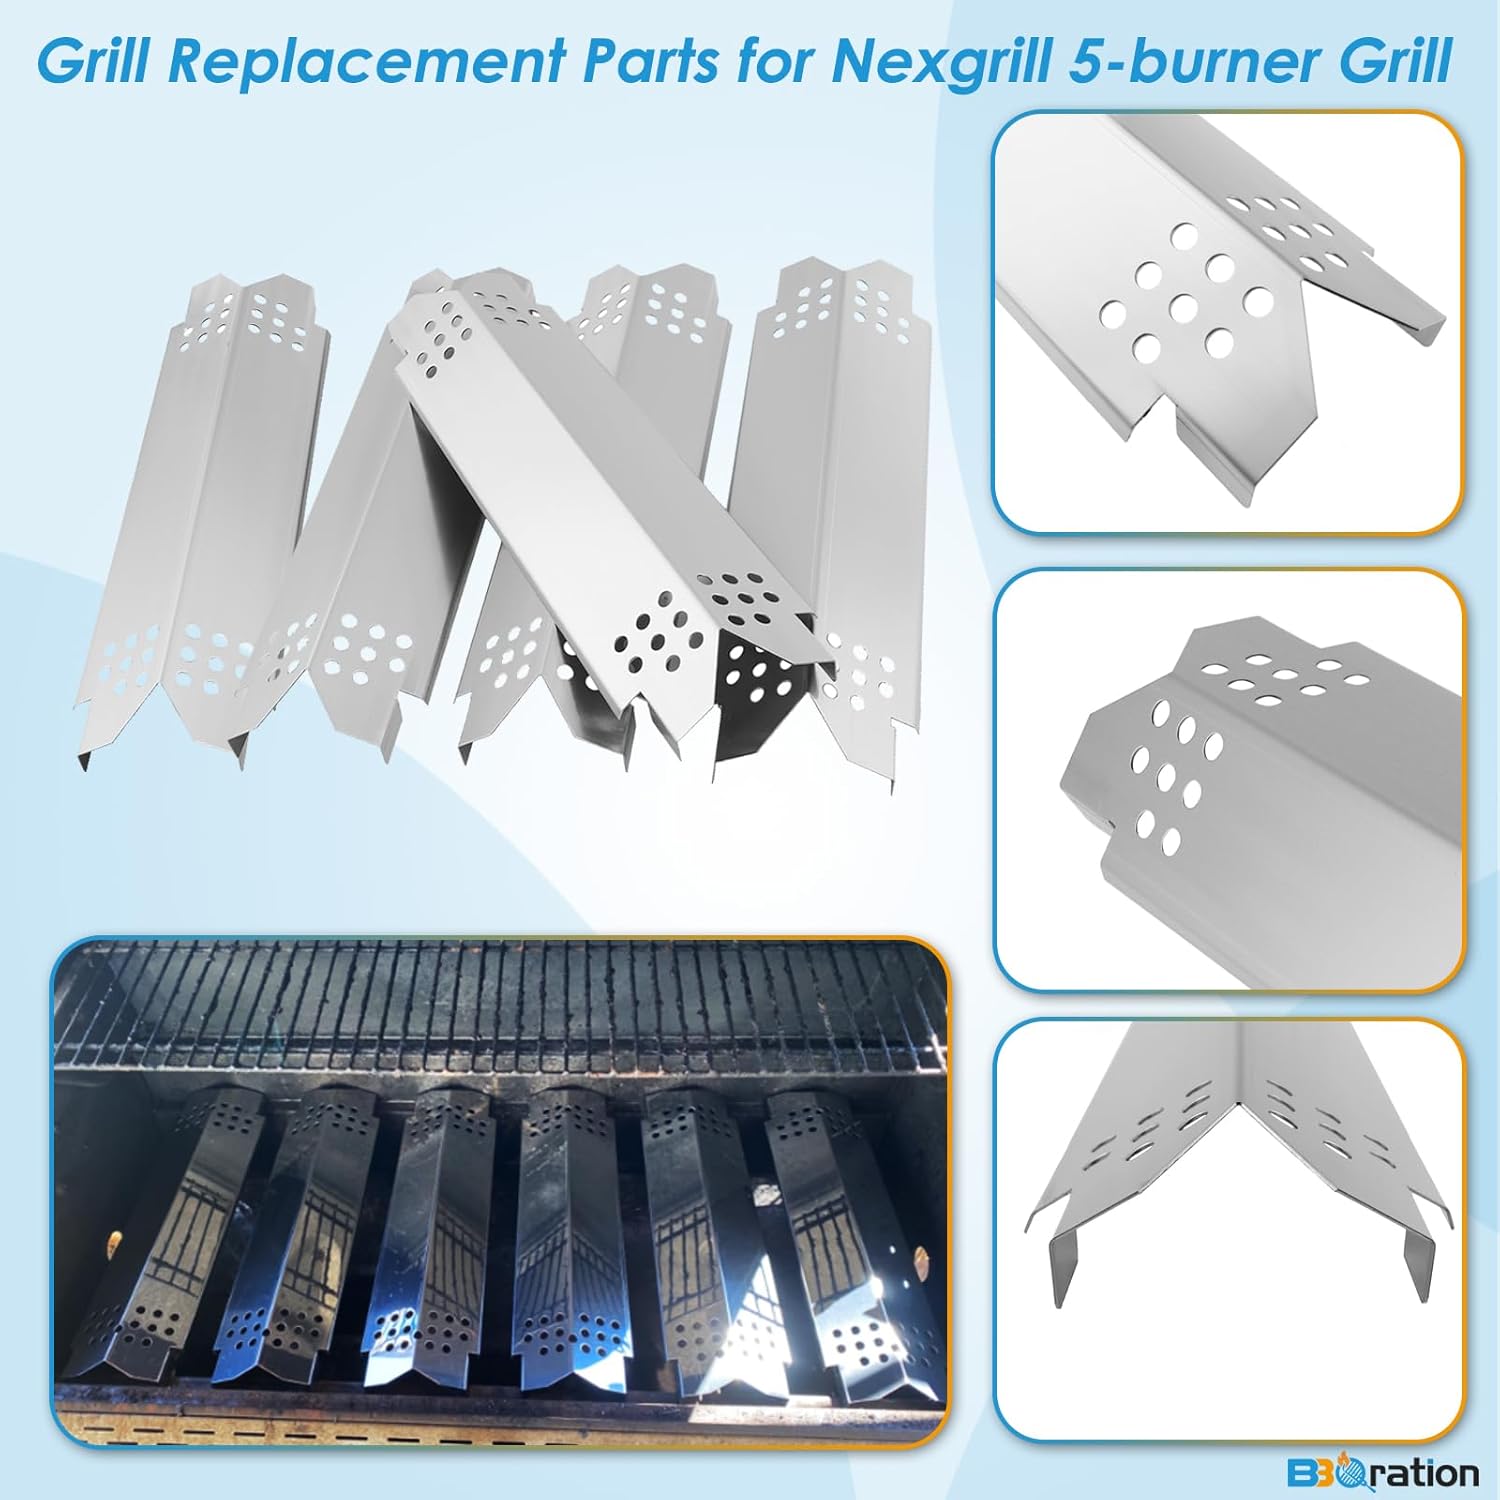
Figure 5.2: View of the new heat plates correctly positioned above the burners, ready for cooking grates.
6. Operating Your Grill with New Parts
Once the new heat plates and burners are installed, your grill should operate as intended. Always follow the operating instructions provided in your original grill manual for safe and effective use. The new components are designed to distribute heat evenly and protect the burners from drippings, enhancing your grilling experience.
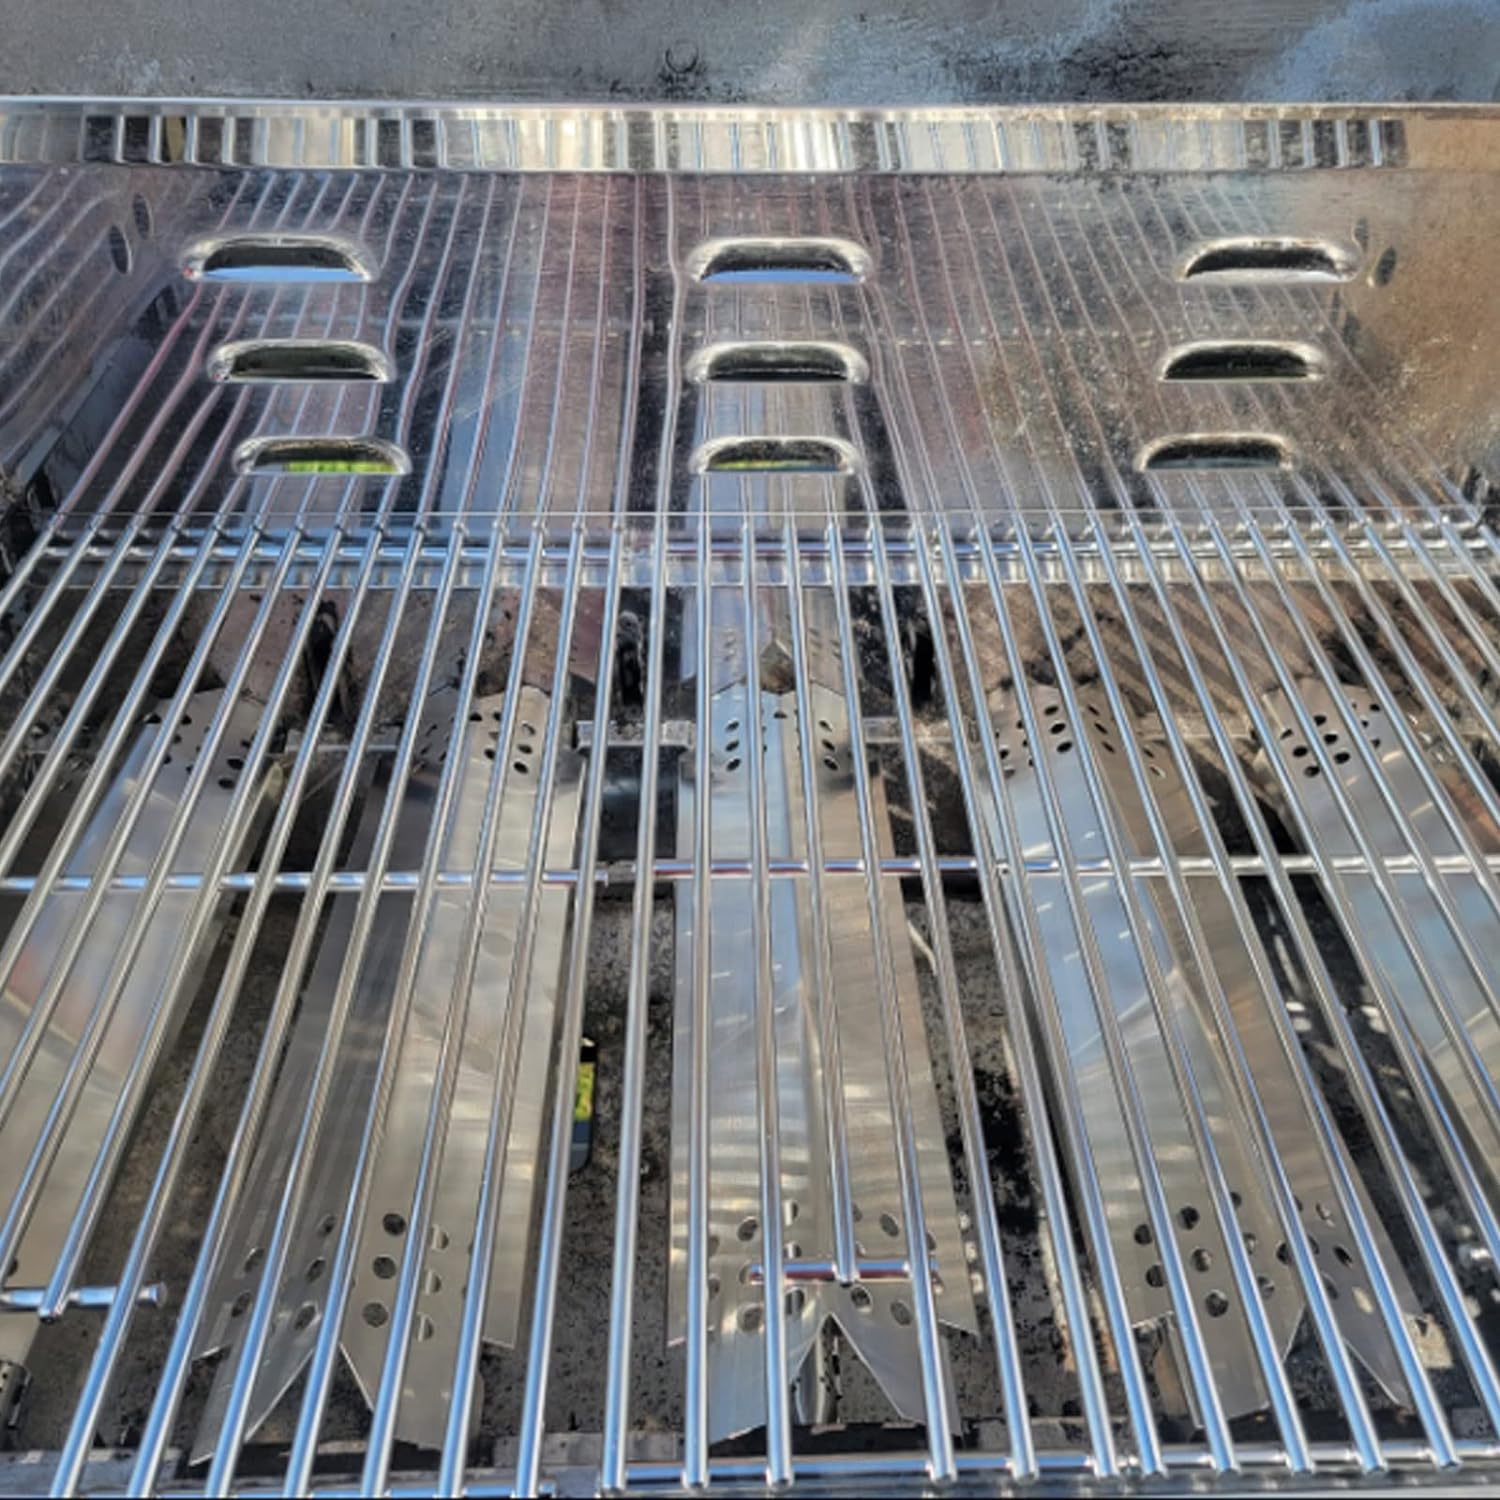
Figure 6.1: An example of a grill in use, demonstrating even heat distribution for cooking after replacement parts installation.
7. Maintenance
Regular maintenance of your grill's internal components will extend their lifespan and ensure consistent performance.
- Regular Cleaning: After each use, allow the grill to cool, then brush off any food residue from the cooking grates. Periodically remove the grates and heat plates to clean any debris or grease buildup from the firebox and around the burners.
- Inspect Burners: Regularly inspect the burner tubes for any blockages (e.g., from insects or food particles) or signs of corrosion. Clean burner ports with a wire brush if necessary to ensure even flame distribution.
- Inspect Heat Plates: Check heat plates for excessive grease buildup or damage. Clean them as needed.
- Storage: When not in use, especially during off-season, cover your grill to protect it from the elements.
8. Troubleshooting Common Issues
| Issue | Possible Cause | Solution |
|---|---|---|
| Burner not igniting |
|
|
| Uneven flame or low heat |
|
|
| Igniter wire length discrepancy |
|
|
9. Product Specifications
| Attribute | Detail |
|---|---|
| Manufacturer | BBQration |
| Item Weight | 5.24 pounds |
| Product Dimensions | 8 x 6 x 6 inches |
| Size (This Kit) | 5-Burner SS |
| Color | Silver |
| Date First Available | October 20, 2023 |
10. Warranty and Support
For any questions regarding your BBQration replacement parts, or for technical support, please contact the manufacturer directly. While specific warranty details are not provided in this manual, most manufacturers offer support for their products.
You can visit the official BBQration store on Amazon for more information and contact options: BBQration Amazon Store